Introduction
In our previous article we saw how to install WordPress on IIS 10.0 with PHP 8.4 and MariaDB 12. Now we will see how to fine-tune this configuration to achieve the best possible performance.
Summary
- Prerequisites
- WordPress Site Health
- Update PHP
- Increase upload size
- Install and enable Imagick
- Enable static and dynamic compression
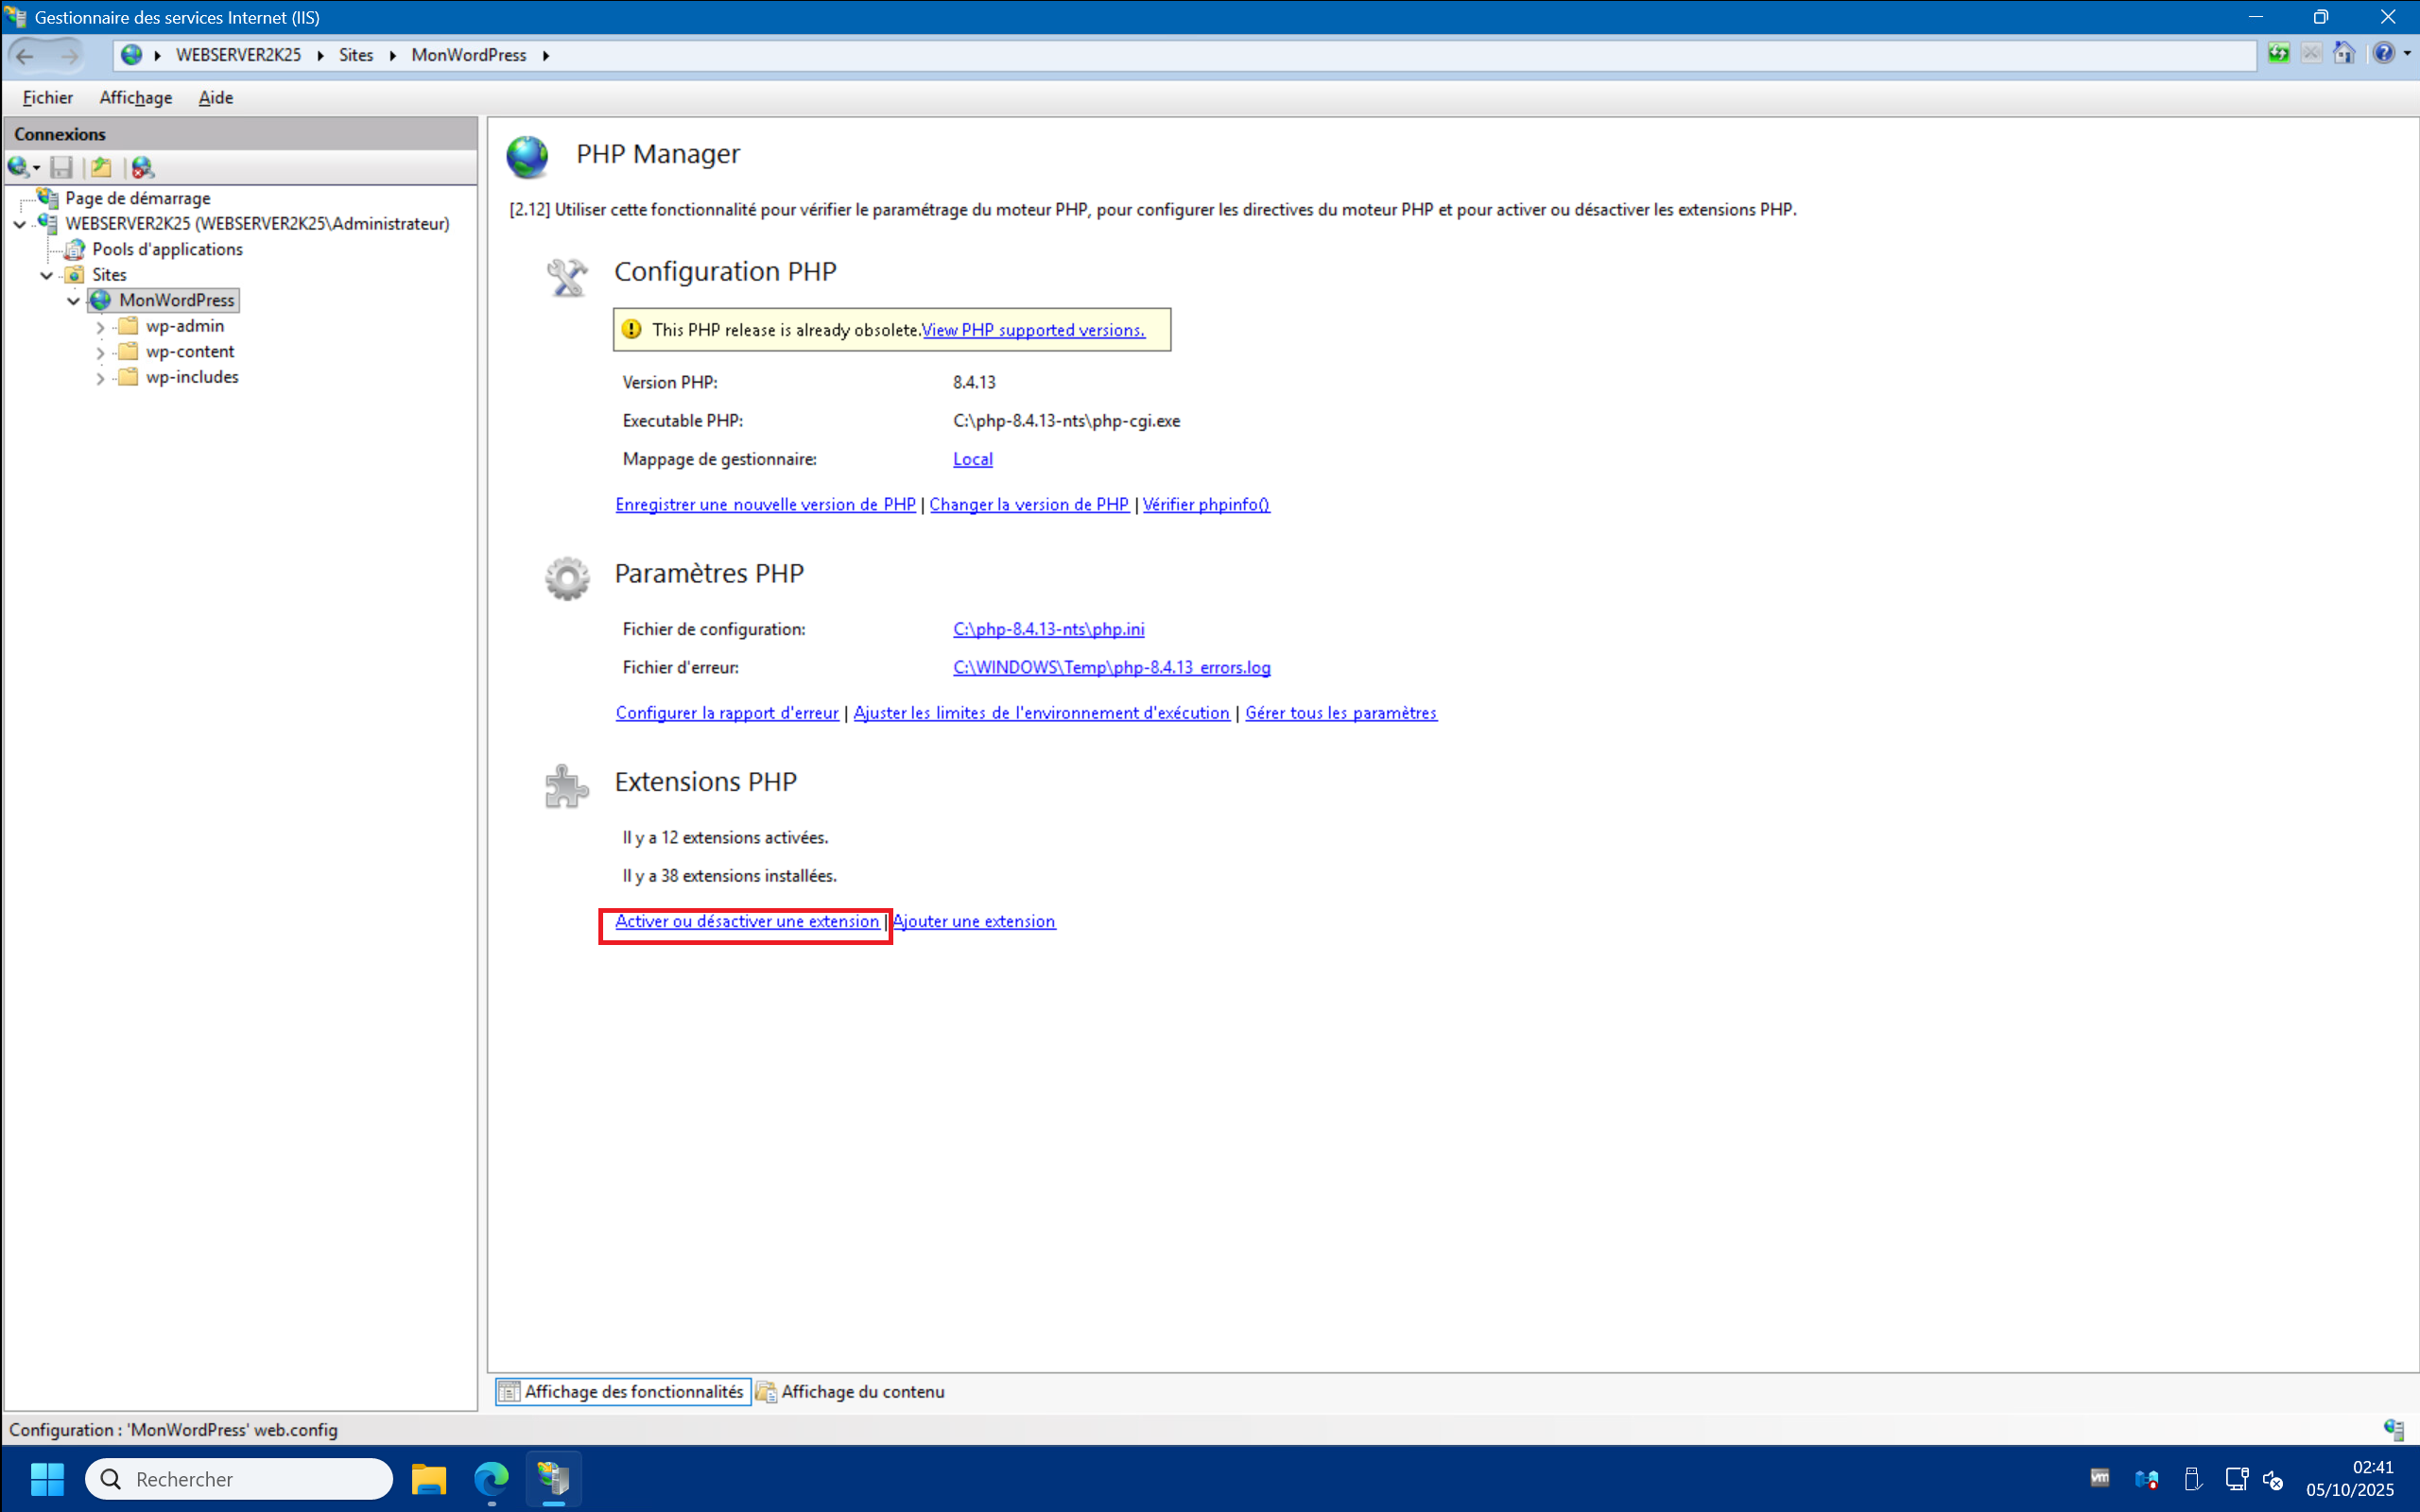
- Enable opcache
- Configure output caching
- Configure the application pool
- Enable the https protocol
- Install and configure the WP Fastest Cache plugin
- Conclusion
Prerequisites :
- A Windows IIS server running PHP and WordPress
- Download the latest version of PHP 8.4
- Download the “PHP Imagick” extension for Windows
WordPress Site Health :
To begin, we’ll take a quick look at our WordPress site. You can check out a test page to assess the overall health of the site (accessibility, enabled plugins, performance, etc.) :
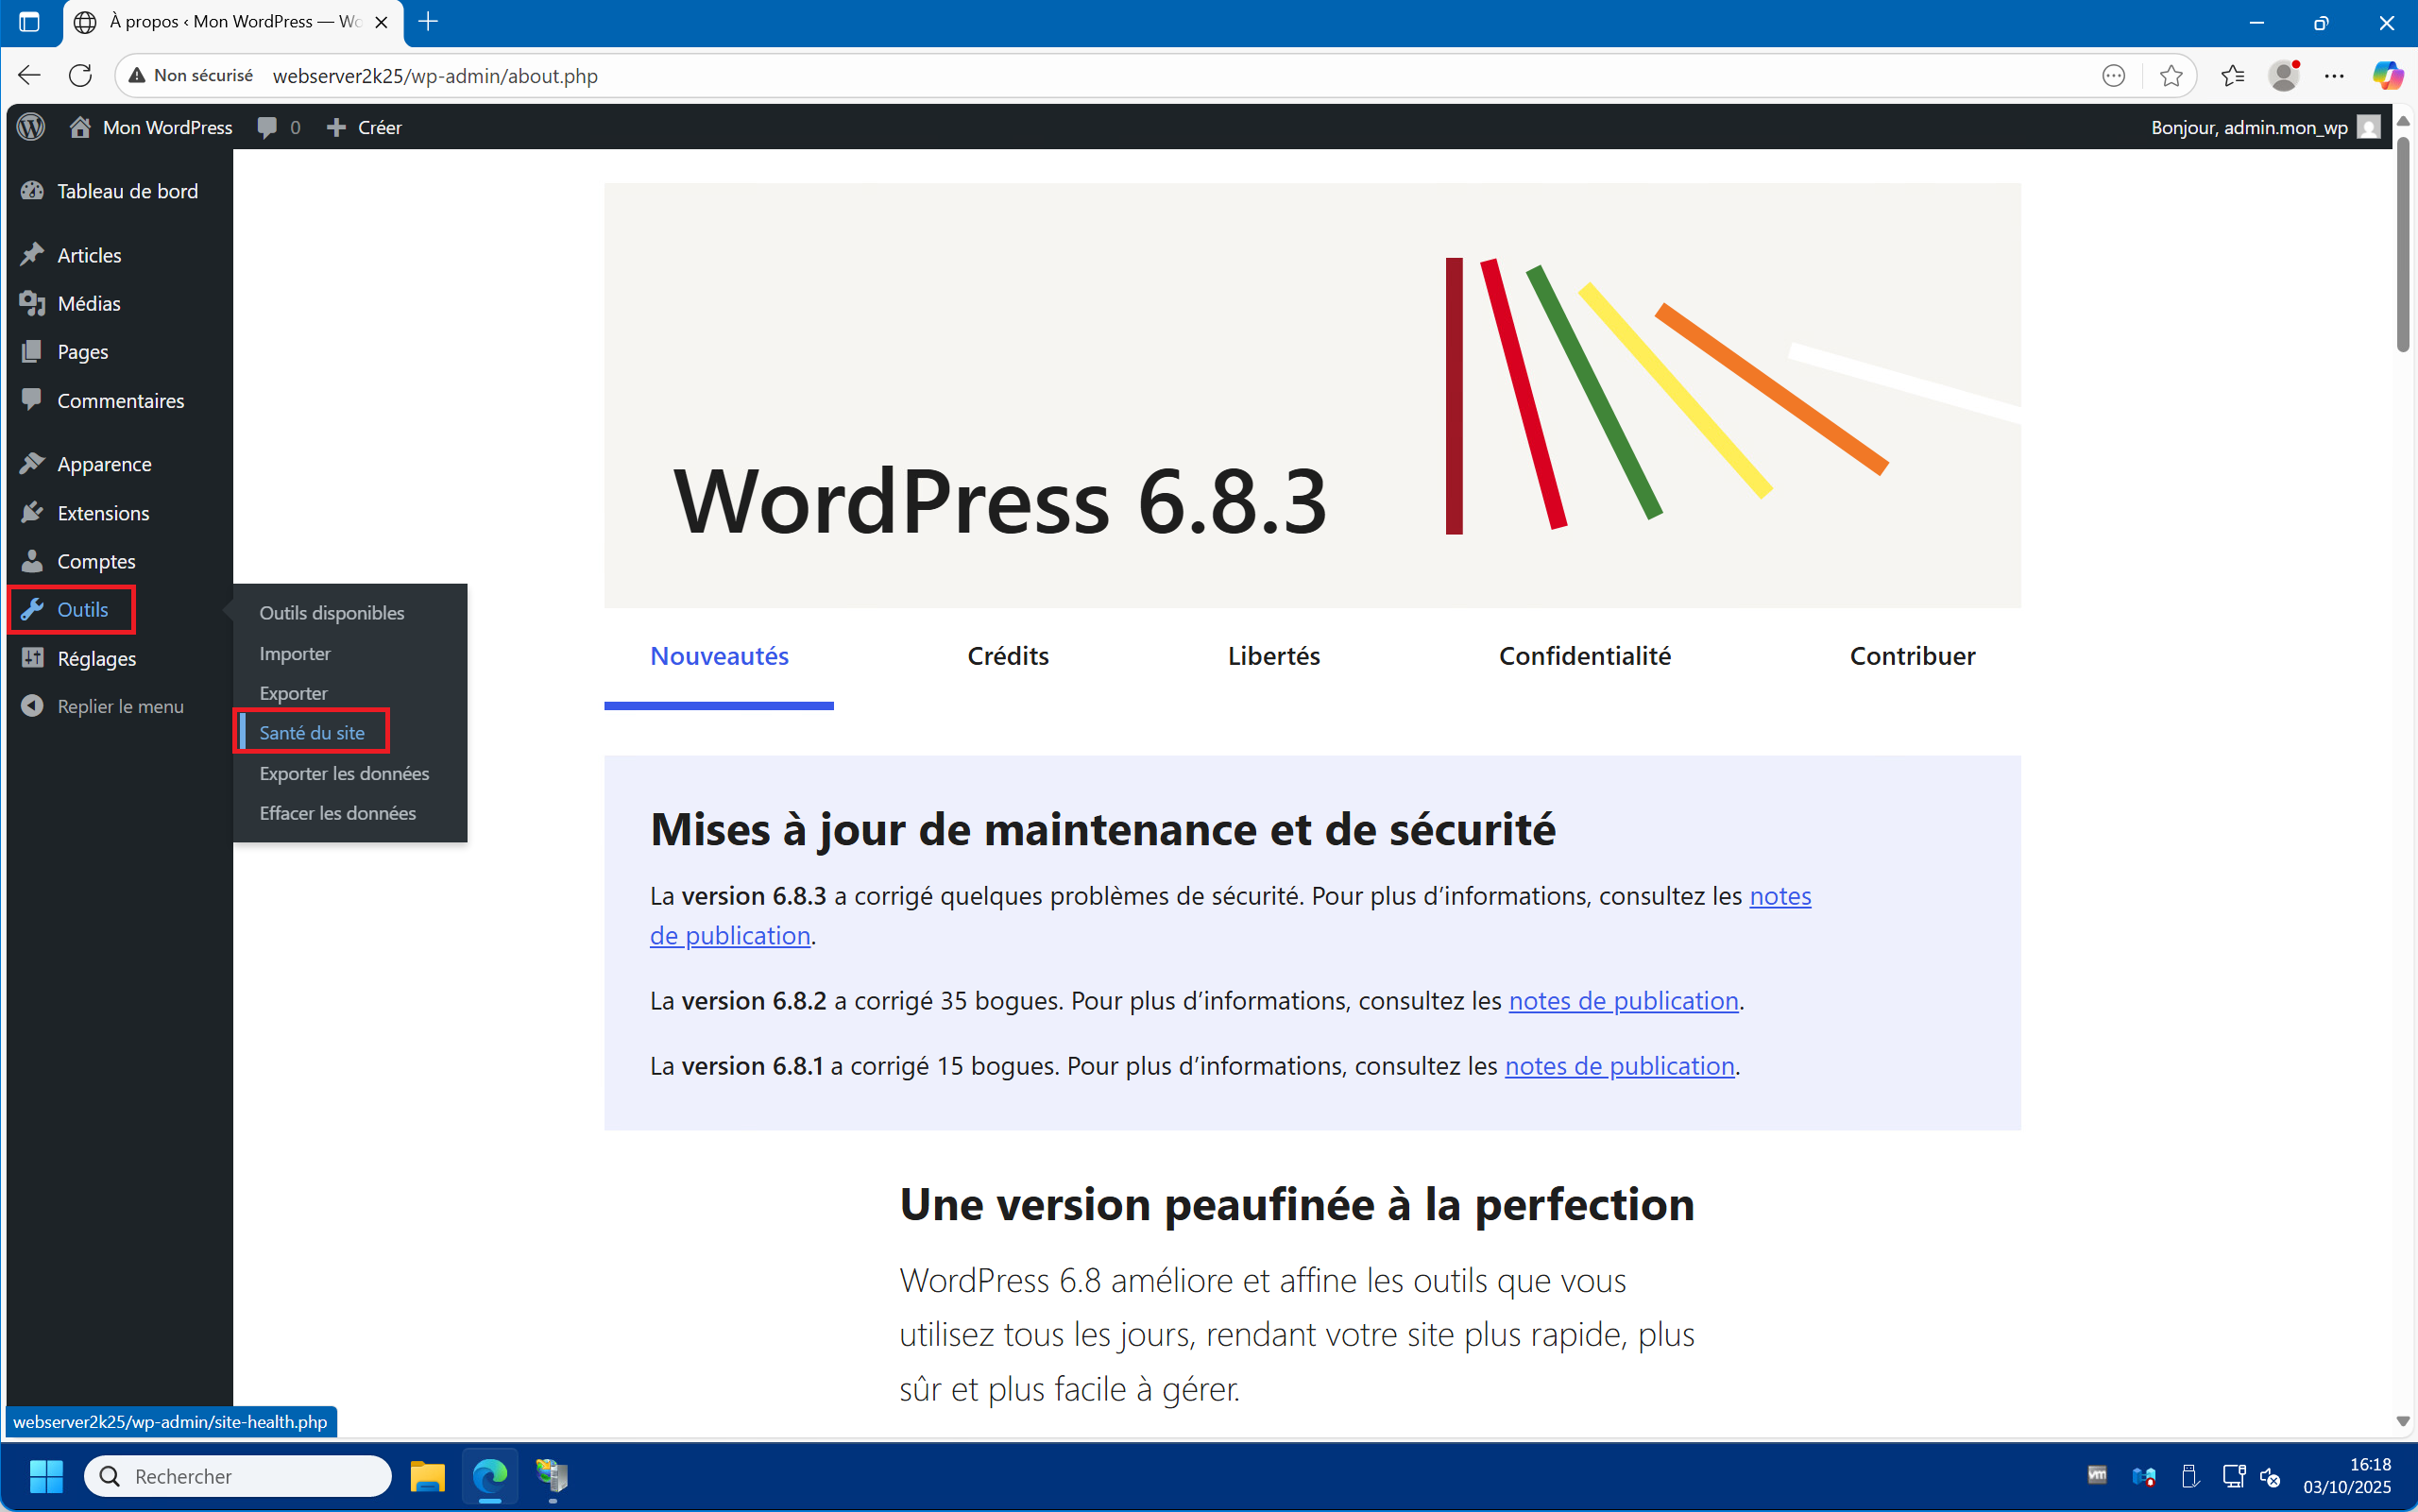
1 – From the menu on the left, click on “Tools” then on “Site Health” :
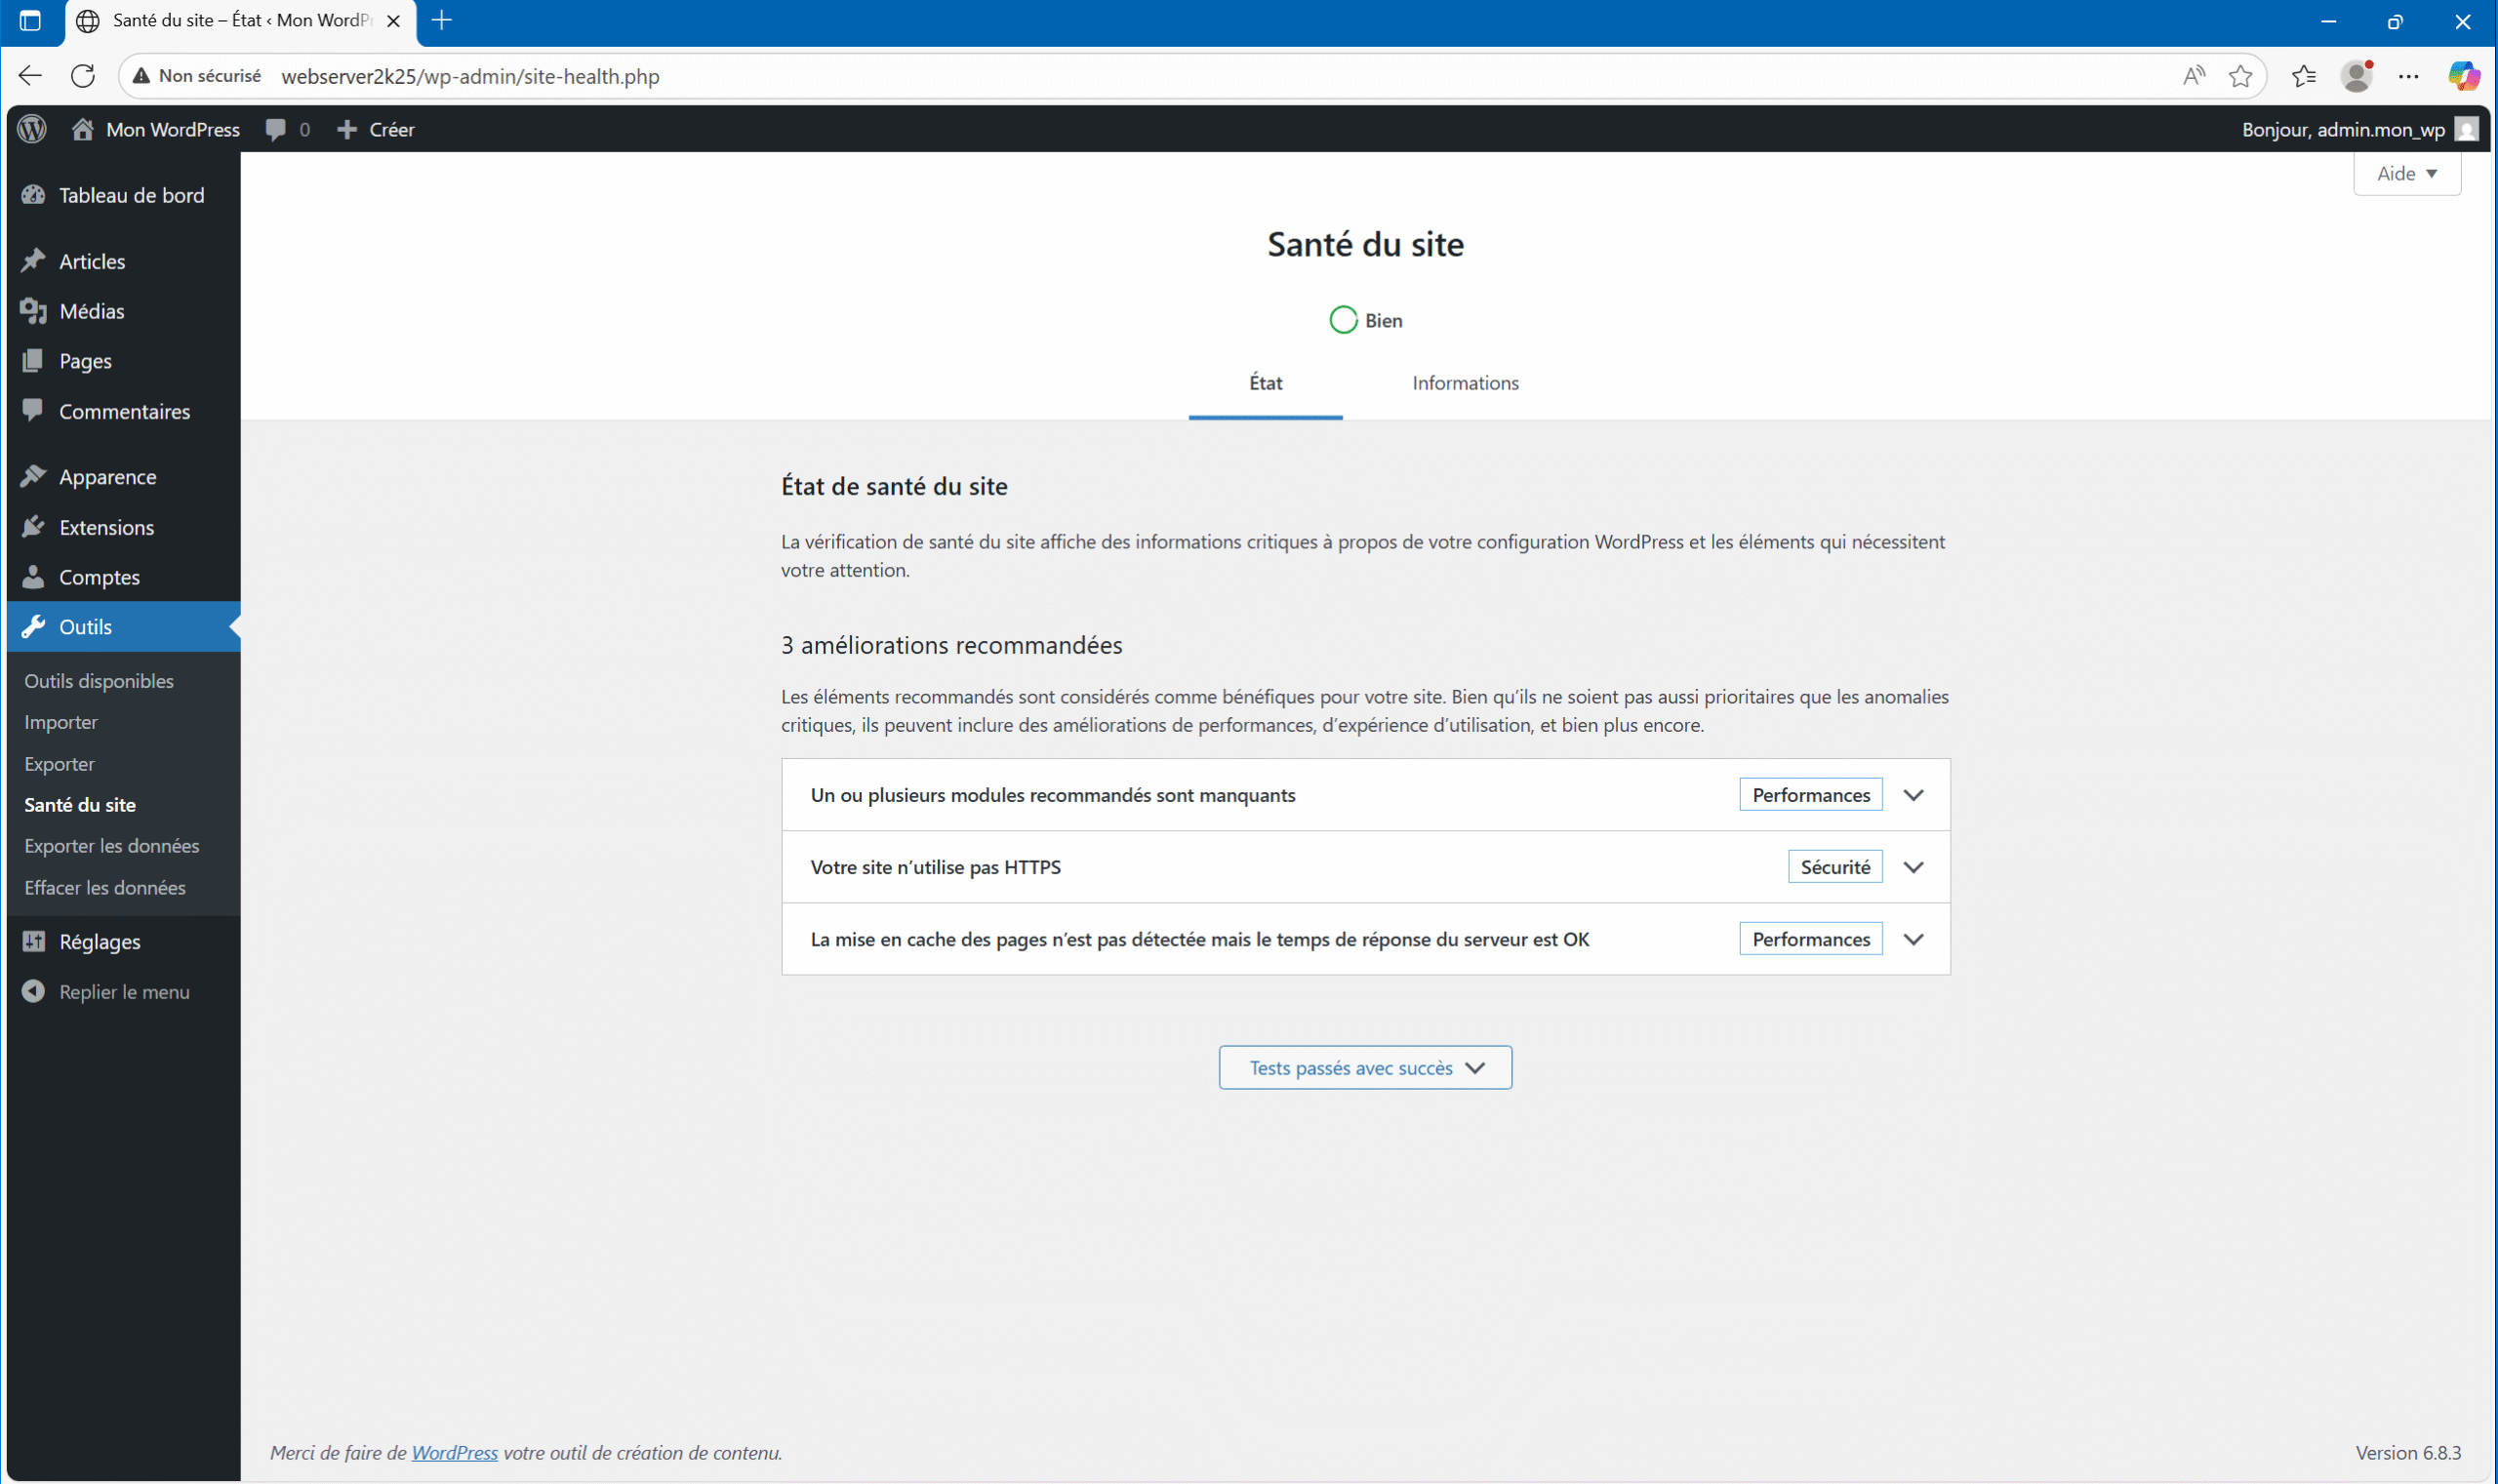
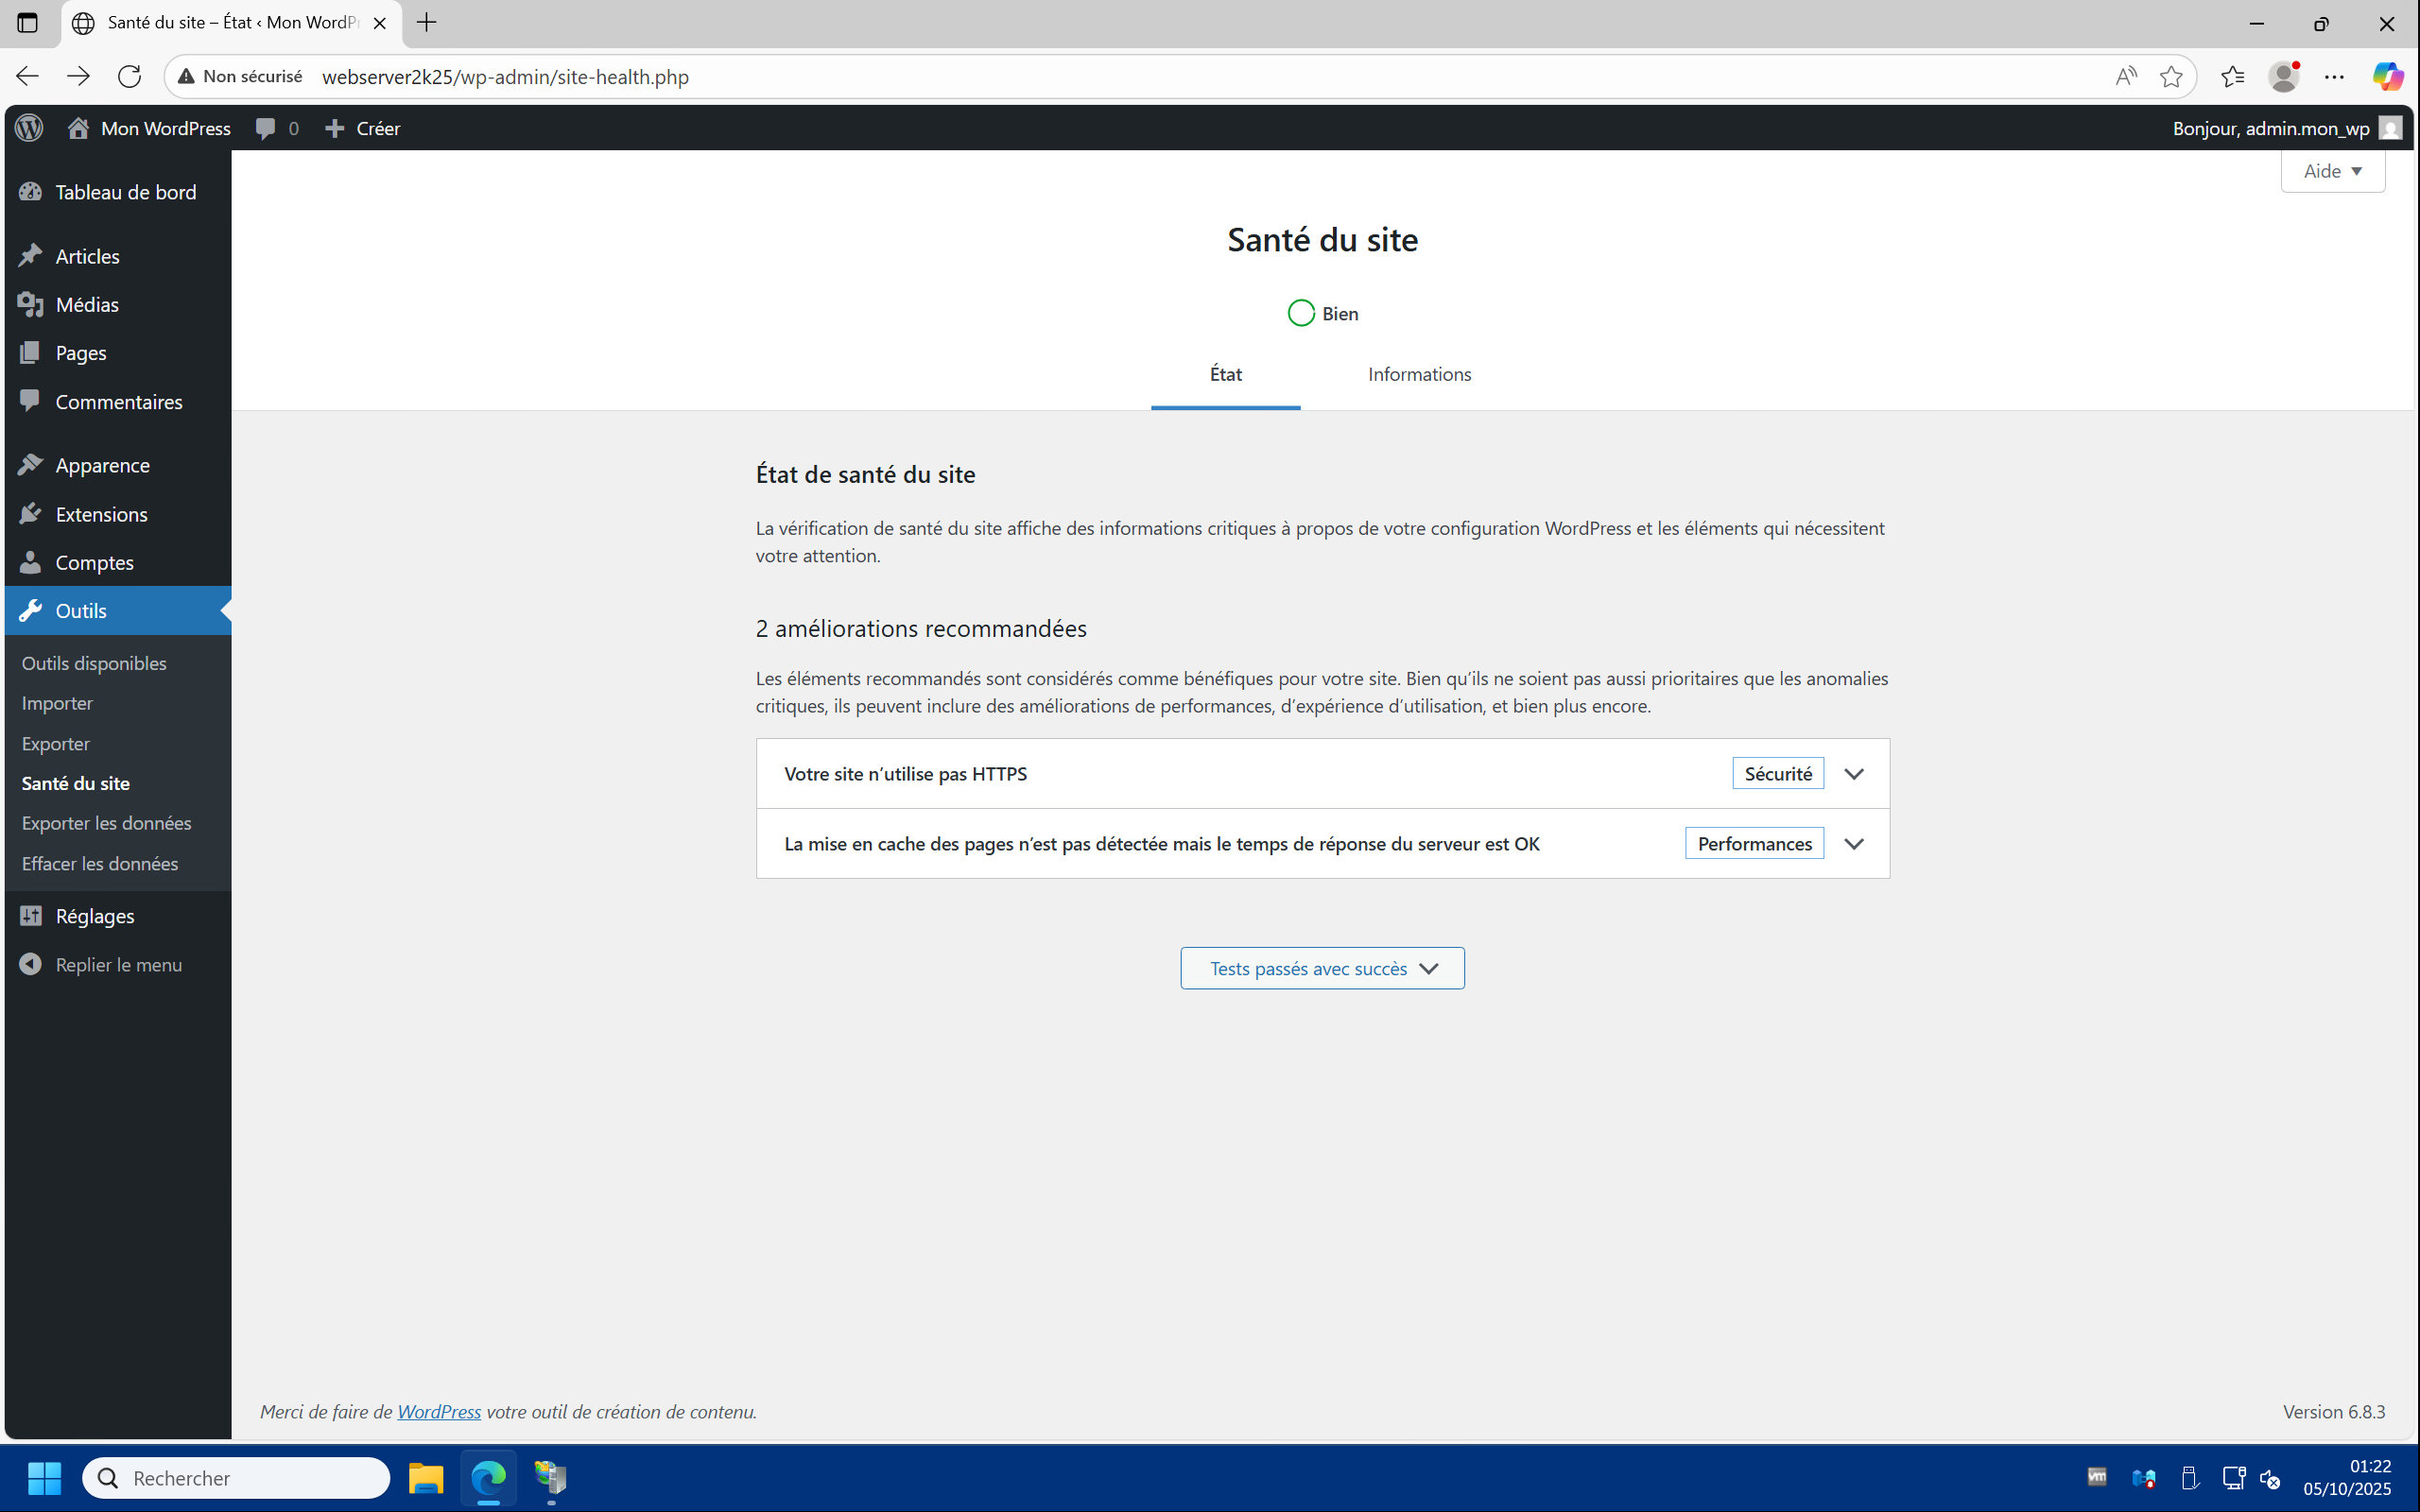
2 – Here we can see 3 recommendations for improvements (quickly going over inactive plugins and themes to uninstall) :
- Missing plugins to install
- HTTPS protocol is not enabled
- Caching is not detected
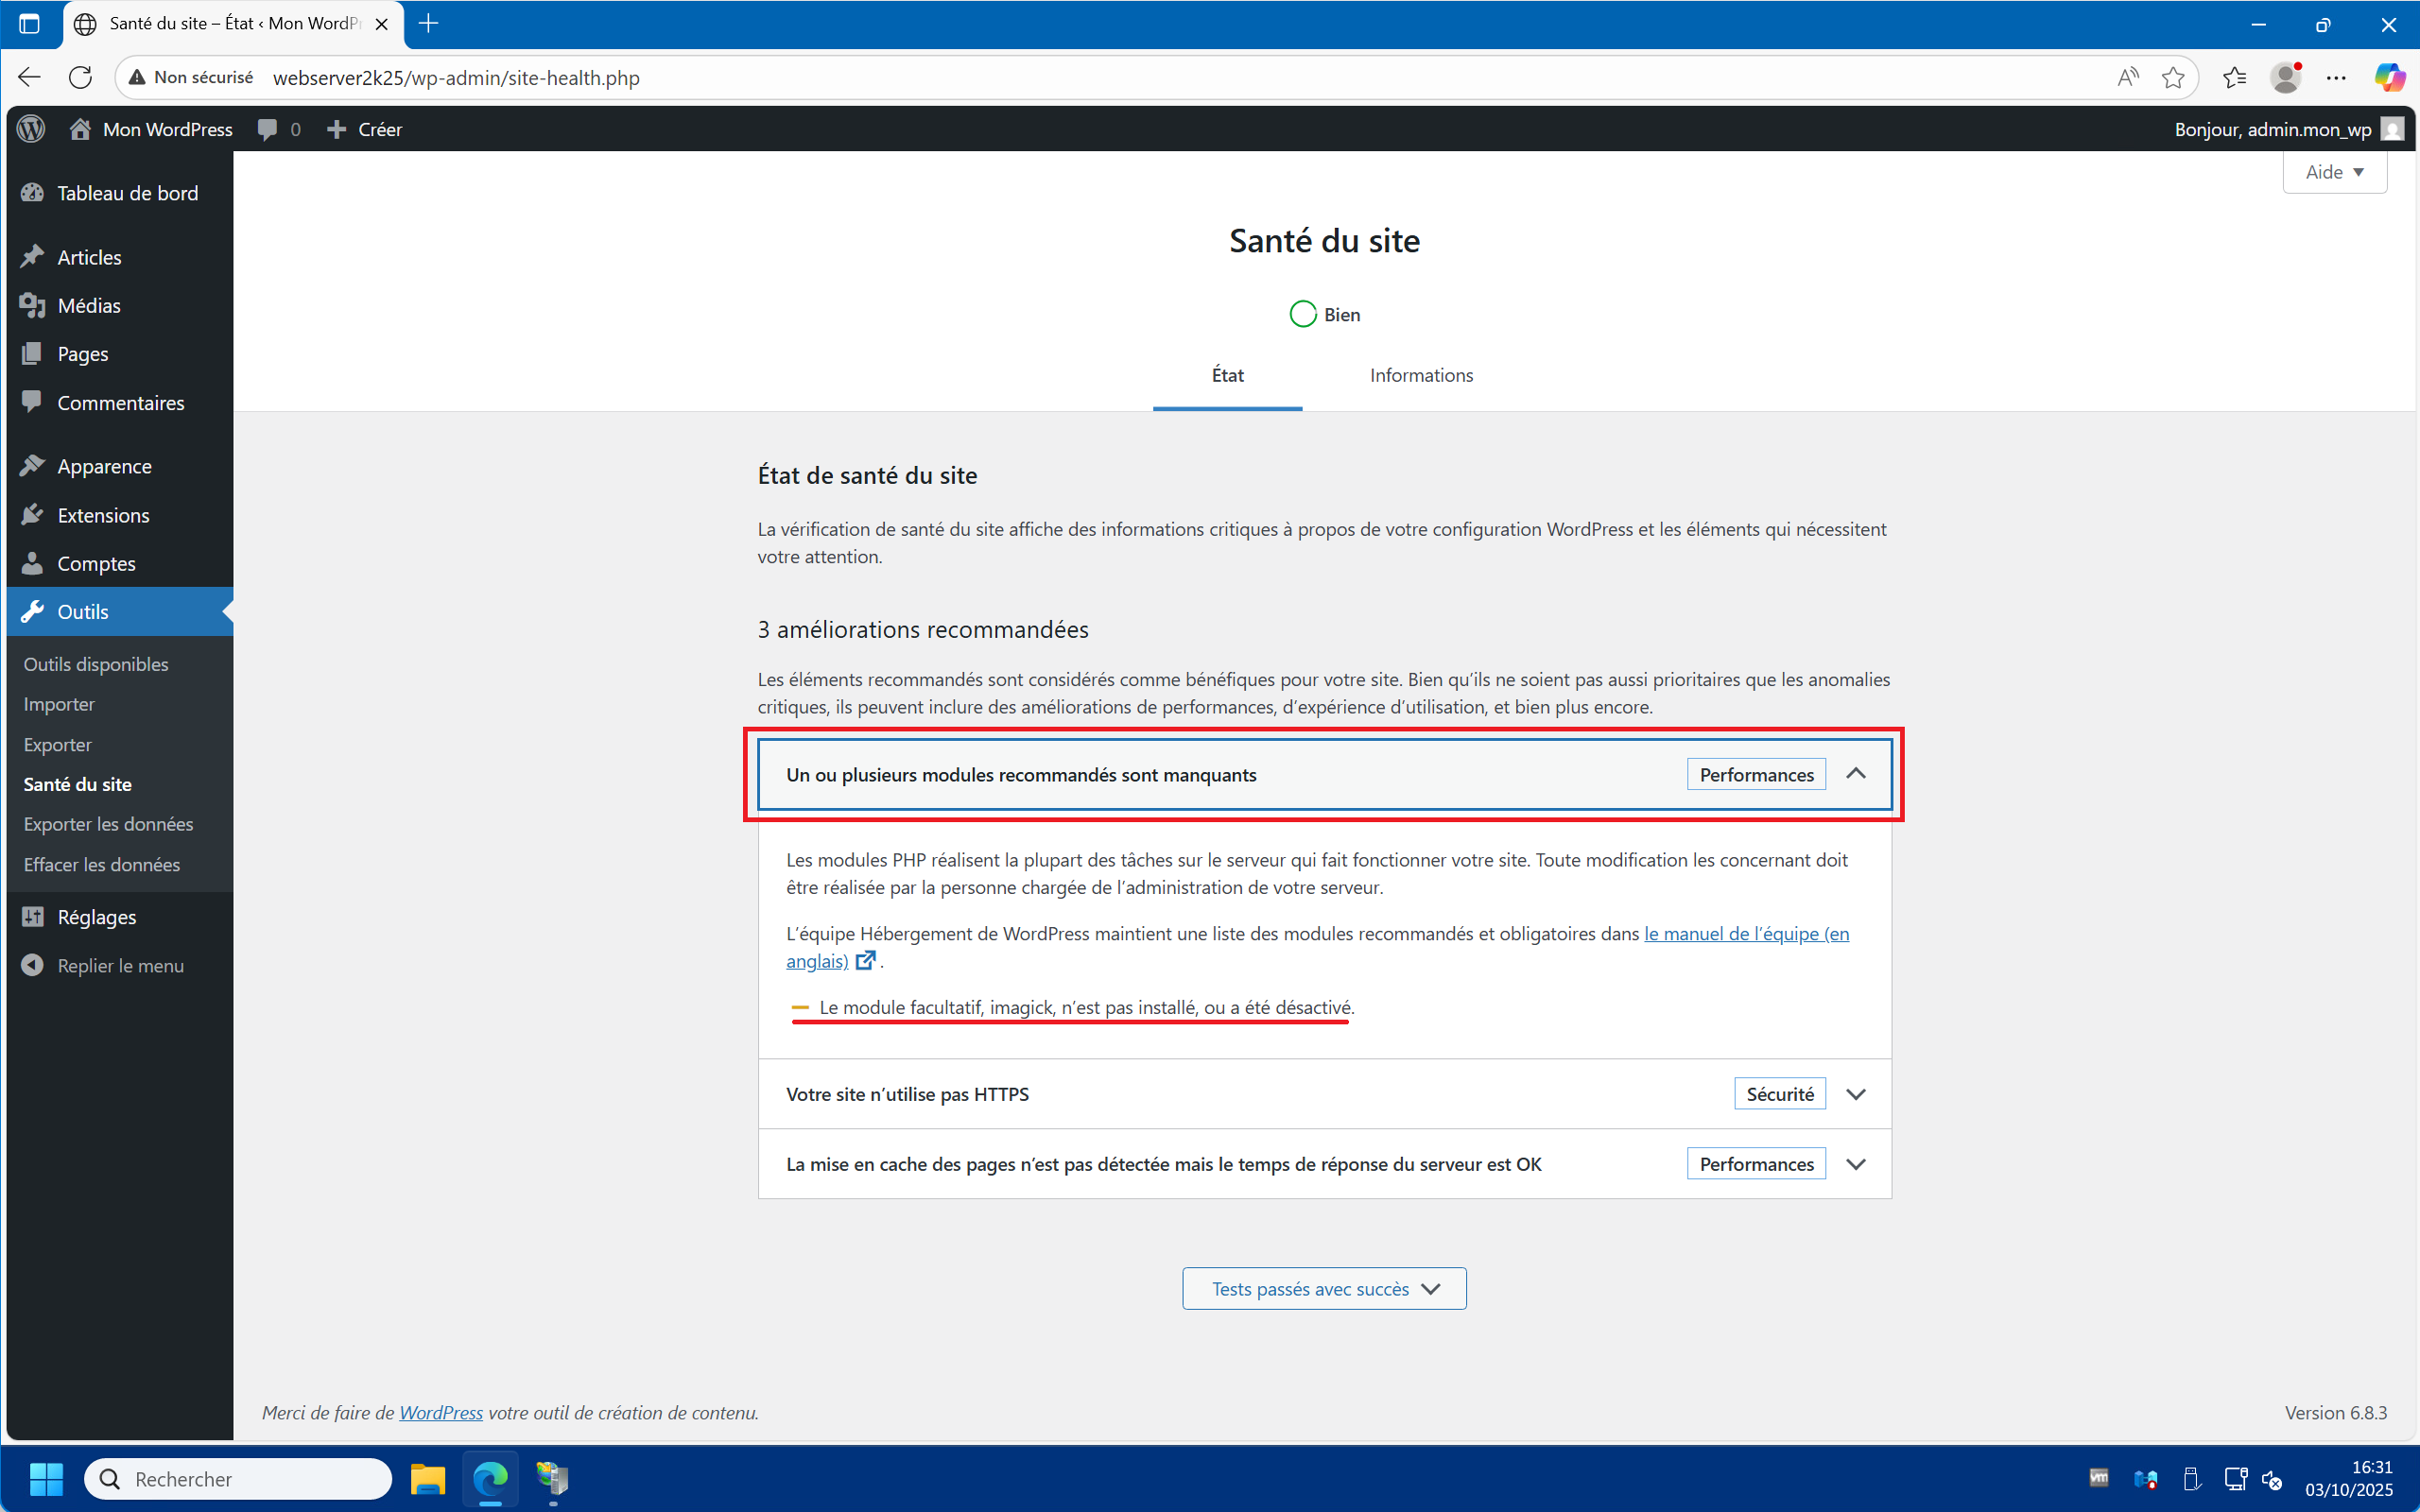
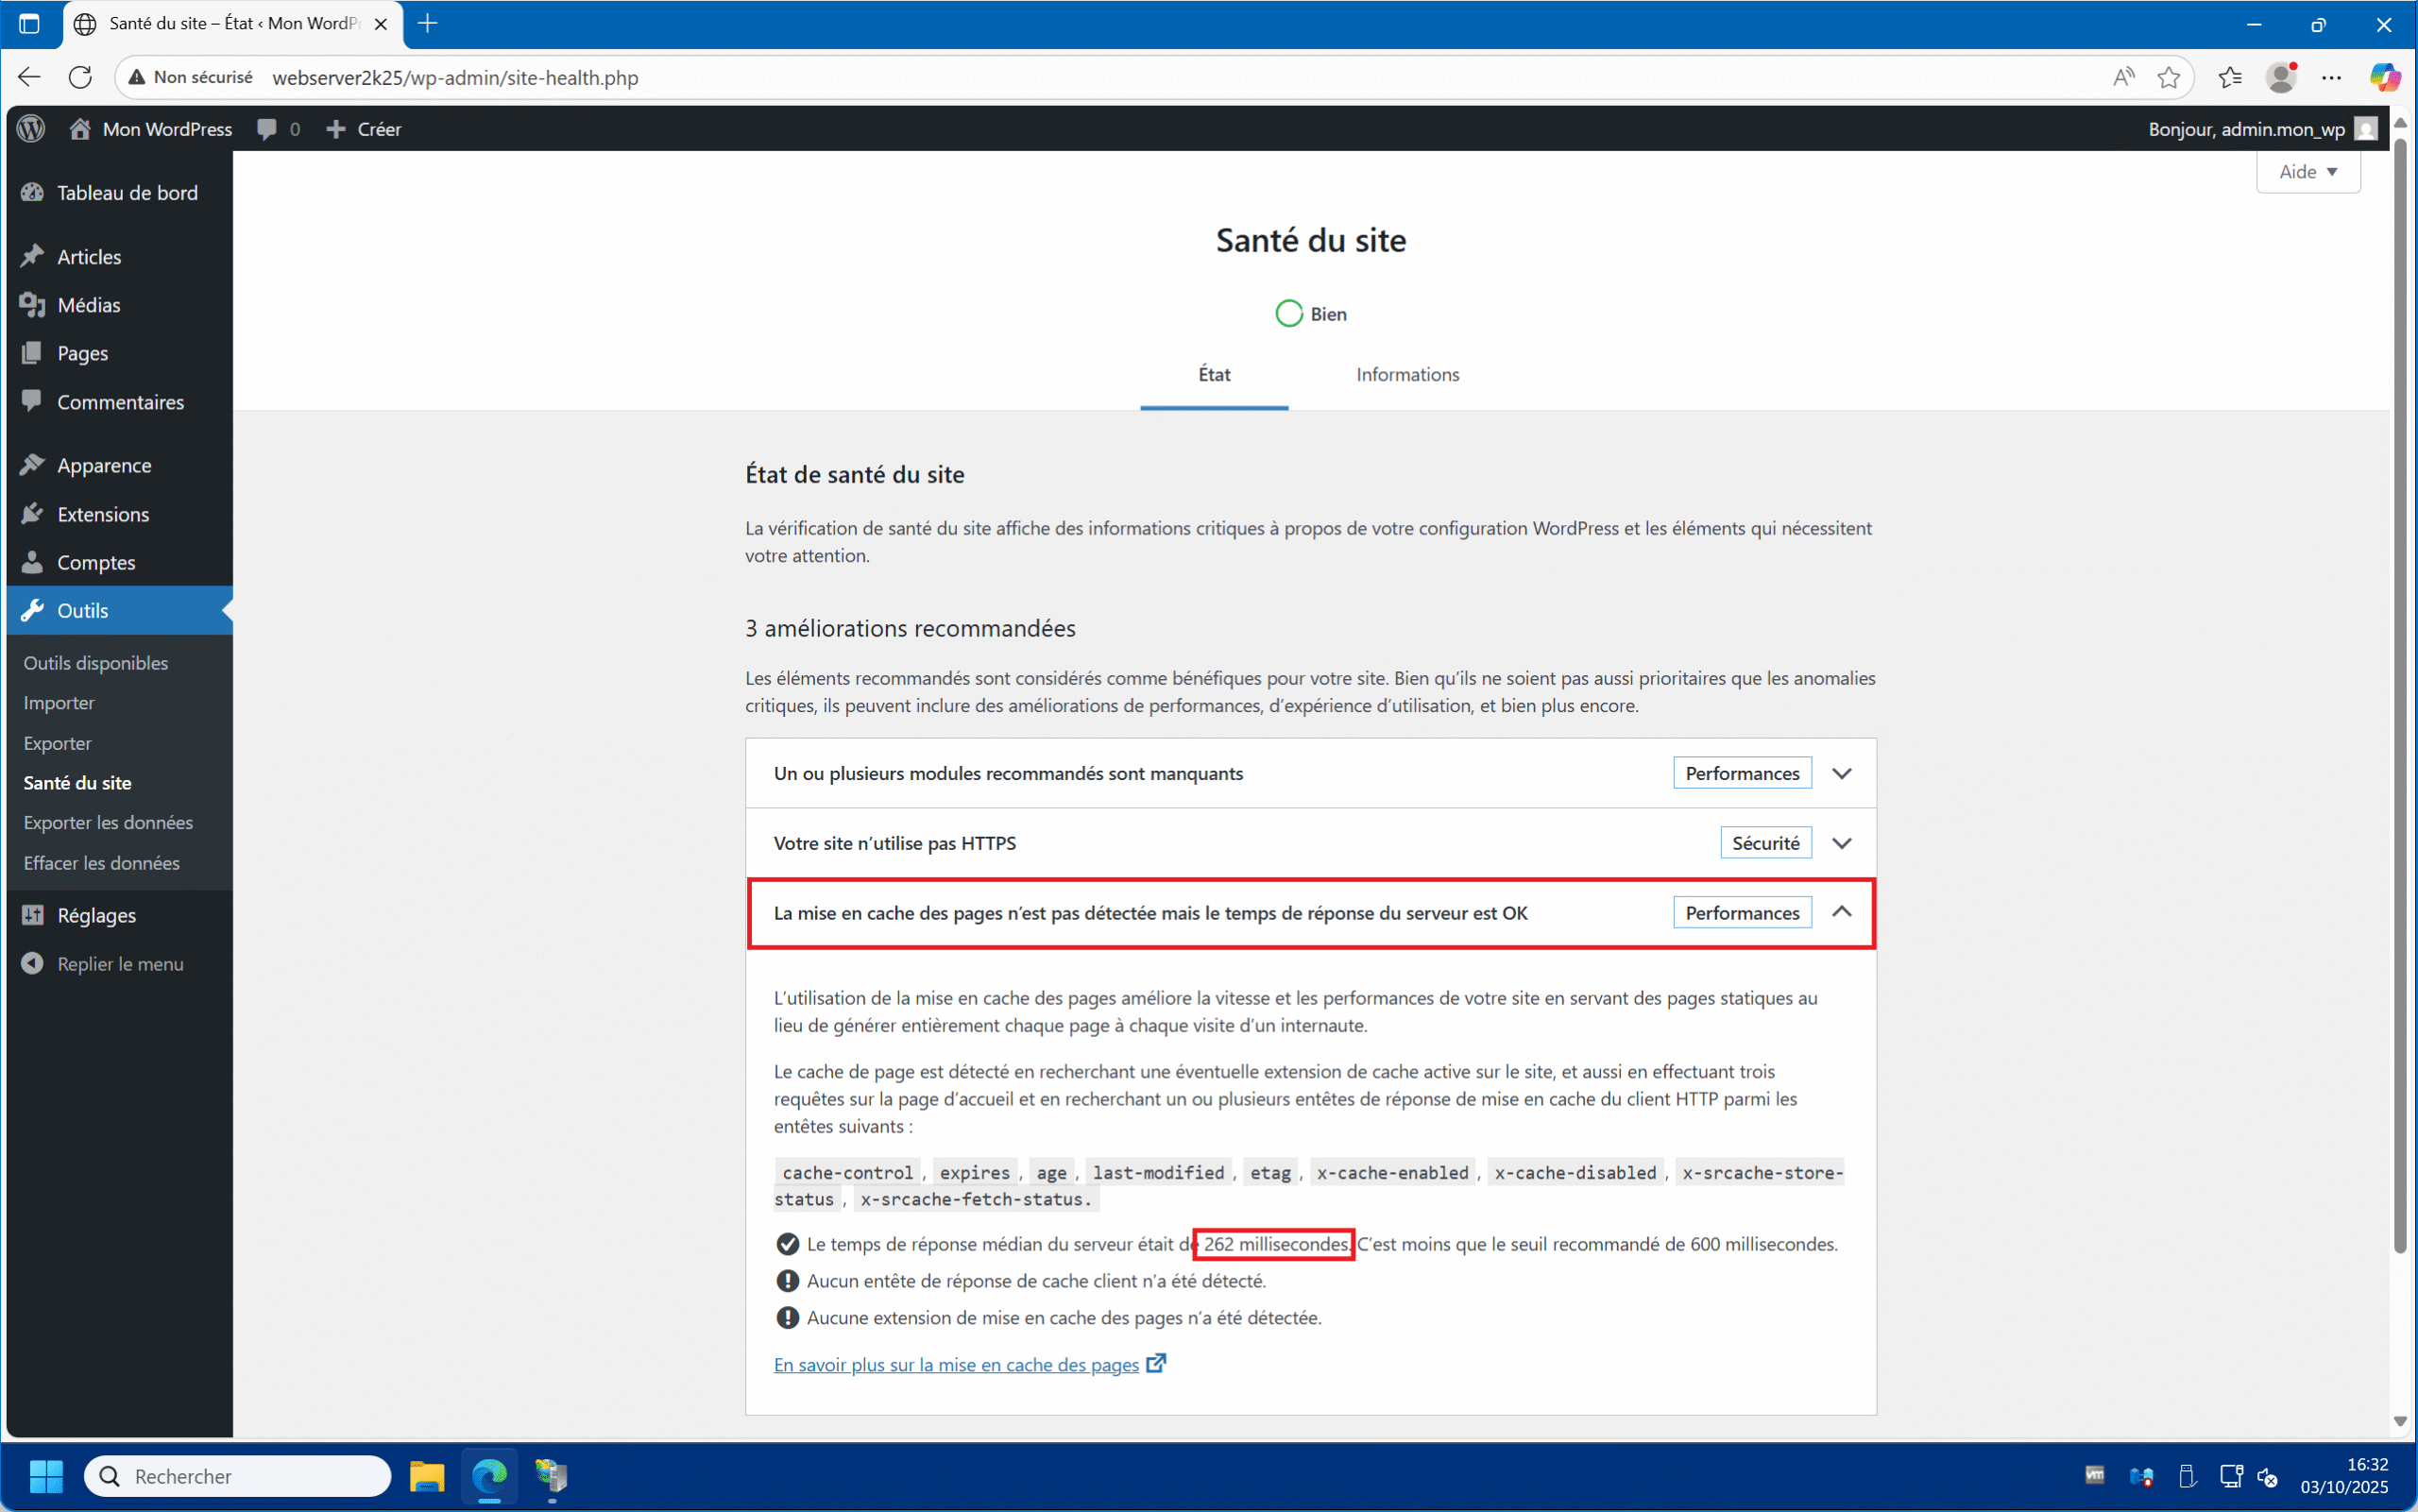
3 – By clicking on “One or more recommended modules are missing” you can see which add-ons are missing. In this case, only the “imagick” module is missing, which we will install later :
4 – By clicking on “Page caching is not detected but the server response time is OK” you will see the site’s latency. That is, the time it takes to respond to requests. In this case, we have 262 milliseconds. This is the value that we will use to evaluate server performance improvements :
Update PHP :
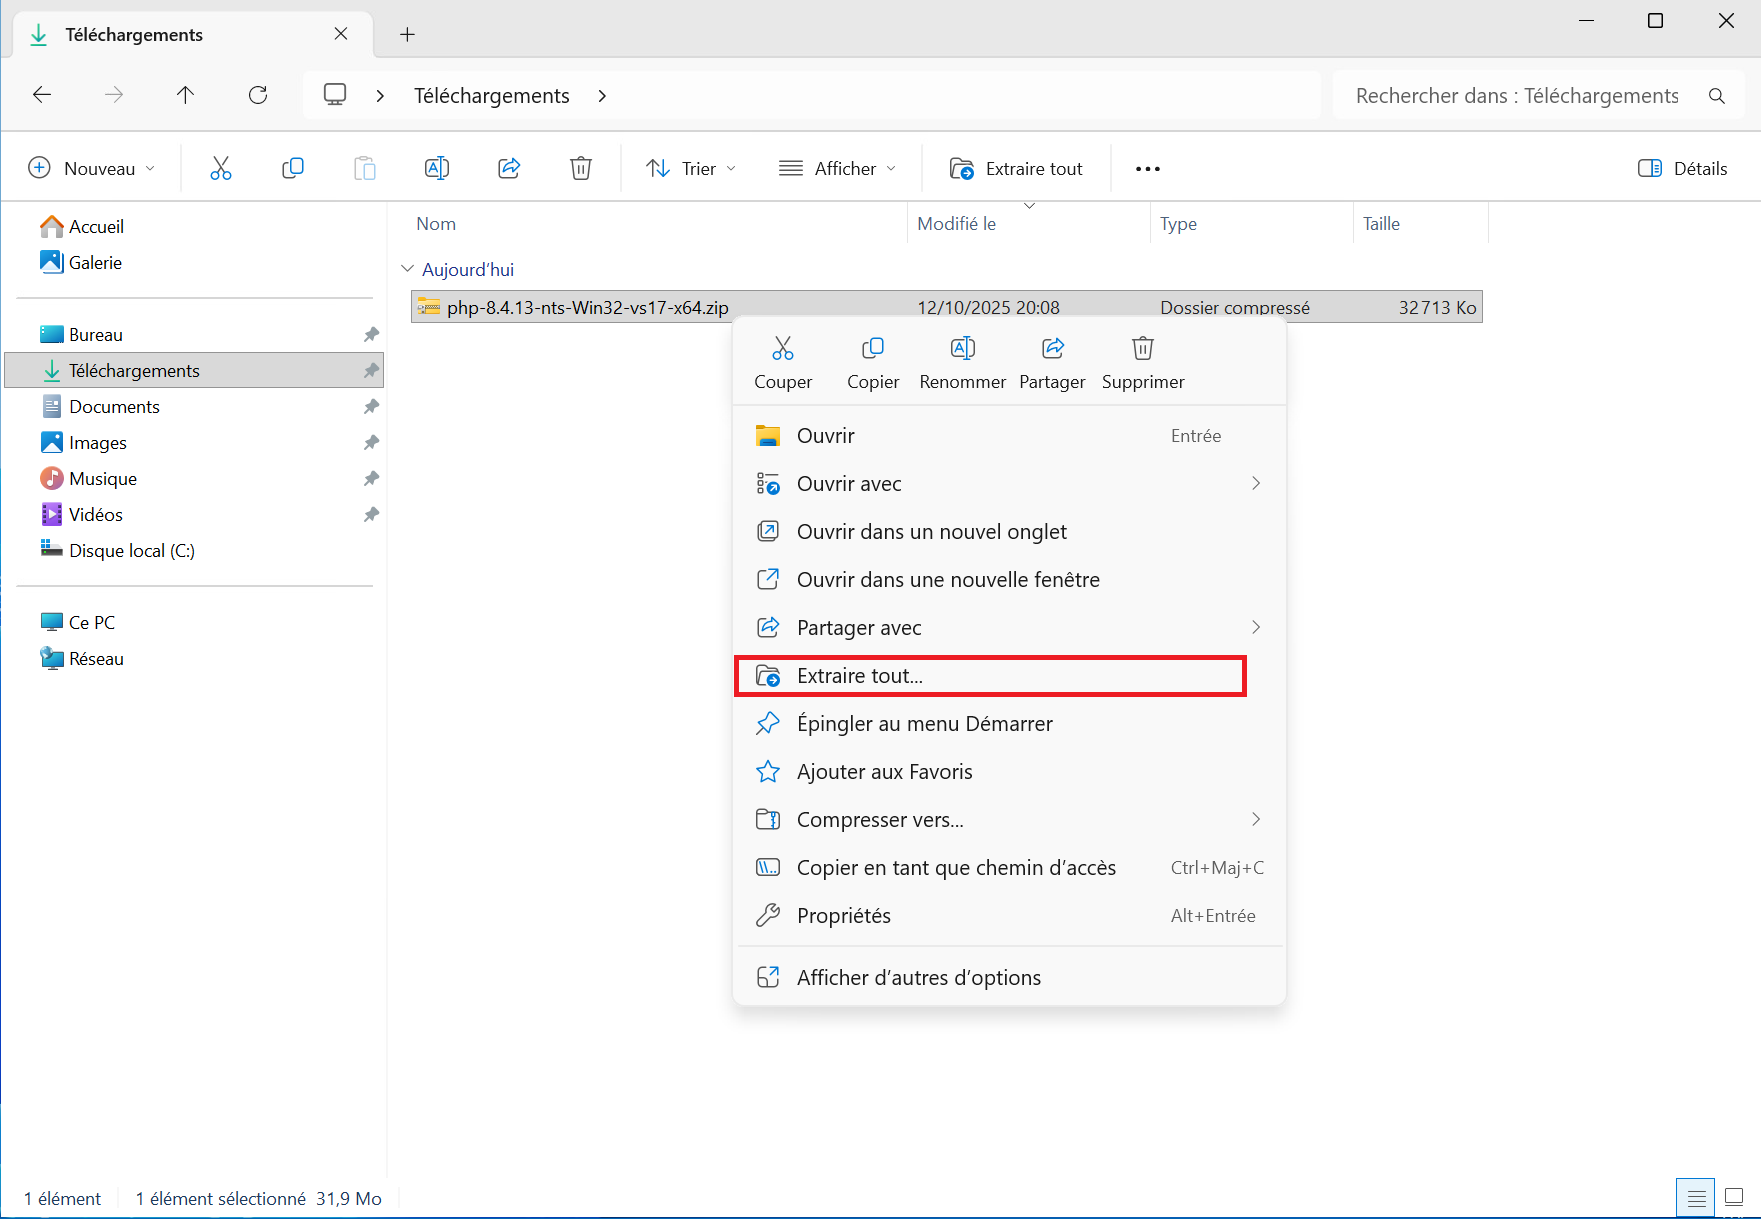
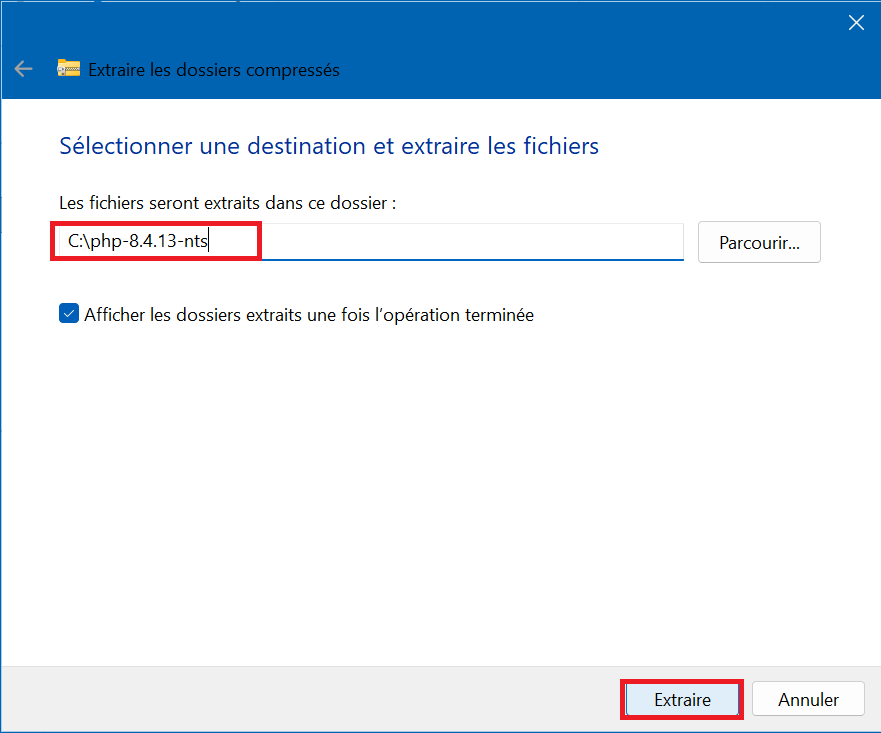
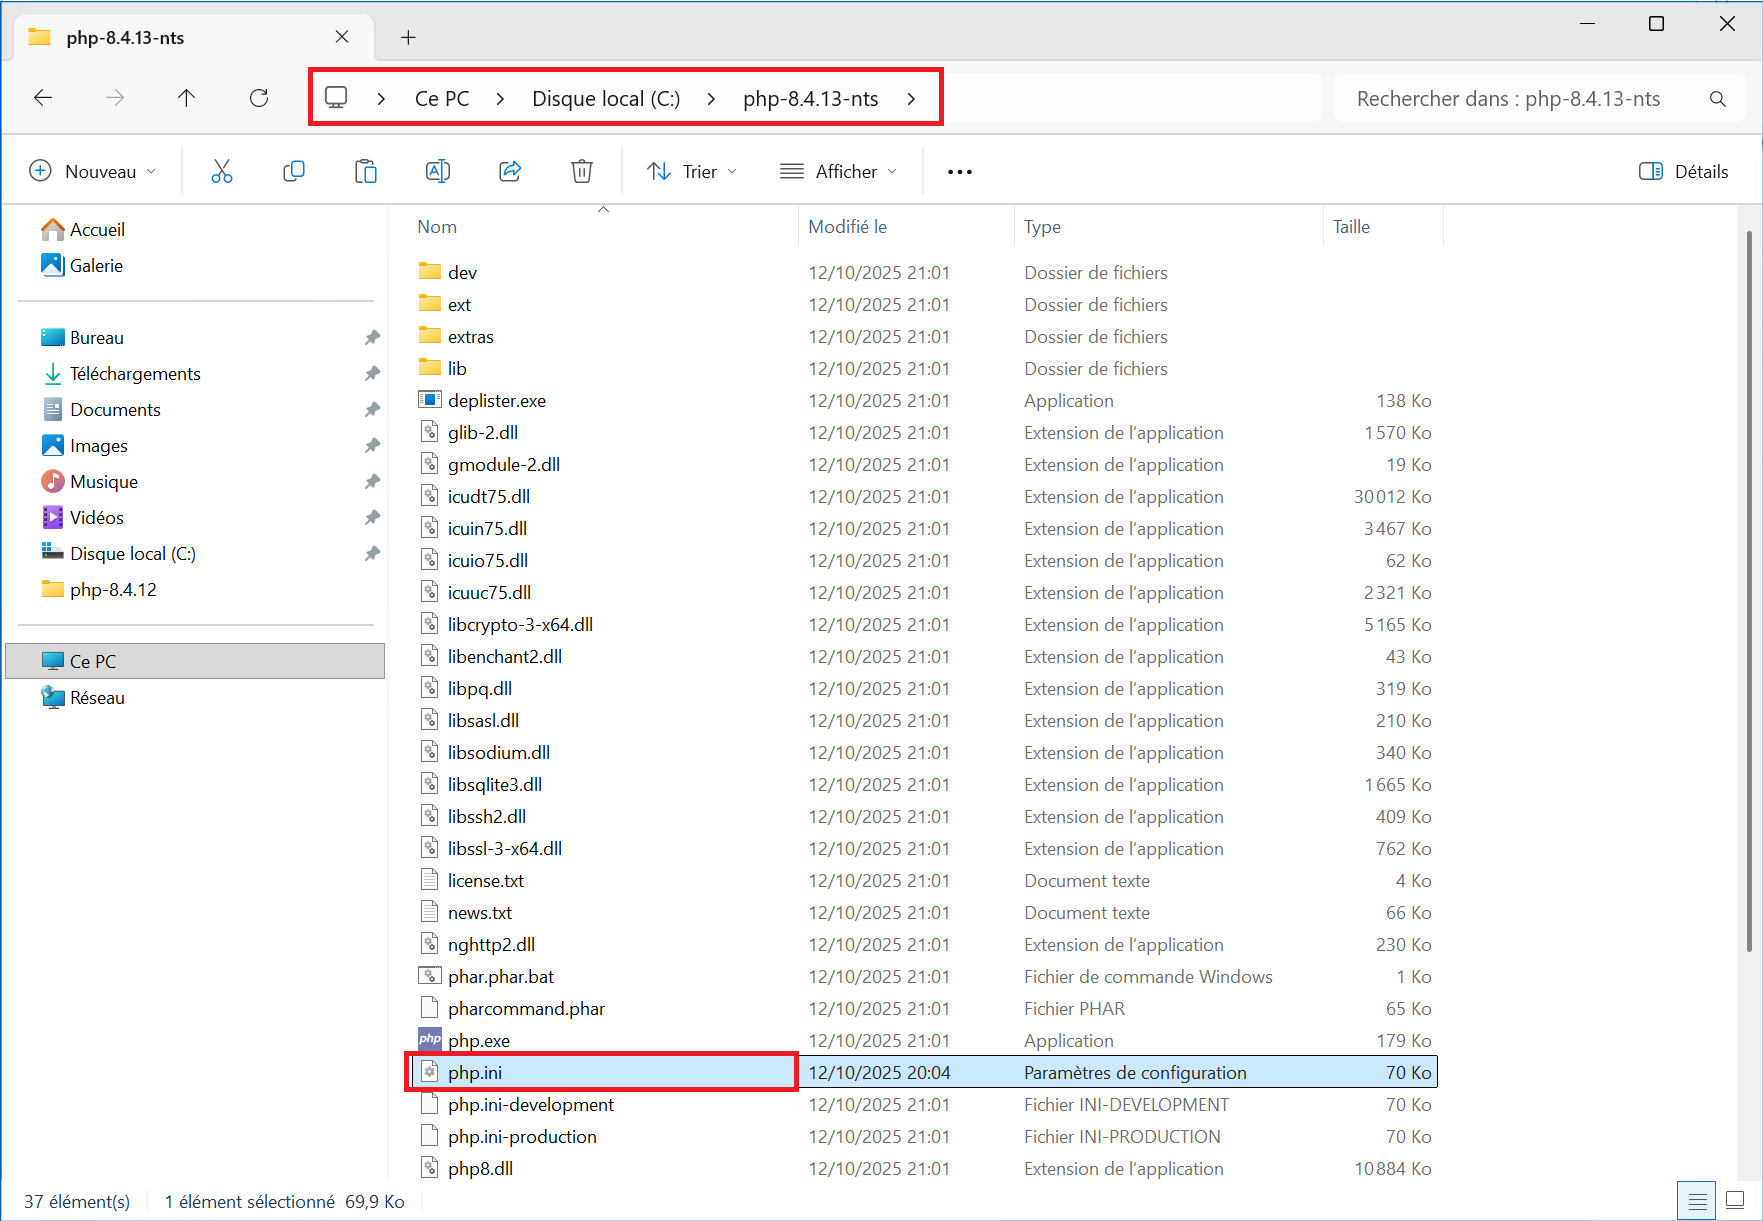
1 – Extract the archive “php-8.4.13-nts-Win32-vs17-x64.zip” into the folder “C:\php-8.4.13-nts” :
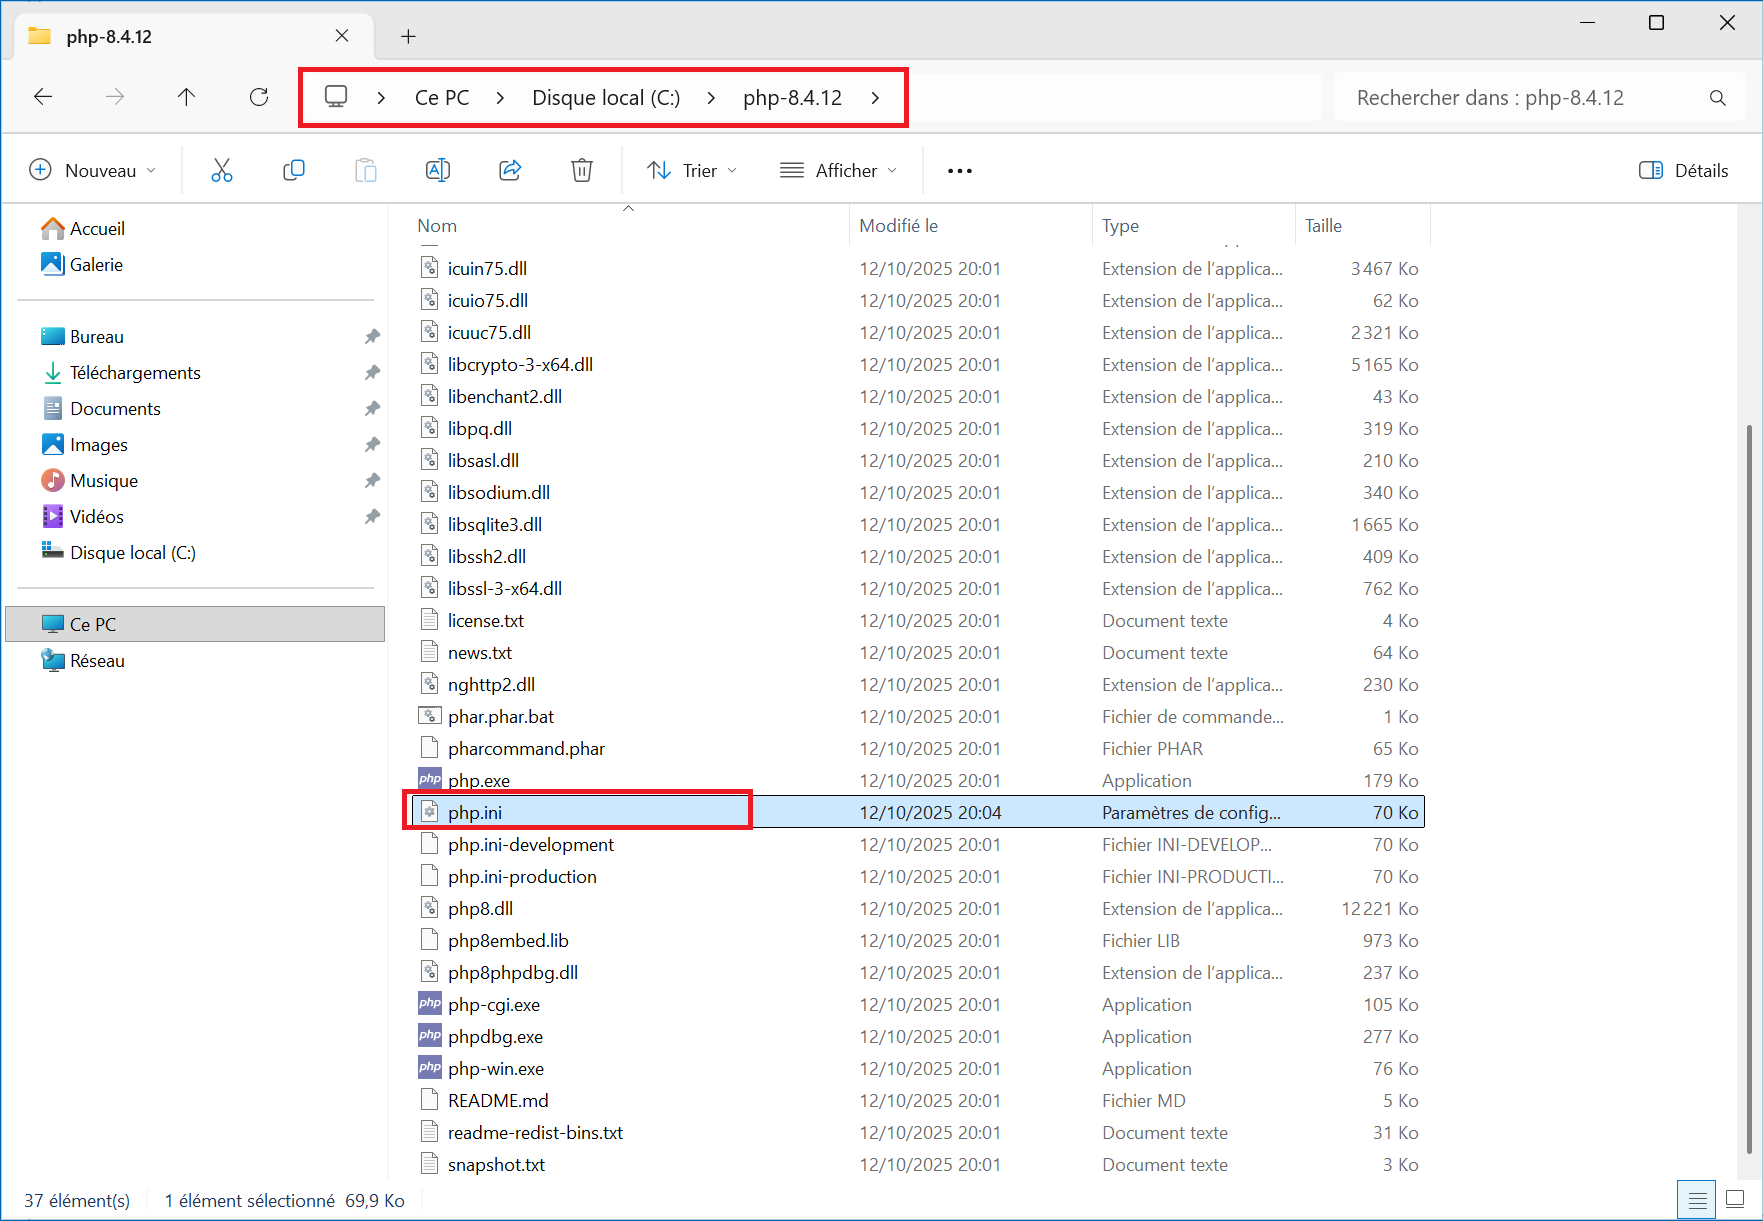
2 – You can copy the “php.ini” configuration file from the previous version’s folder to the new one. In this case, from “C:\php-8.4.12” to “C:\php-8.4.13-nts” . This will save you from having to reactivate the extensions :
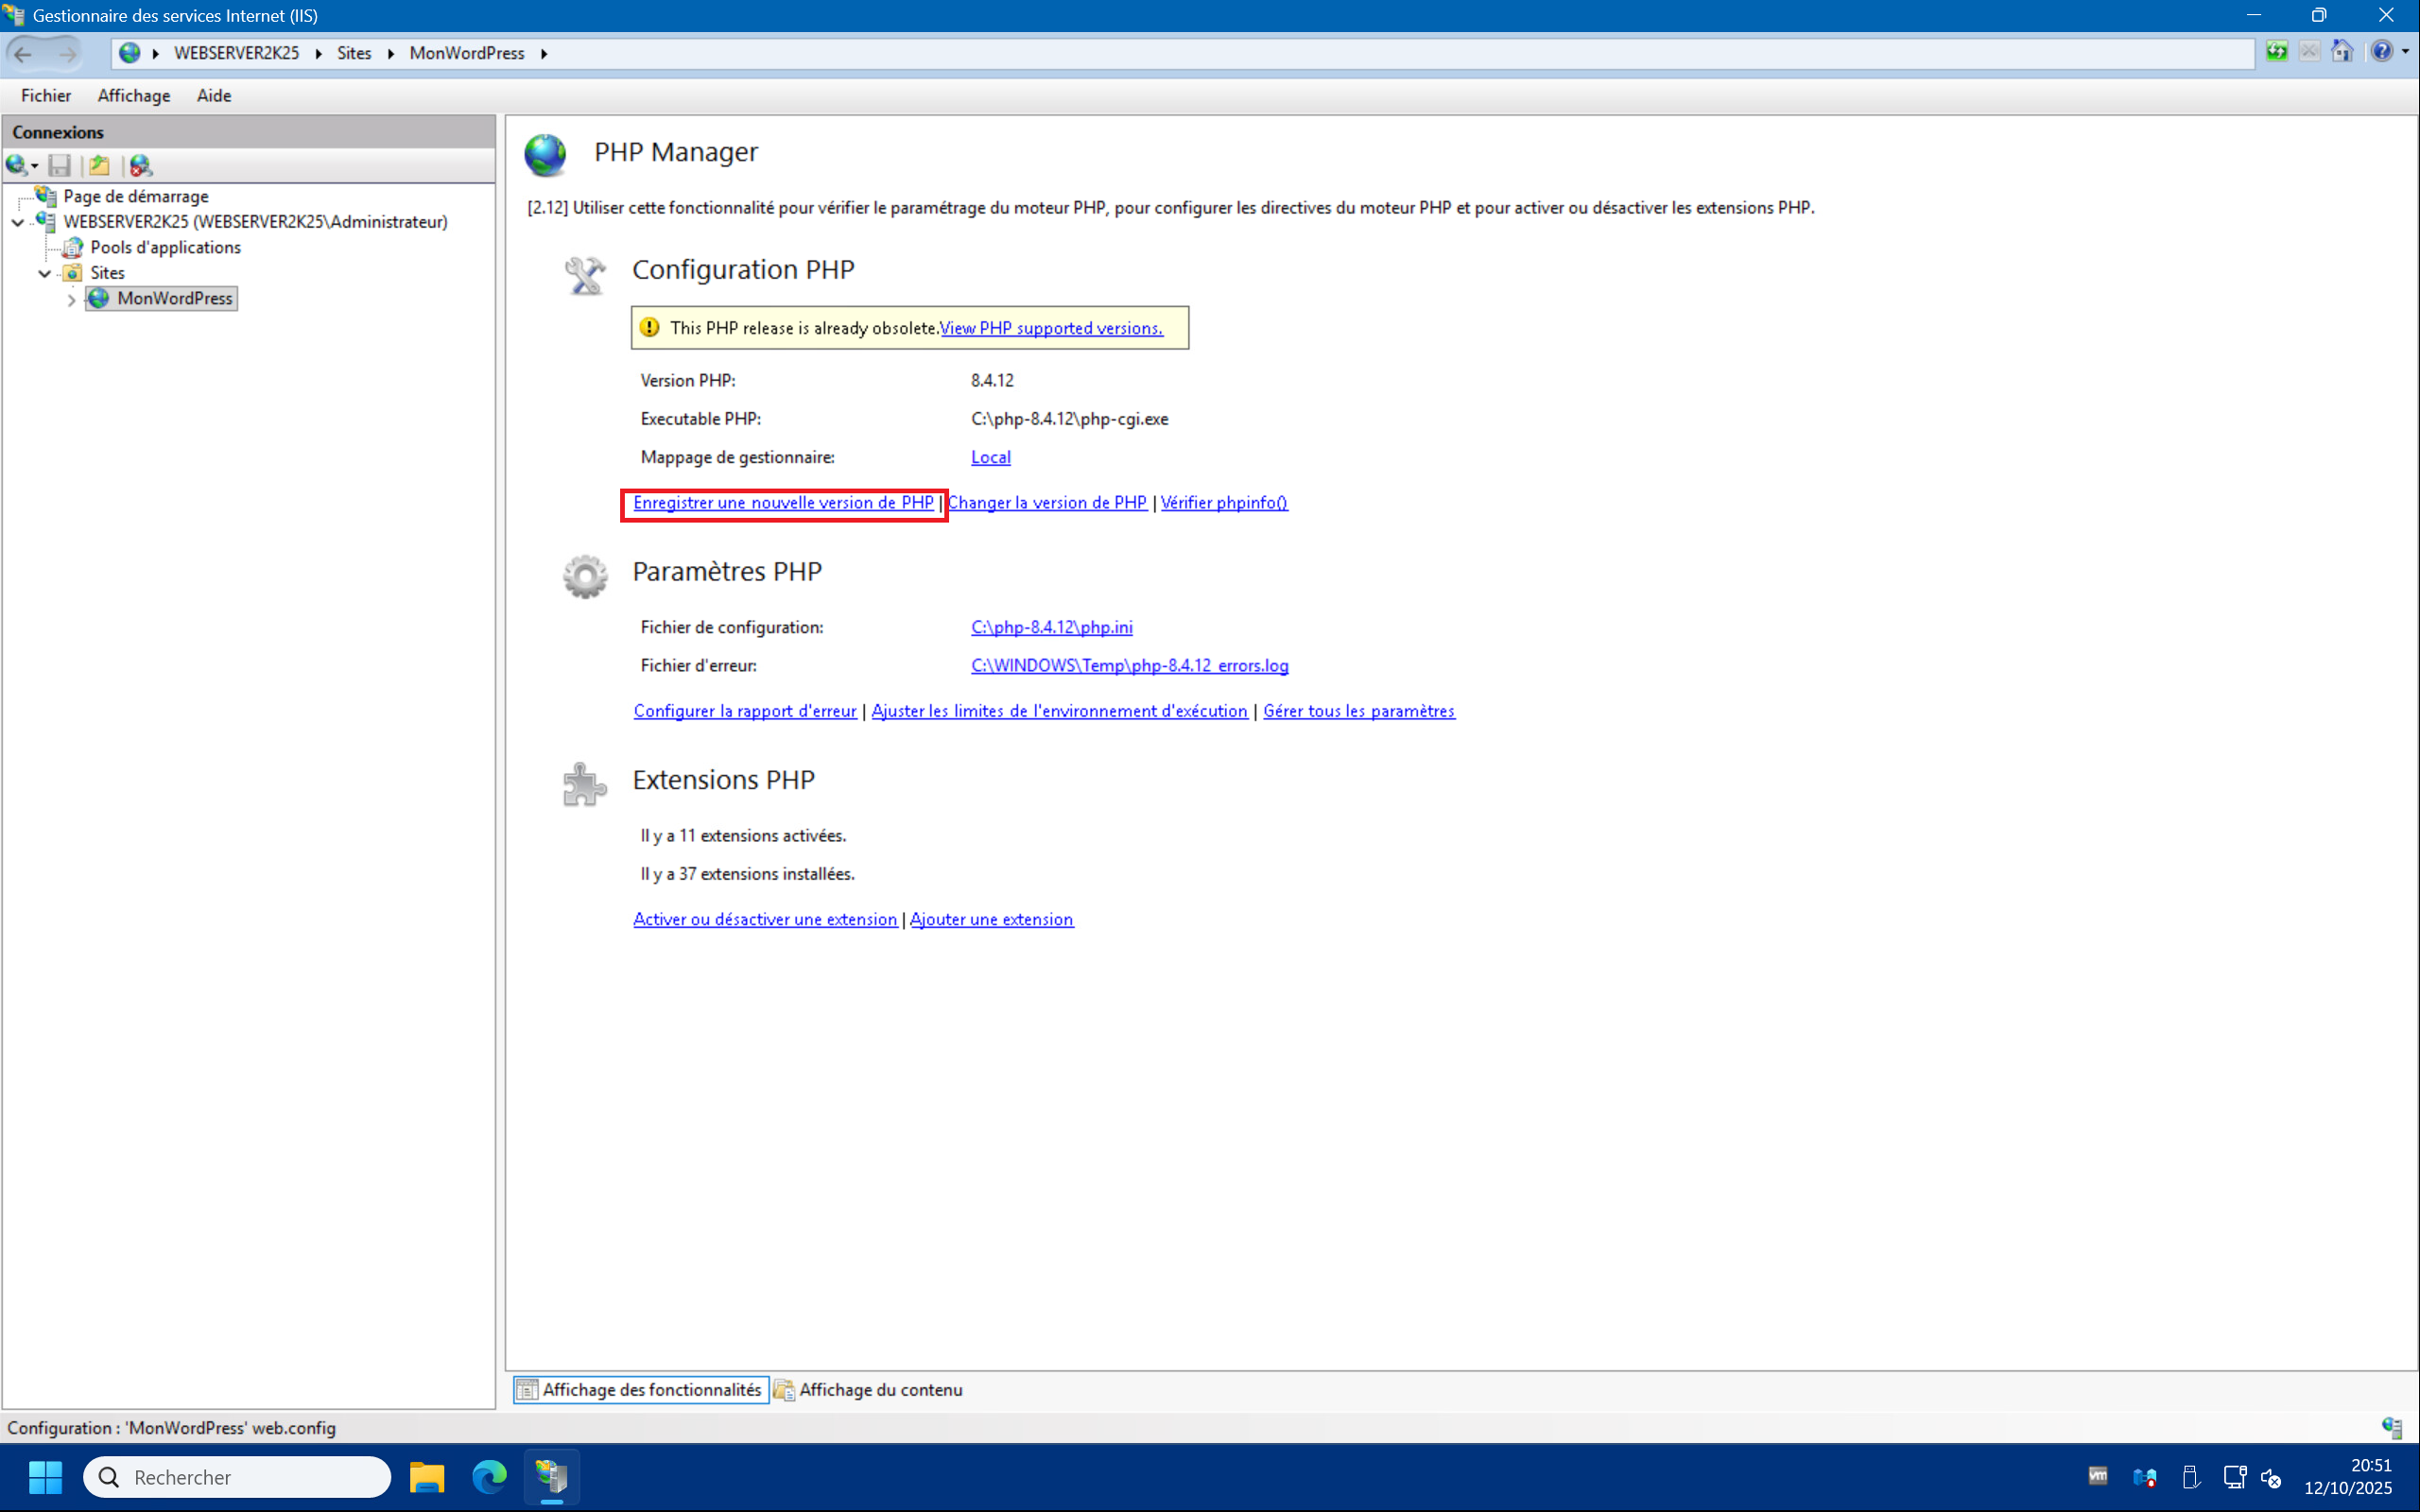
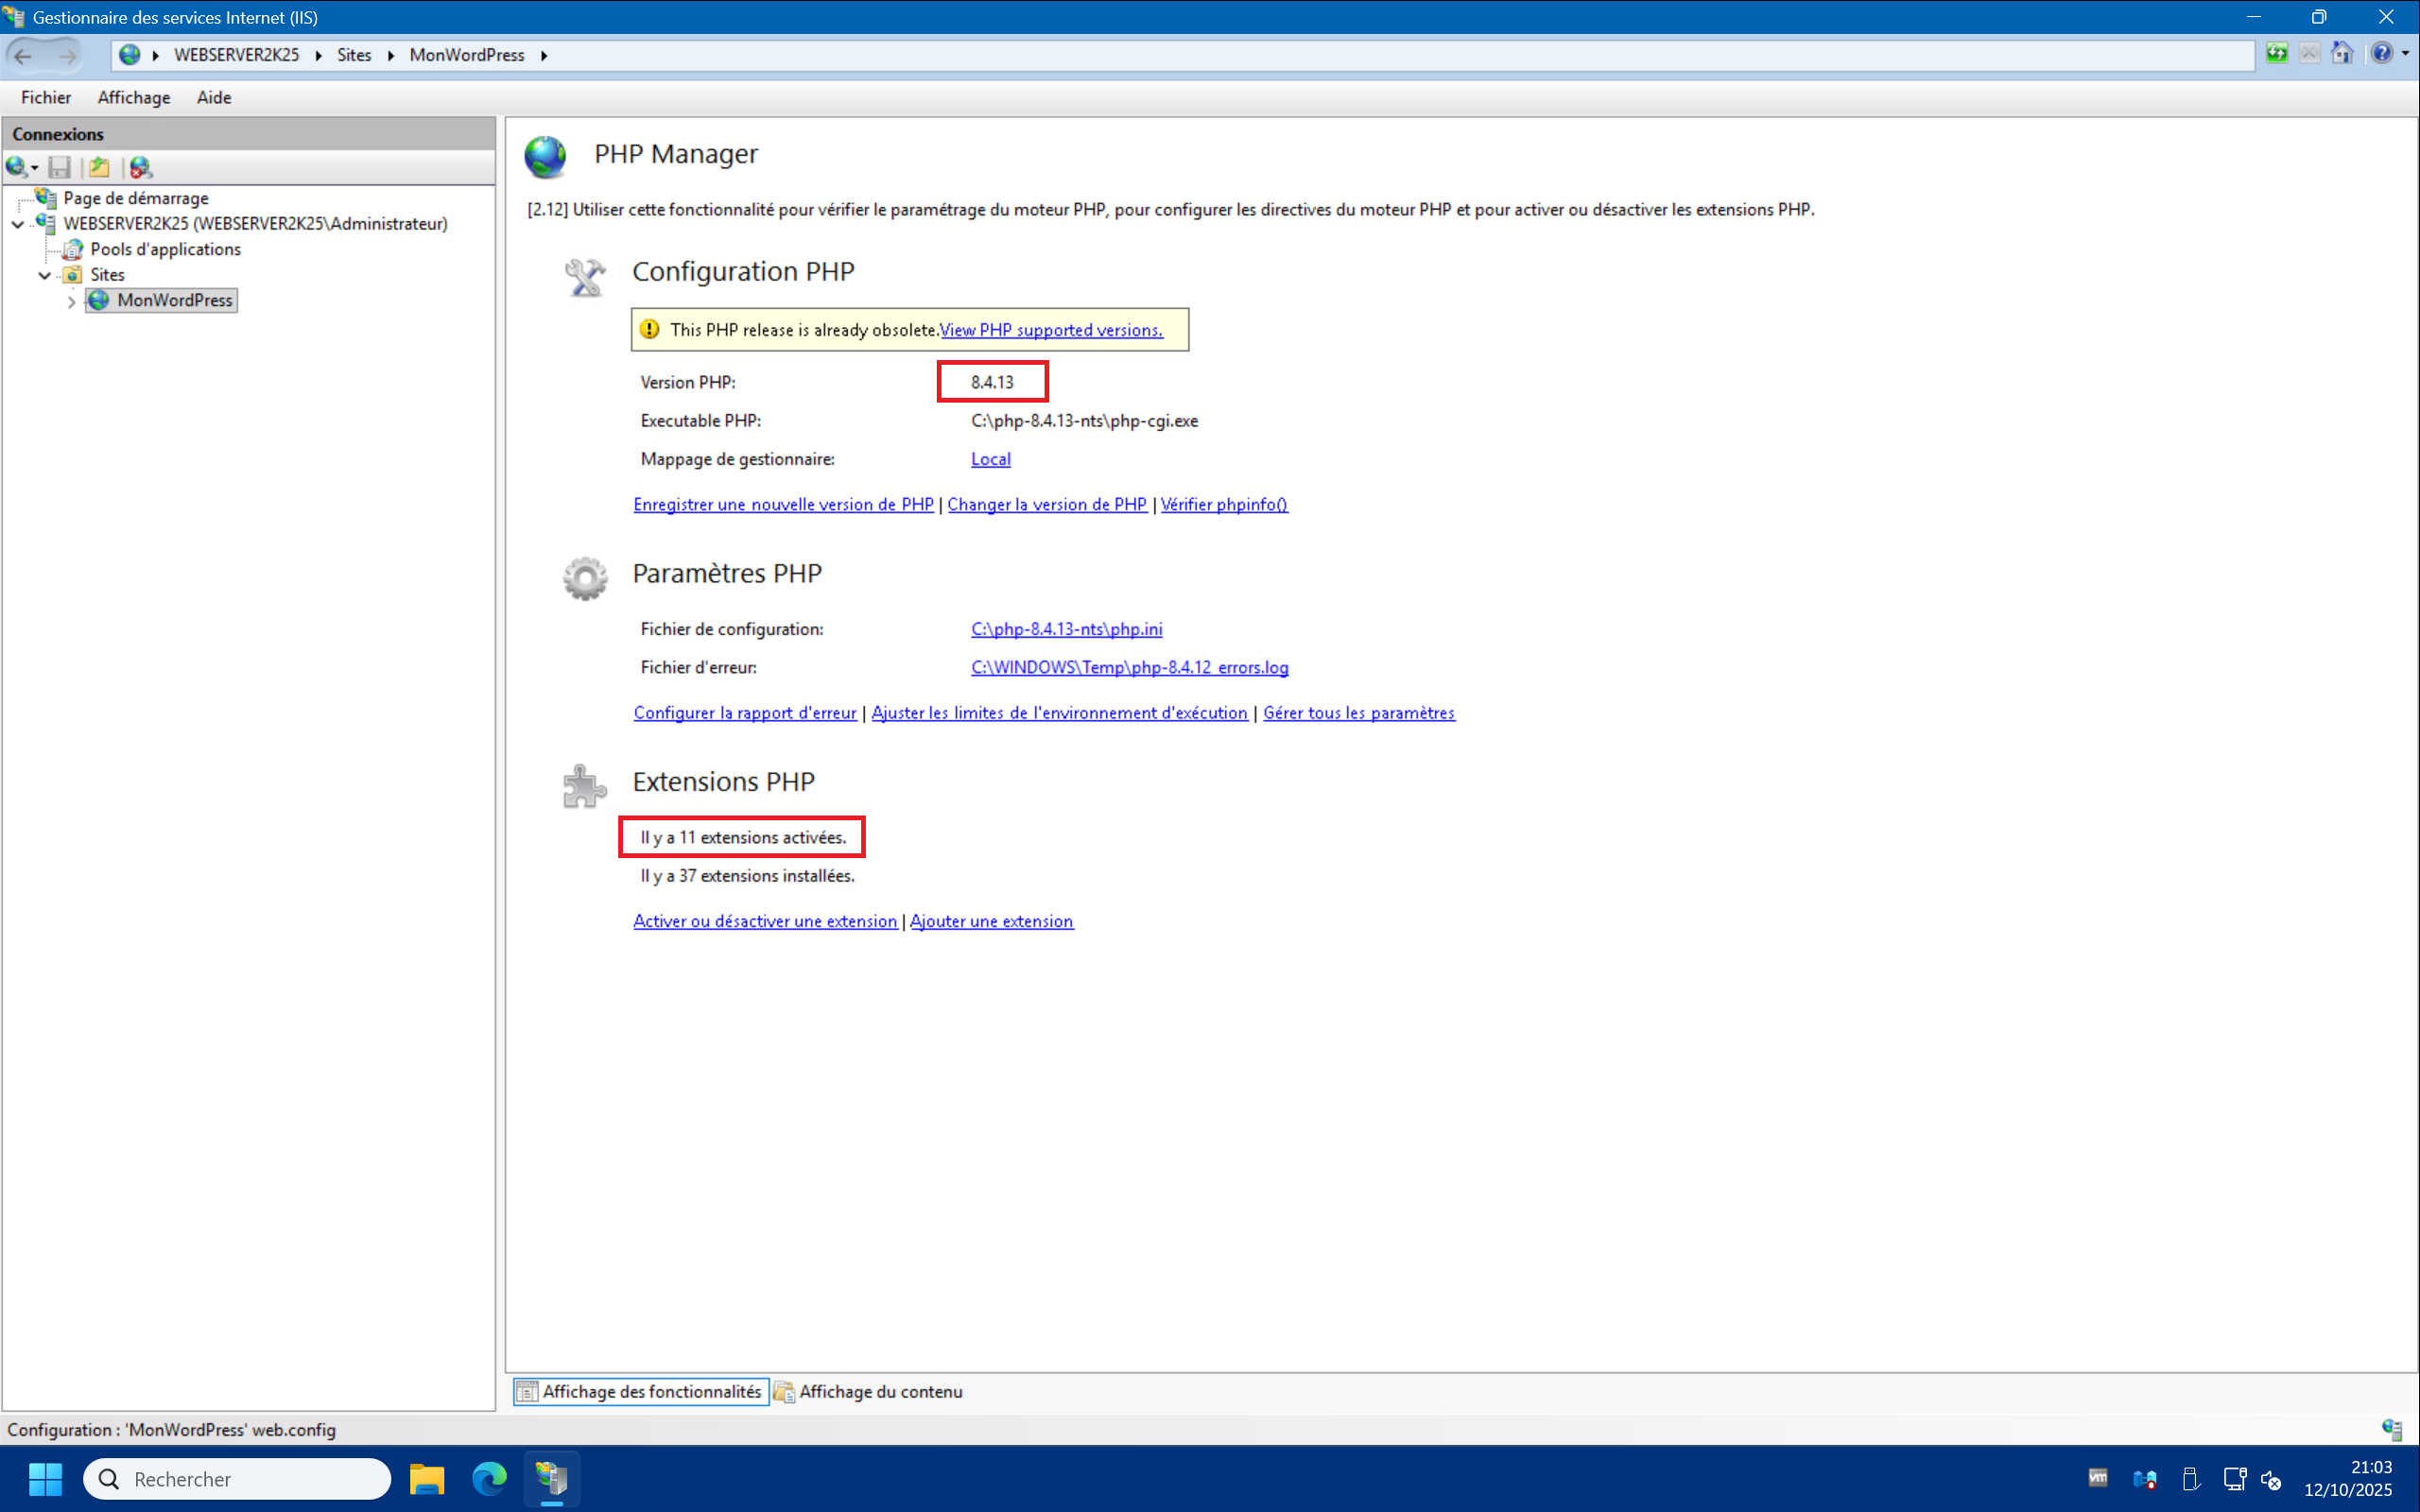
3 – In the IIS management console, launch PHP Manager and then click on “Register new PHP version” :
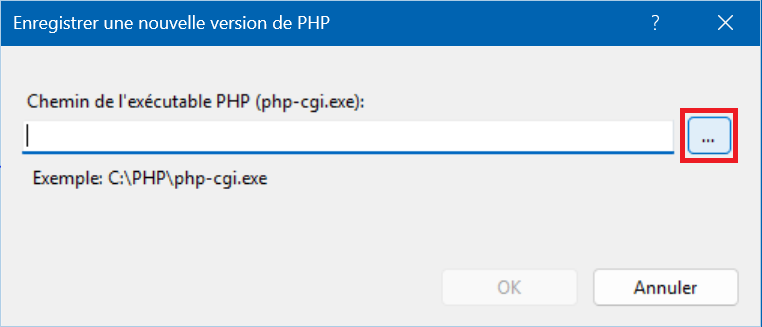
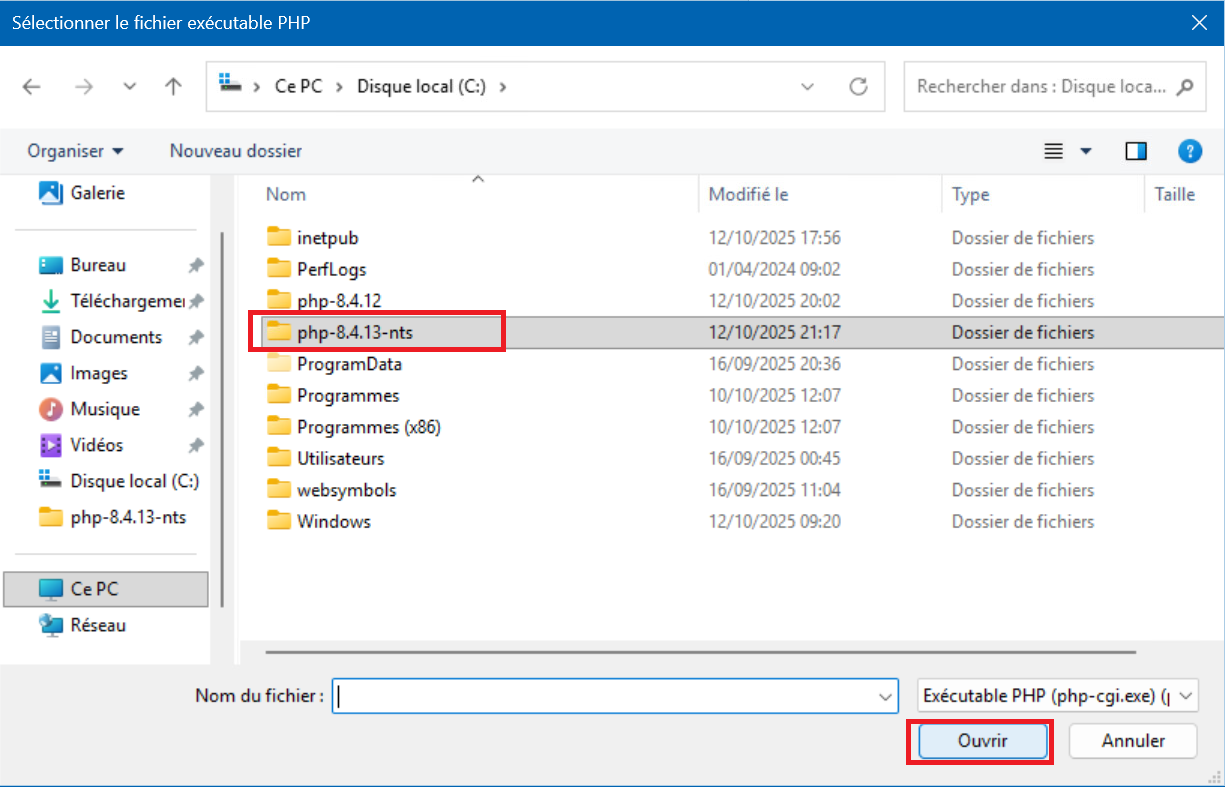
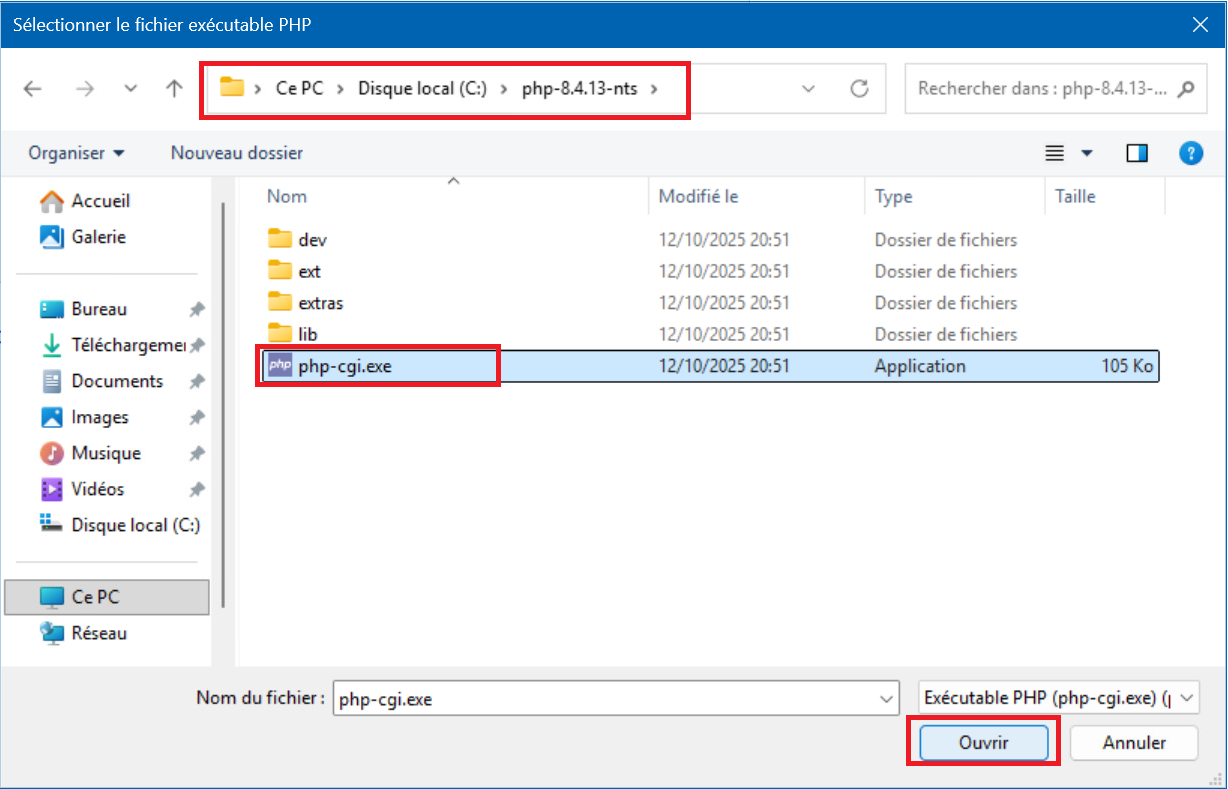
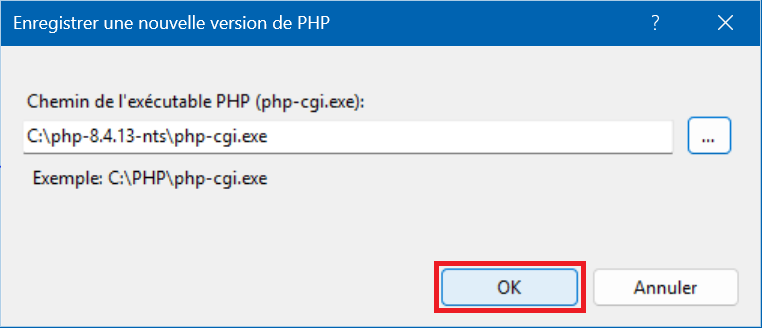
4 – Click on the “…” button then select the “php-8.4.13-nts” folder and click on “Open“. Then click on the “php-cgi.exe” file and on “Open” . Finish with “OK” :
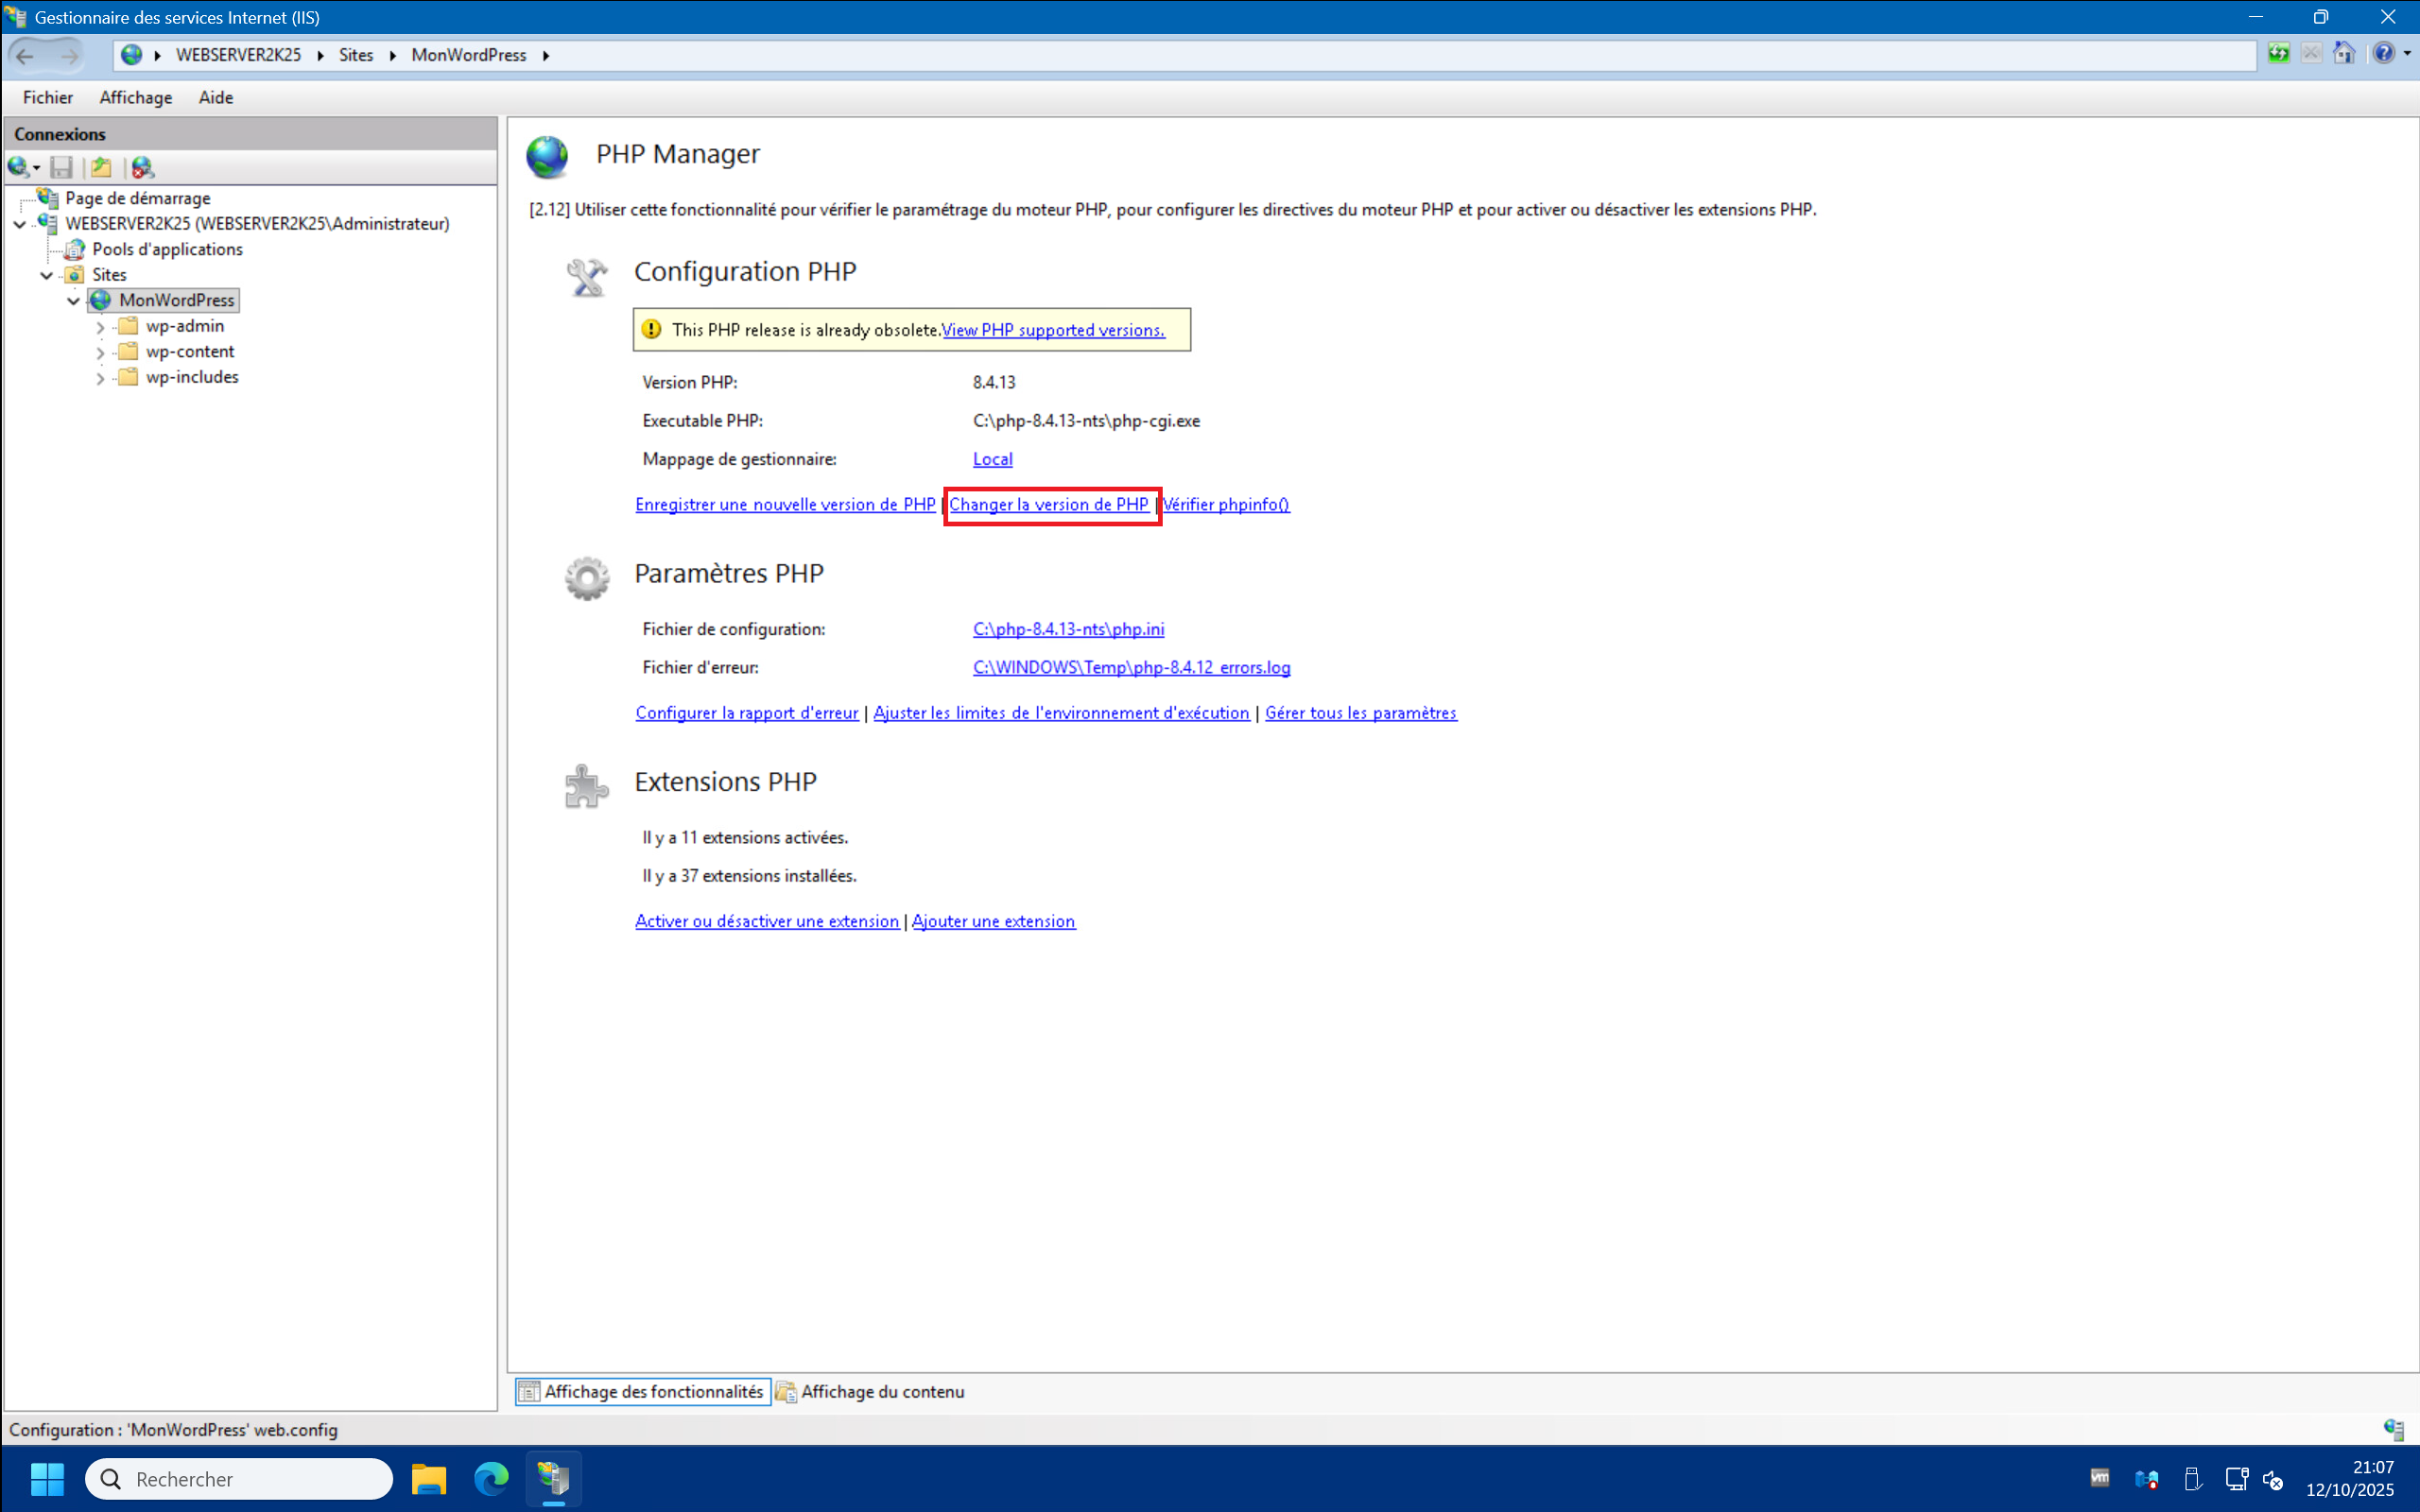
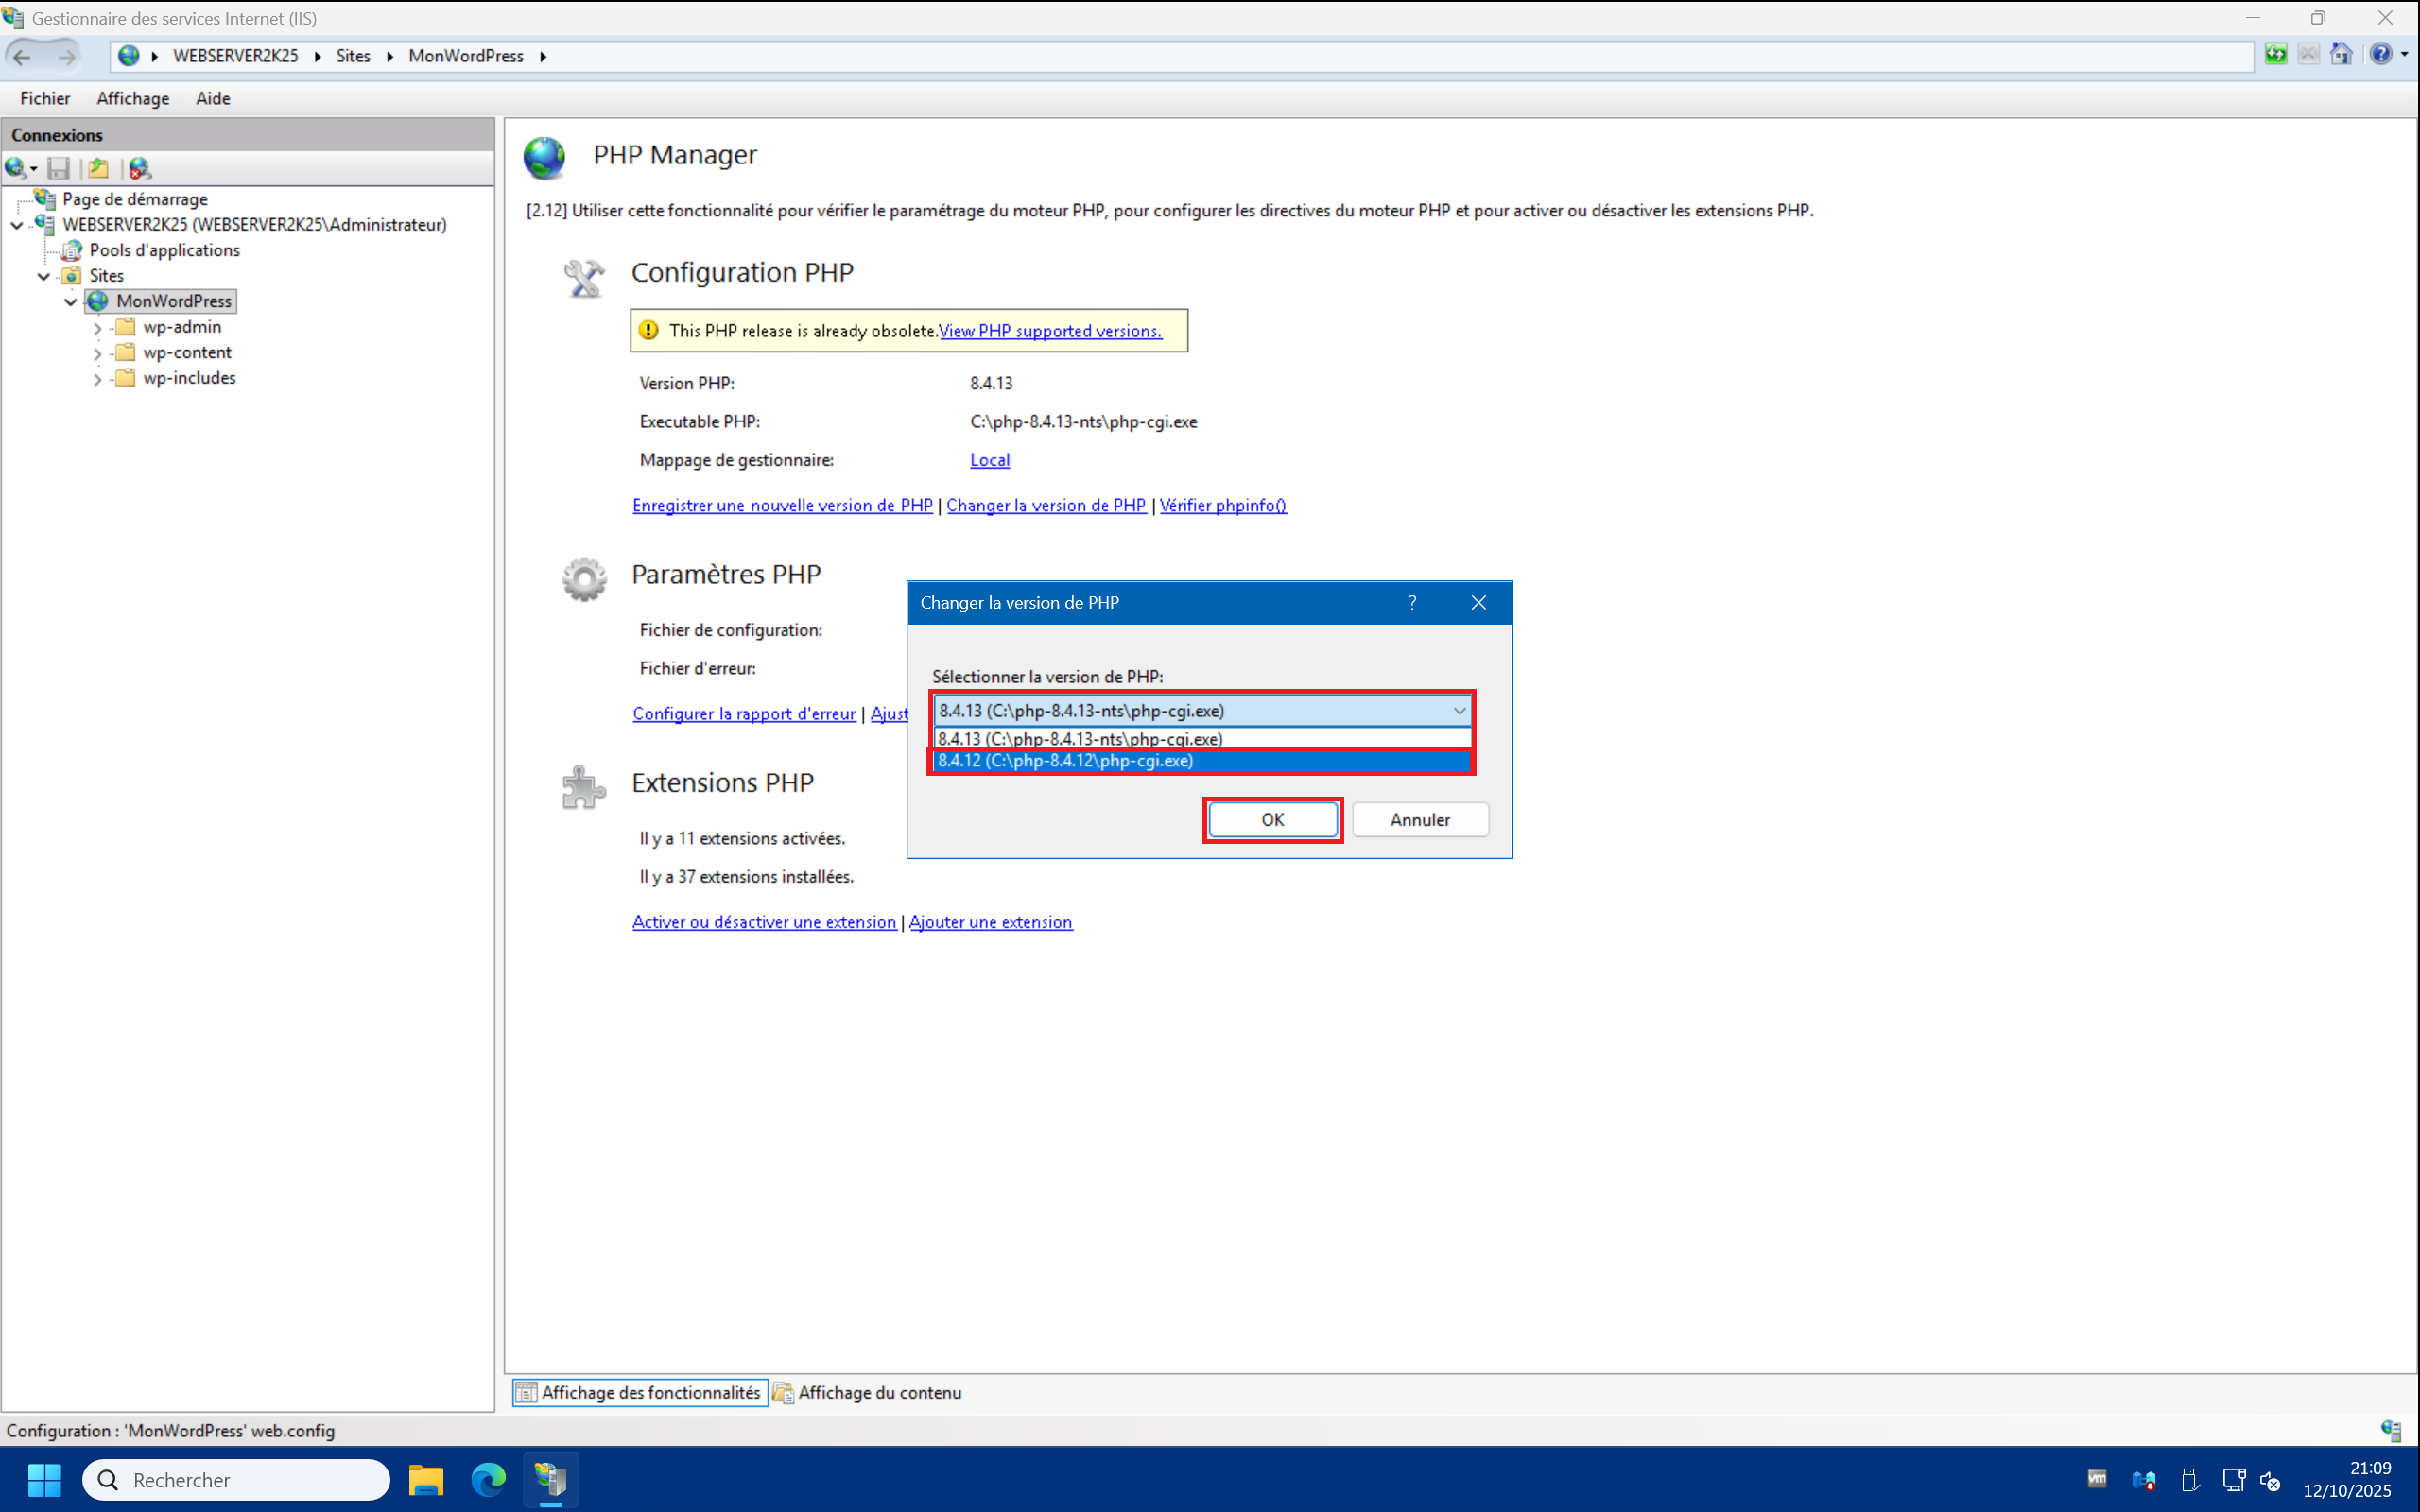
5 (optional) – You can switch between PHP versions on the fly via PHP Manager. To do this, click “Change PHP version” and then select the desired version from the drop-down menu. Finally, click “OK” :
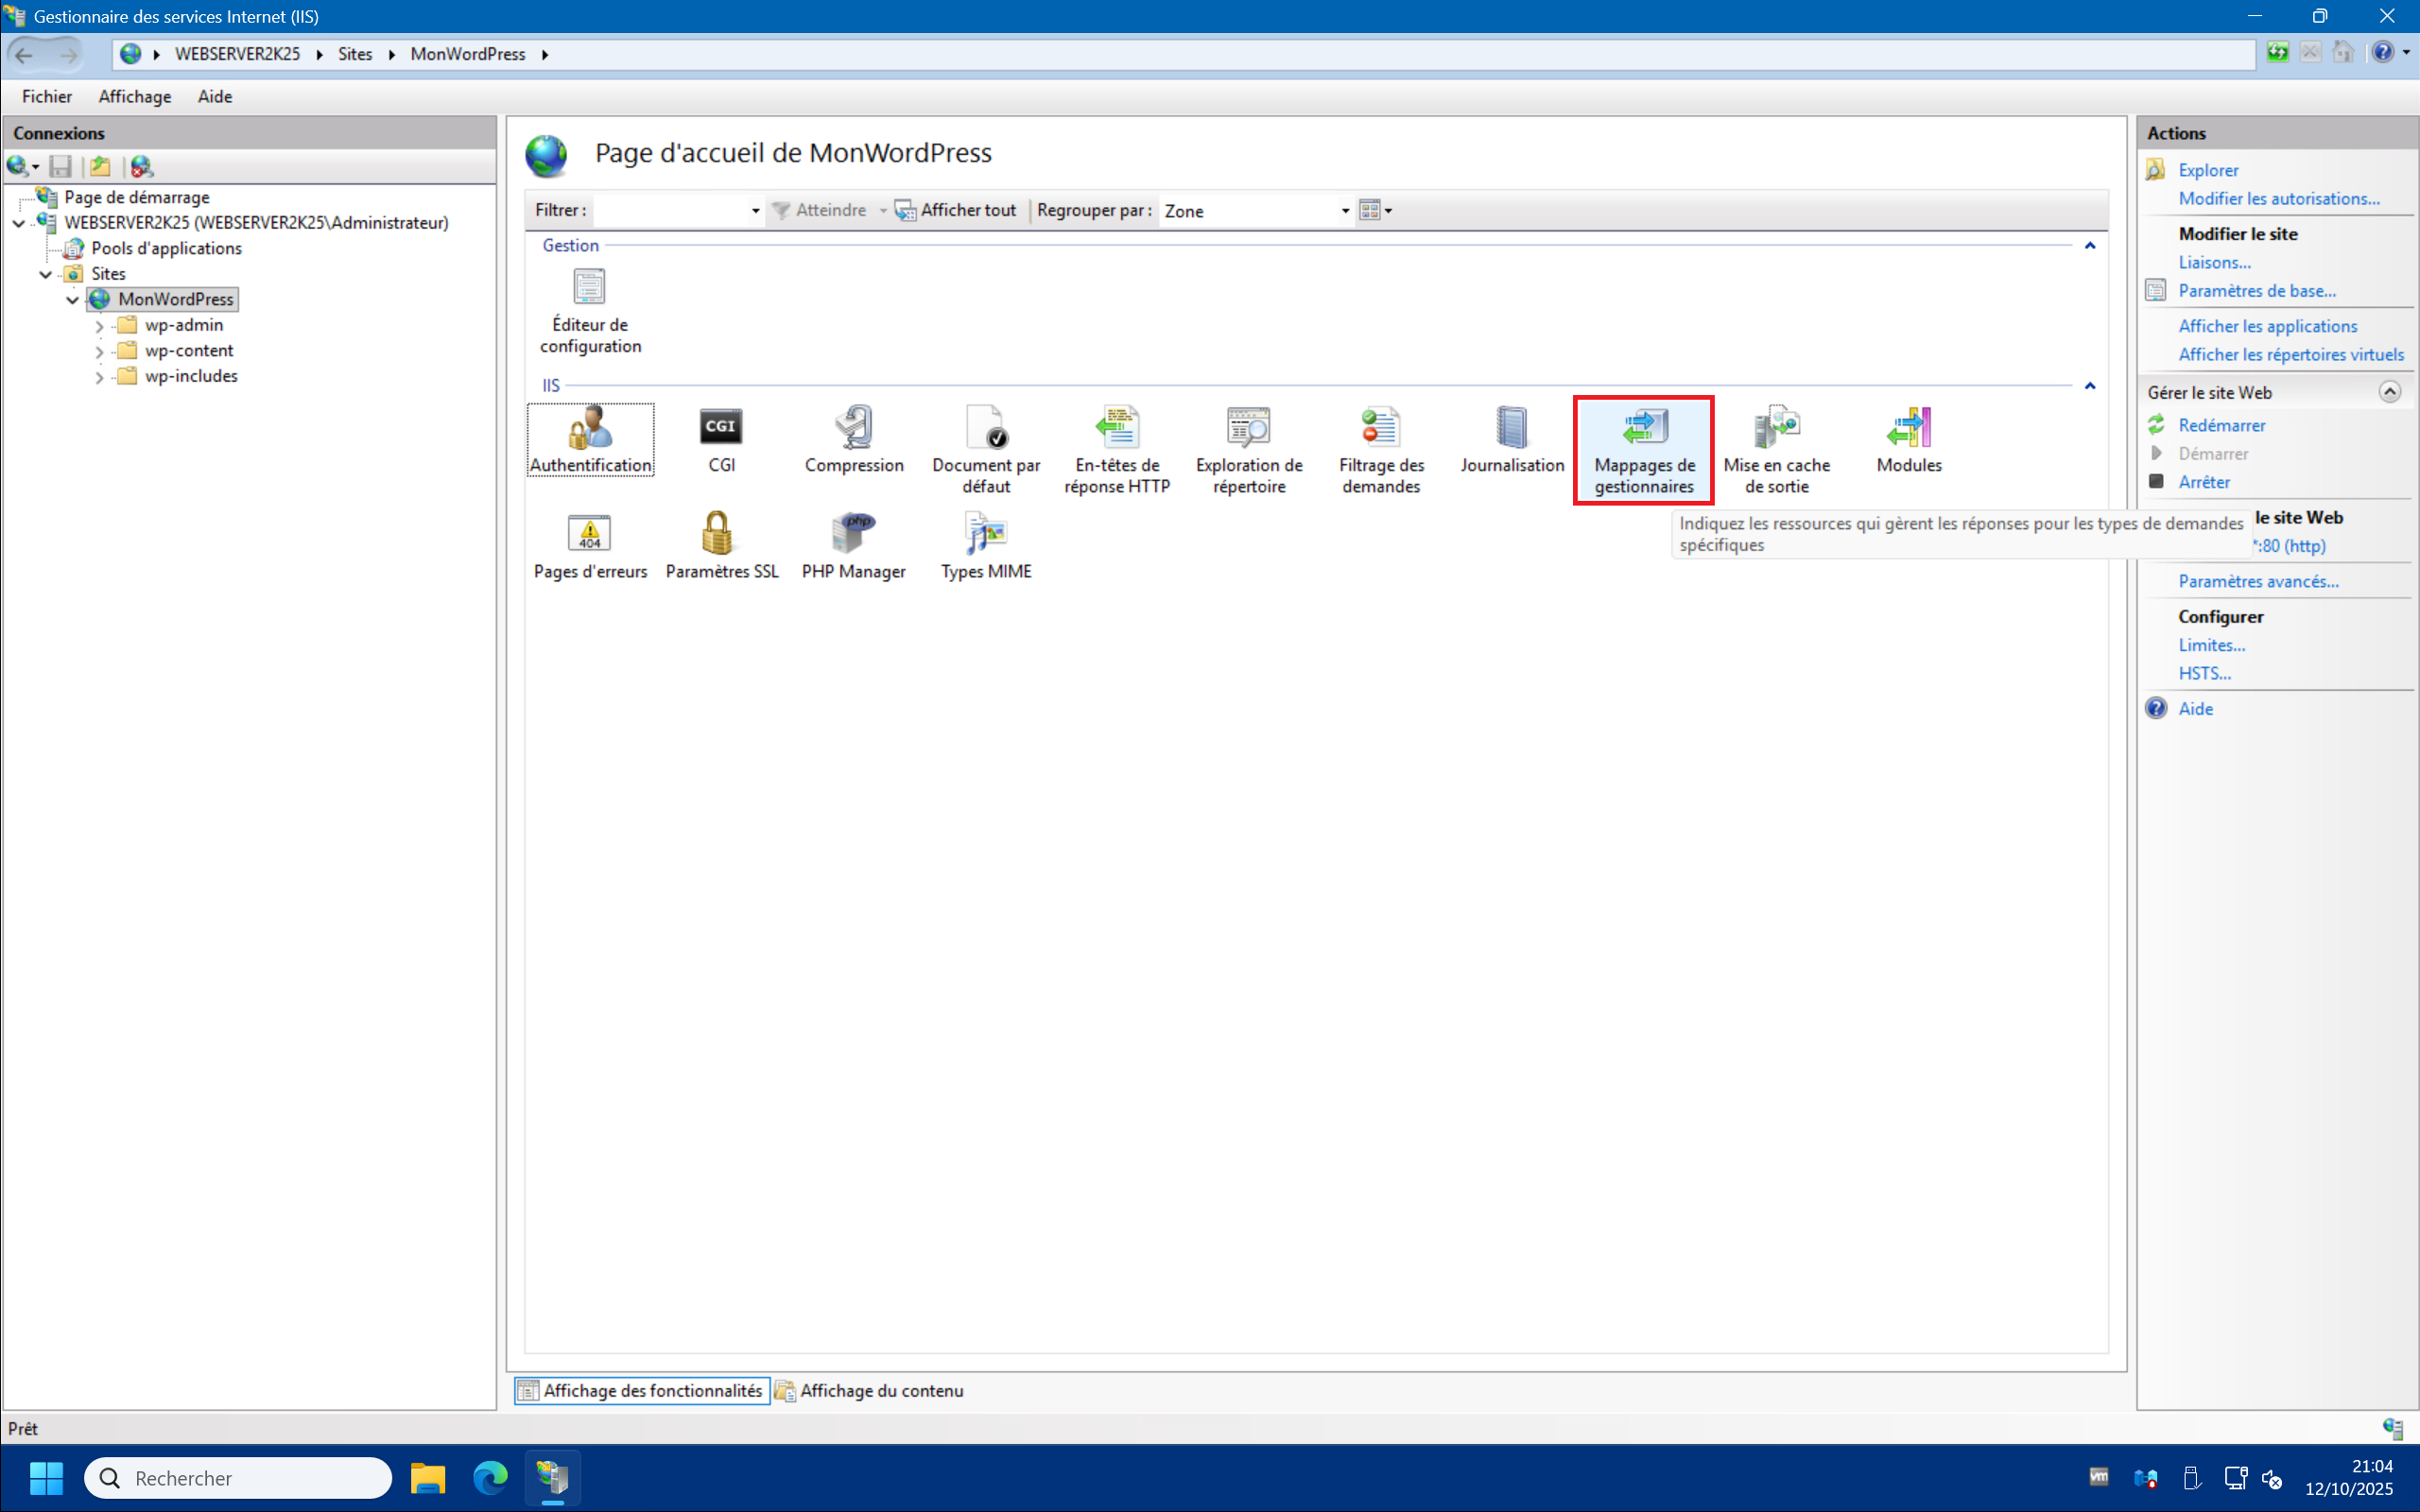
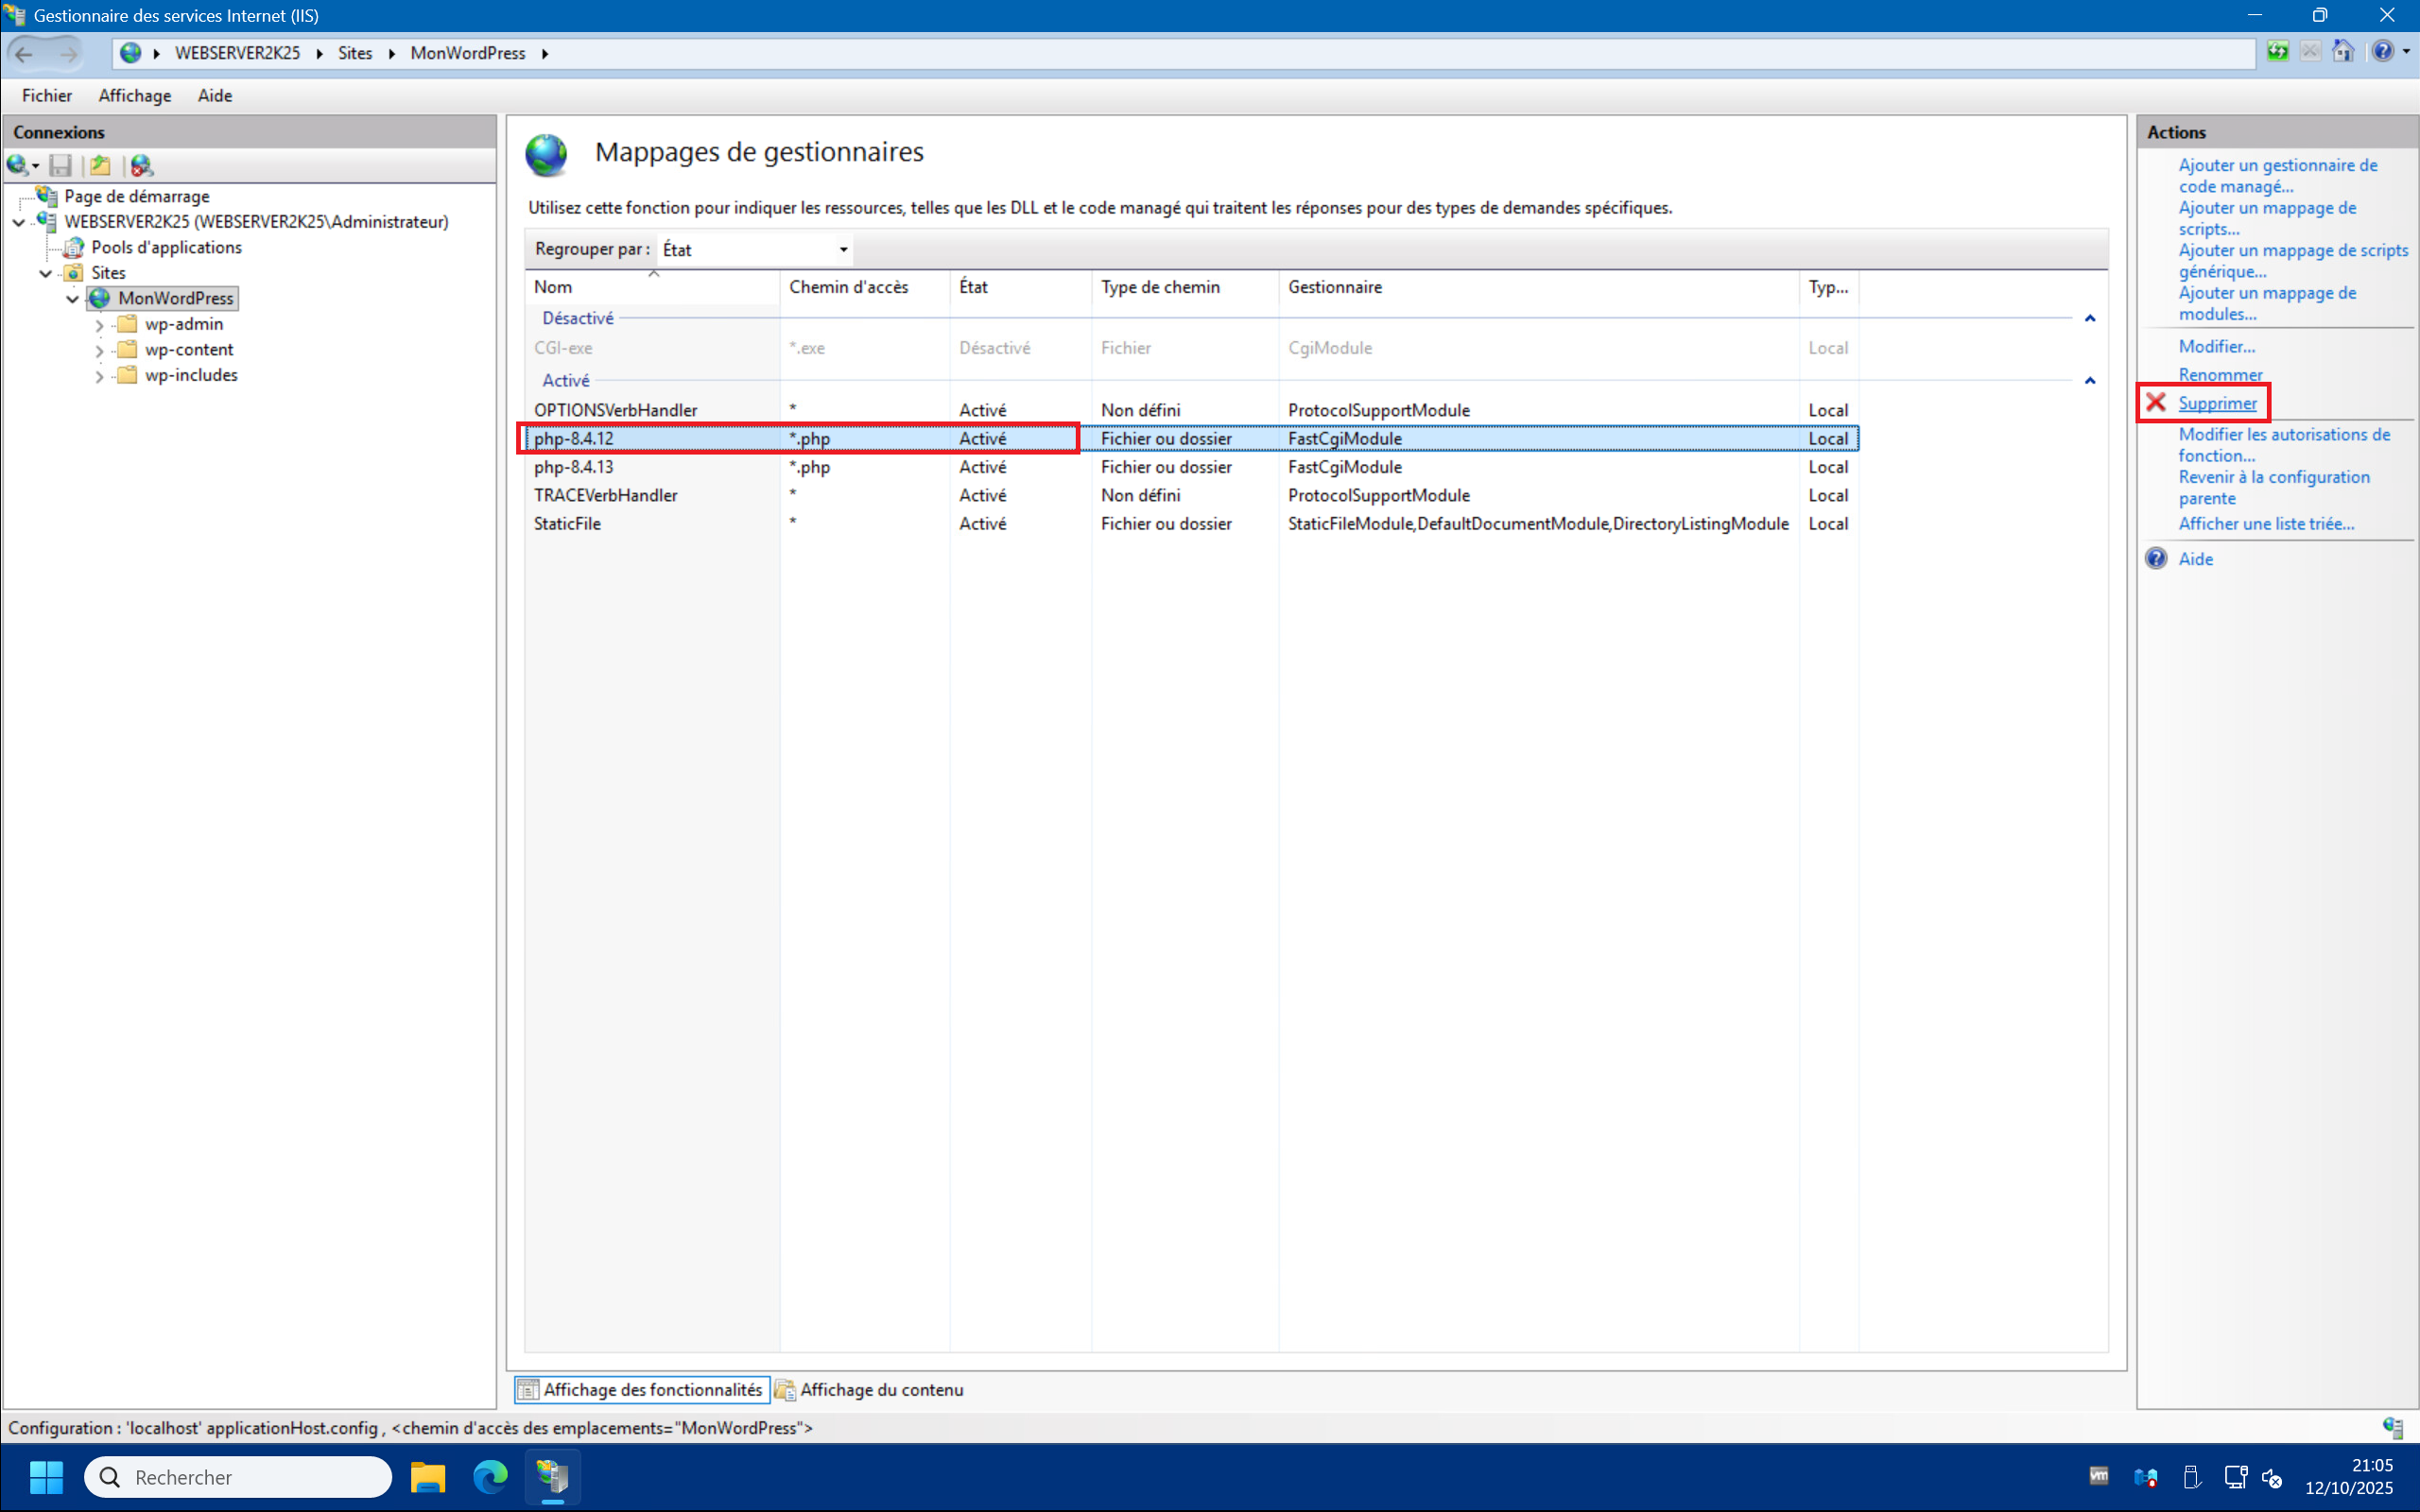
6 (optional) – You can also unregister a version of PHP that you no longer use. Simply return to the site’s home page in IIS Manager, then double-click on “Handler Mappings” , then select the version of the FastCgi php module that you want to remove and finally click on “Supprimer” in the top right corner :
Increase upload size :
In WordPress, it is possible to upload media files via the web interface. However, the size of these files is limited by the default PHP configuration.
1 – To see the allowed upload size, simply click on “Medias” in the left menu and then “Add a media file” :

2 – You’ll see the maximum upload size here. It’s 2 MB by default.

3 – A first step is to increase the default size limit for requests managed by IIS so as not to have a transfer error beyond 30 MB.
Limites des demandes <requestLimits> | Microsoft Learn
To do this, you need to return to the IIS management console, then double-click on “Request filtering” :
4 – Click on “Edit Feature Settings” :
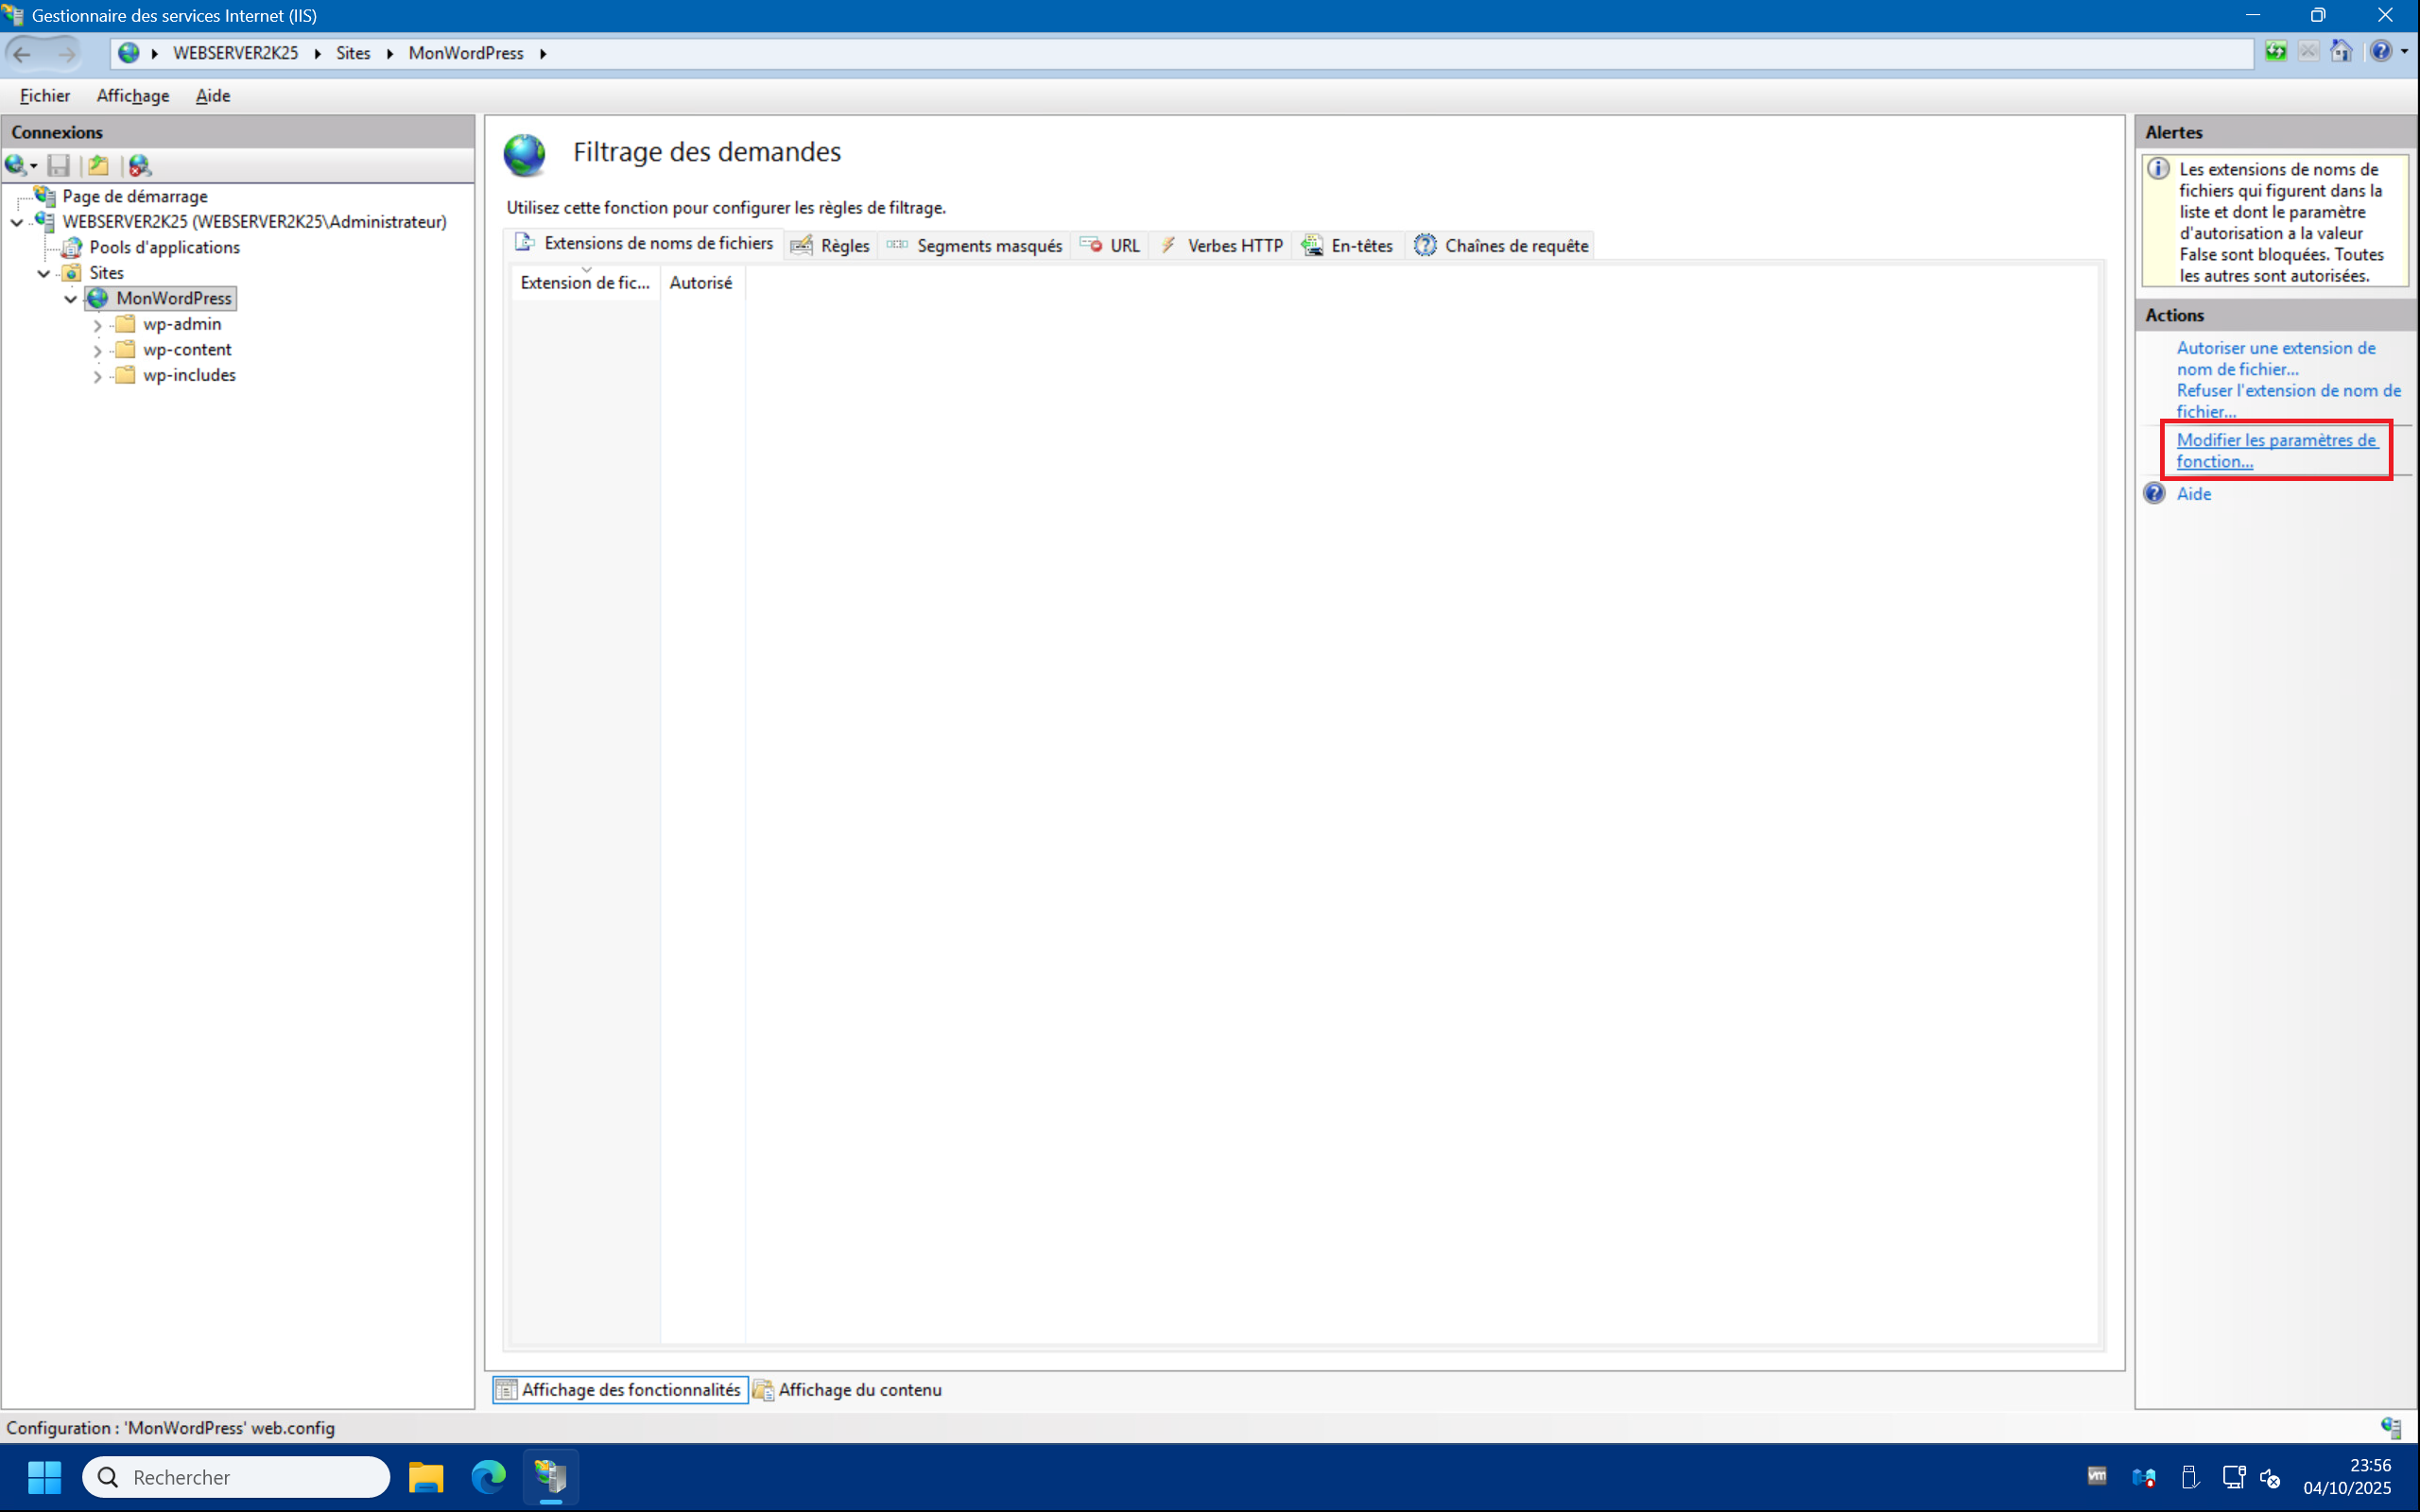
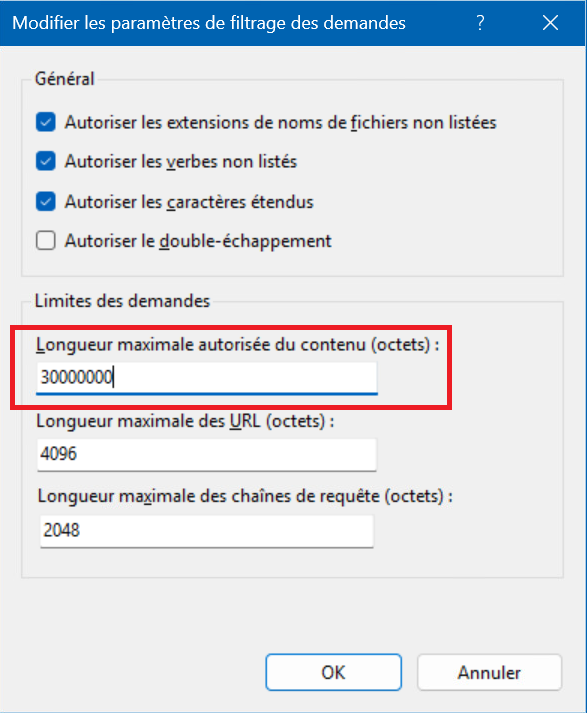
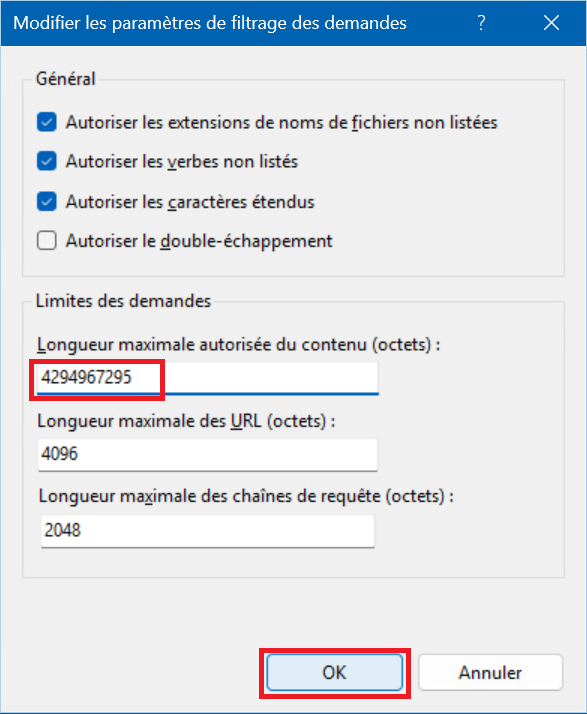
5 – In the window that appears you will see a field “Maximum allowed content length (bytes):” . By default this value is 30000000 bytes, which is approximately 28.6 MB. The maximum value for this field is 4294967295 bytes, which is 4 GB. Set the field to this value and then click “OK” :
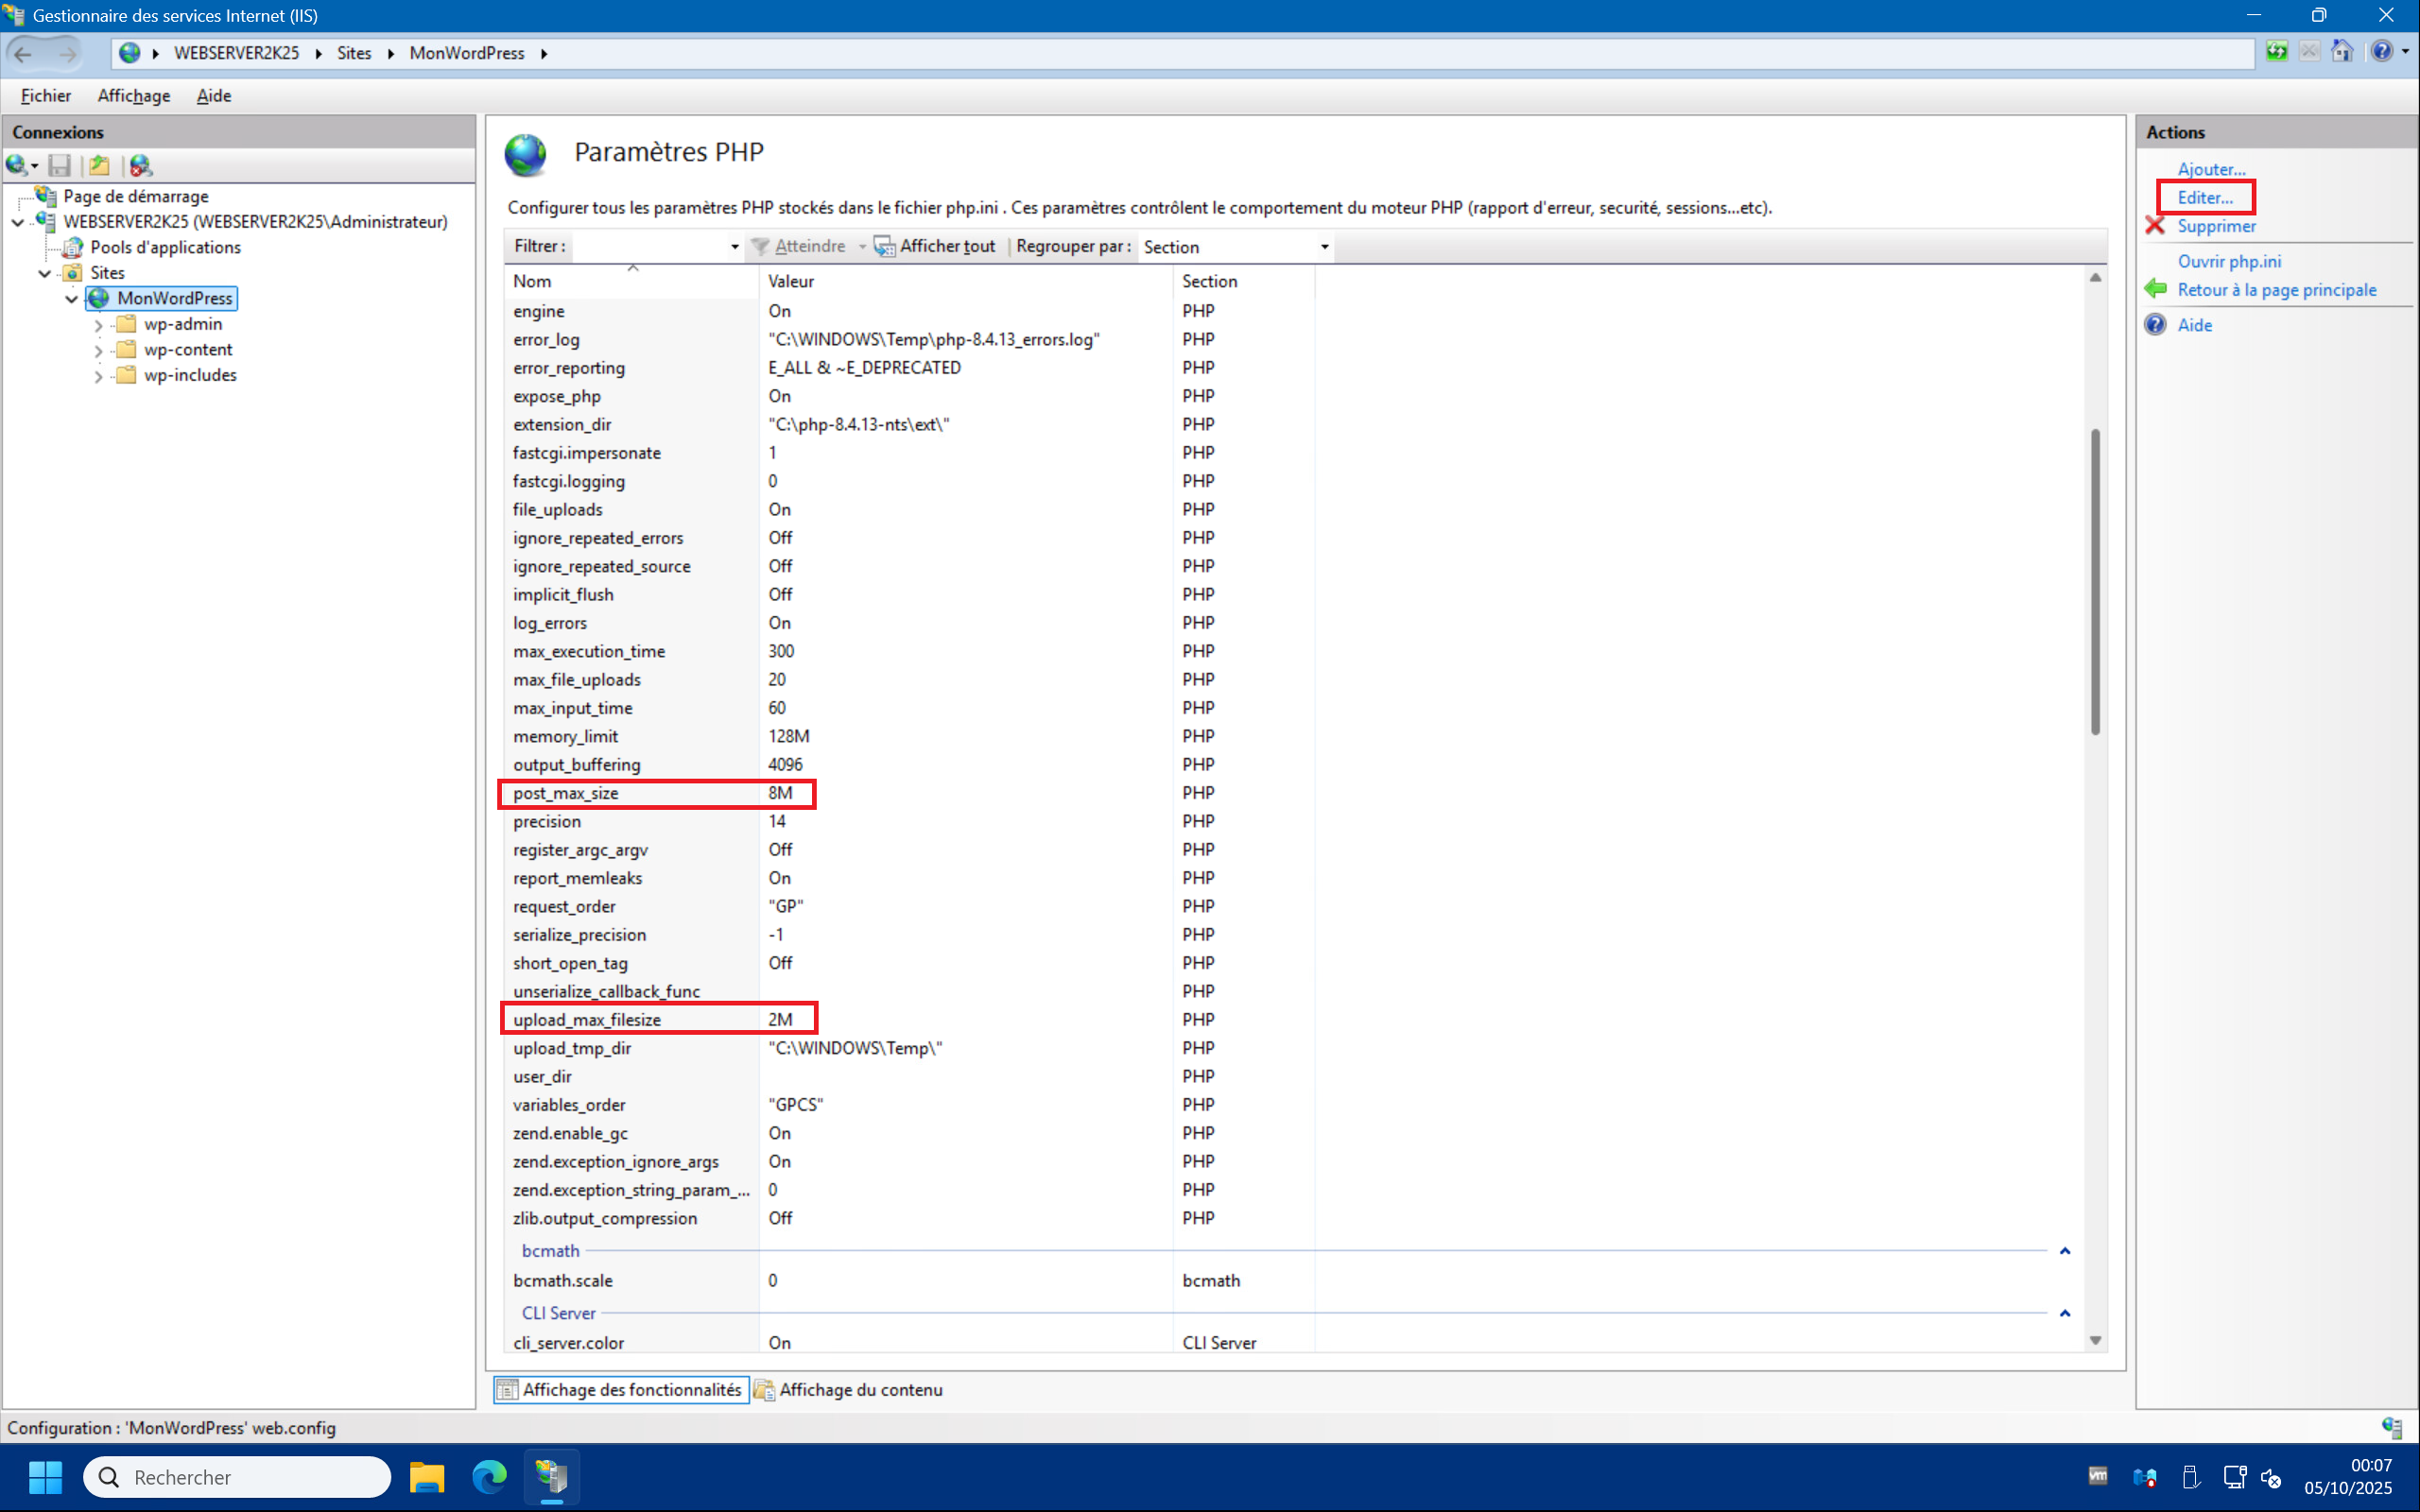
6 – We can now move on to the PHP configuration. We need to go back to PHP Manager on the site side and click on “Manage all settings” :
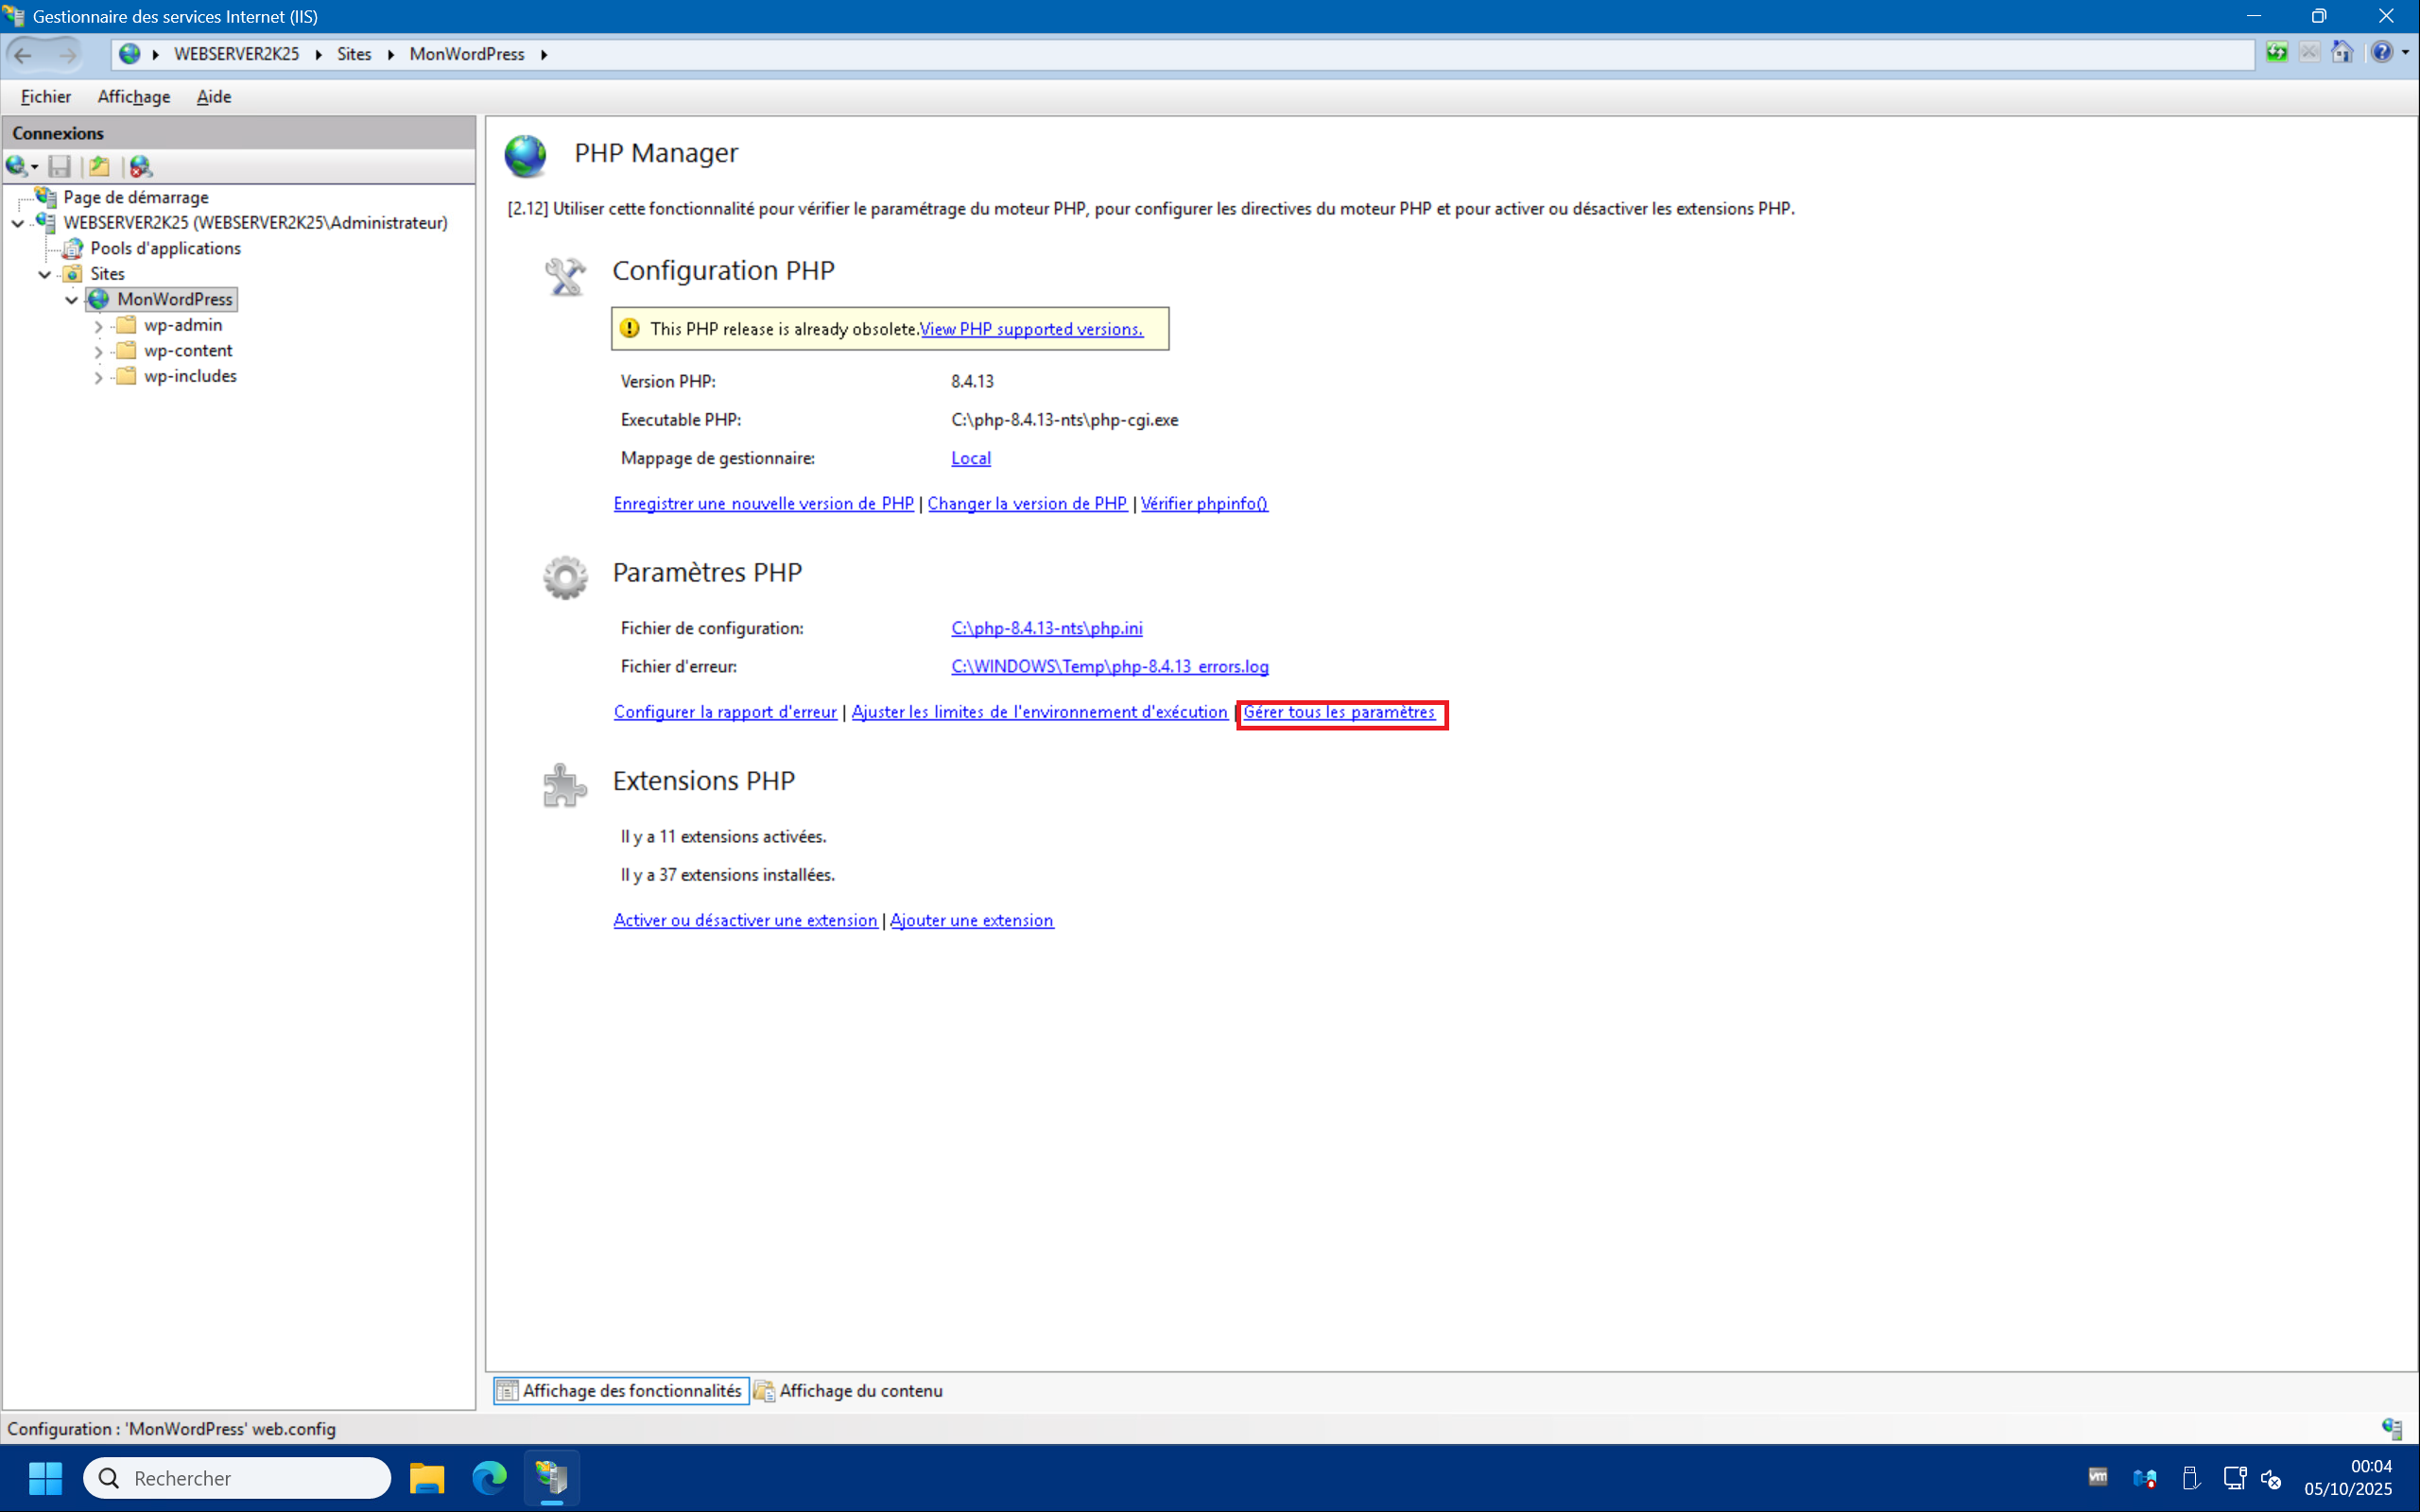
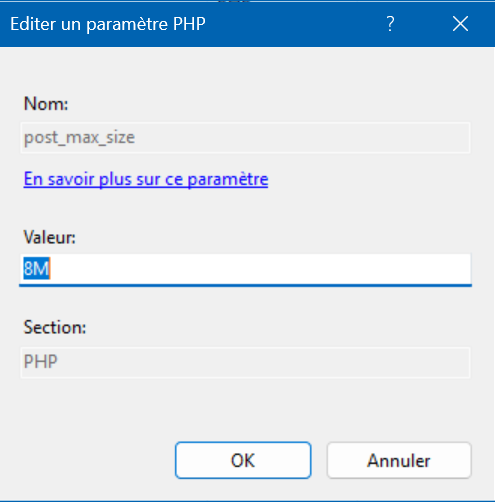
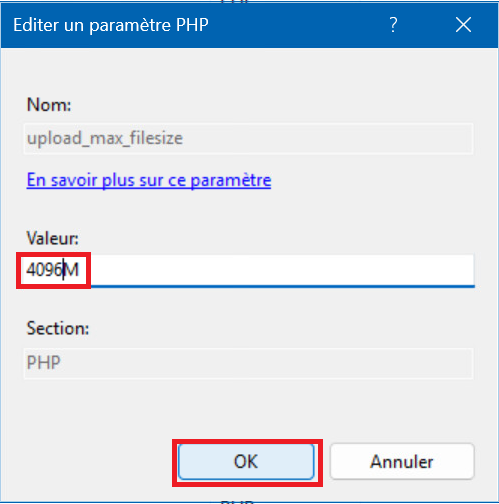
7 – On the PHP Settings page you will see the “post_max_size” and “upload_max_filesize” . Click on the setting you want to change and then click “Edit…” in the top right corner. Set “post_max_size” and “upload_max_filesize” to 4096M, i.e. 4 GB, then click “OK” :
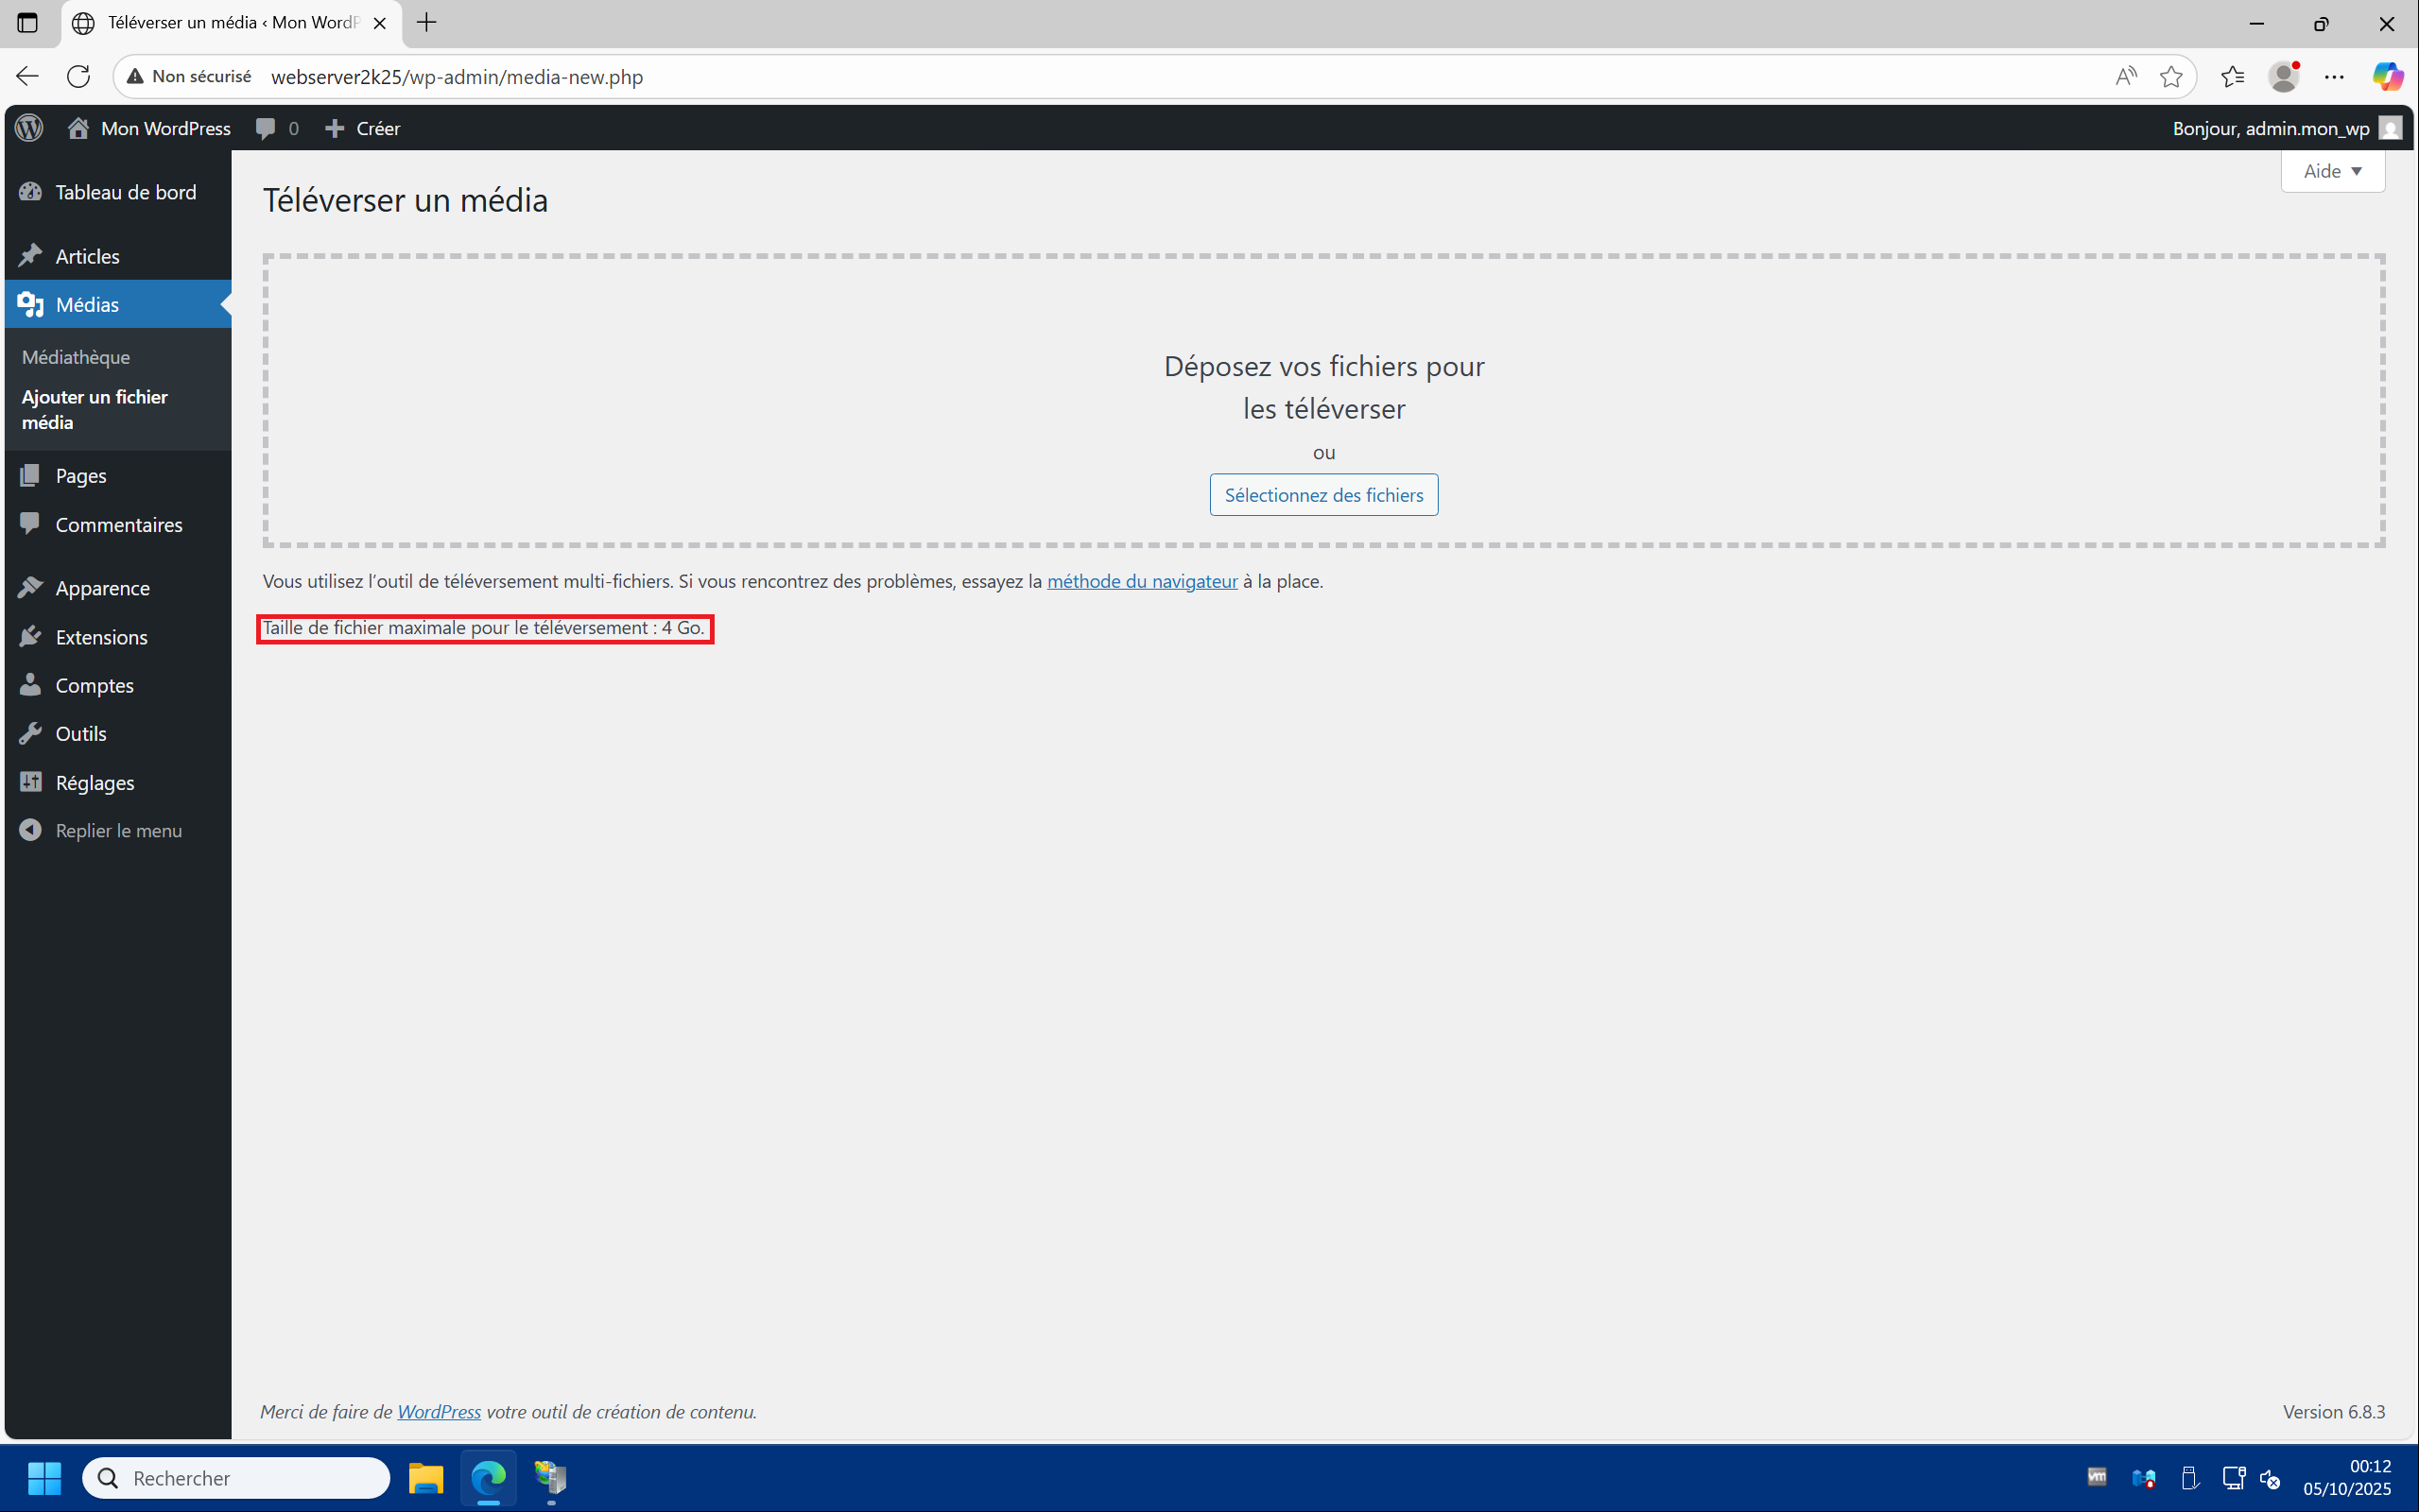
8 – By returning to the “Medias” > “Add Media File” page you should see that the maximum upload size has increased to 4 GB :
Install and enable Imagick :
Basically, installing the Imagick PHP extension involves extracting the .dll files into the PHP installation directory of the WordPress site, then activating it via PHP manager. But only the “php_imagick.dll” DLL will go into the PHP “ext” directory, the others will go to the root of the directory.
1 – Open the compressed archive “php_imagick_3.7.0-8.4-nts-vs17-x64.zip” and copy the file “php_imagick.dll” into the “ext” directory of your PHP installation. In this case, it should be “C:\php-8.4.13-nts\ext” :
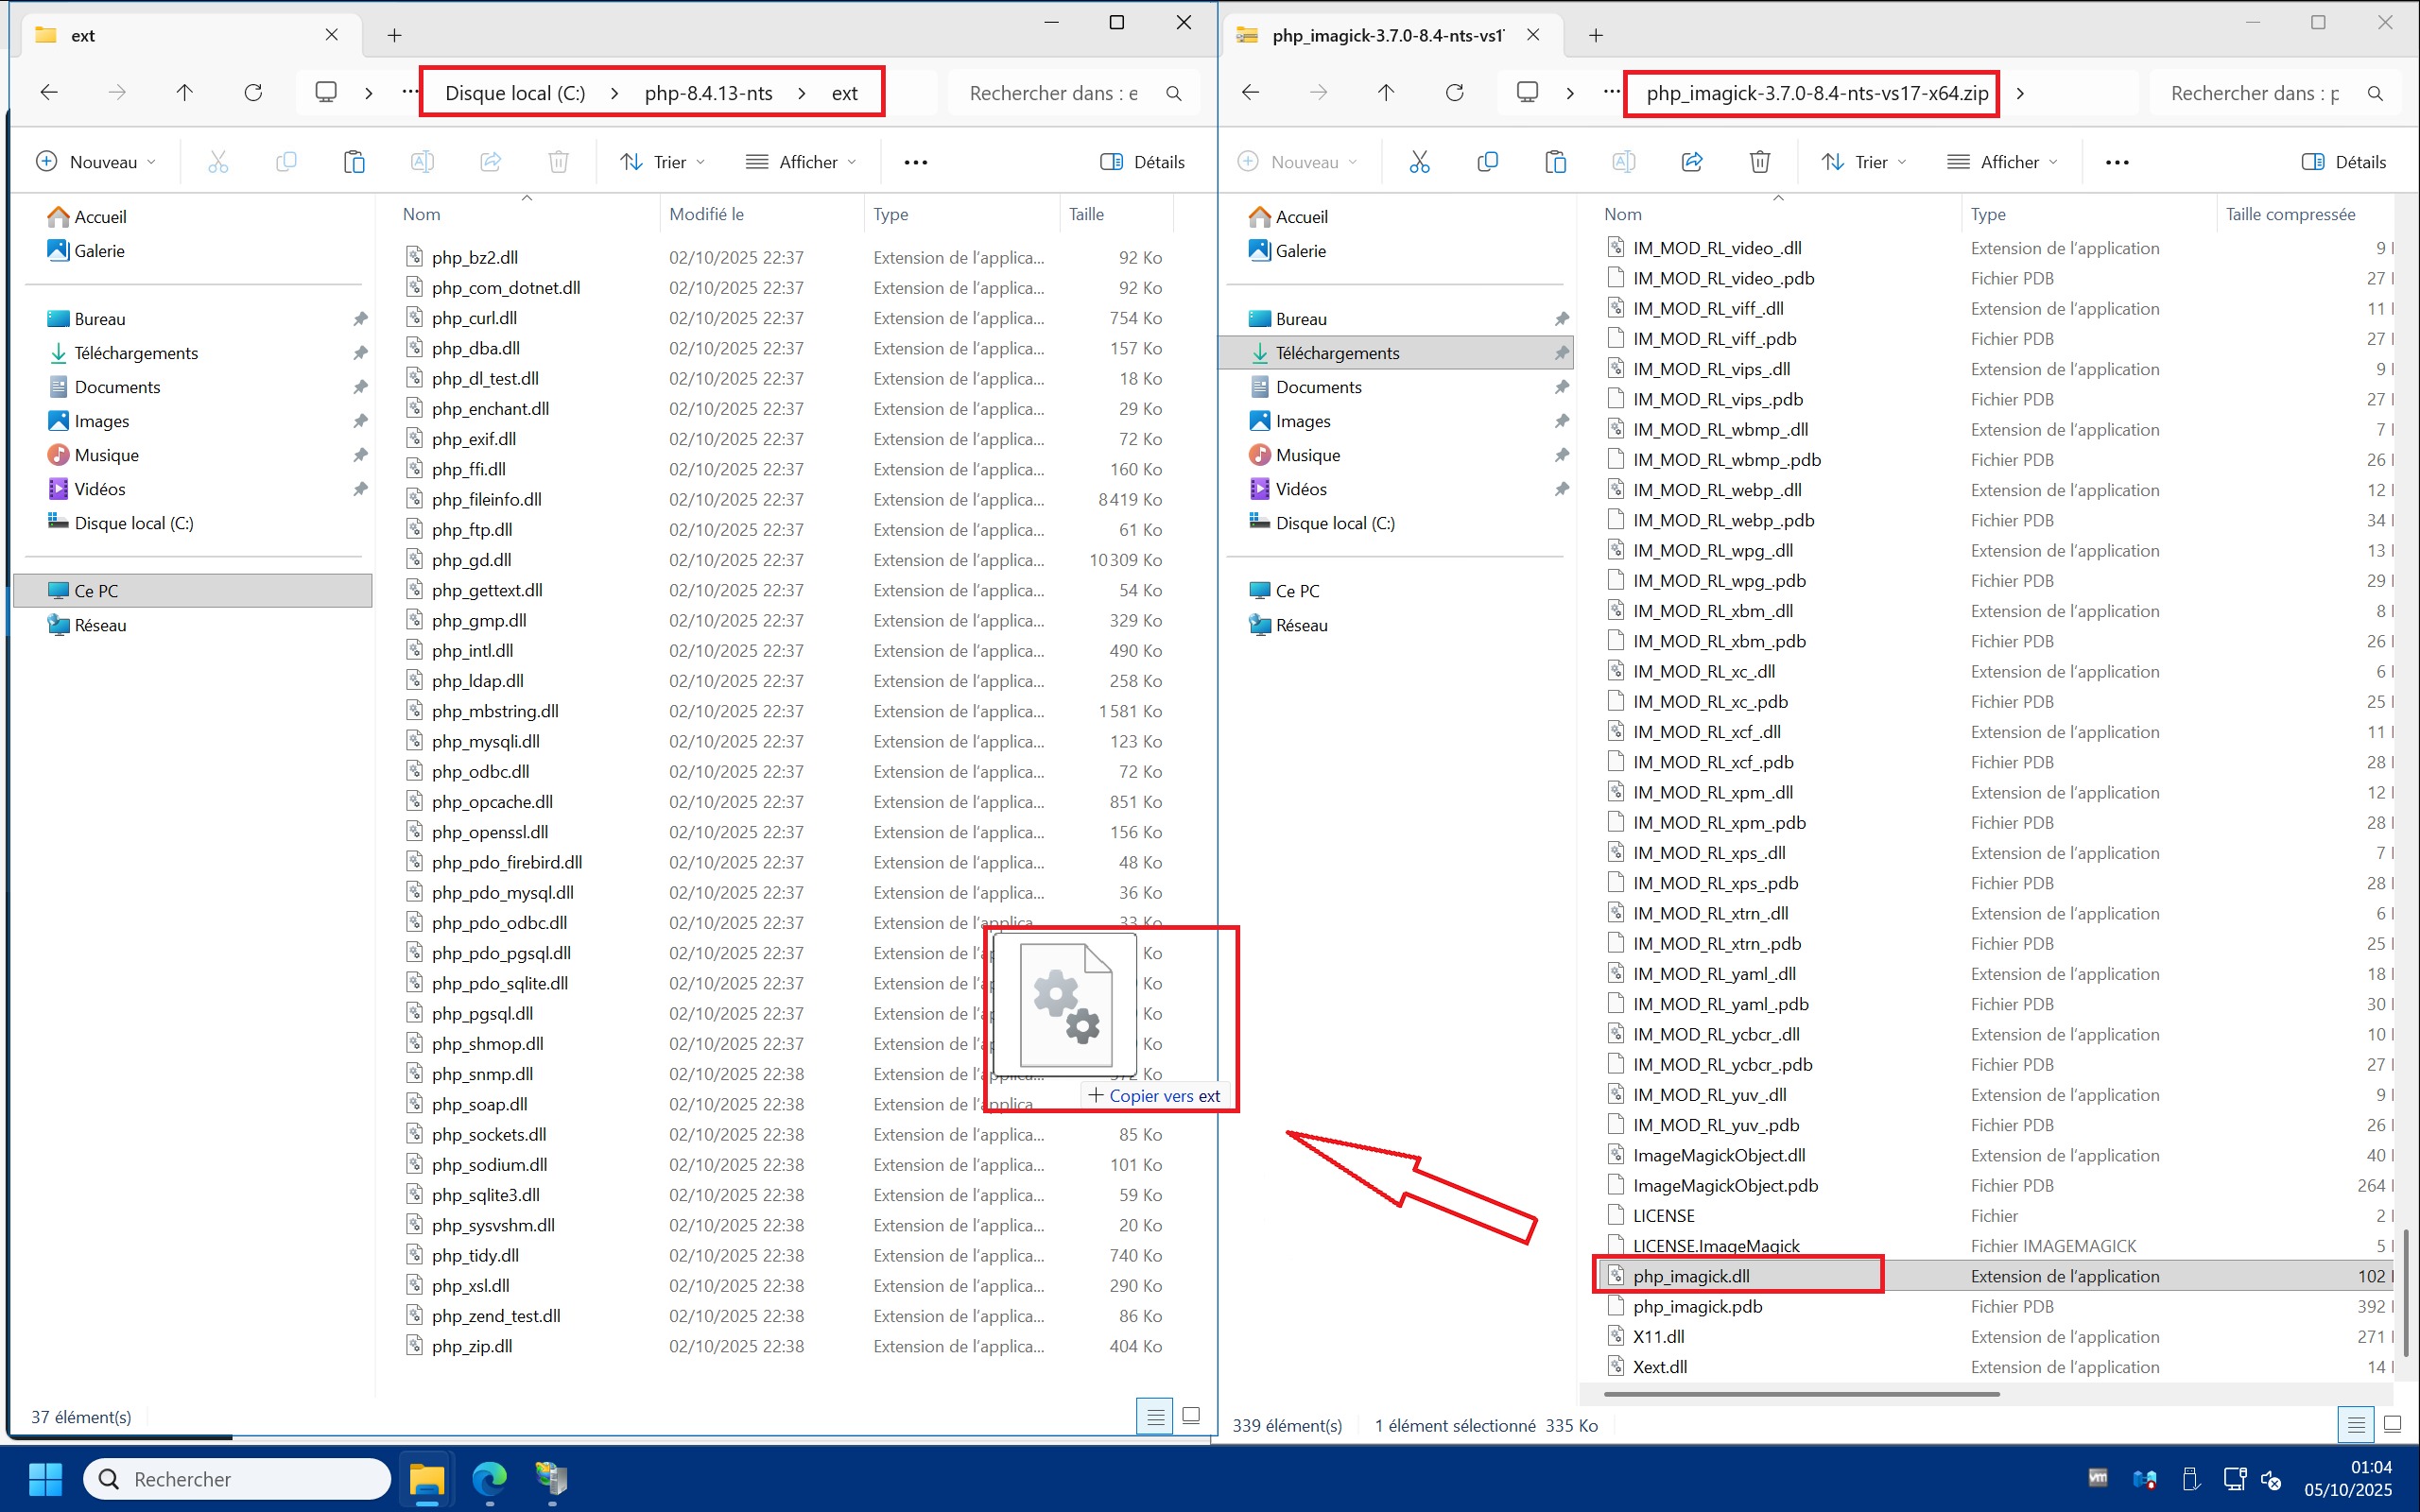
2 – Still in the “php_imagick_3.7.0-8.4-nts-vs17-x64.zip” archive, you must copy all other .dll files (apart from php_imagick.dll which you have already copied into “ext” ) into the root directory of your PHP installation. In our example this is “C:\php-8.4.13-nts” .
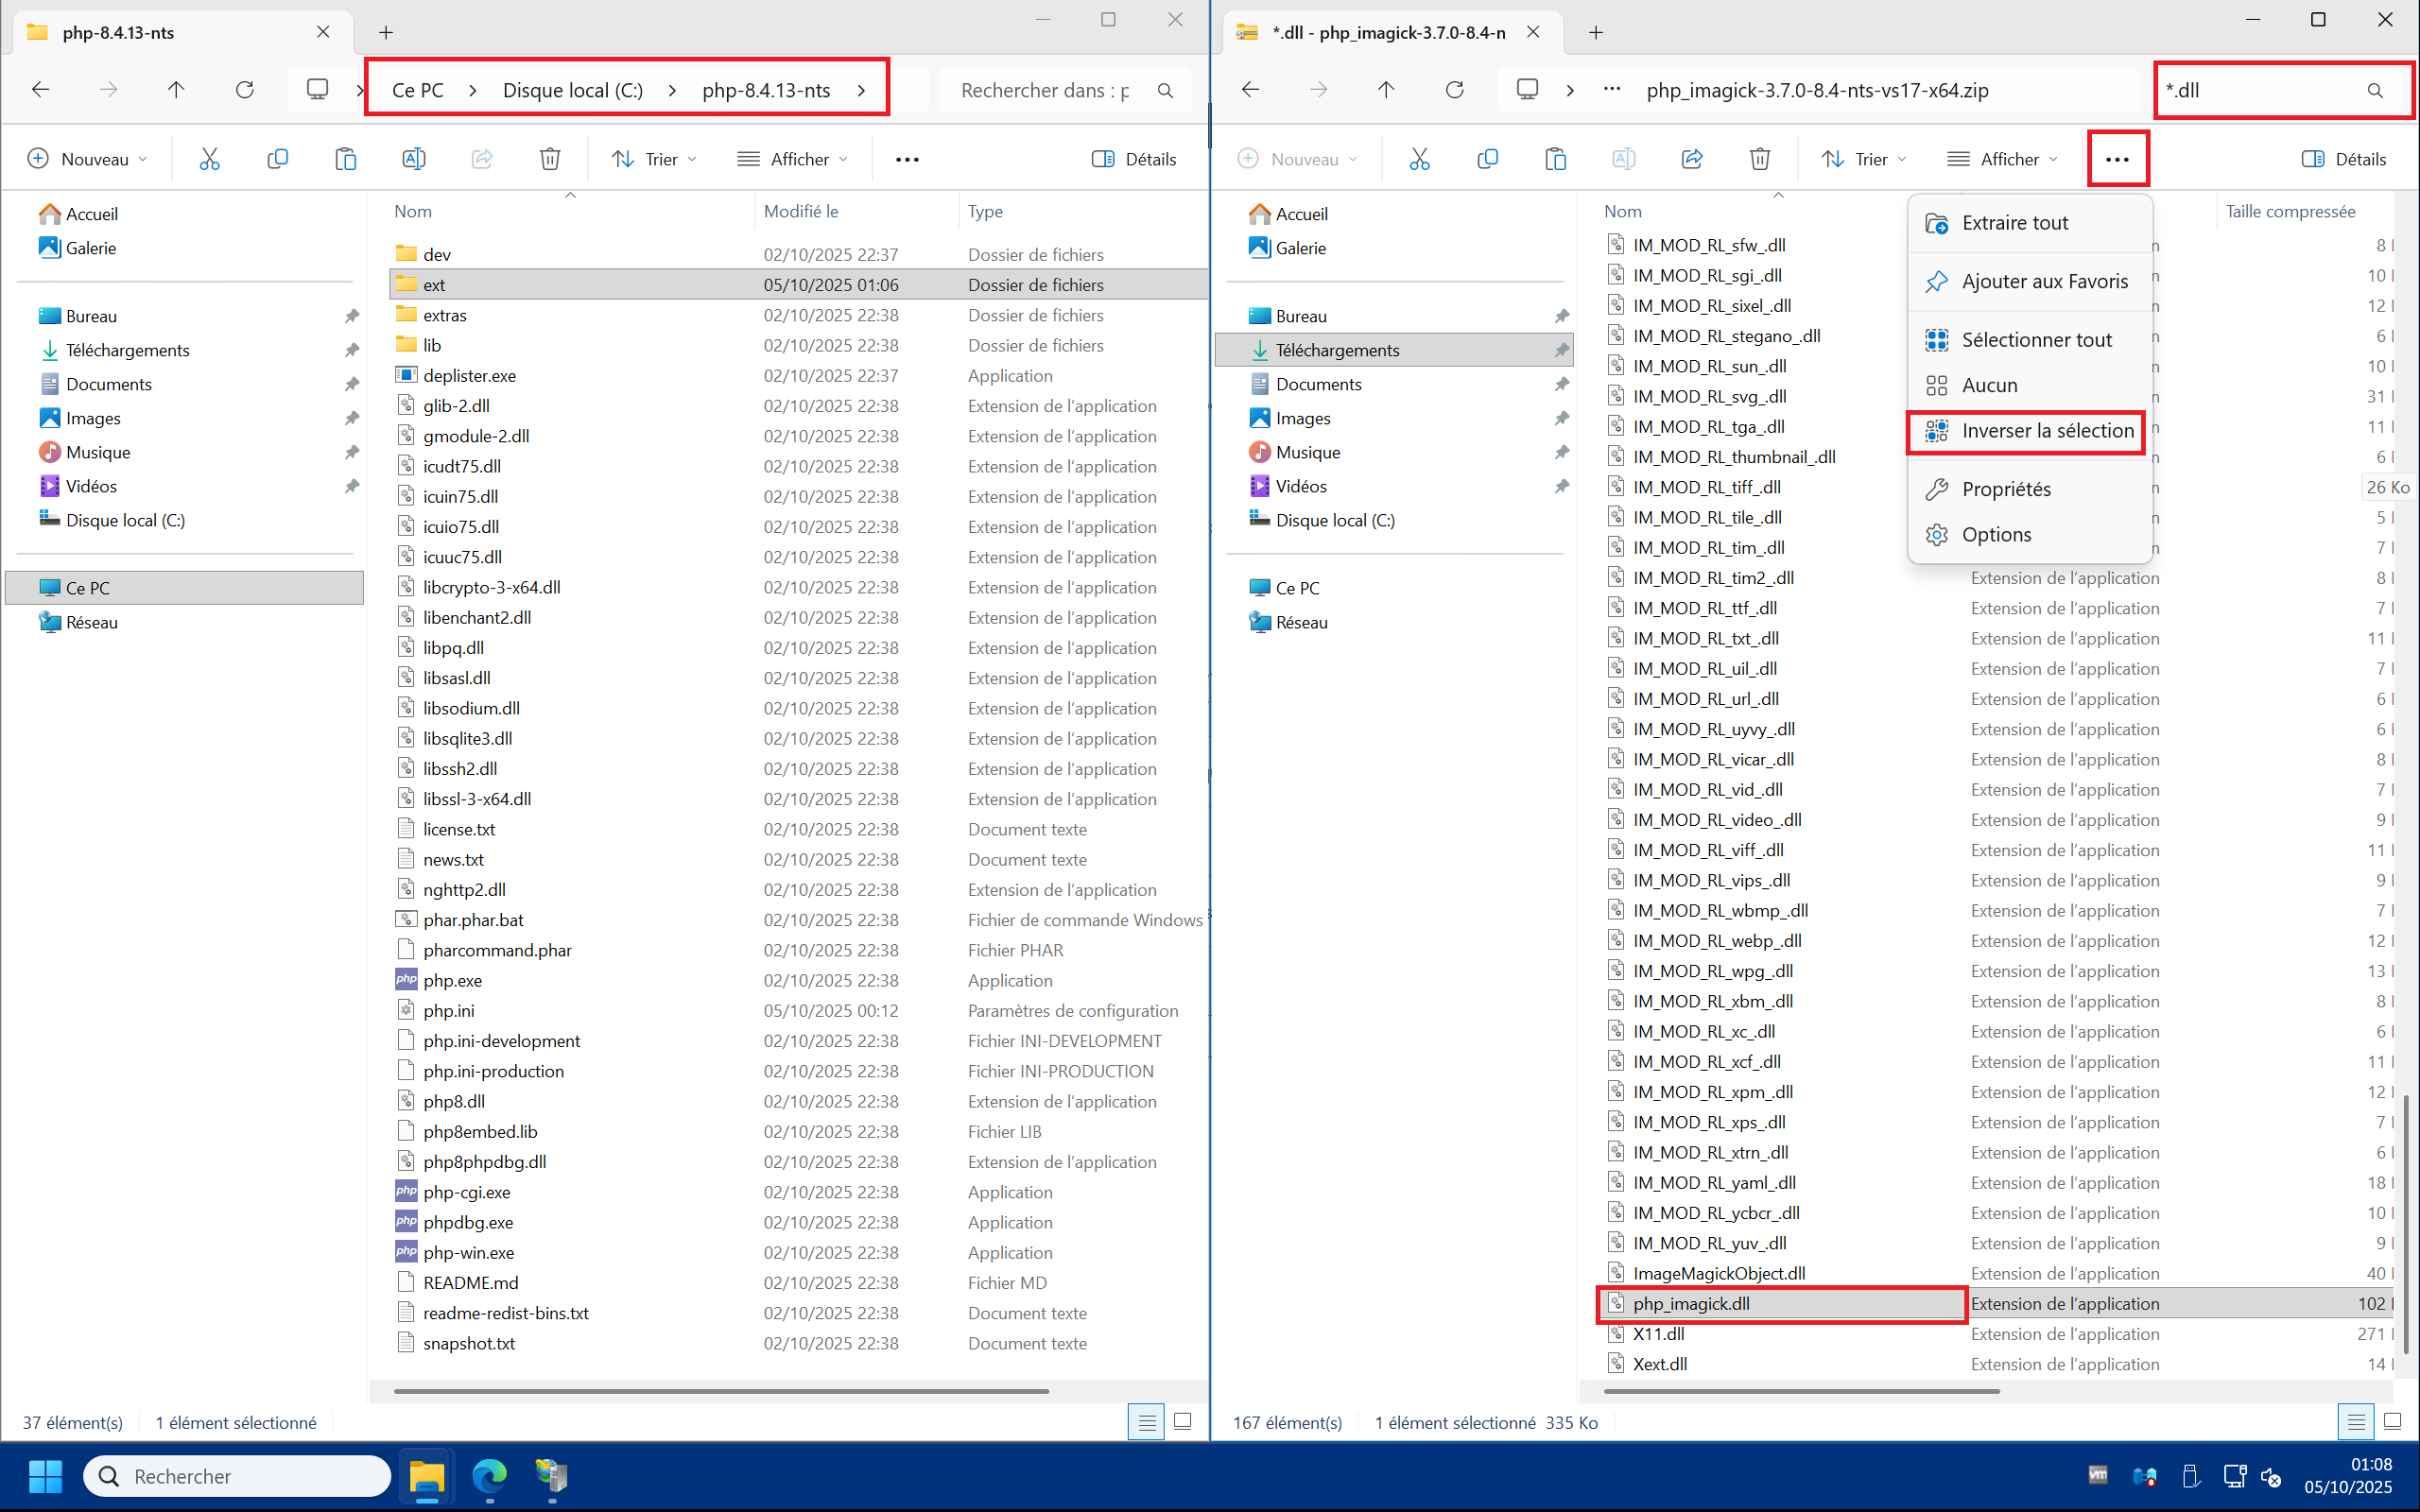
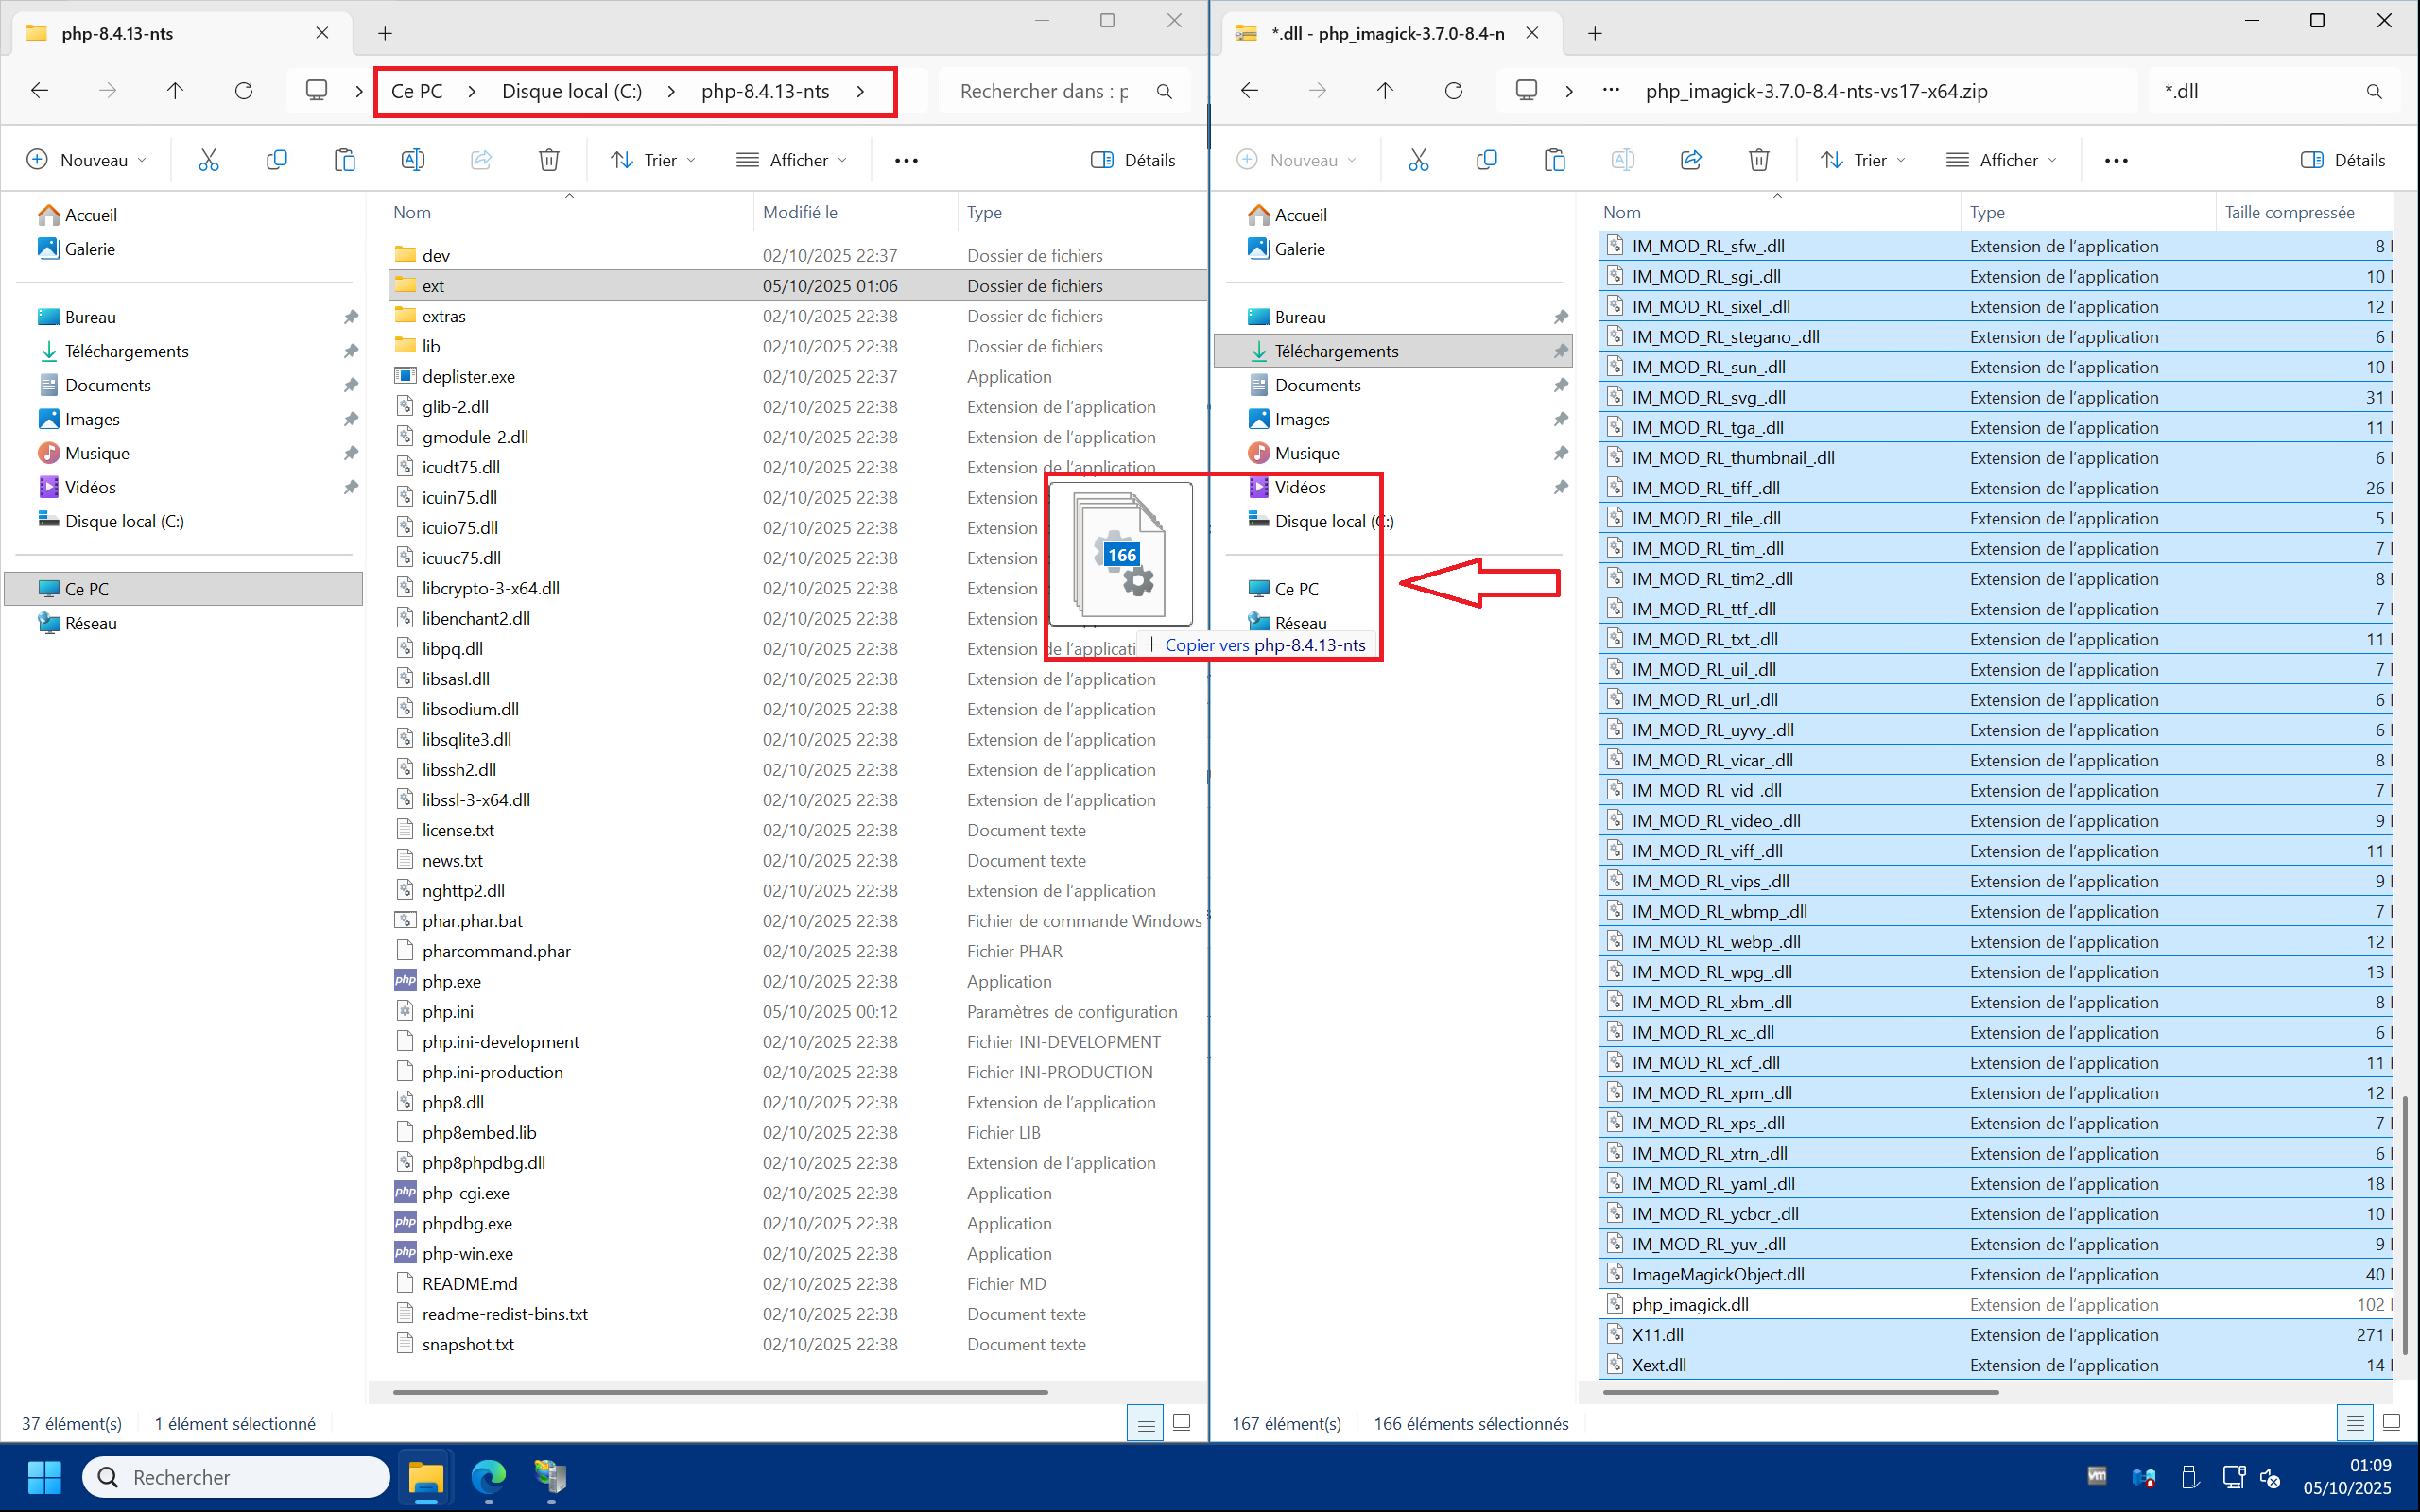
NB : The archive also contains debug .pdb files that are not strictly necessary. A) To avoid copying them you can search in the top right corner for “*.dll” to only display the .dll files, then select the “php_imagick.dll” file (which you do not want to copy), then click on the “…” button at the top of the file explorer, then “Invert selection” . B) So you have selected only the .dll files without php_imagick.dll and so you can drag and drop them into the “C:\php-8.4.13-nts” :
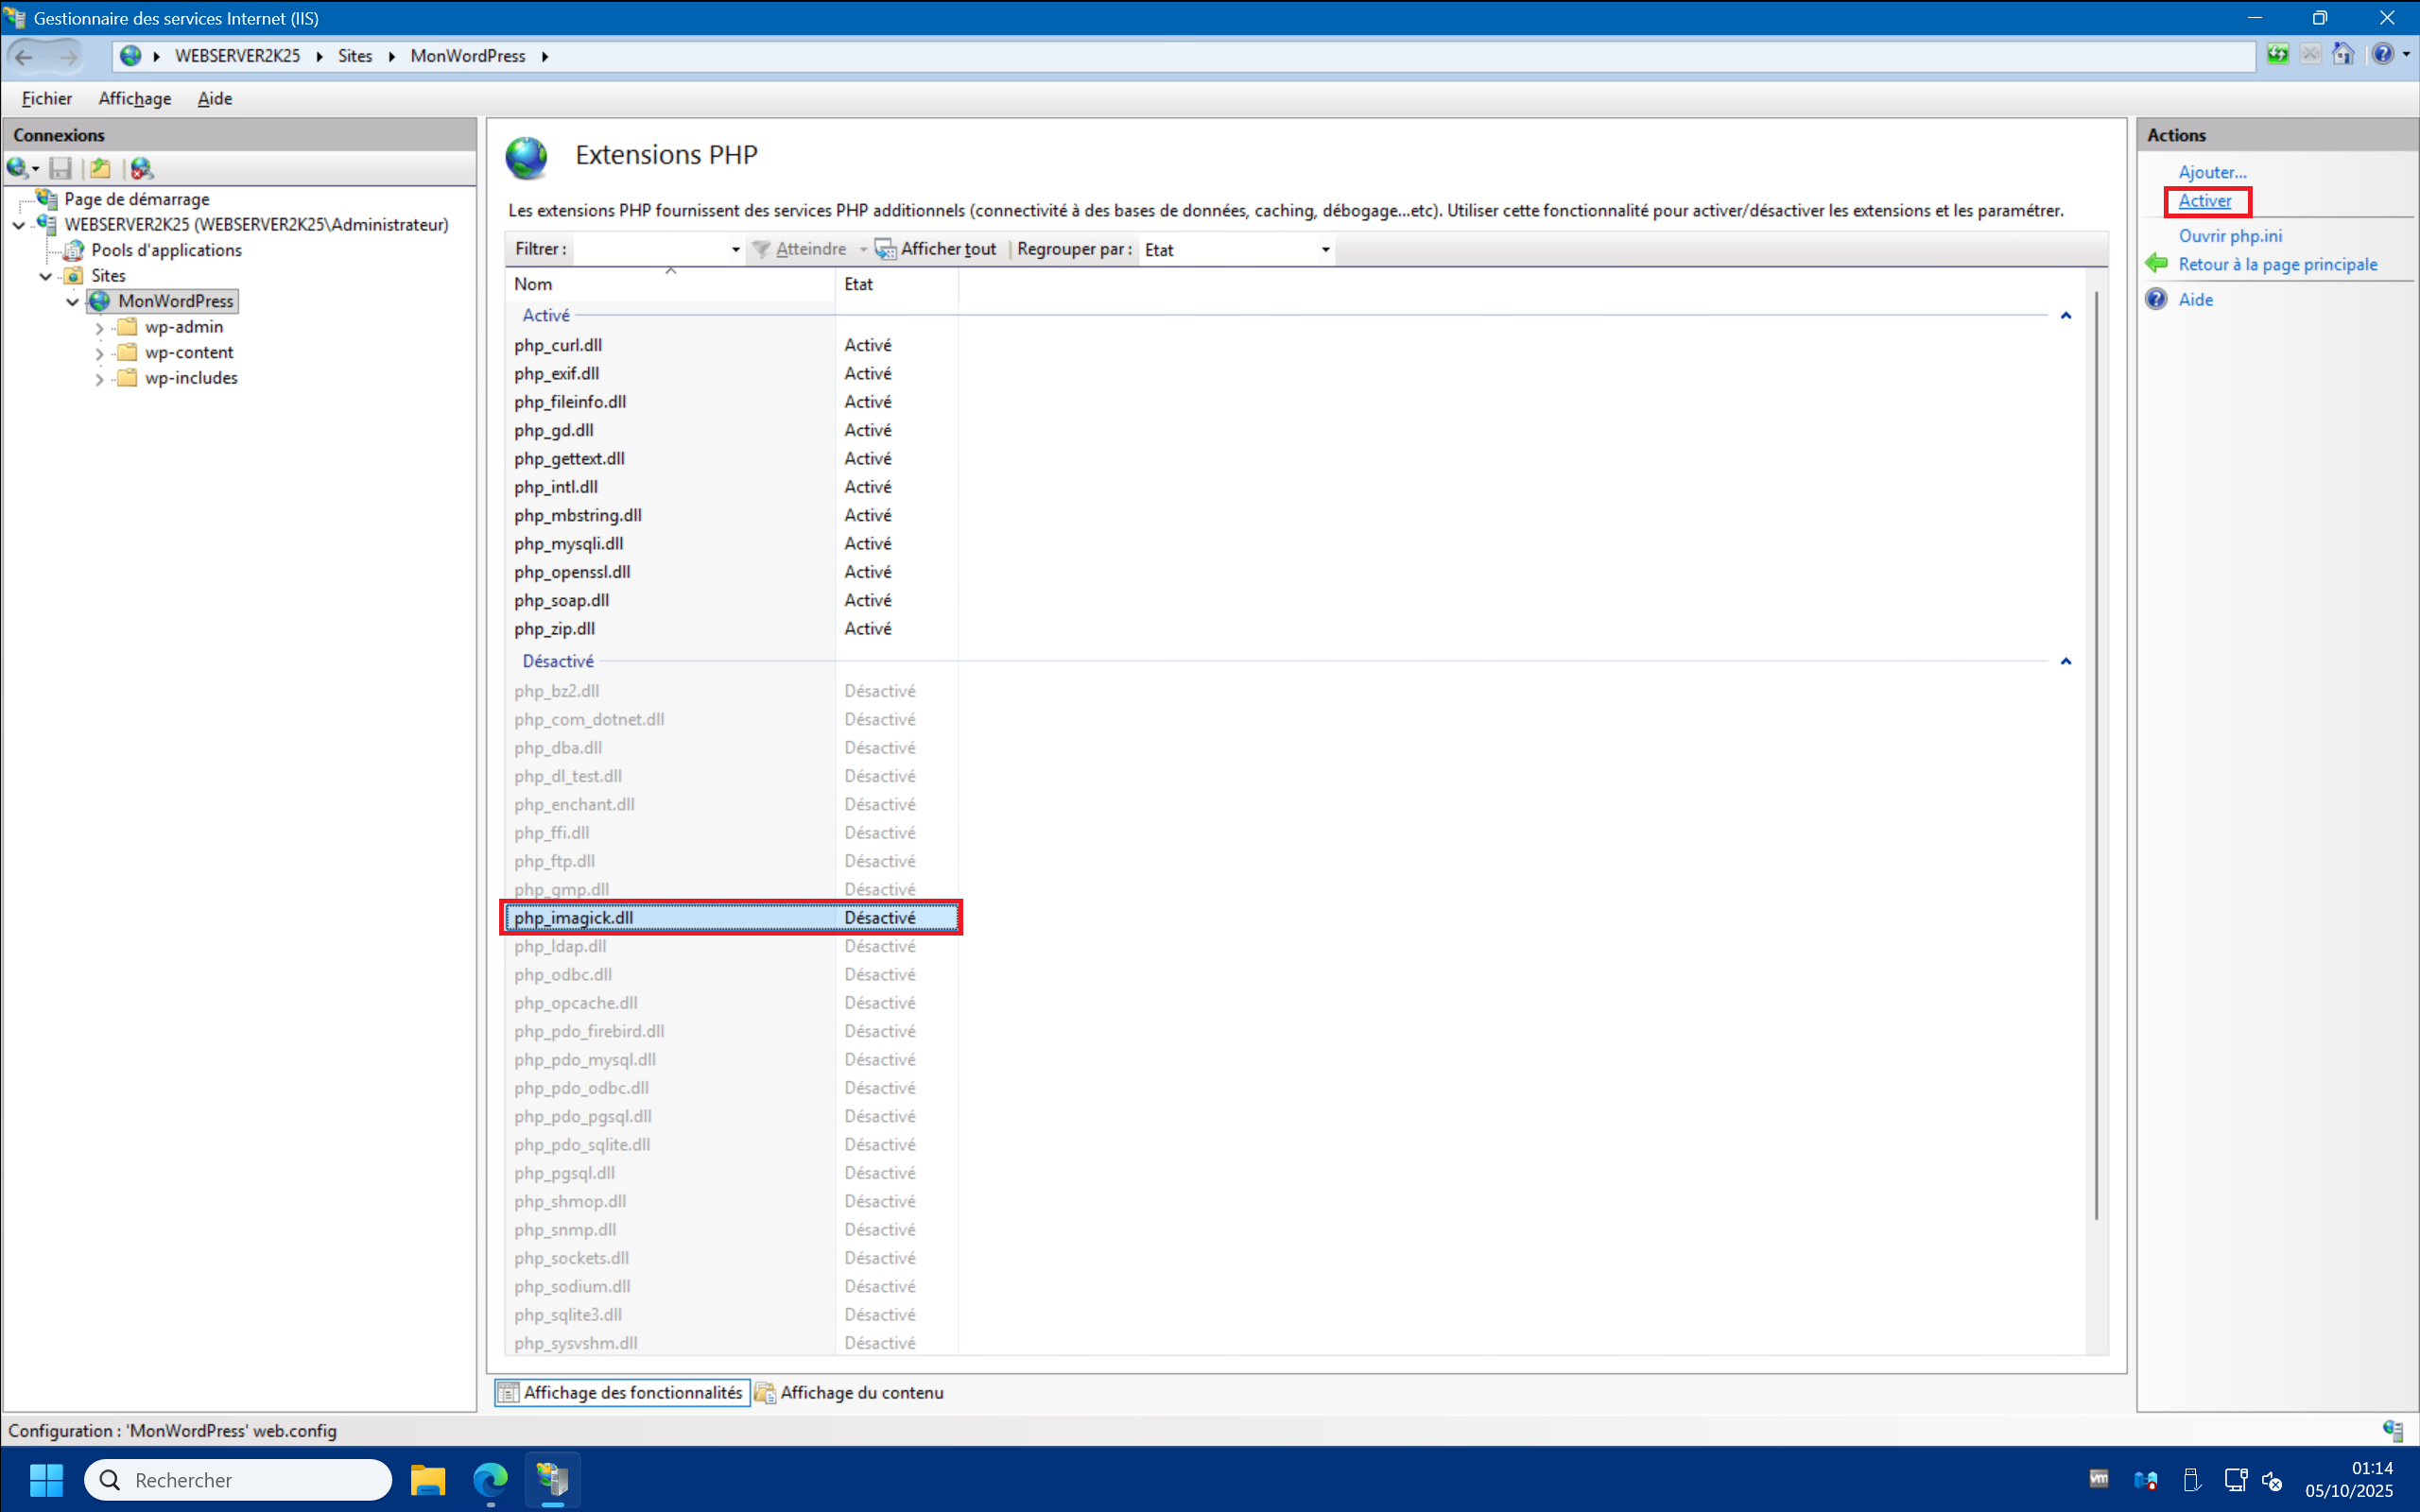
3 – Go back to the IIS Management Console, then PHP Manager, then click on “Enable or disable an extension” . You should see “php_imagick.dll” in the list of disabled extensions. Click on it and then on “Enable” in the top right corner :

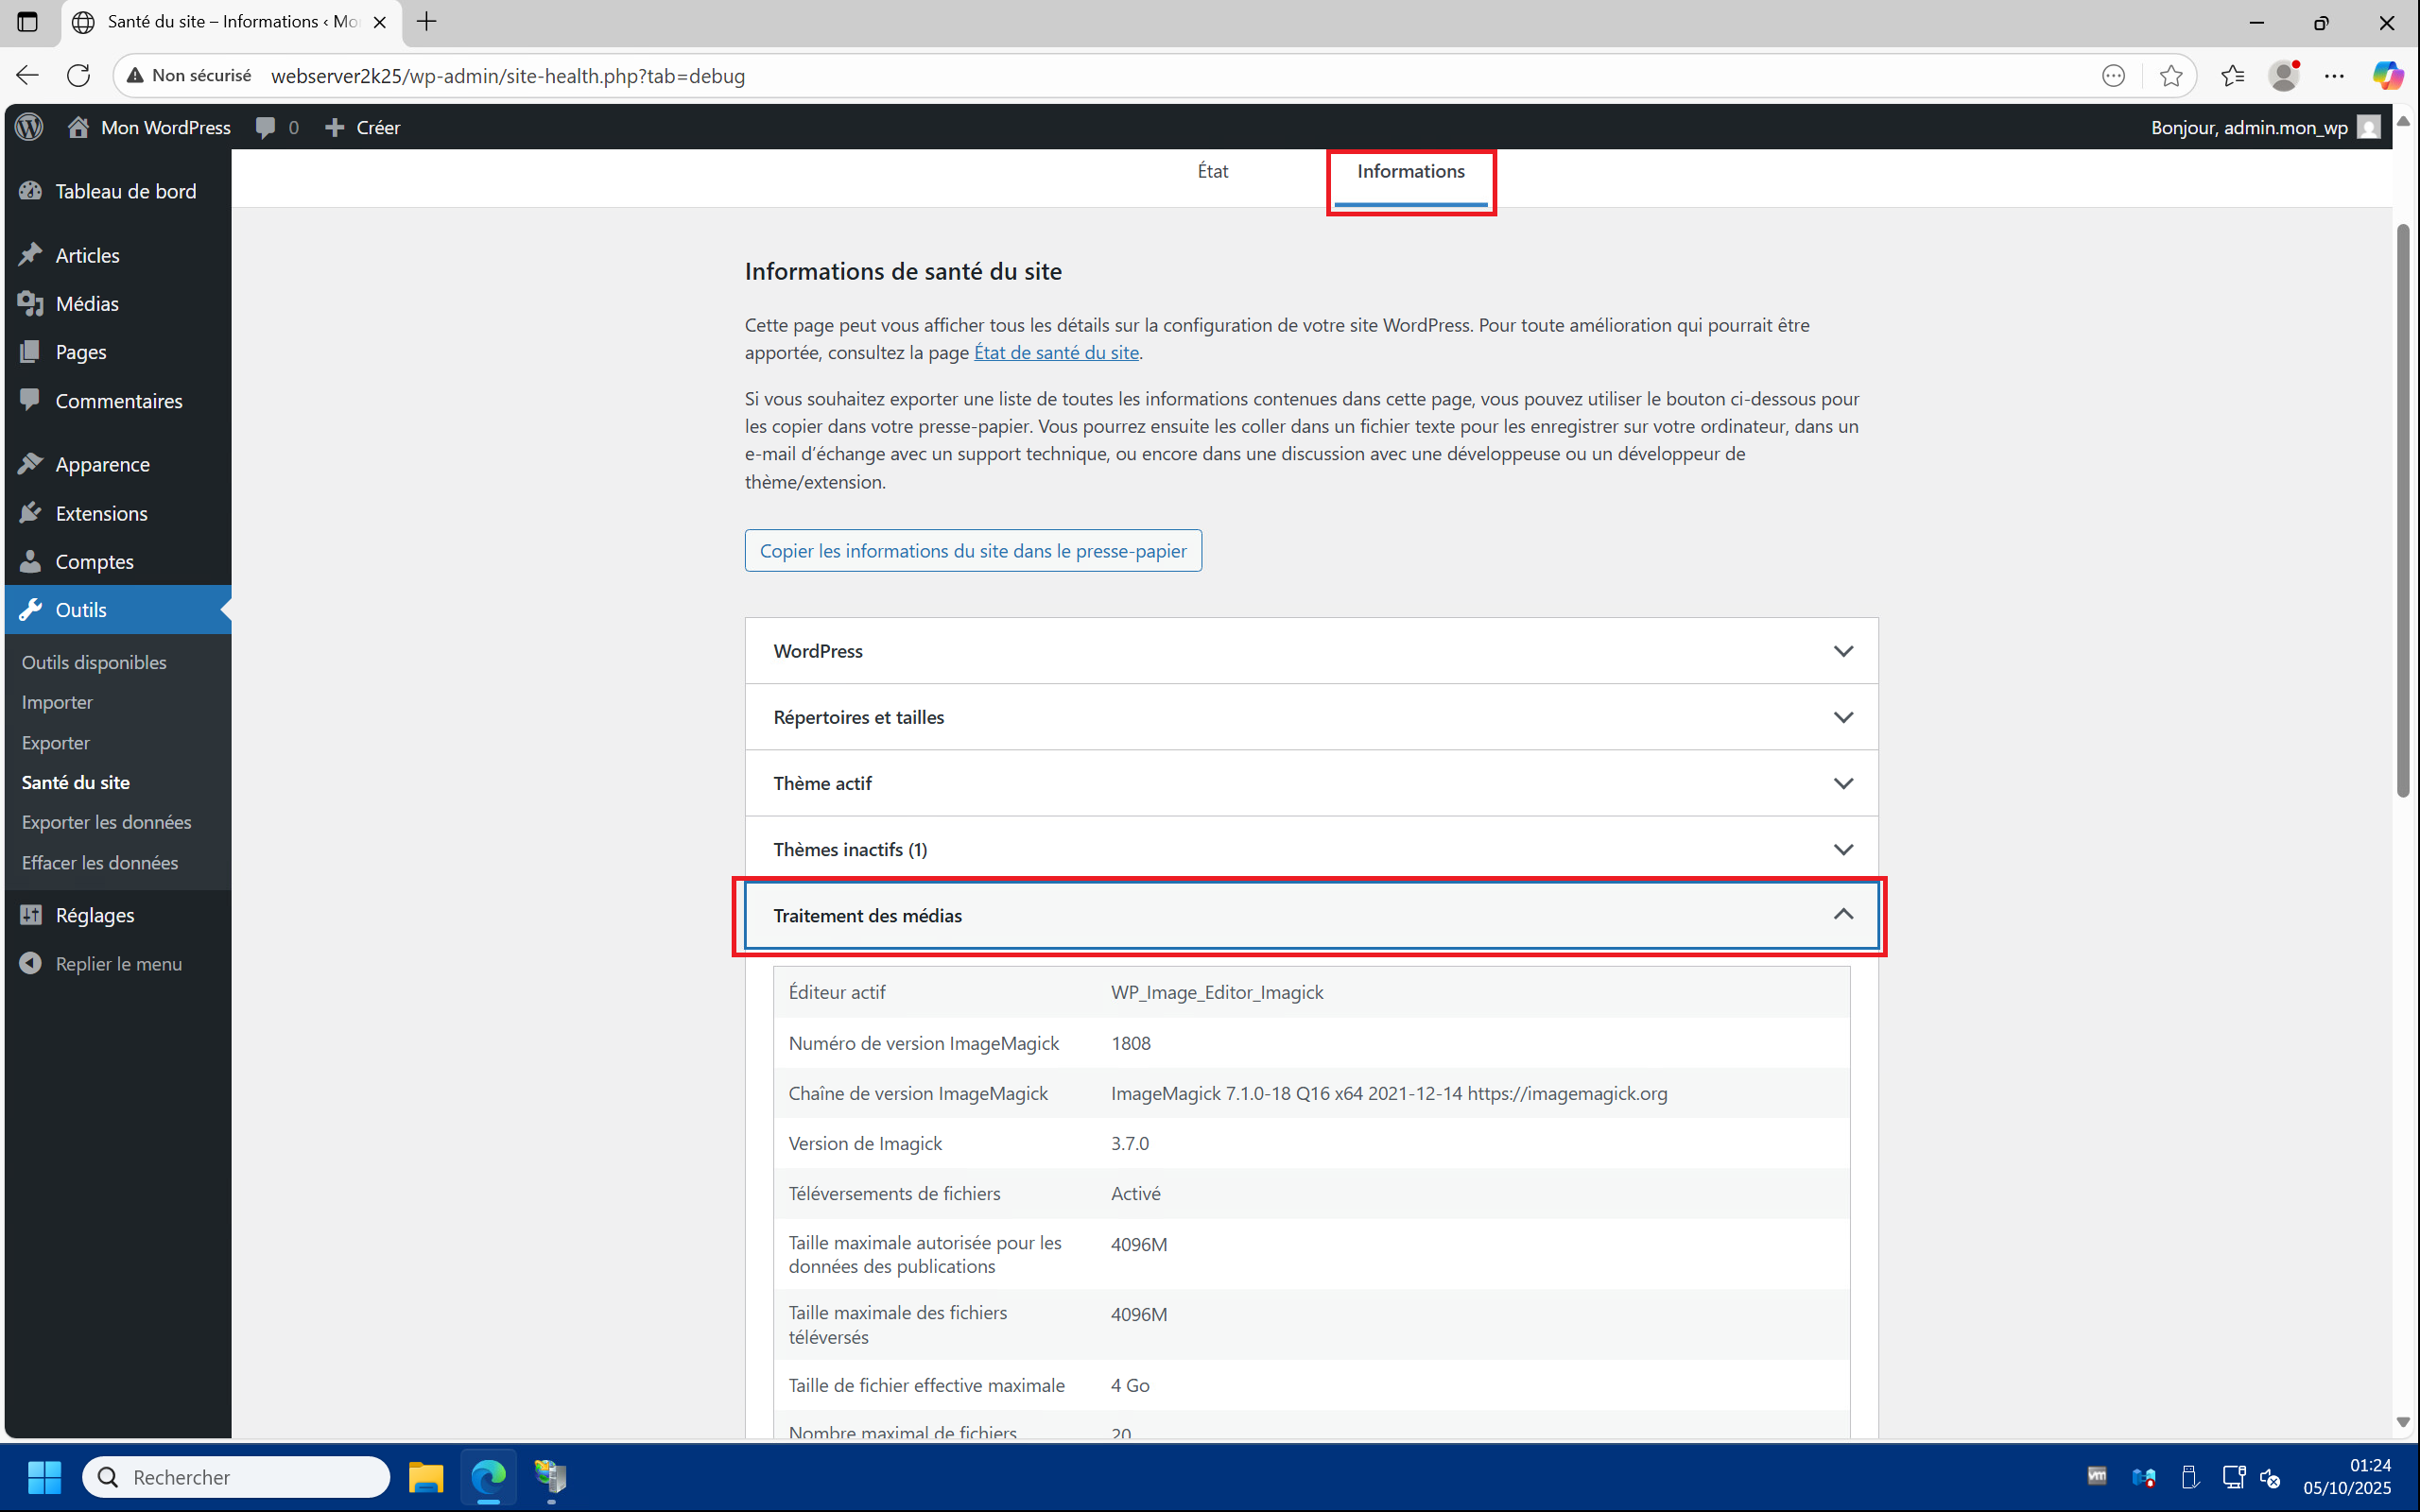
4 – Go back to your WordPress site and go to “Tools” > “Site Health” and you should see that the missing plugins recommendation has disappeared. By clicking on the “Info” tab and then dropping down to “Media Handling” you should see that WordPress is indeed using “WP_Image_Editor_Imagick” (instead of the default GD) :
Enable static and dynamic compression :
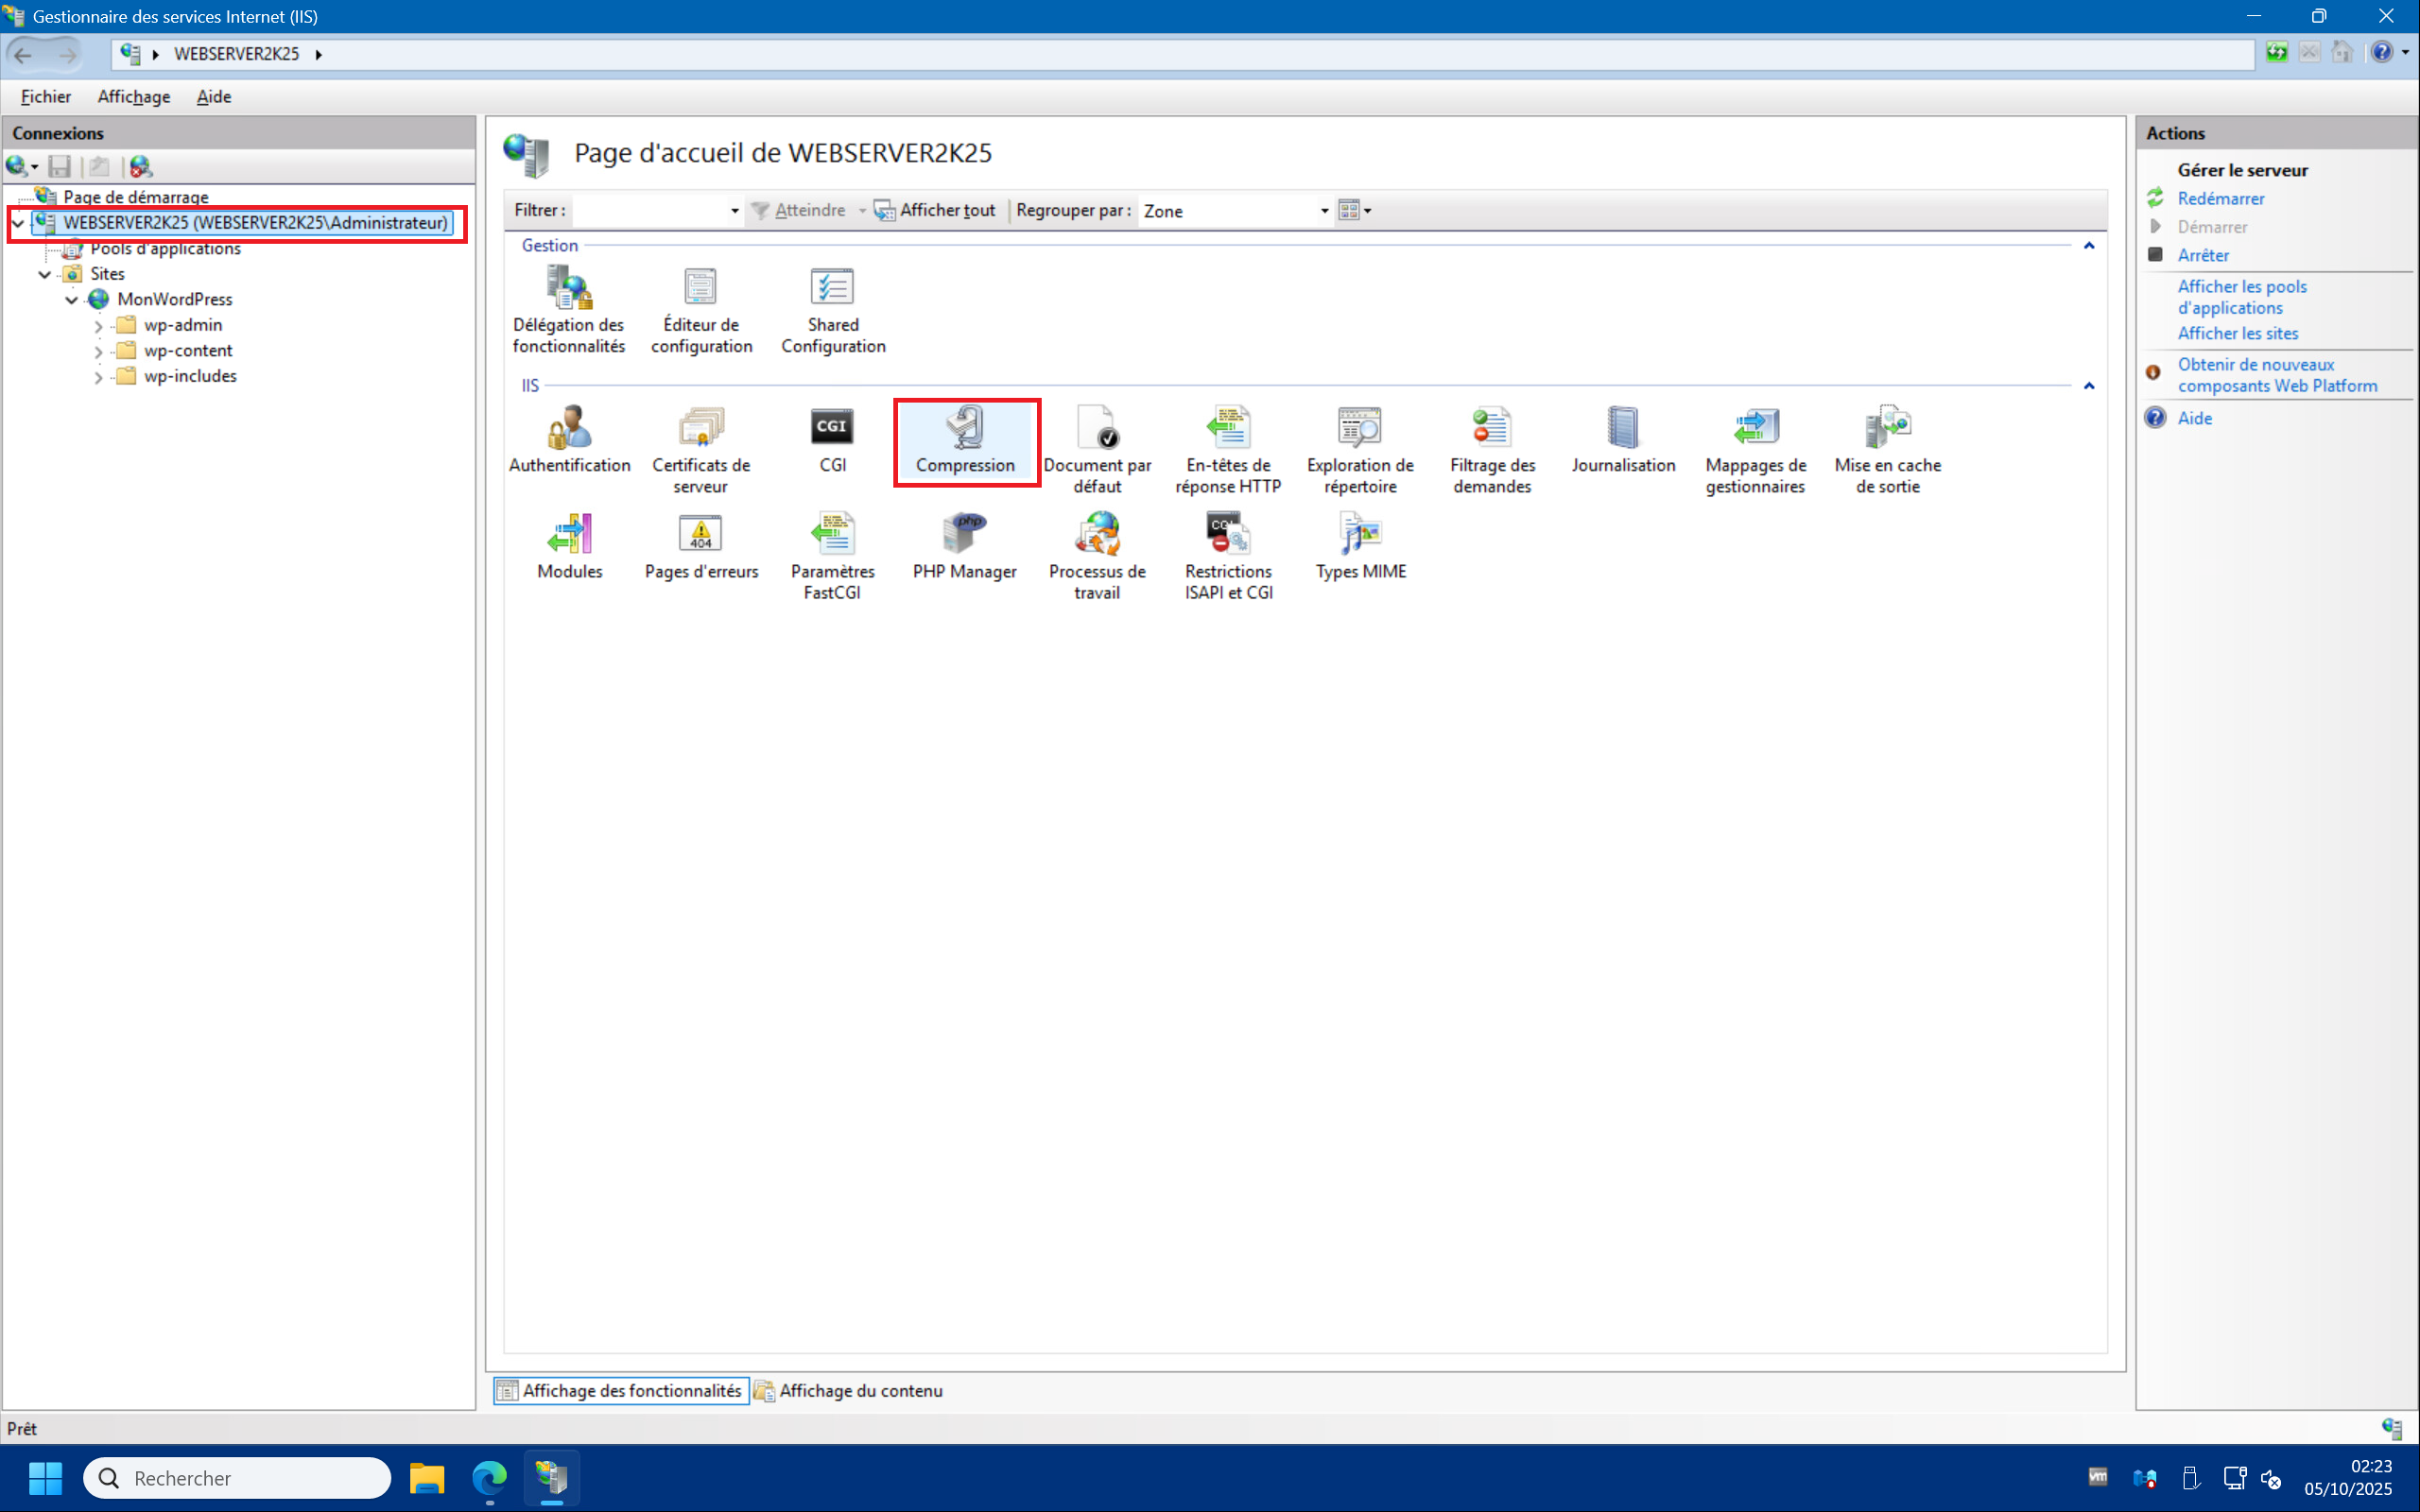
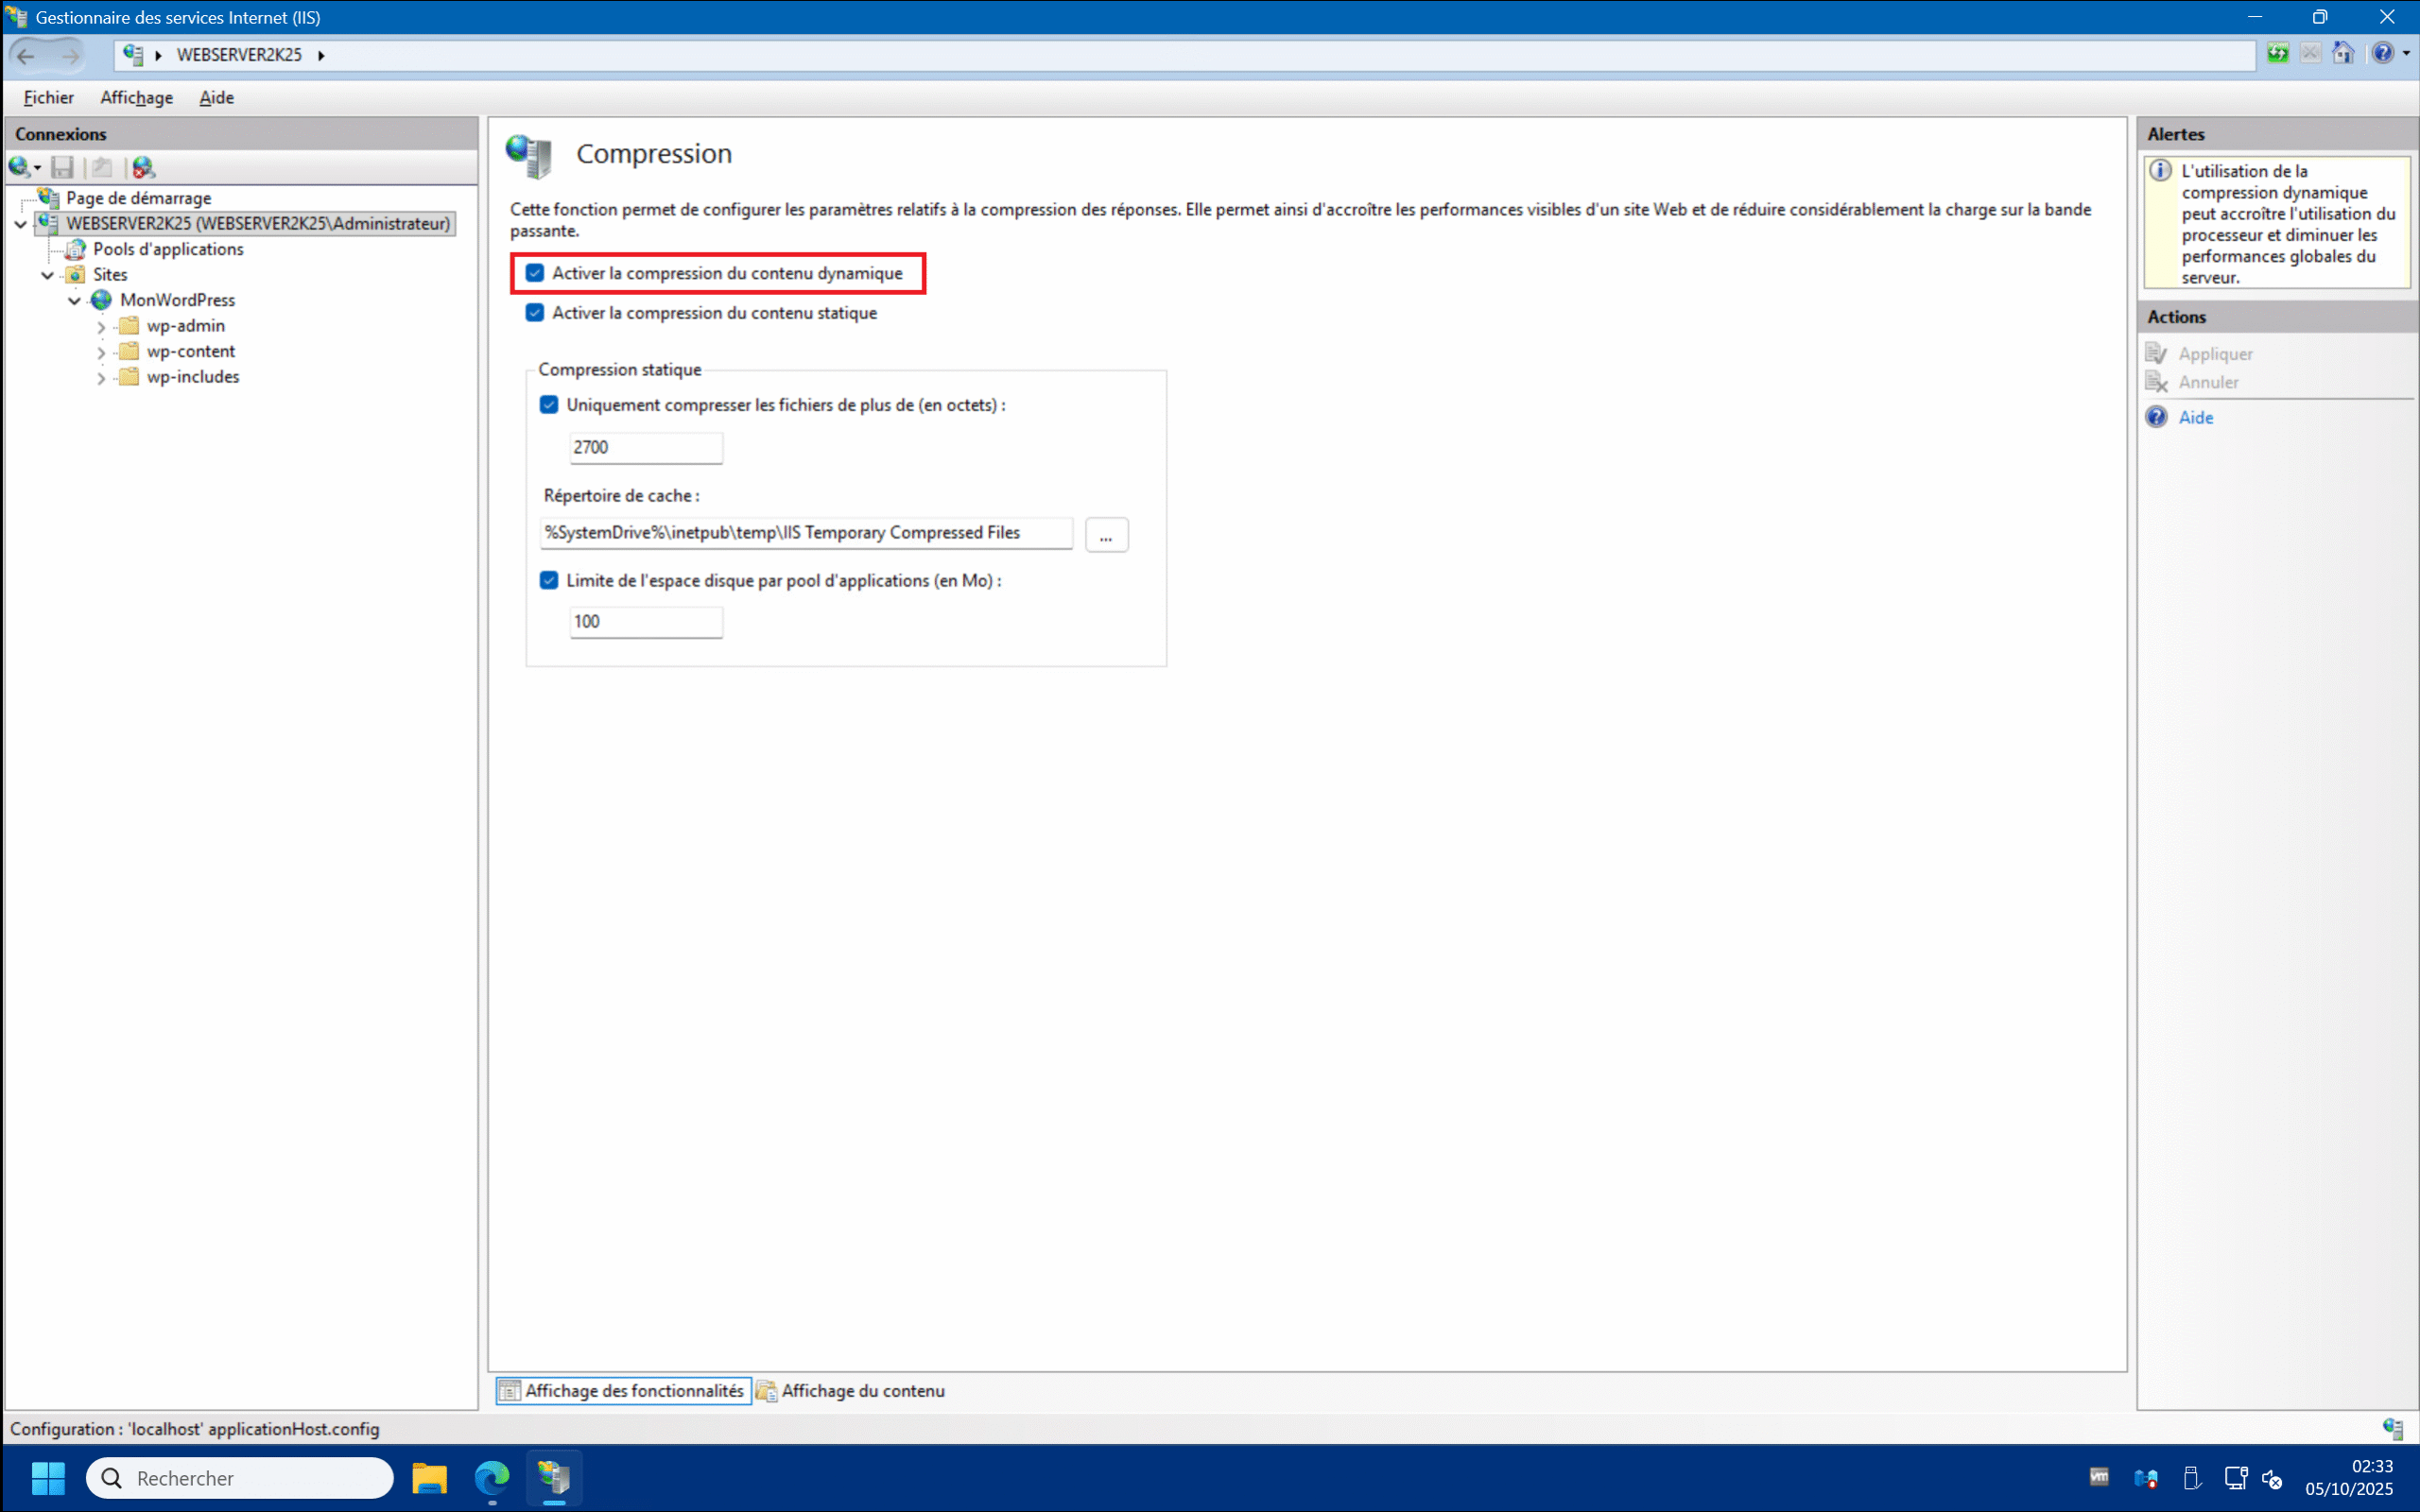
1 – In the IIS Management Console, in the server section, double-click on “Compression” . You should see that the “Enable dynamic content compression” box is grayed out :
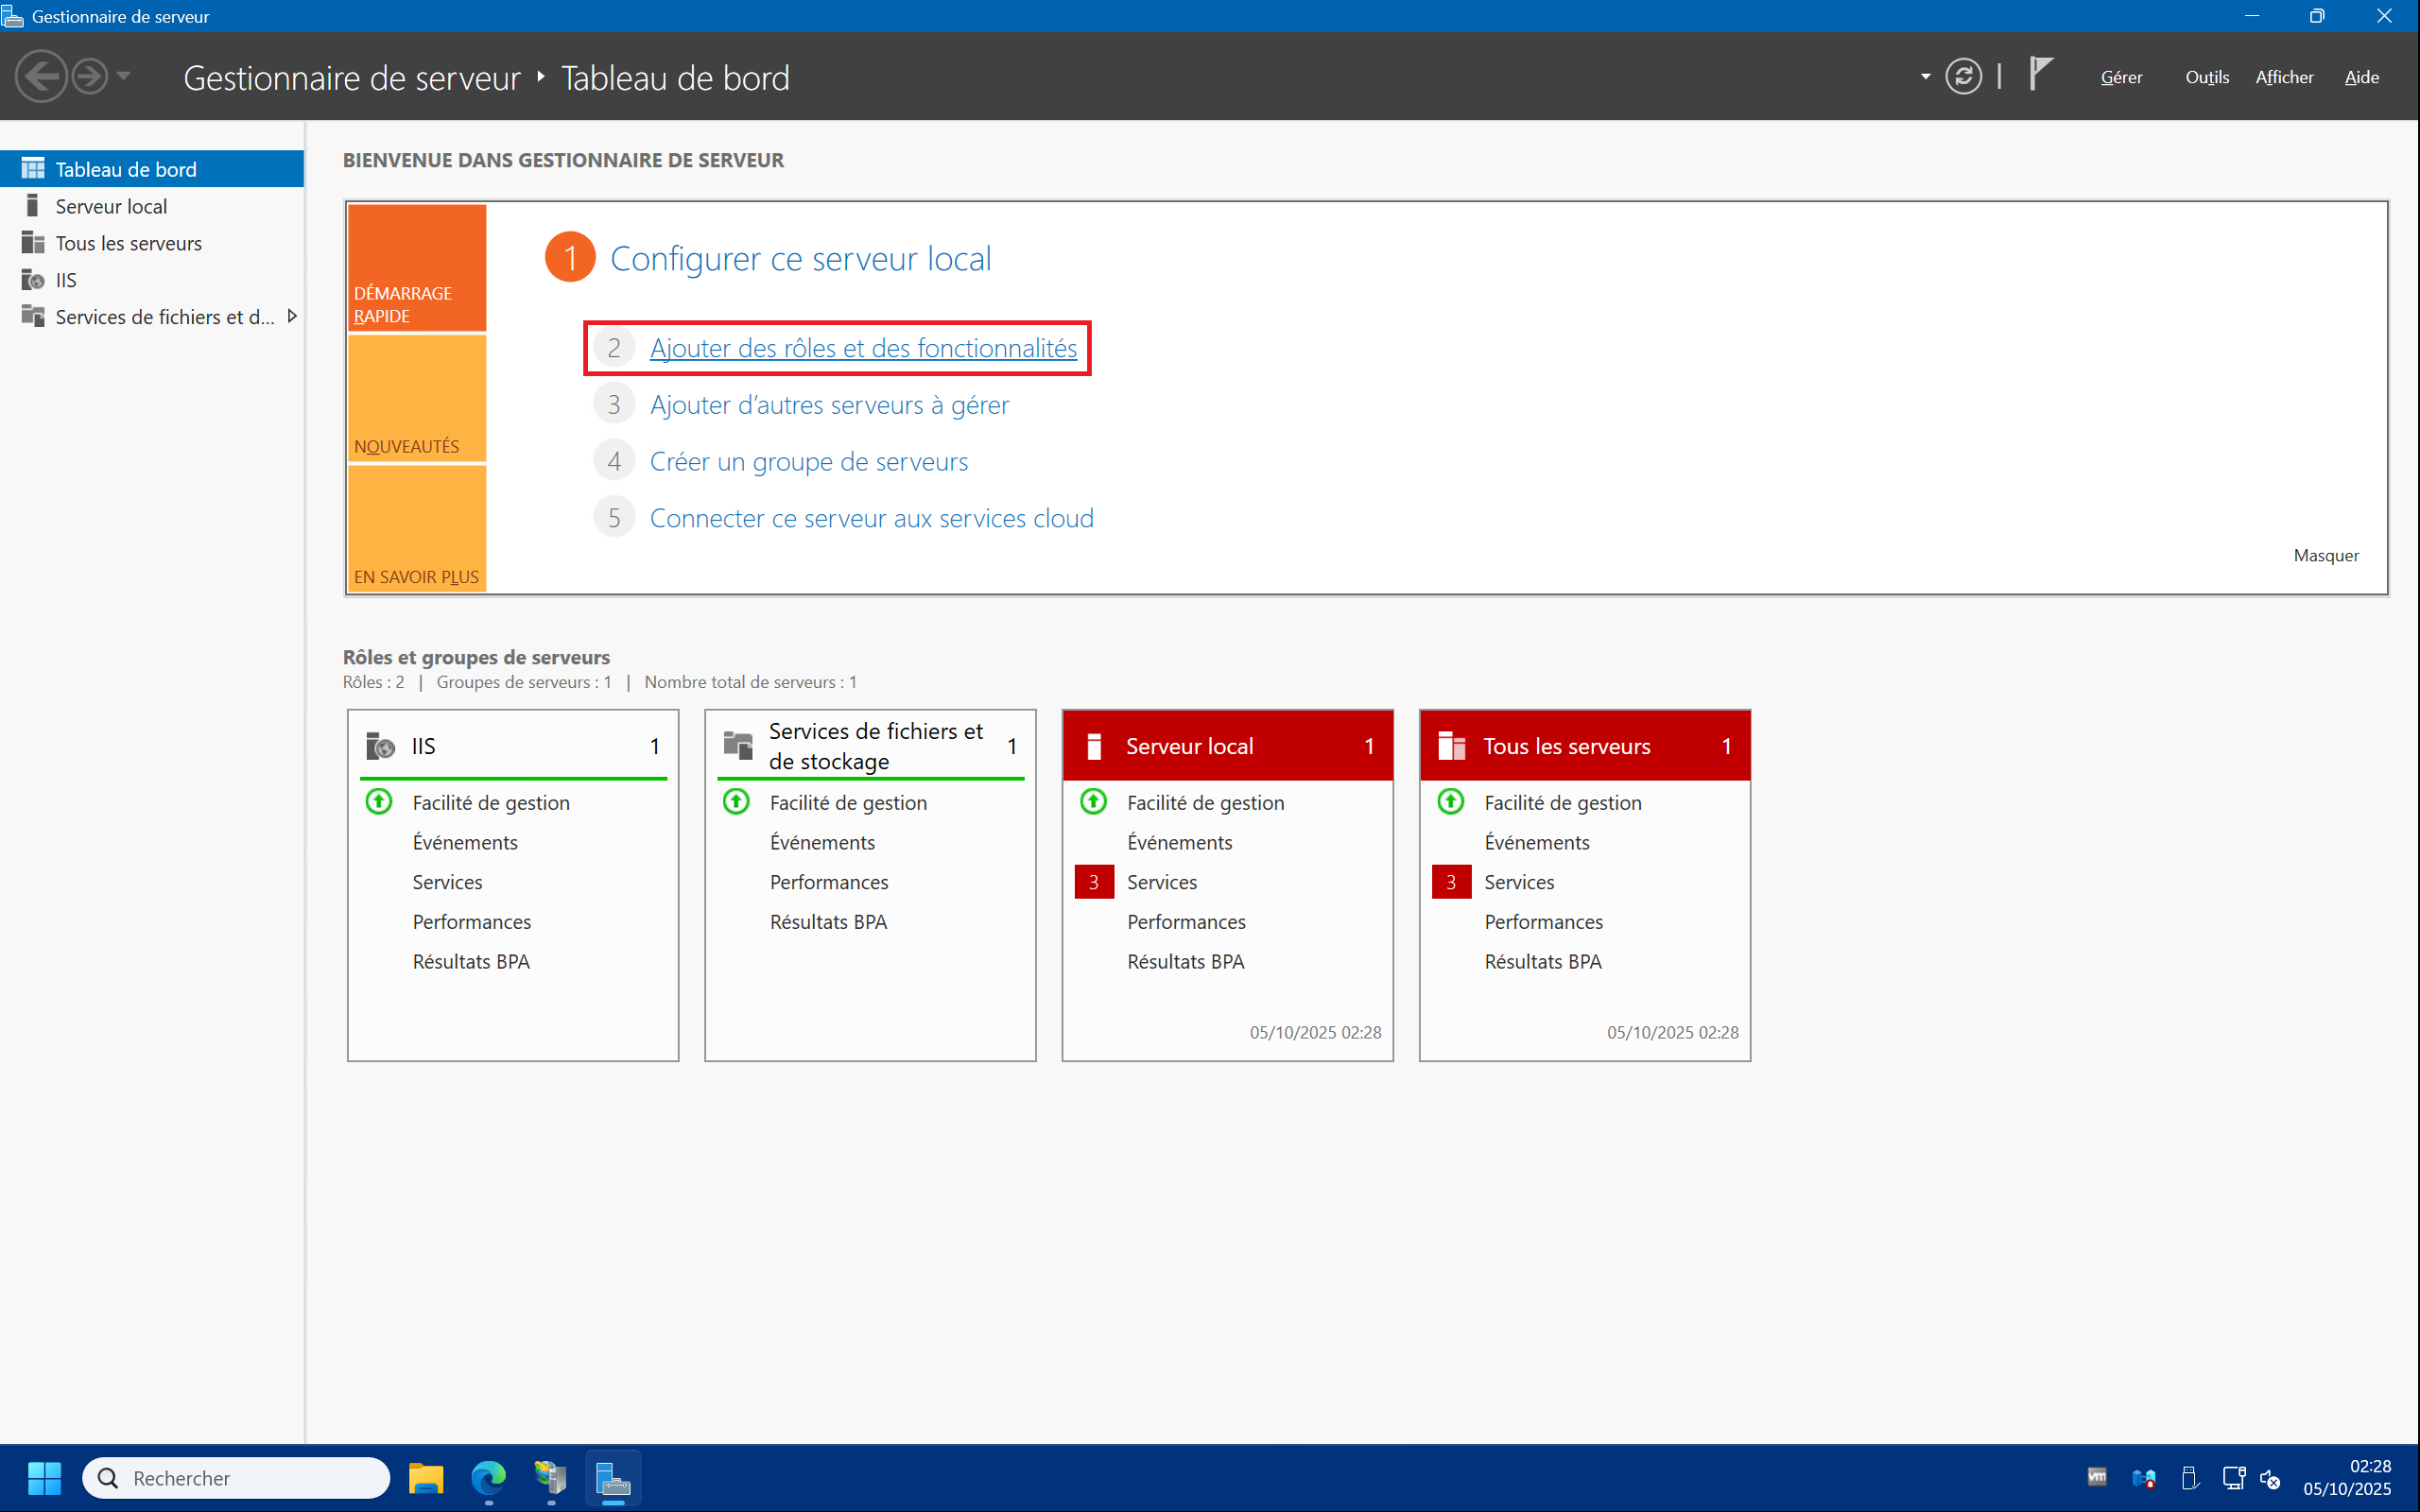
2 – Open Server Manager, then click “Add Roles and Features” :
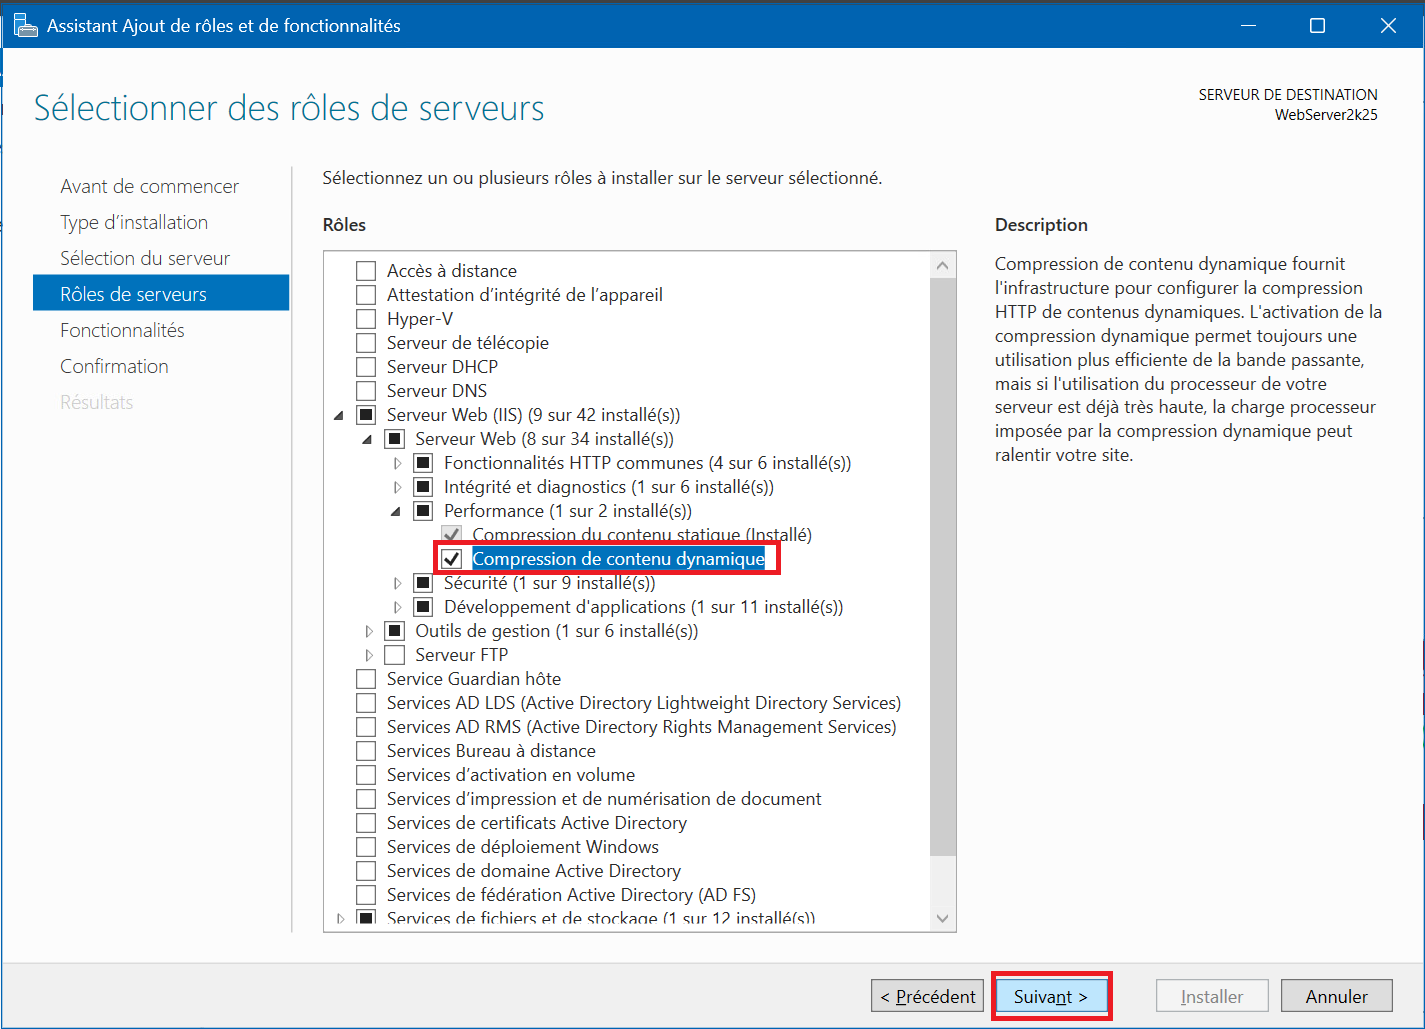
3 – Skip the preliminary steps by clicking next, then once in the “Server Roles” section, expand “Web Server (IIS)” > “Web Server” > “Performance” , then check “Dynamic Content Compression” and “Next” . Leave the rest as default and confirm the installation :
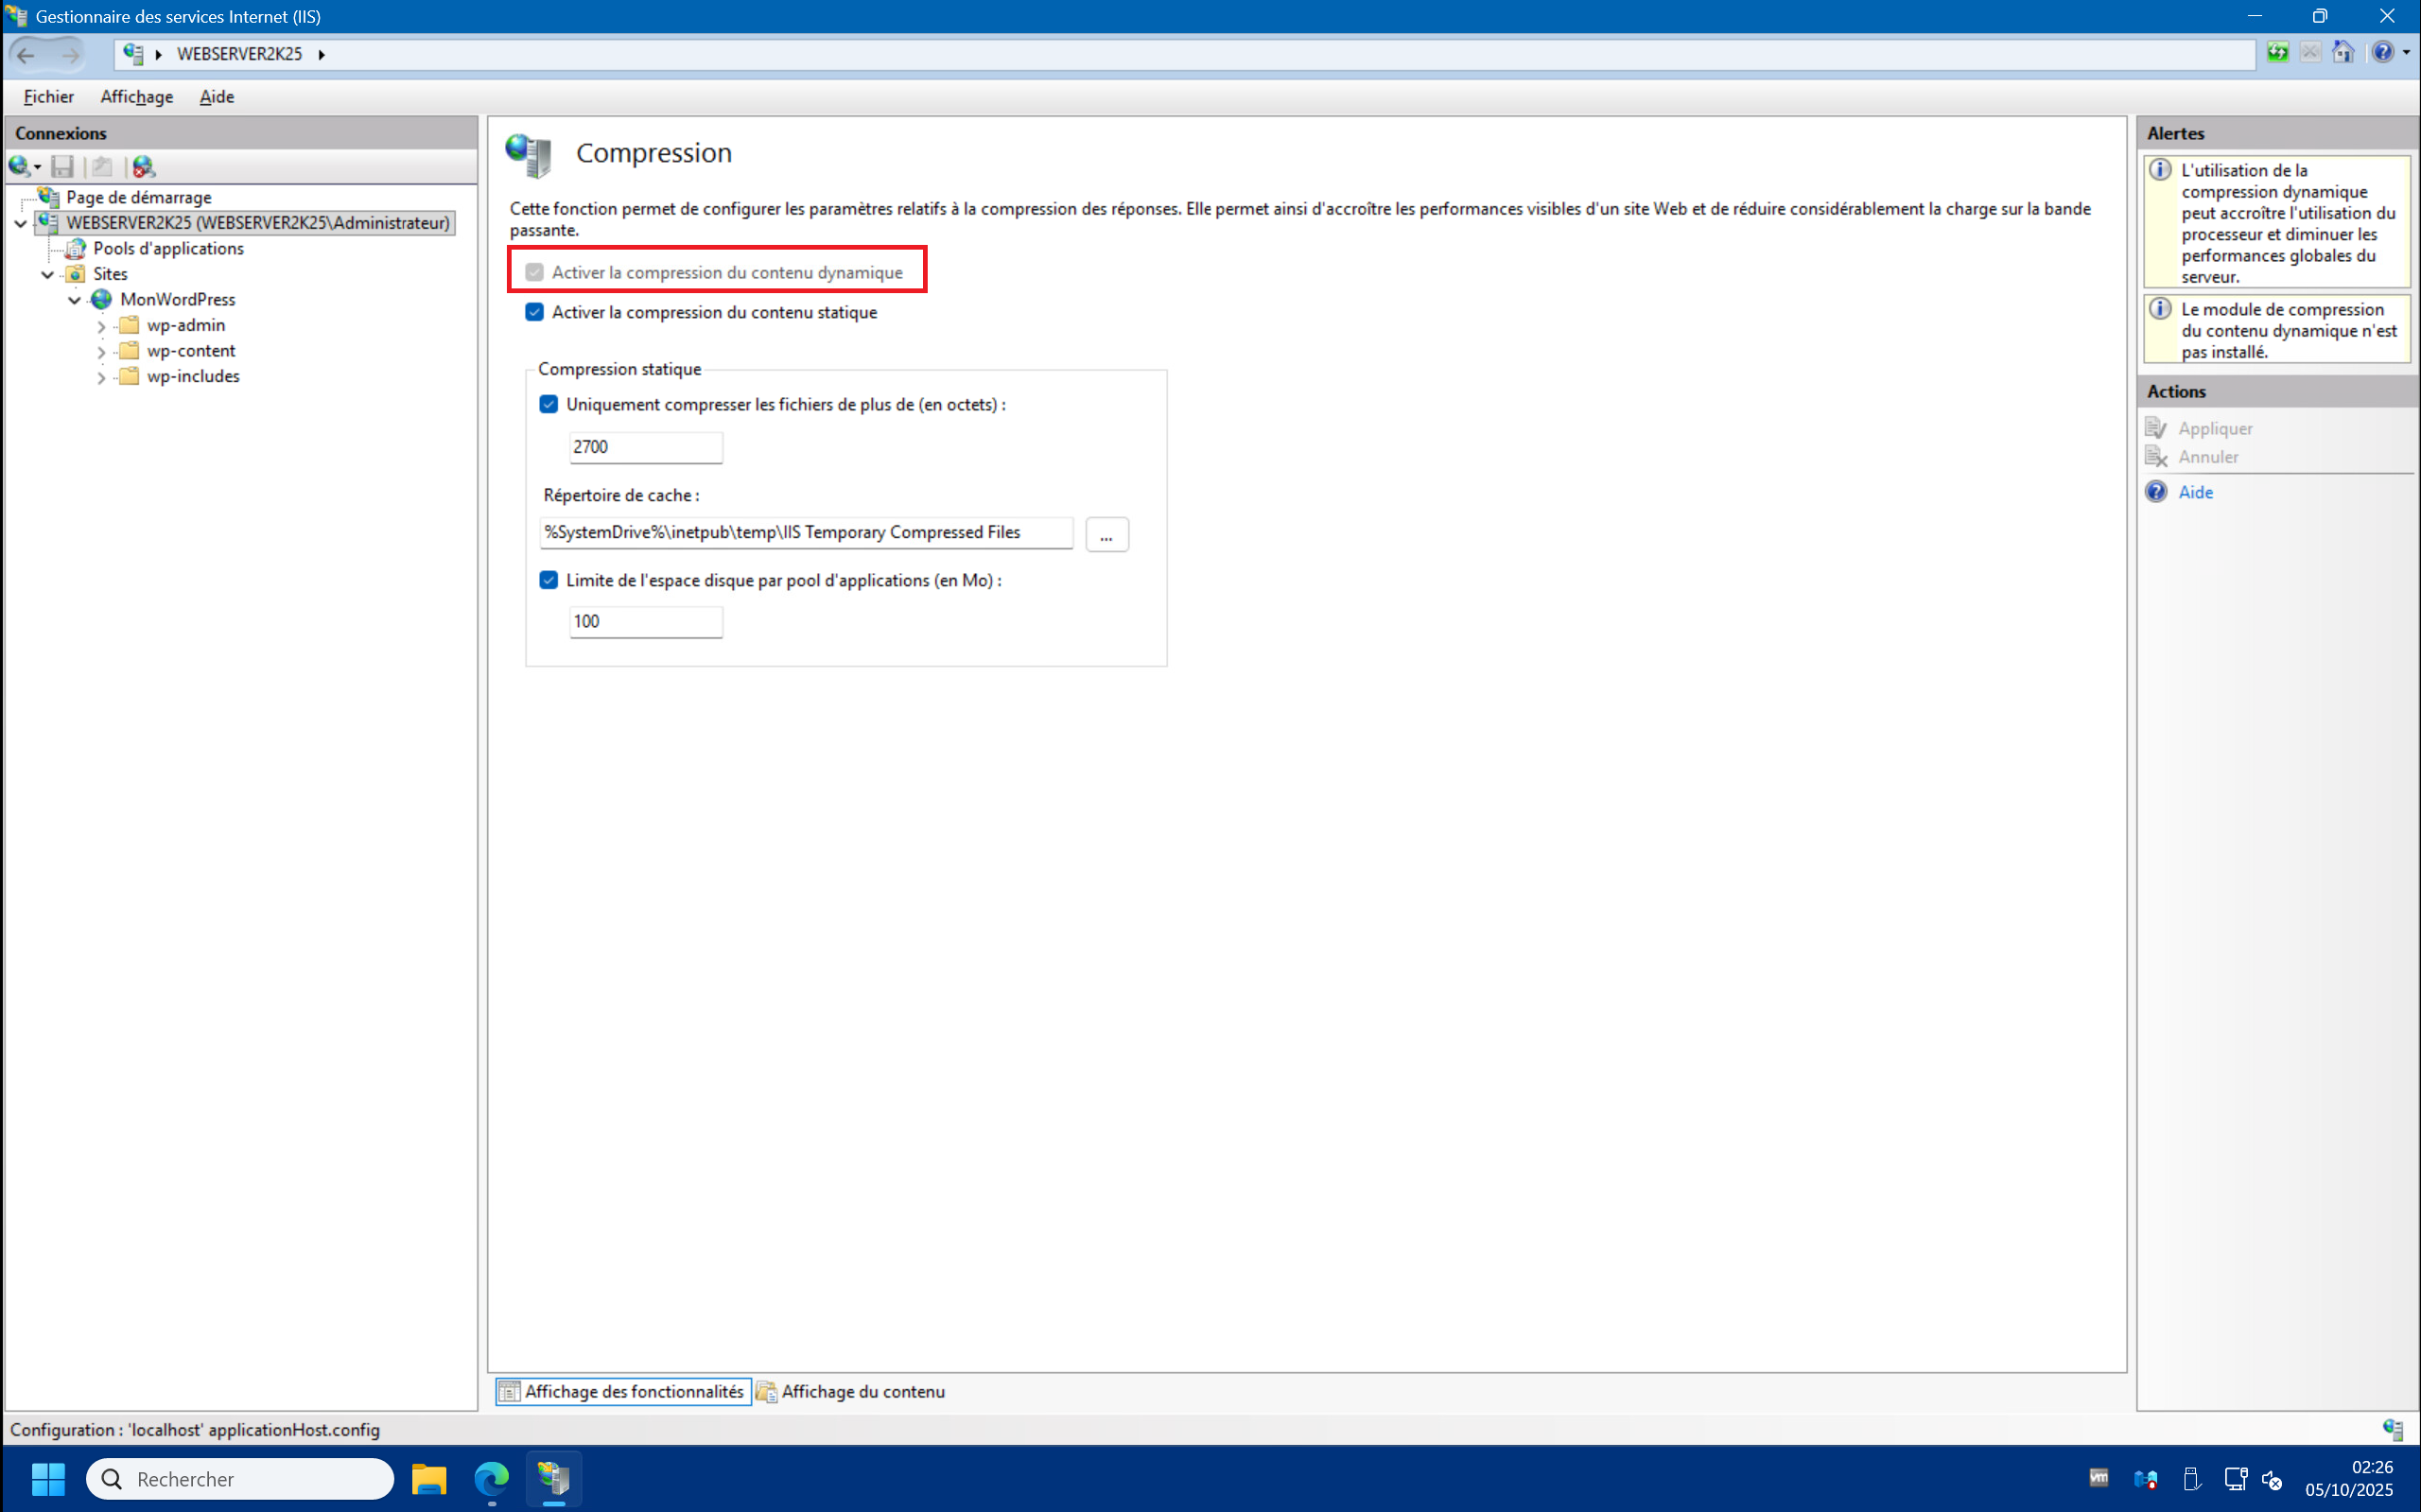
4 – Once the role installation is complete, you can return to the IIS console and select “Compression” as before. You should see that dynamic content compression is enabled :
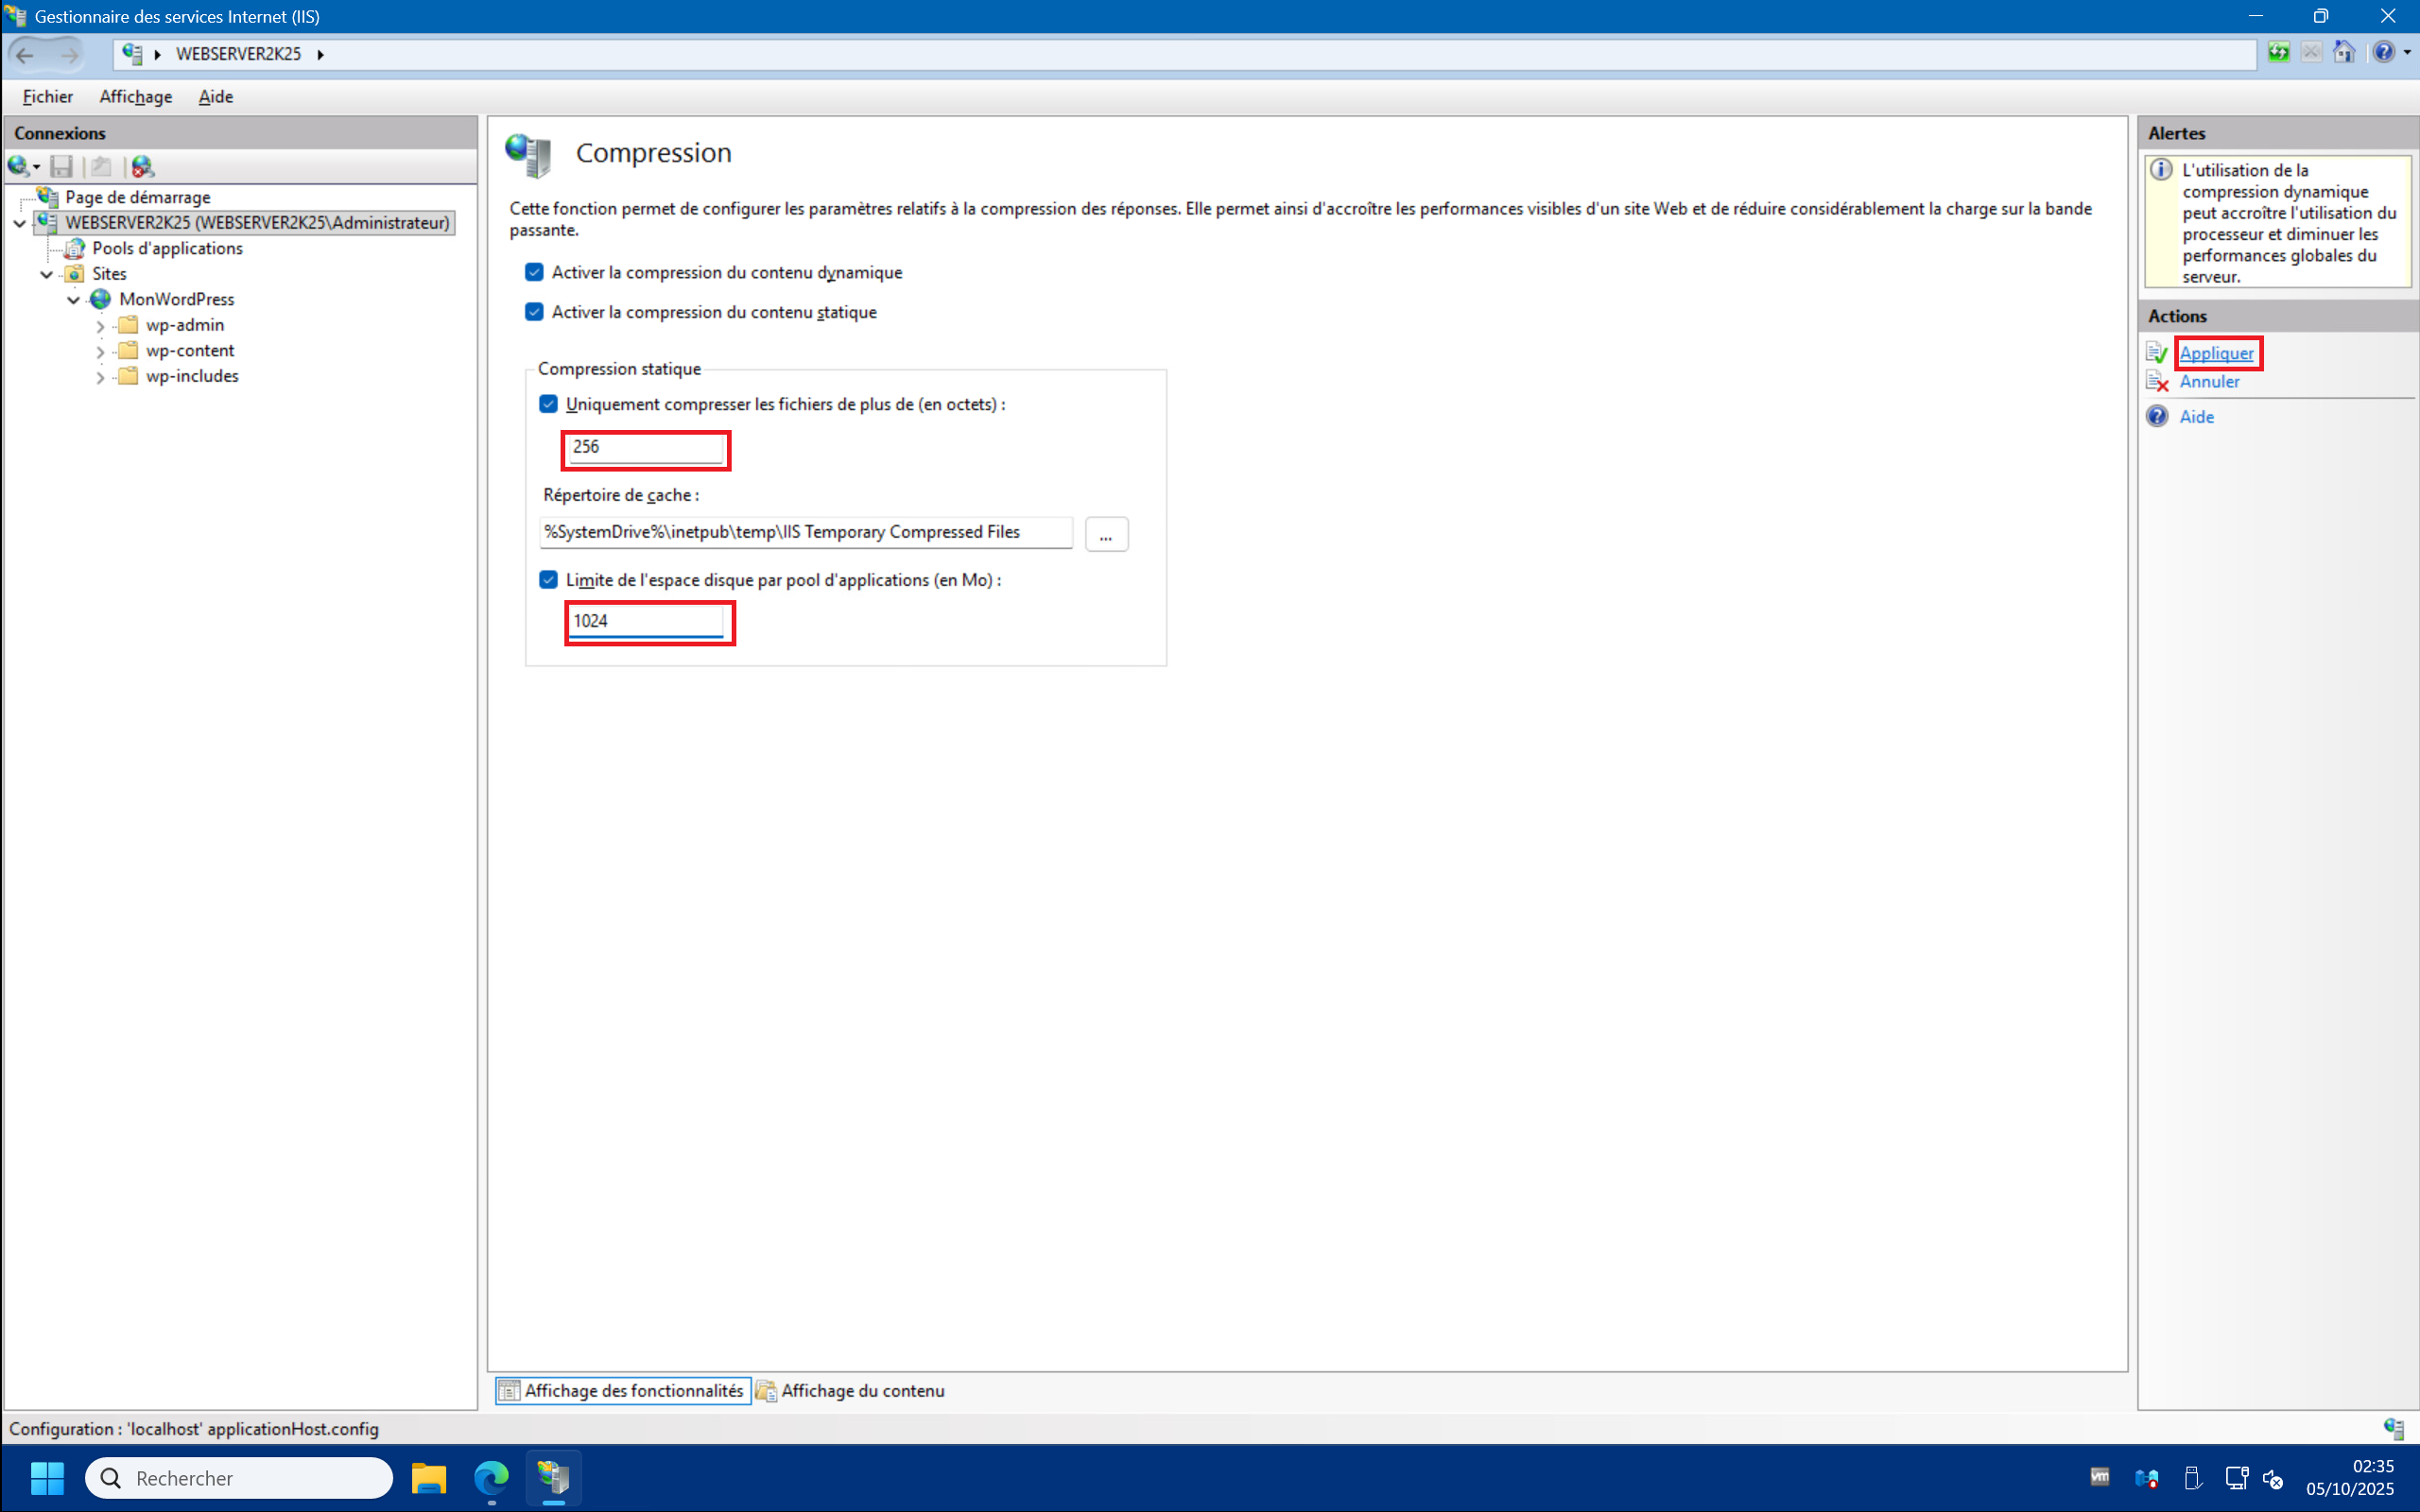
5 – You can also adjust the static content compression settings by lowering the minimum file size to compress to 256 Bytes and the disk space limit to 1024 MB (1 GB) :
Enable opcache :
Let’s not beat around the bush: enabling the “opcache” extension is what will probably give you the biggest performance boost.
1 – Launch PHP Manager then click on “Enable or disable an extension” , then select “php_opcache.dll” and click on “Enable” at the top right :
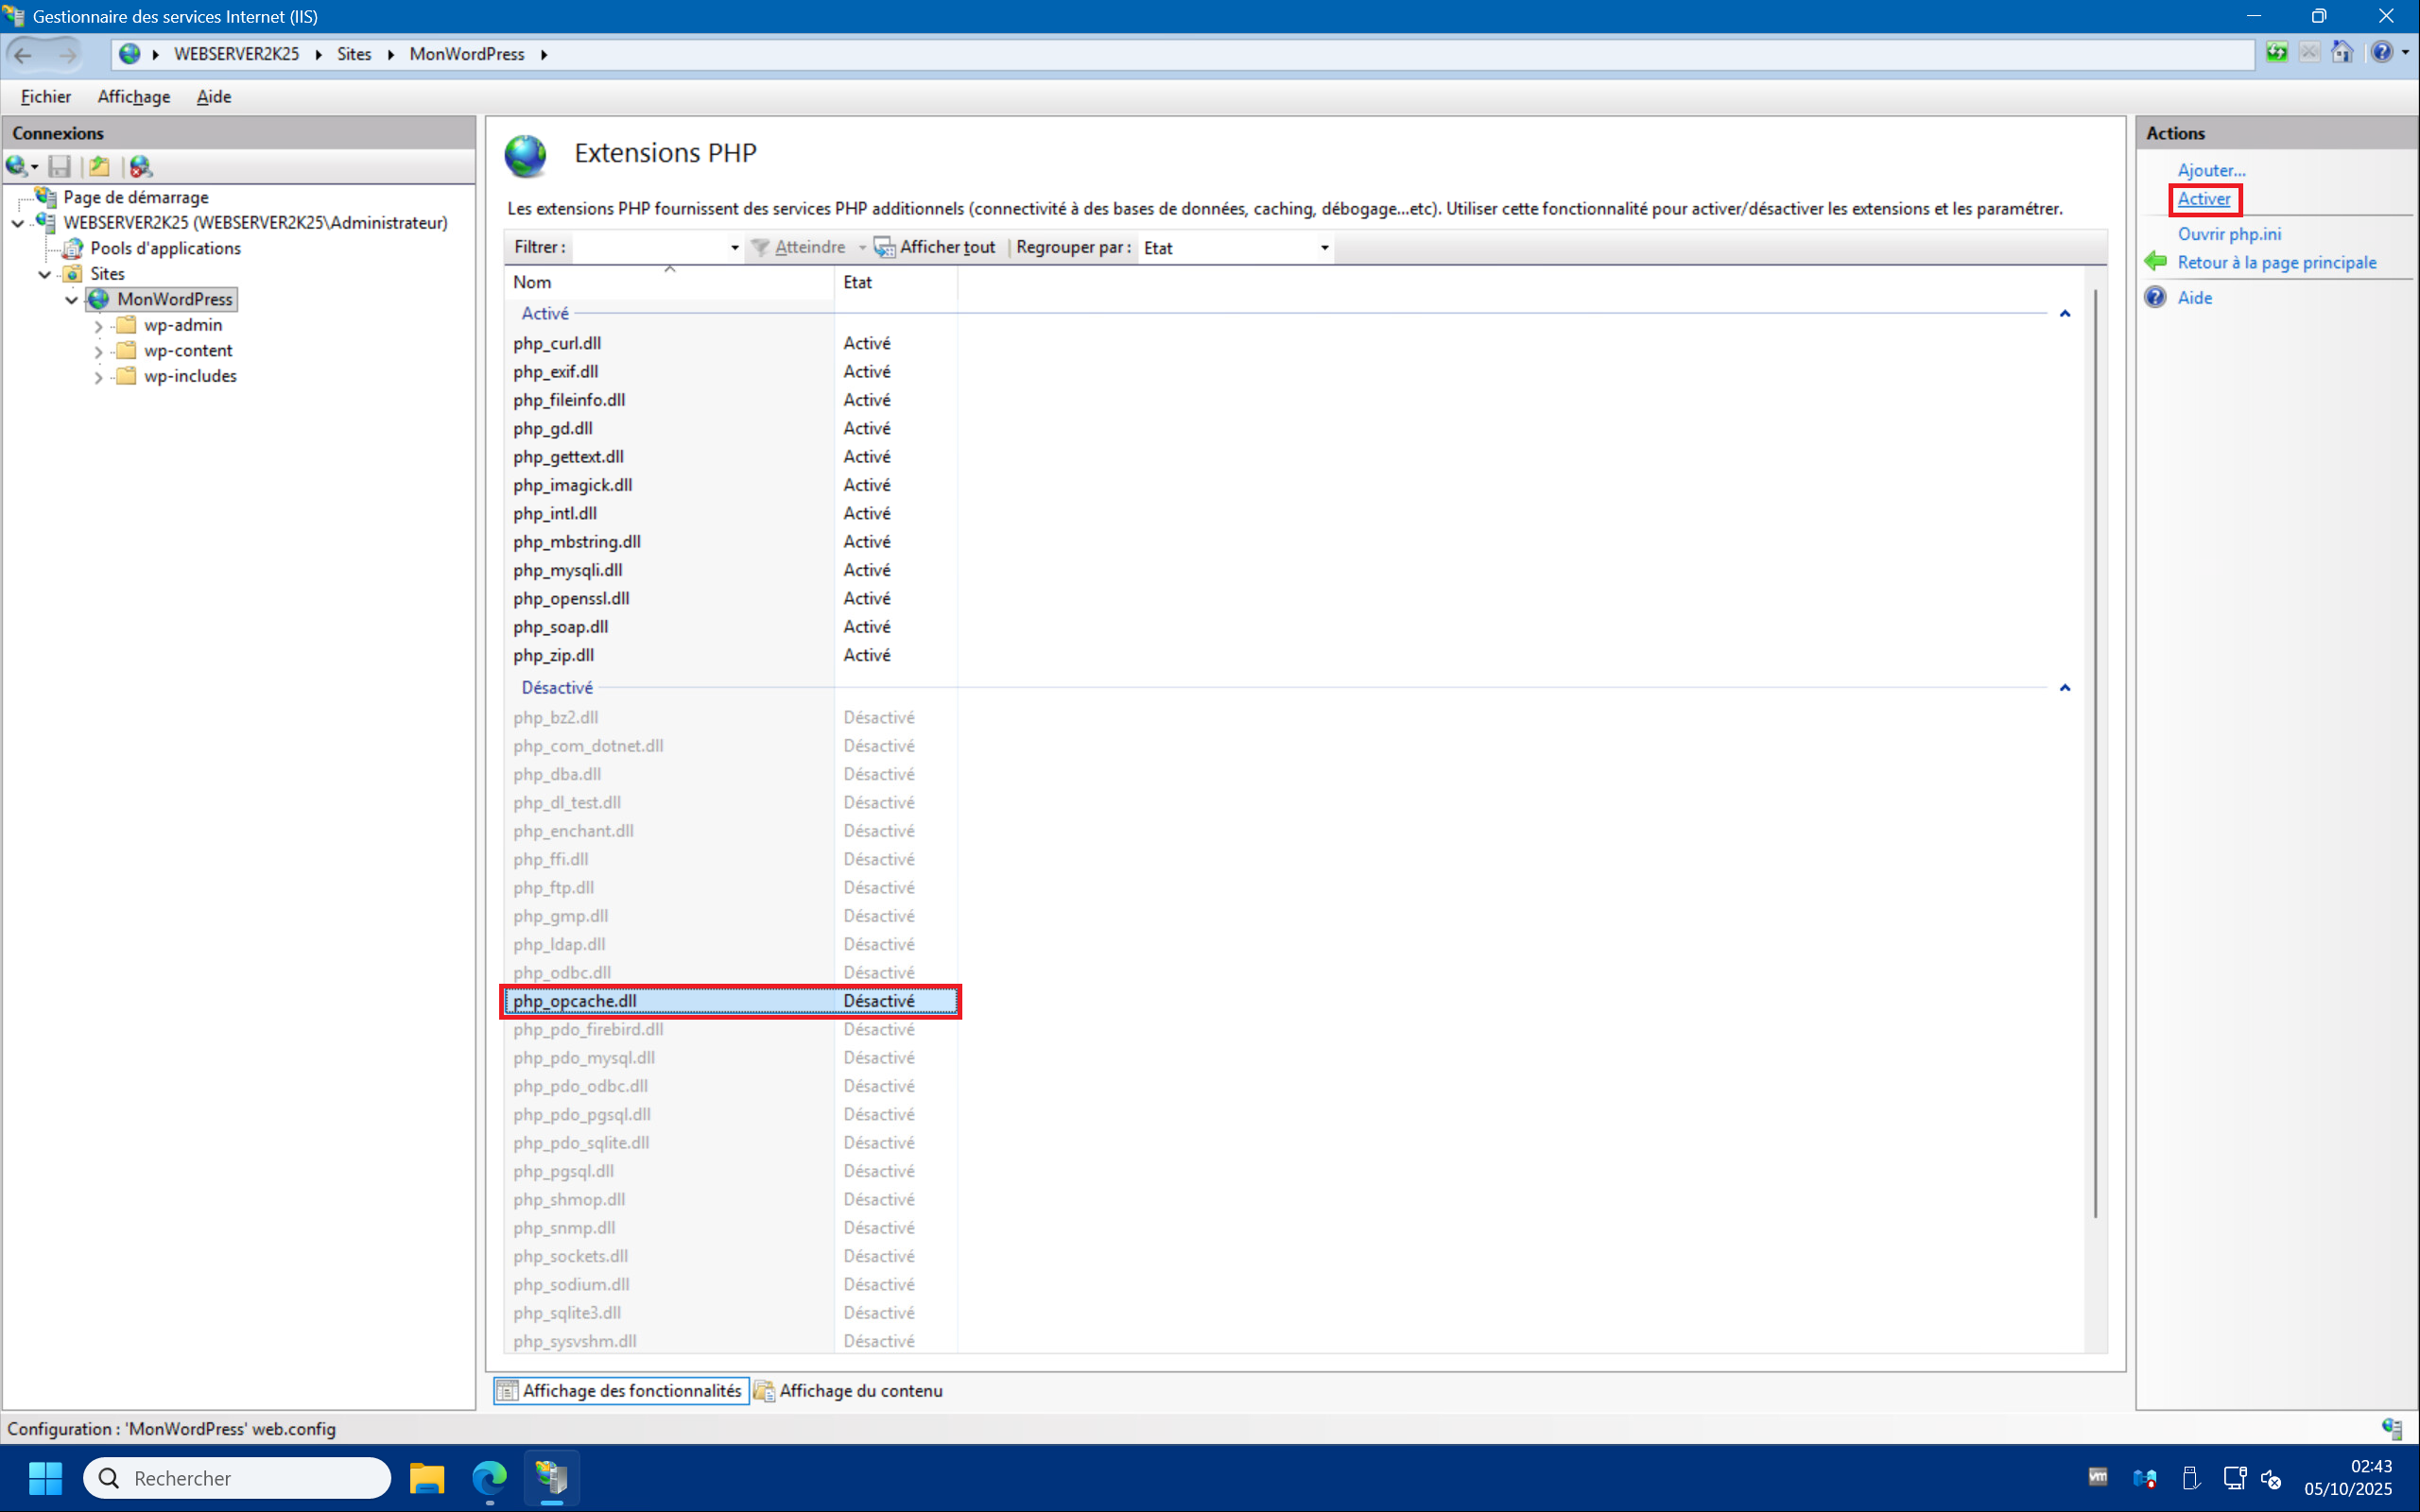
2 – Returning to the site health status, you should see that the site response time has decreased significantly. Here we went from 262 to 53 milliseconds !

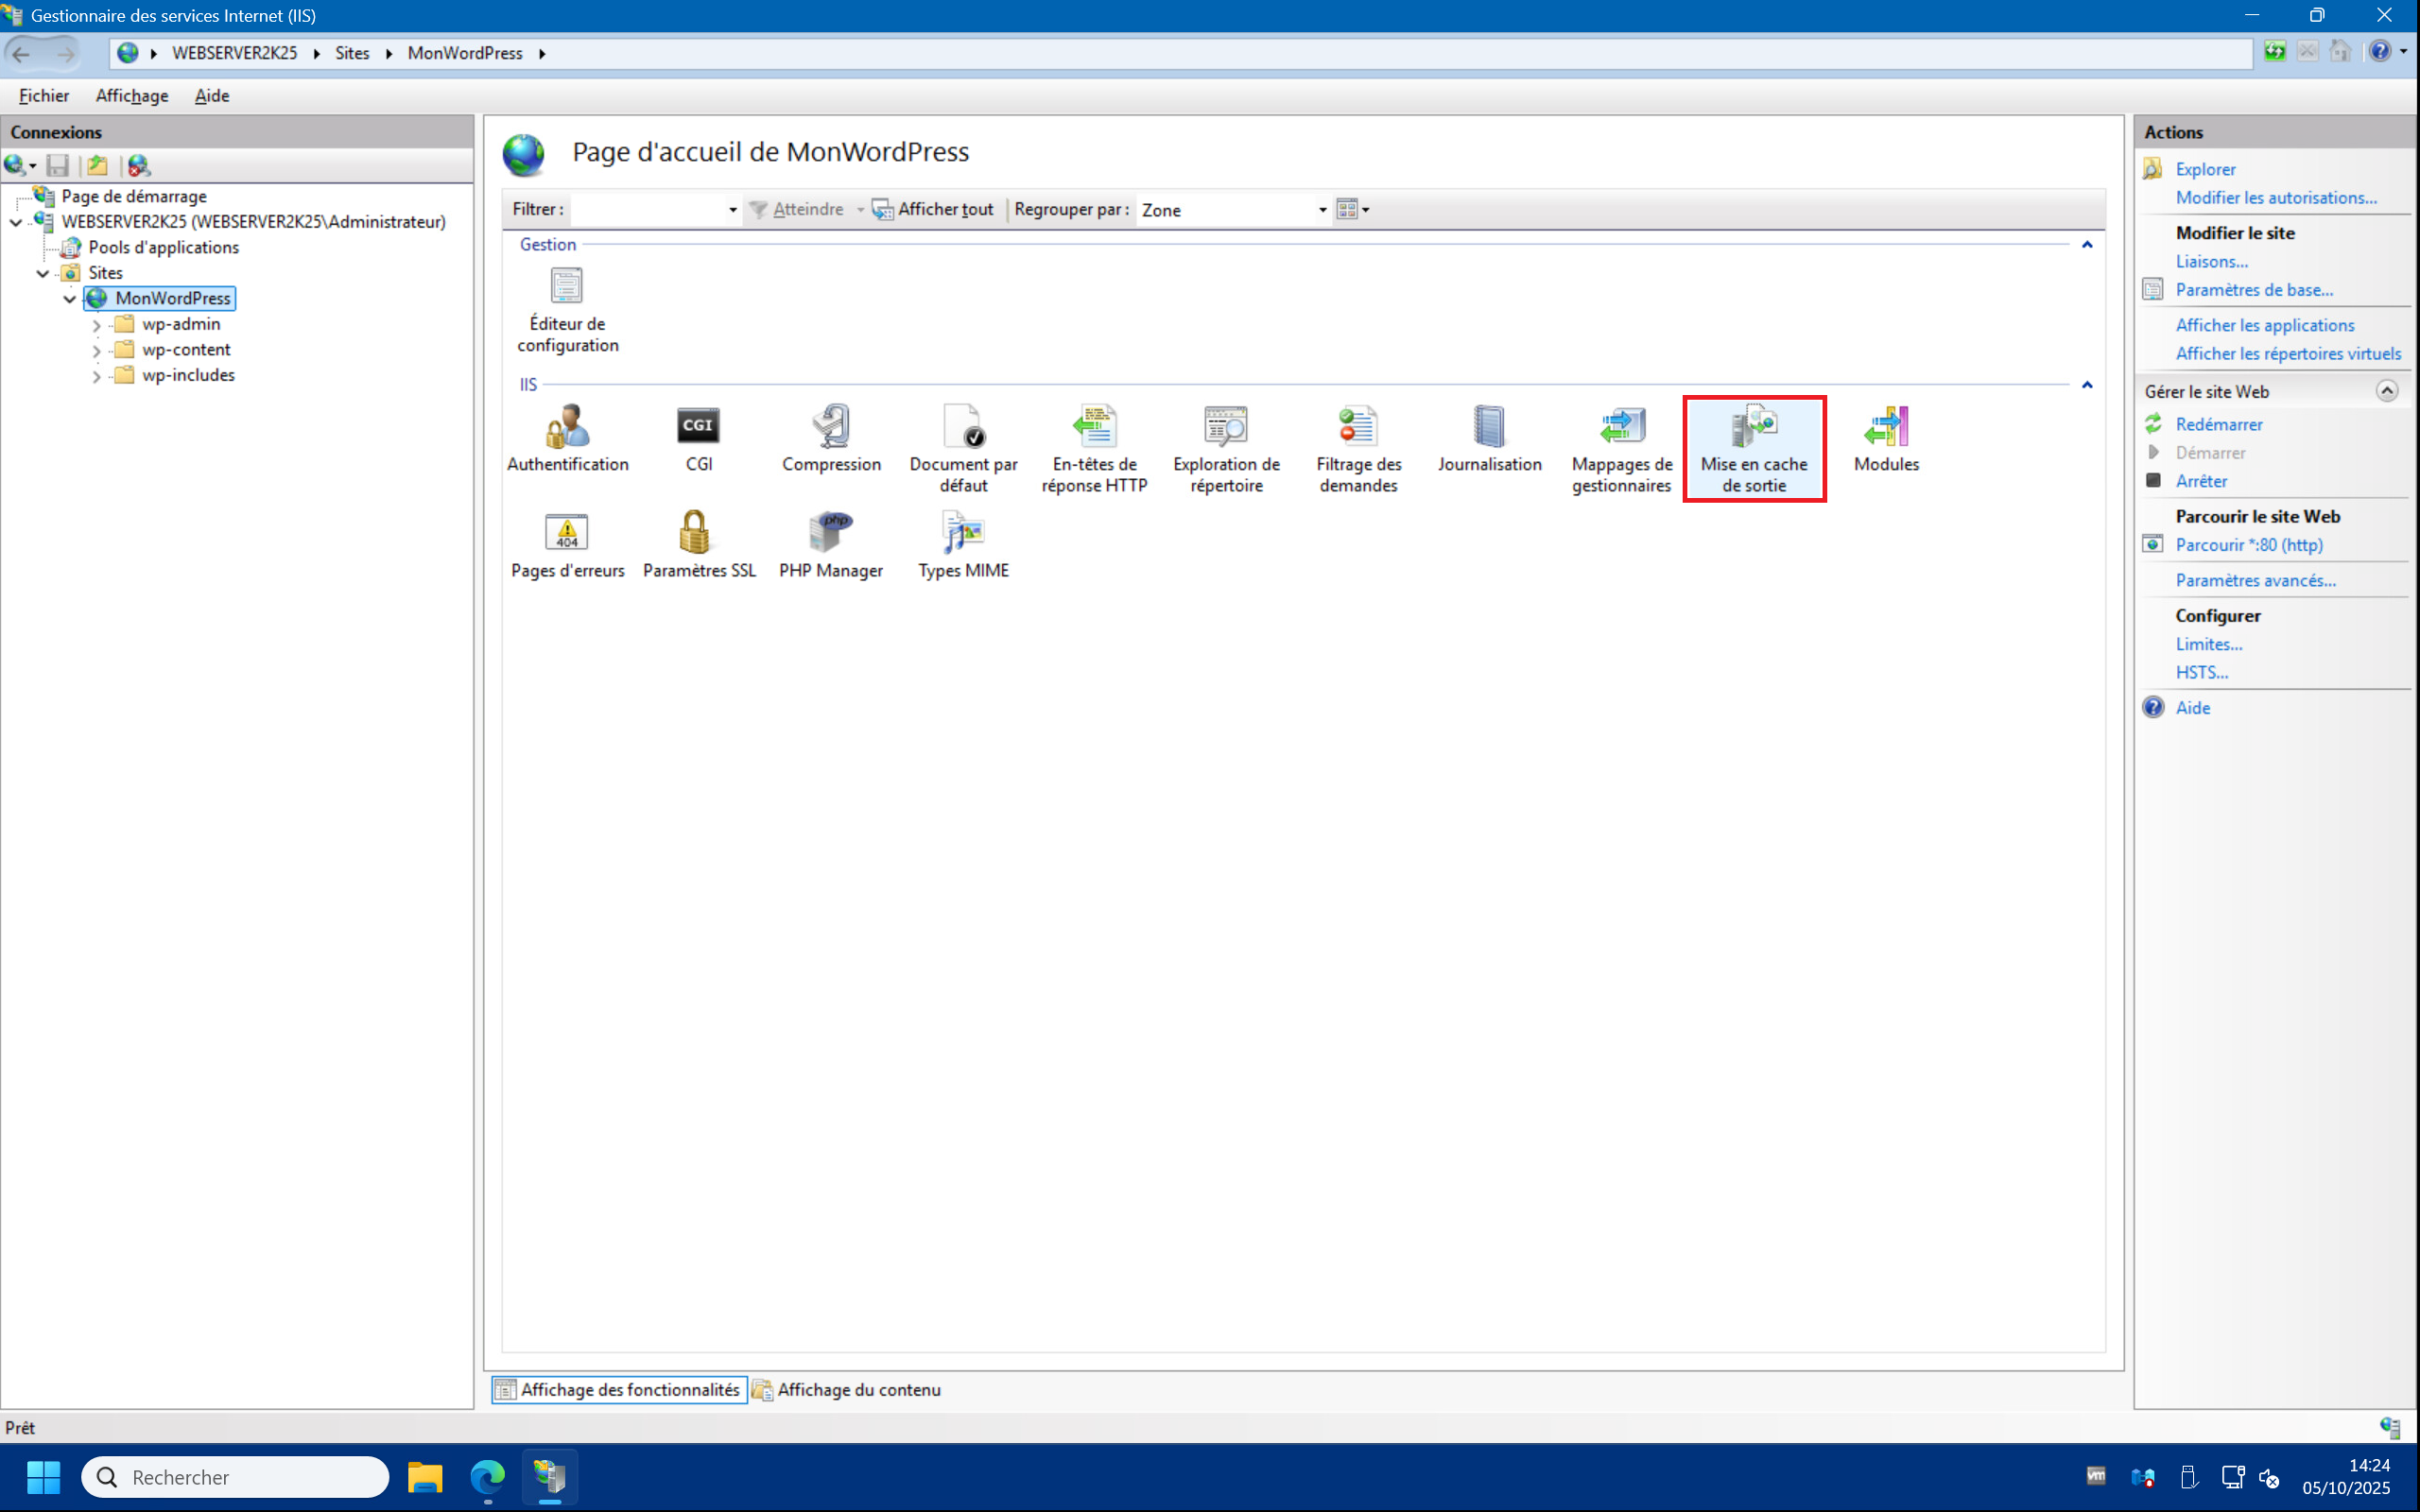
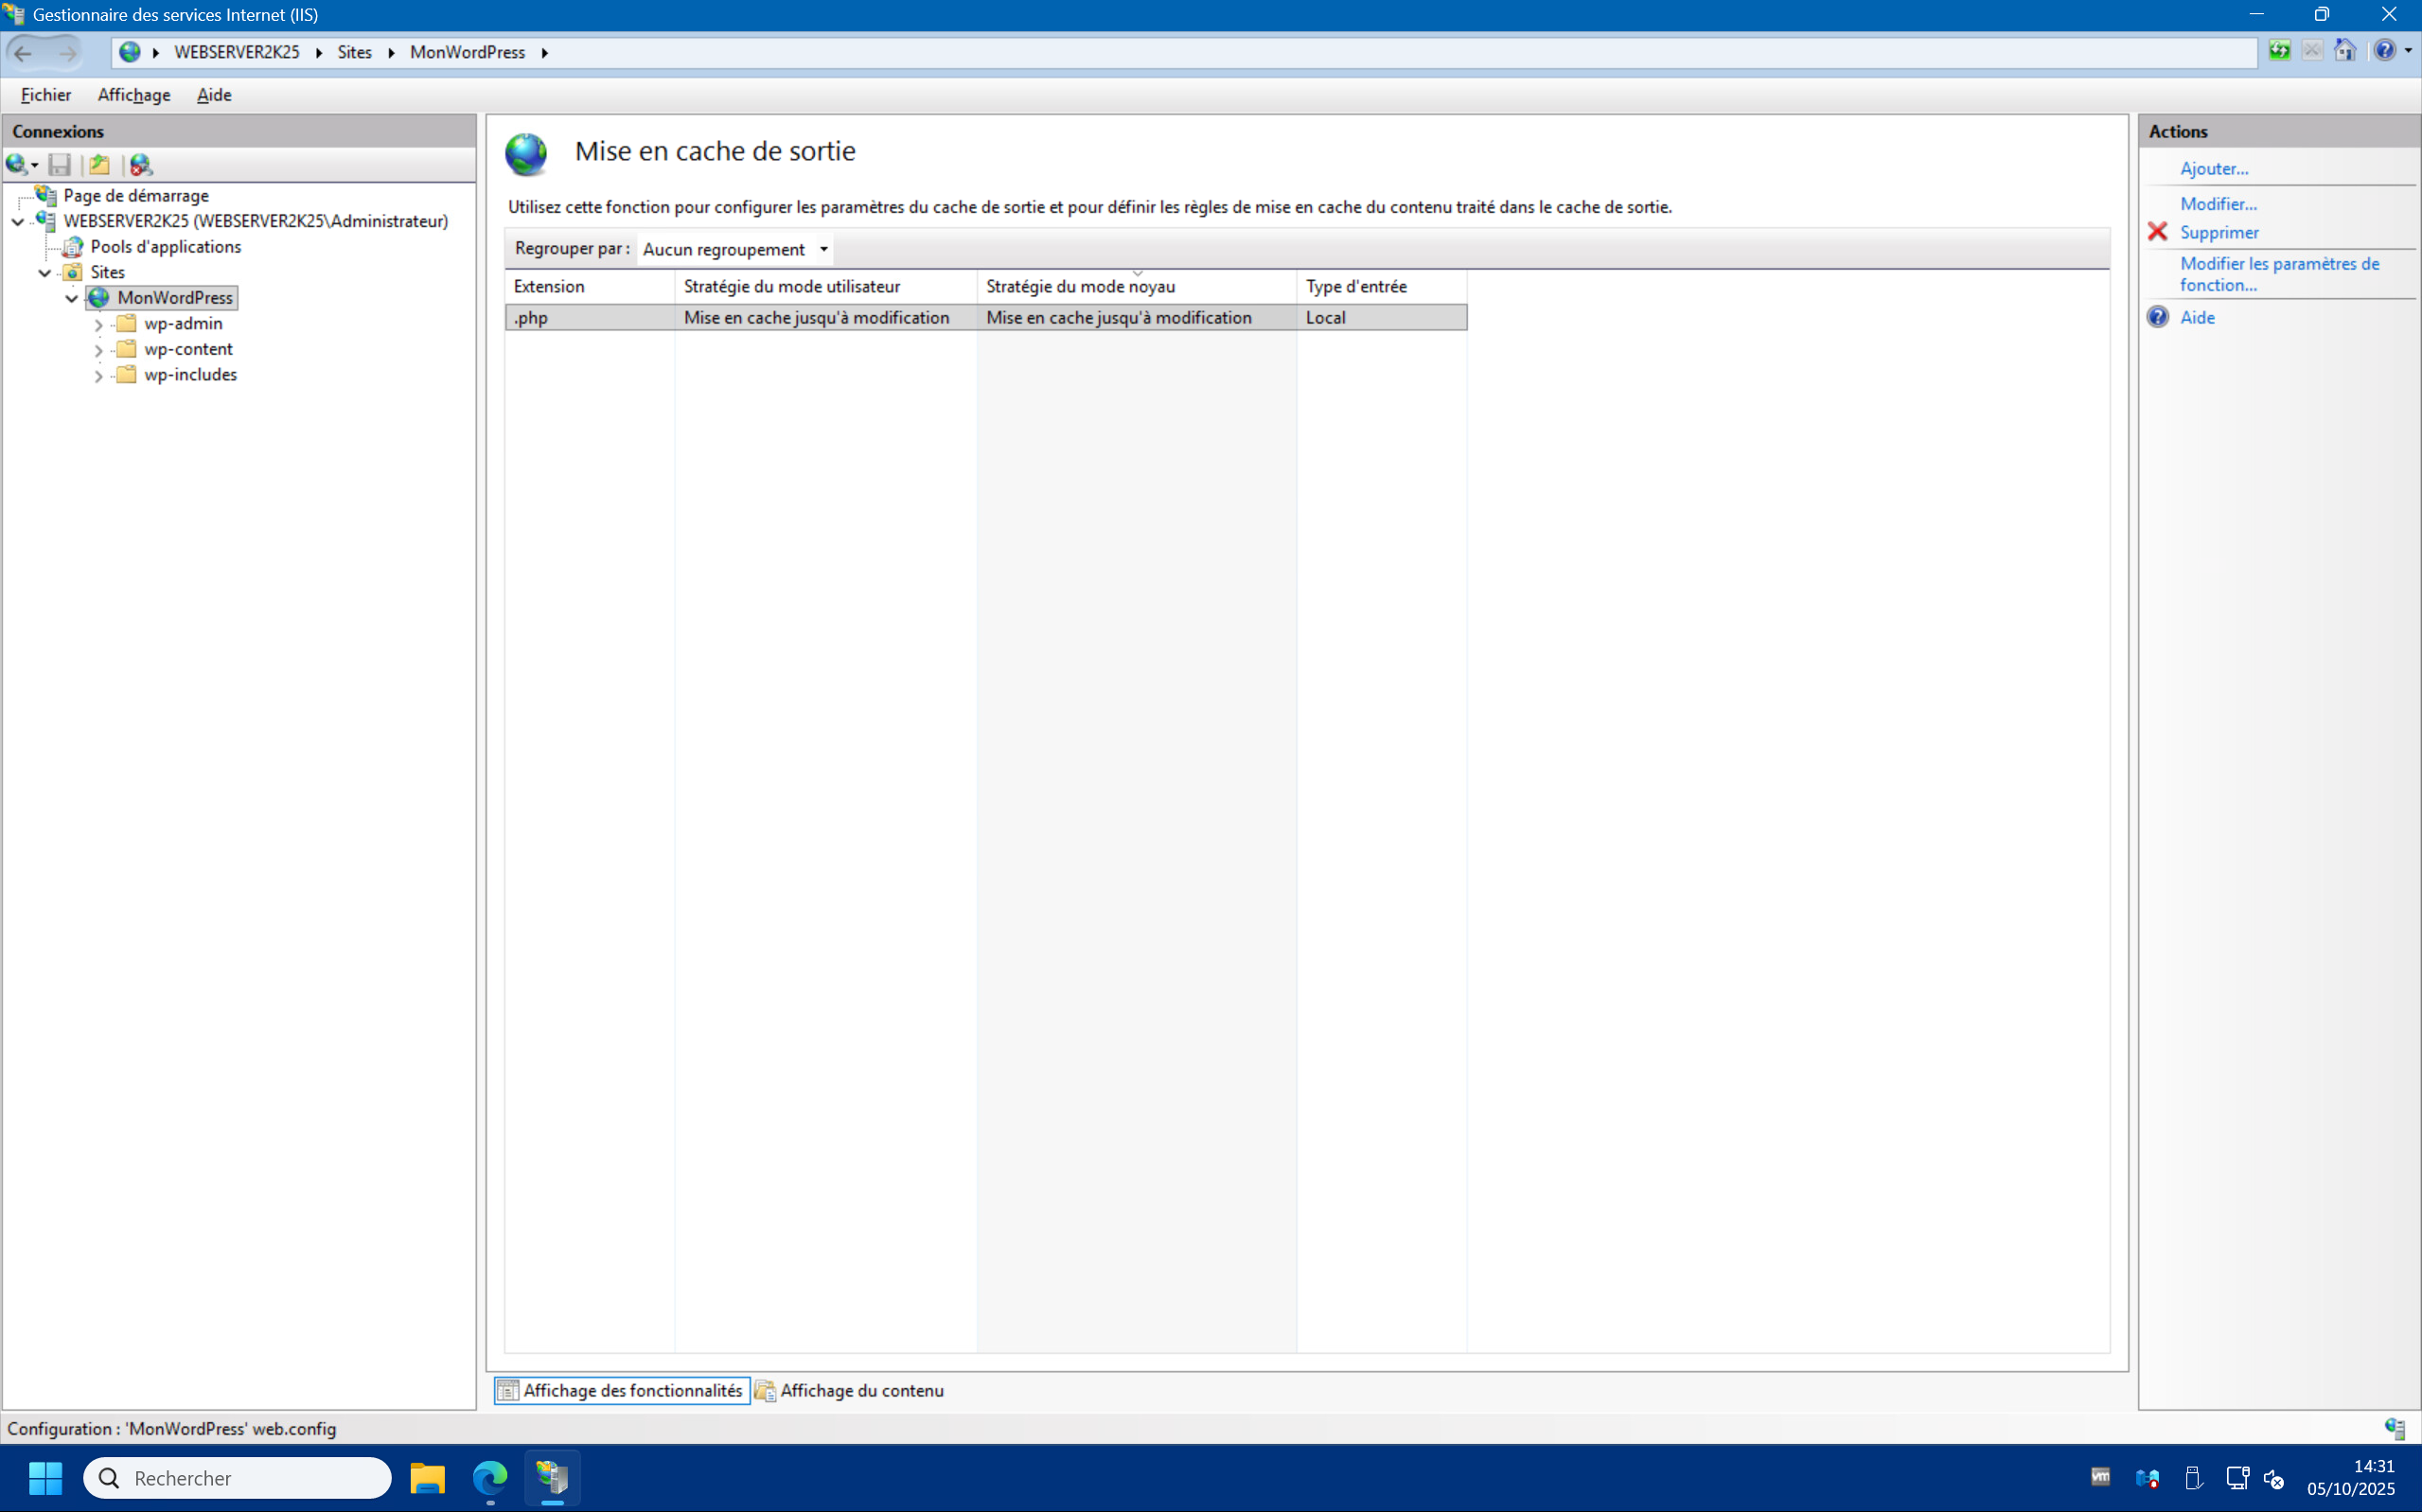
Configure output caching :
1 – On your site’s home page in the IIS Management Console, double-click “Output Caching” and then “Add…” in the top right corner :
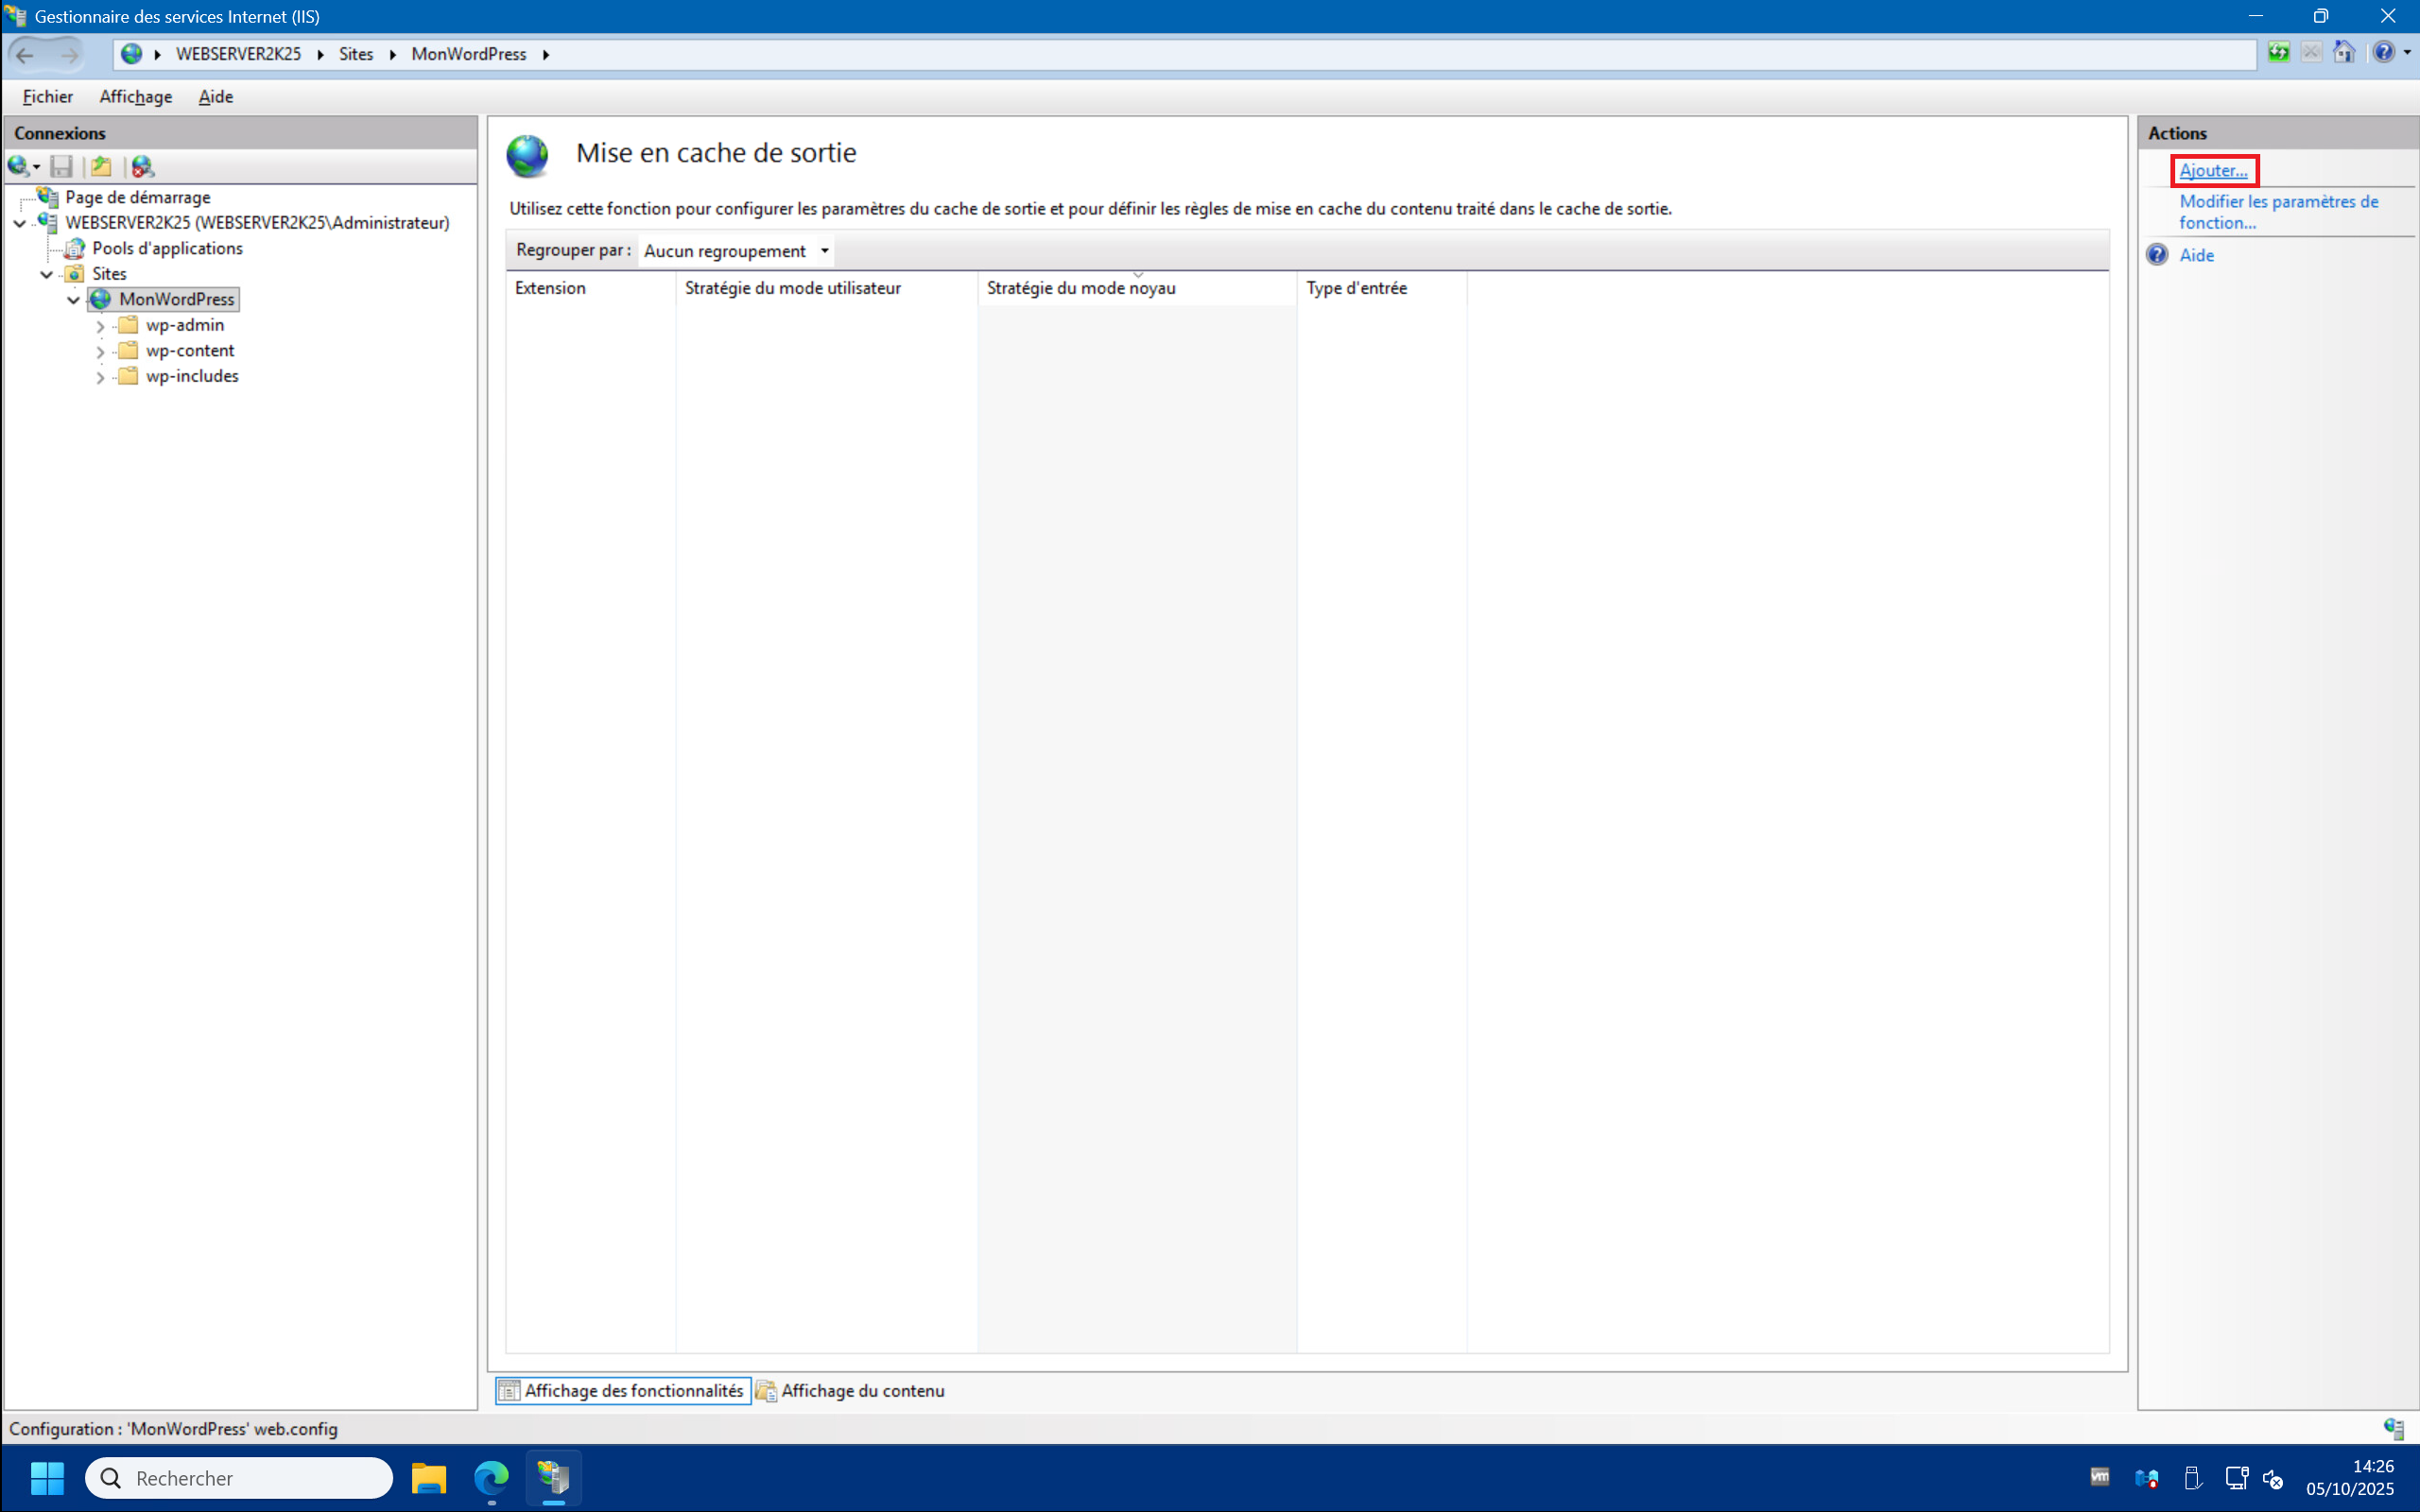
2 – In the “Add Cache Rule” window, enter “.php” in the “File name extension:” field, then check the “User-mode caching” and “Kernel-mode caching” boxes, then click “Advanced…” , check the ““Query string variable(s):” box and enter the “*” symbol in the field and finish by clicking “OK” :


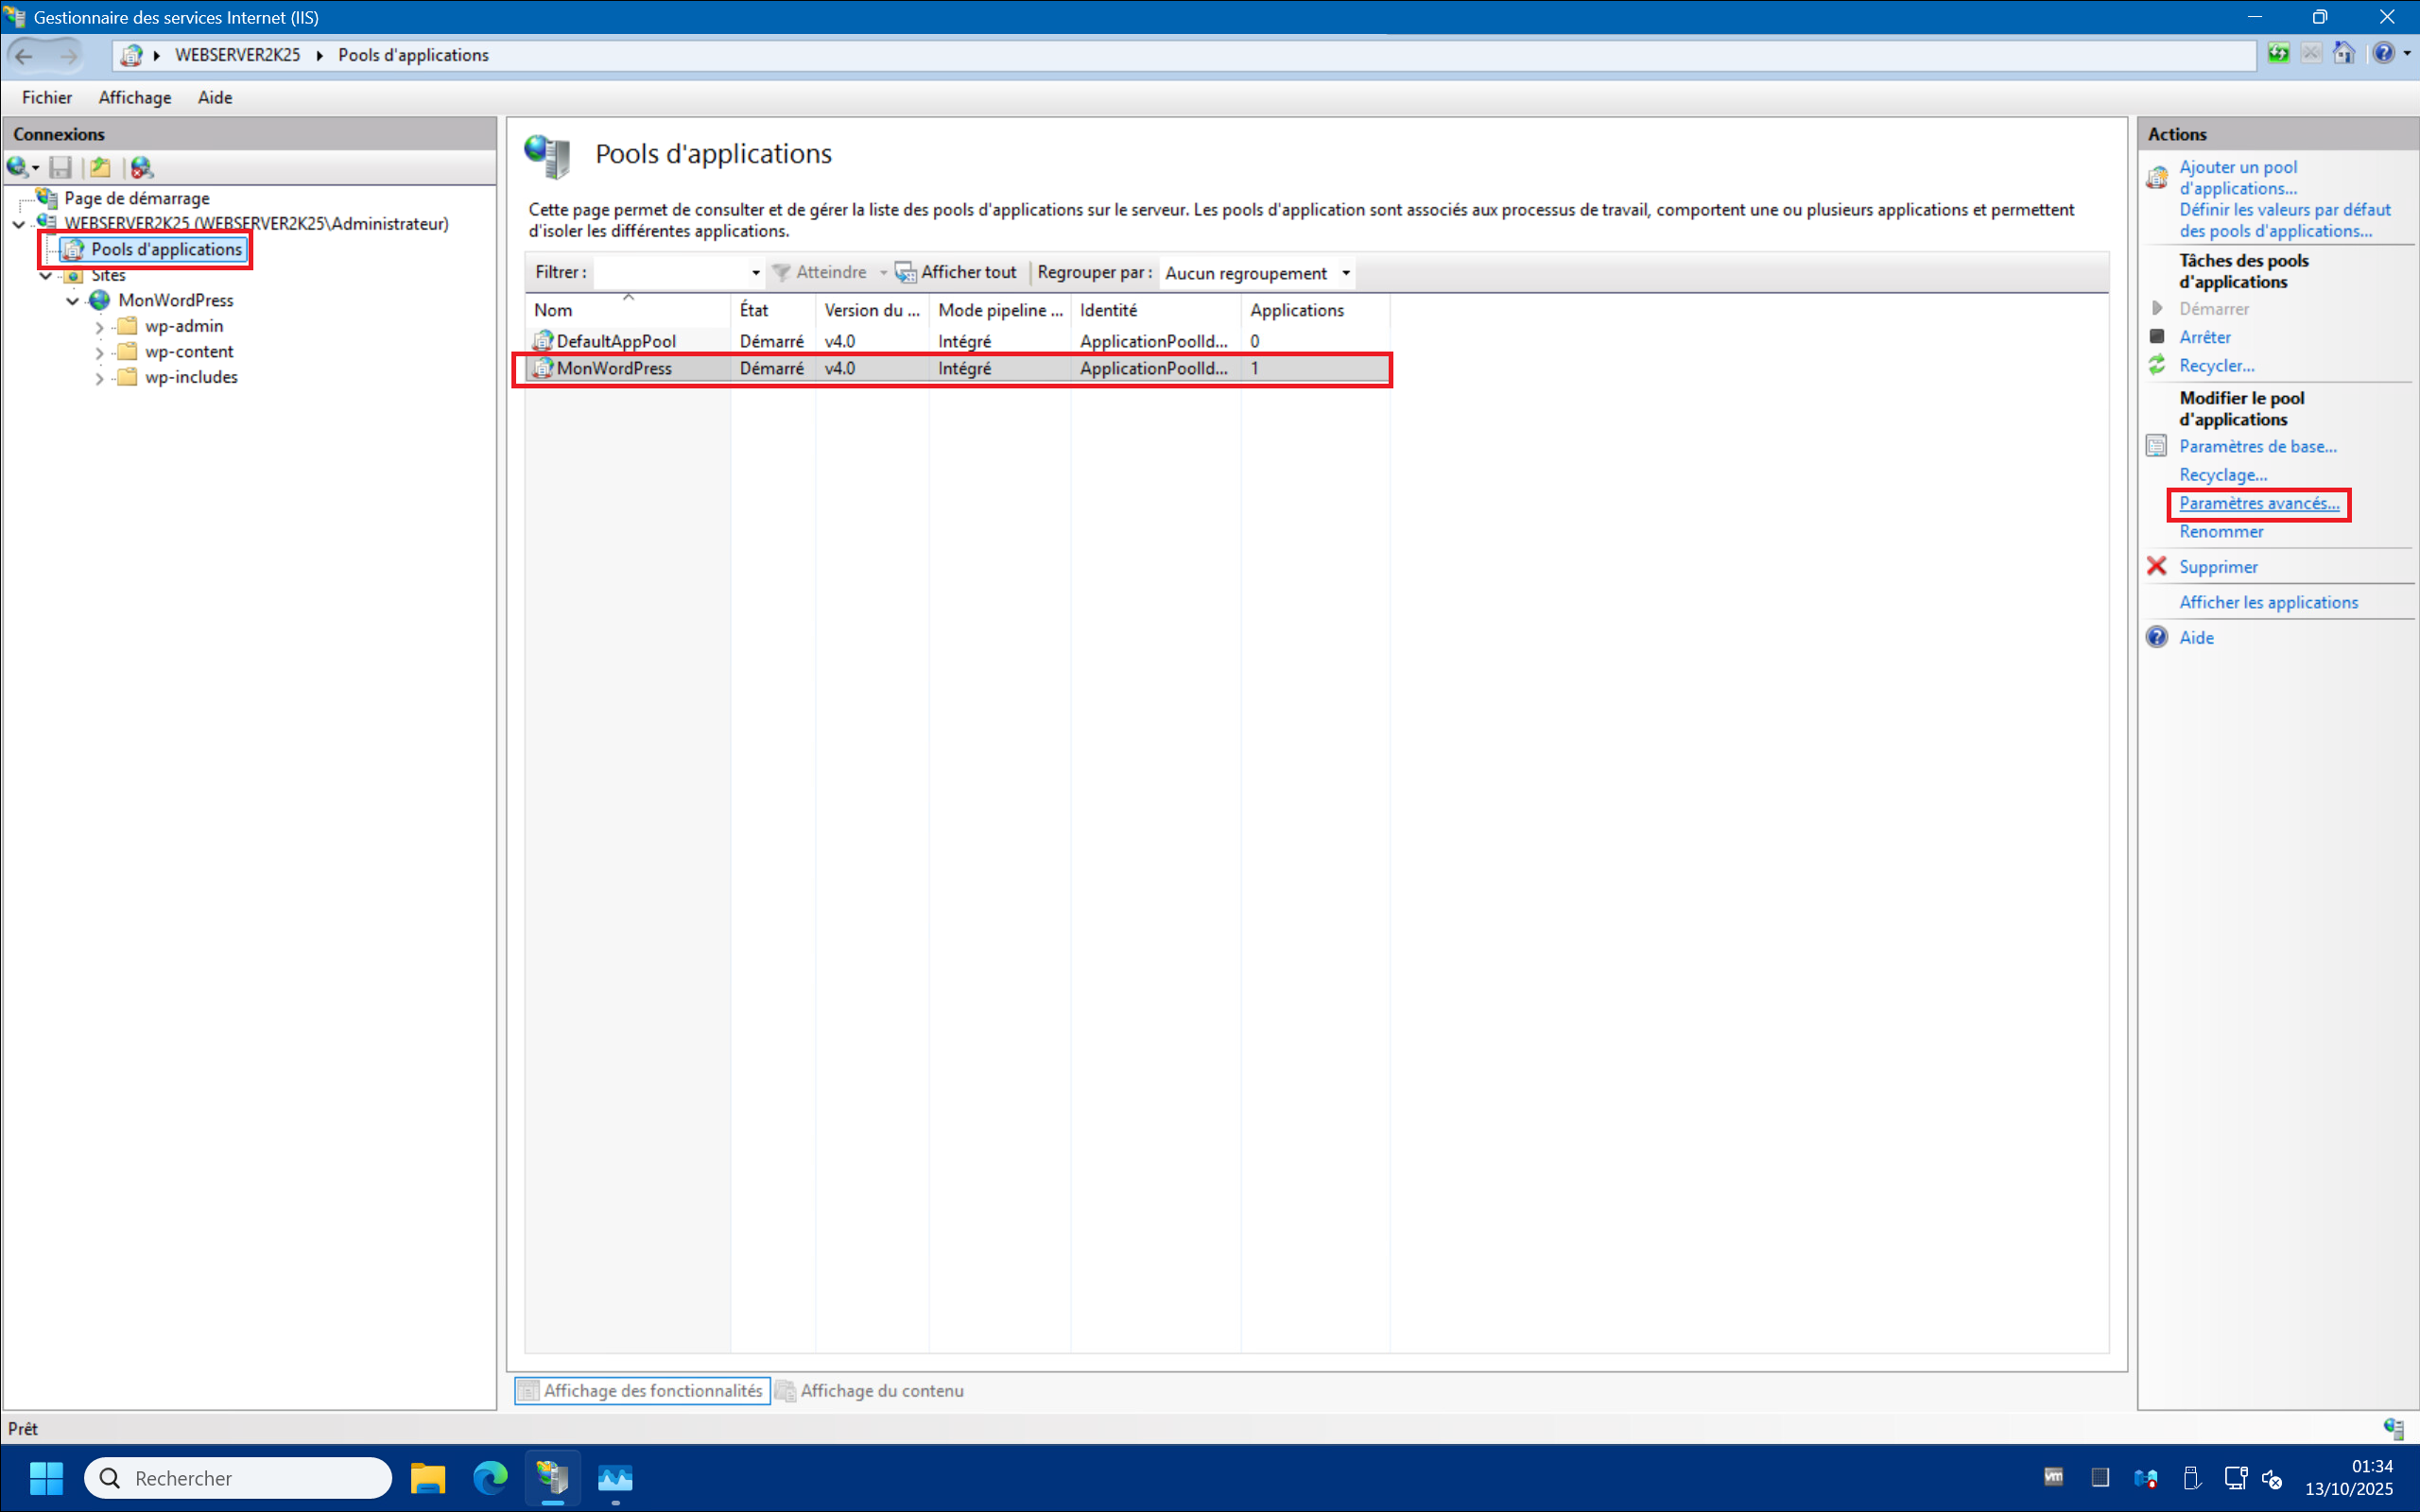
Configure the application pool :
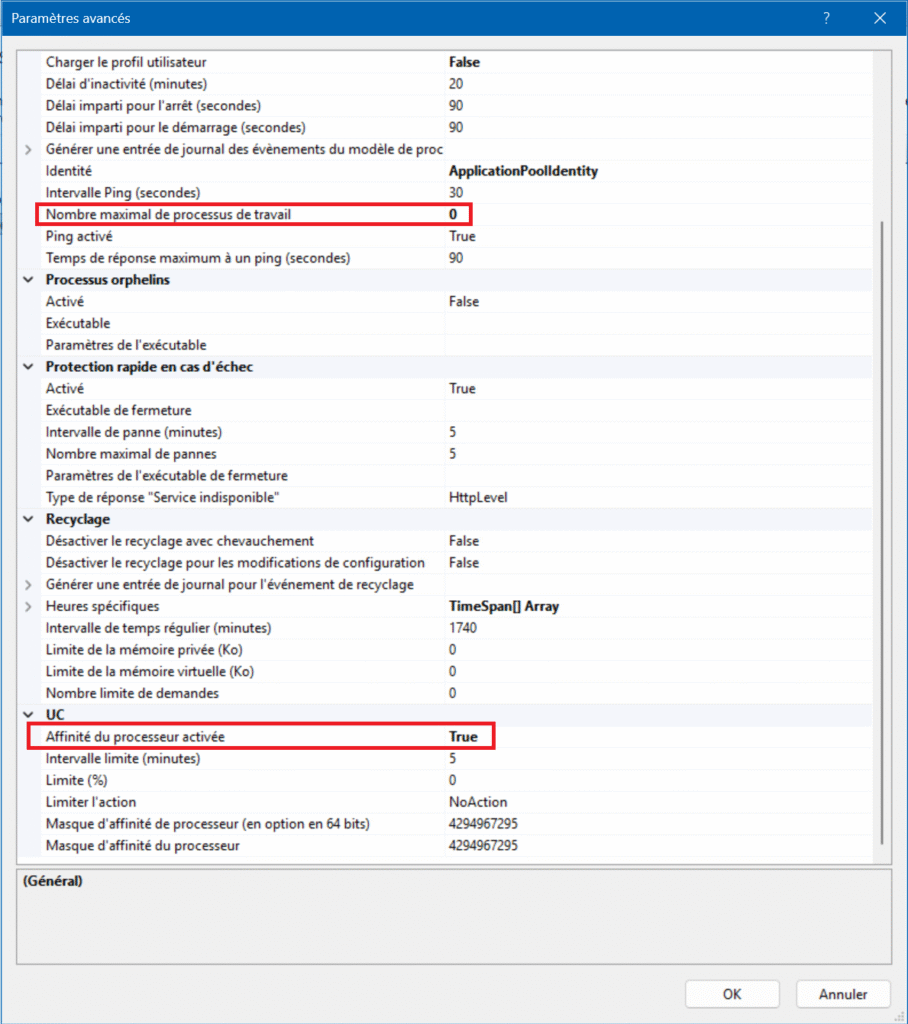
1 – In the “Connections” menu on the left, click on “Application Pools” , then select your site’s pool. Here, “MonWordPress” for example, and finally on “Advanced Settings…” in the “Actions” menu on the right :
2 – Change the value of “Maximum Worker Processes” from “1” to “0” . Then change the parameter “Processor Affinity Enabled” from “False” to “True” and finally click “OK” :
Enable the https protocol :
A – IIS https configuration :
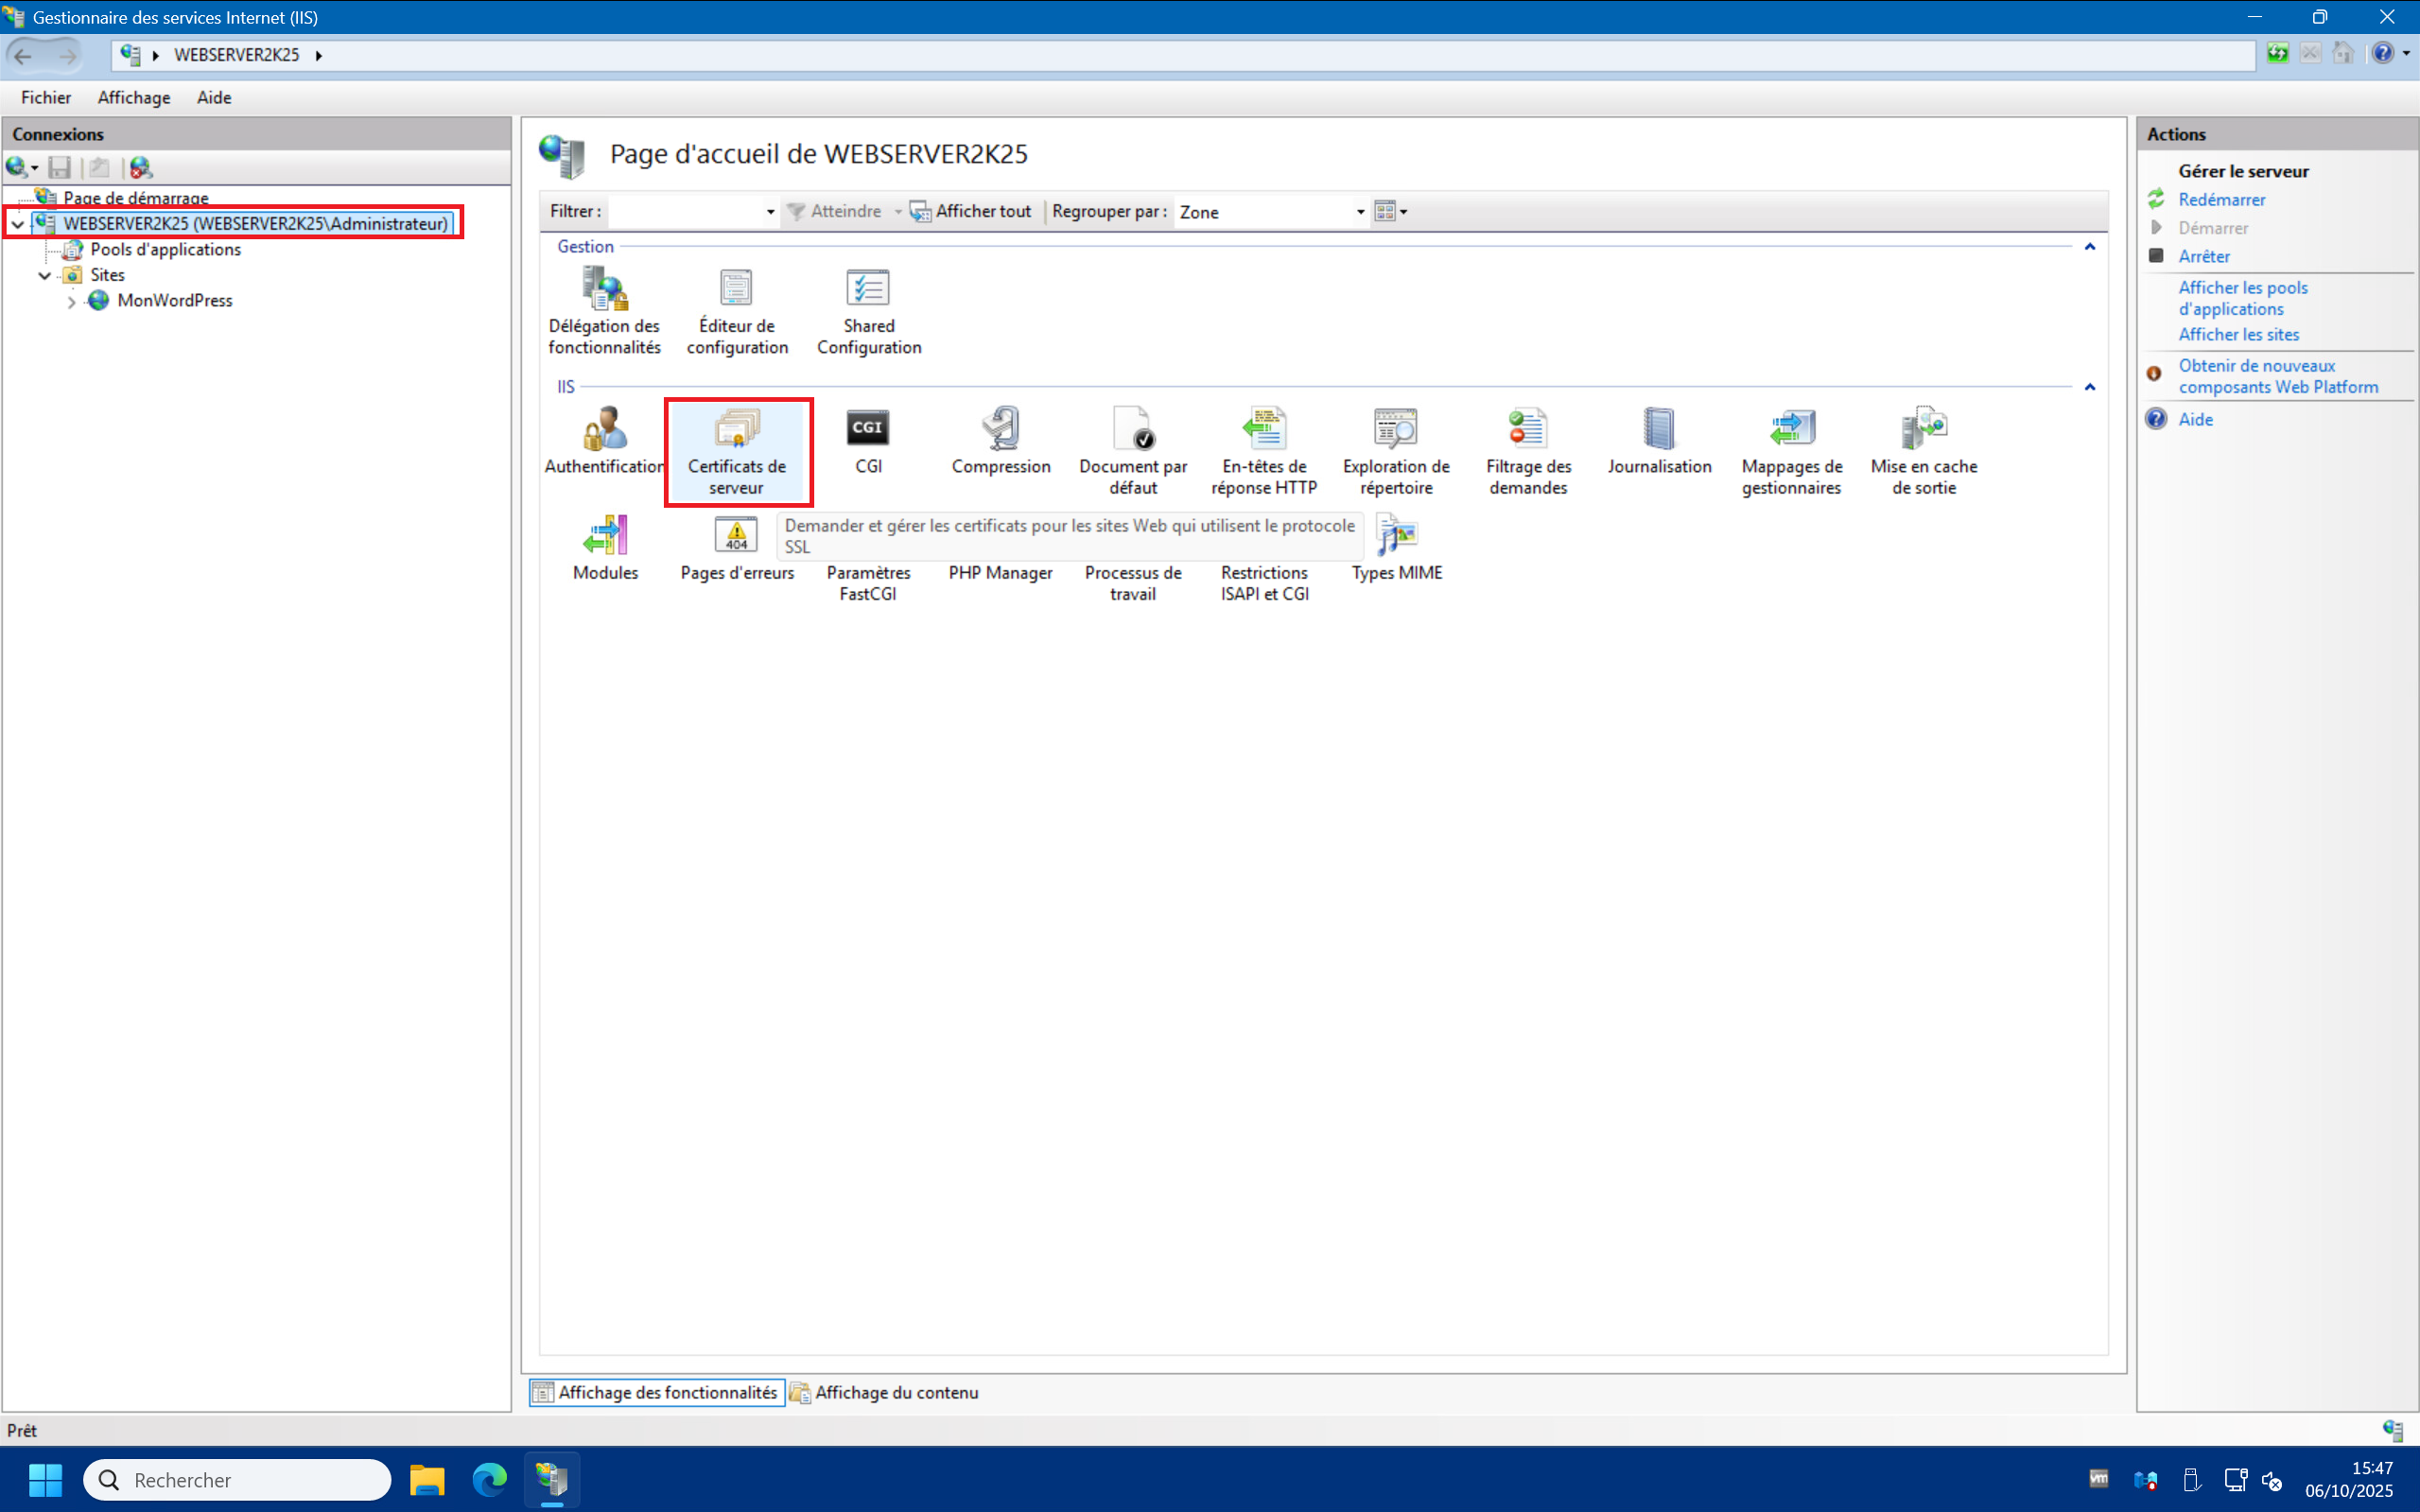
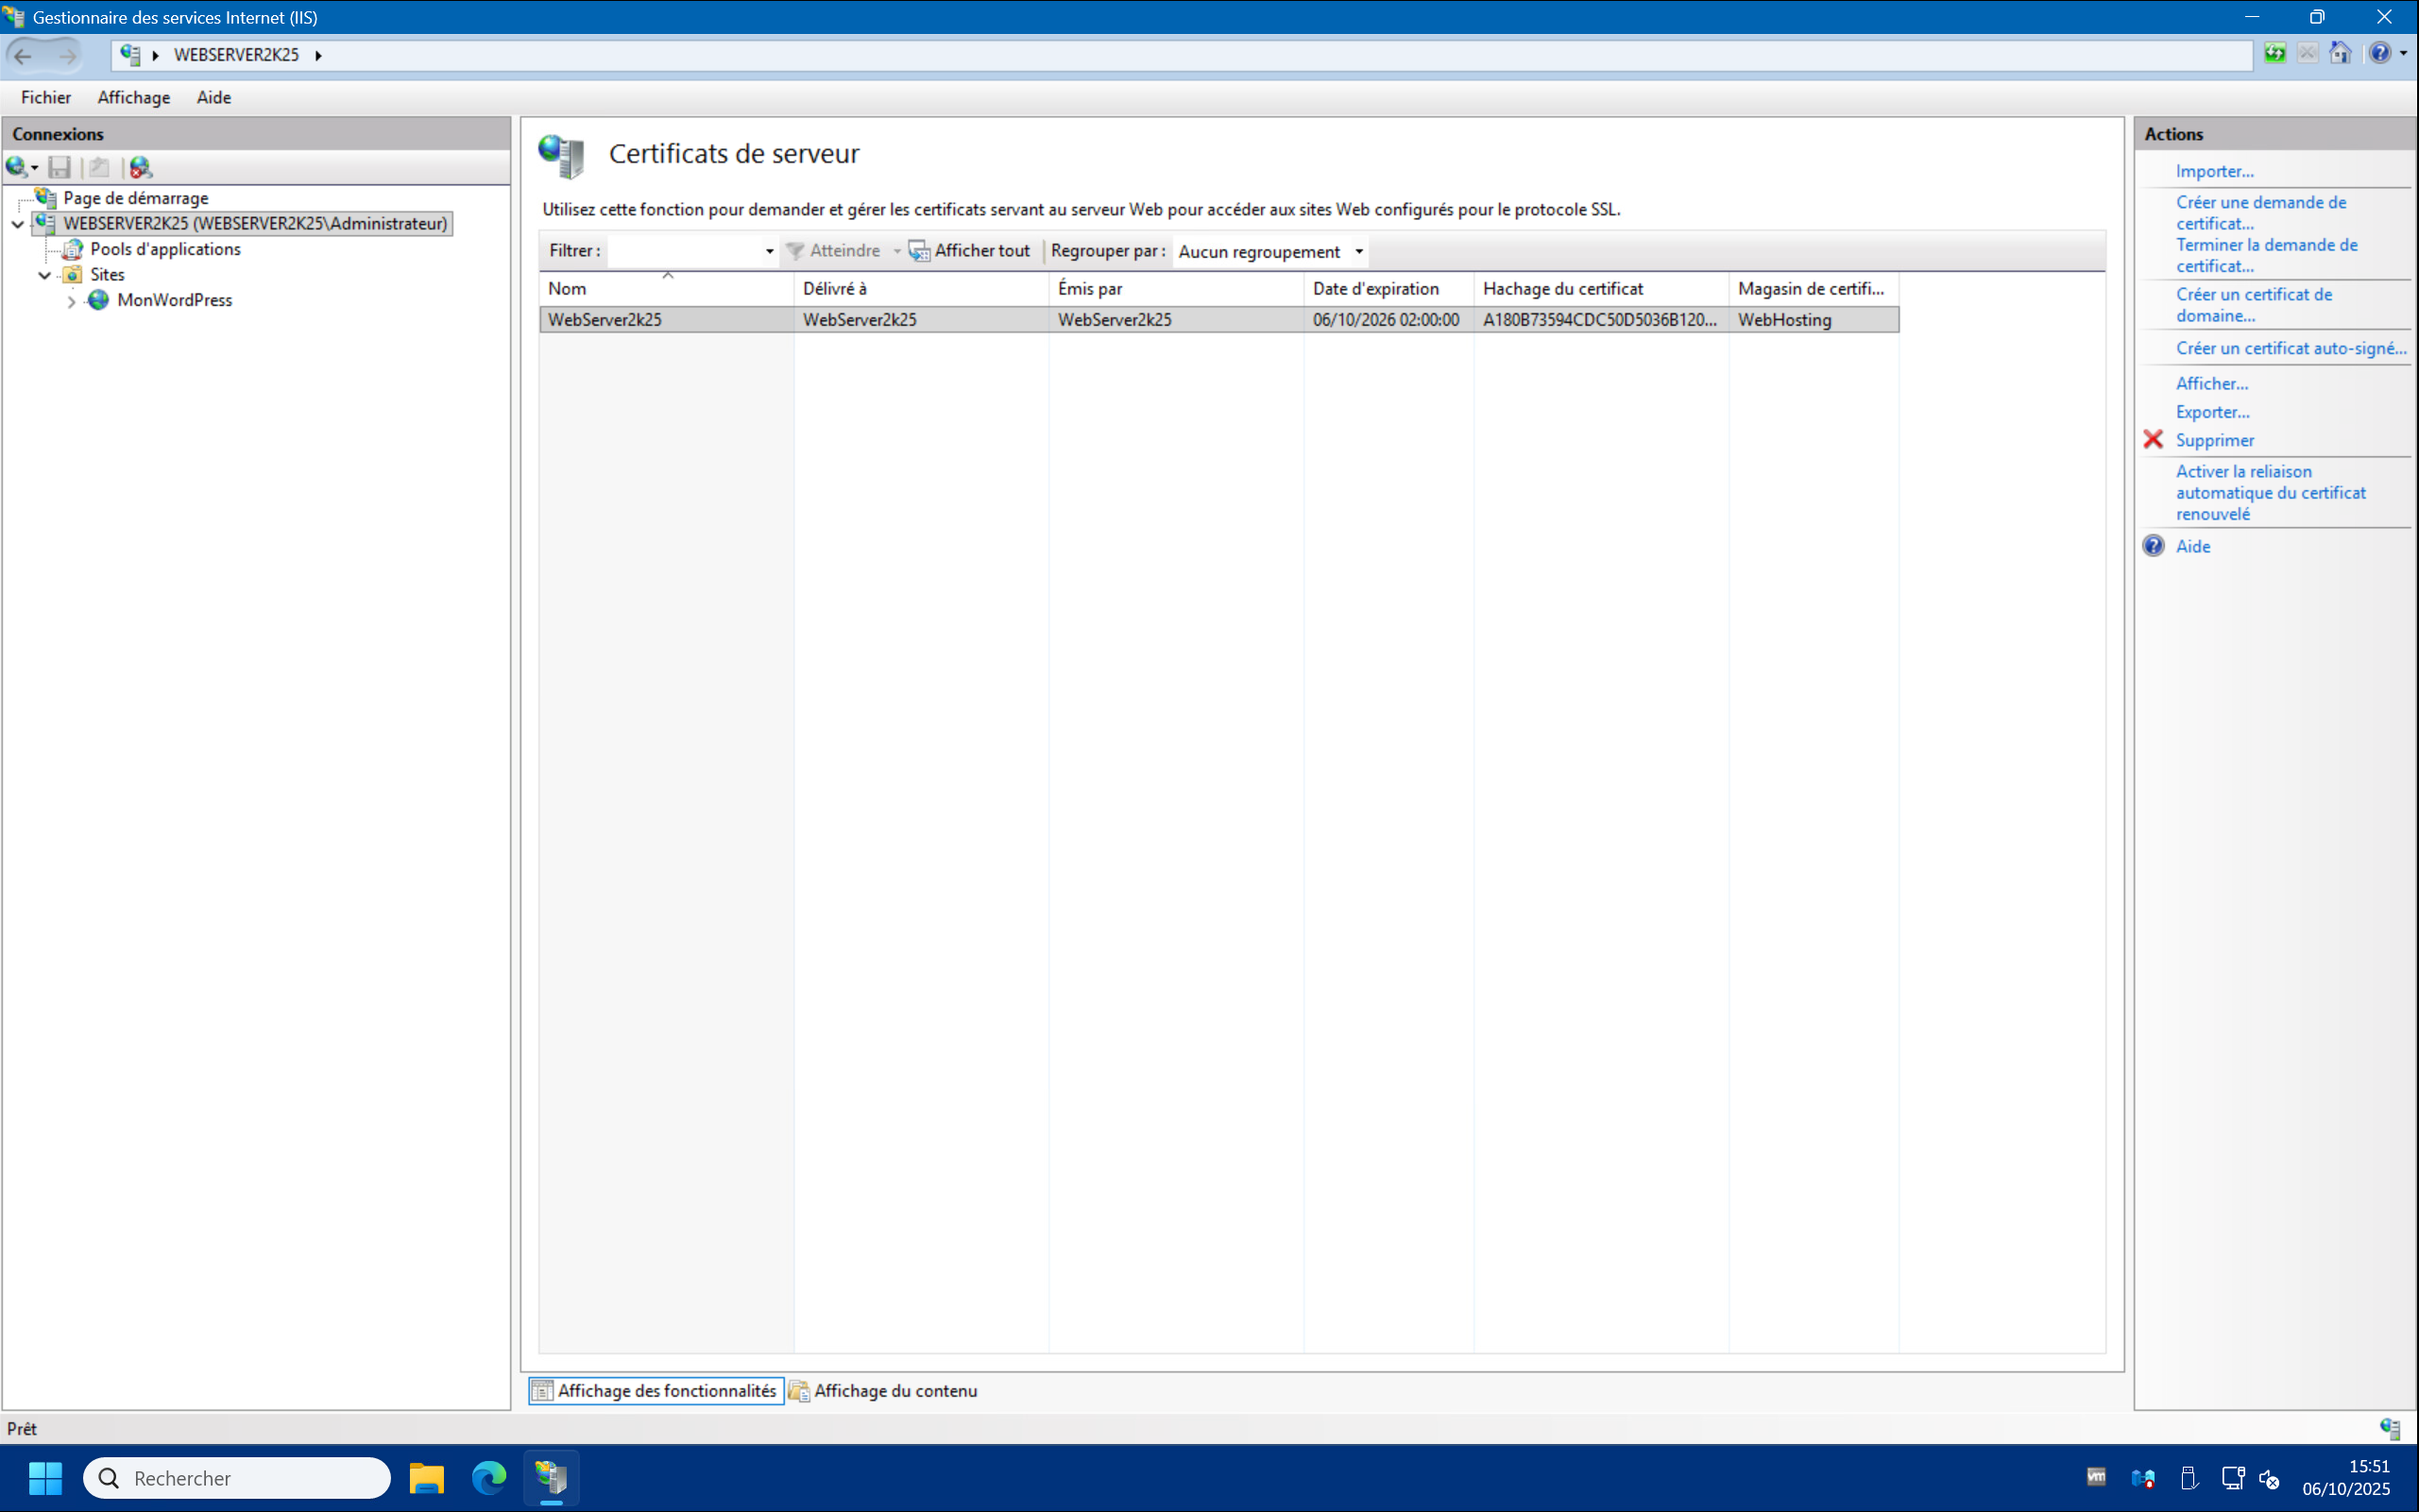
1 – First, we will create a self-signed certificate to secure our https protocol. To do this, in the IIS management console, click on the server in the “Connections” list at the top left, then double-click on “Server Certificates” and then on “Create Self-Signed Certificate…” at the top right :
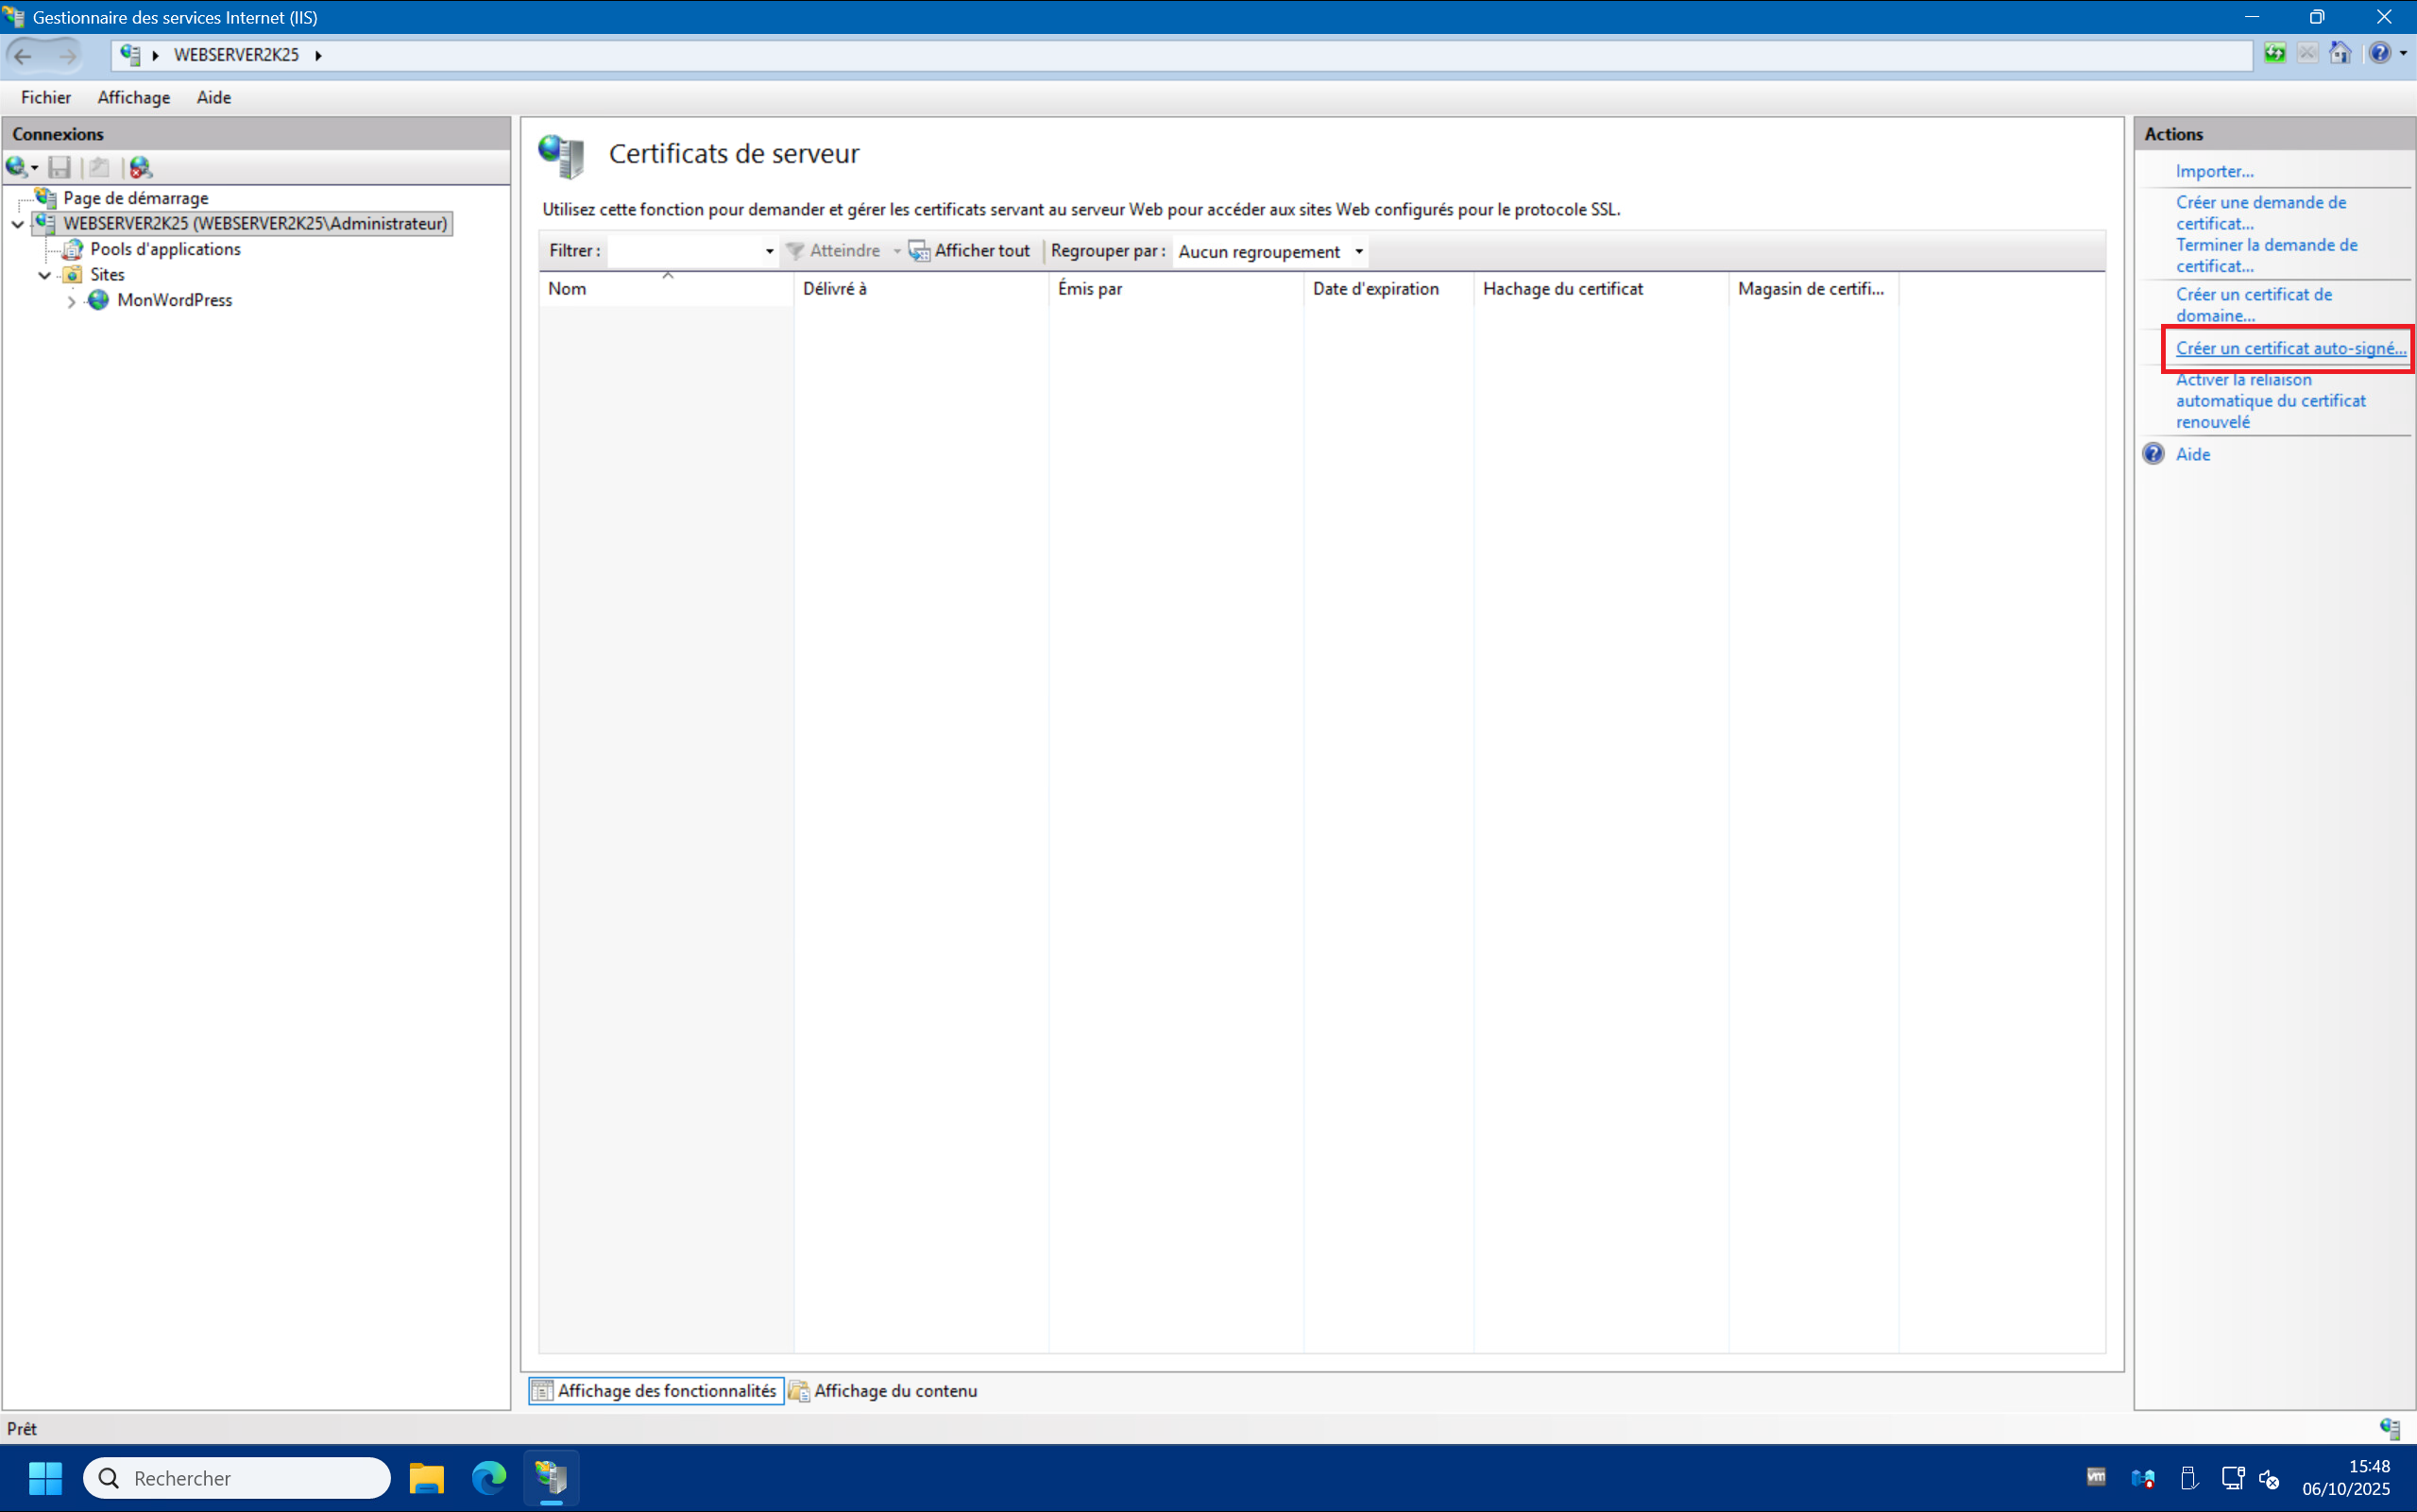
2 – Enter a name of your choice (preferably your server’s hostname) in the “Specify a friendly name for the certificate:” field, then select “Web Hosting” from the “Select a certificate store for the new certificate:” drop-down menu and finally click “OK” :

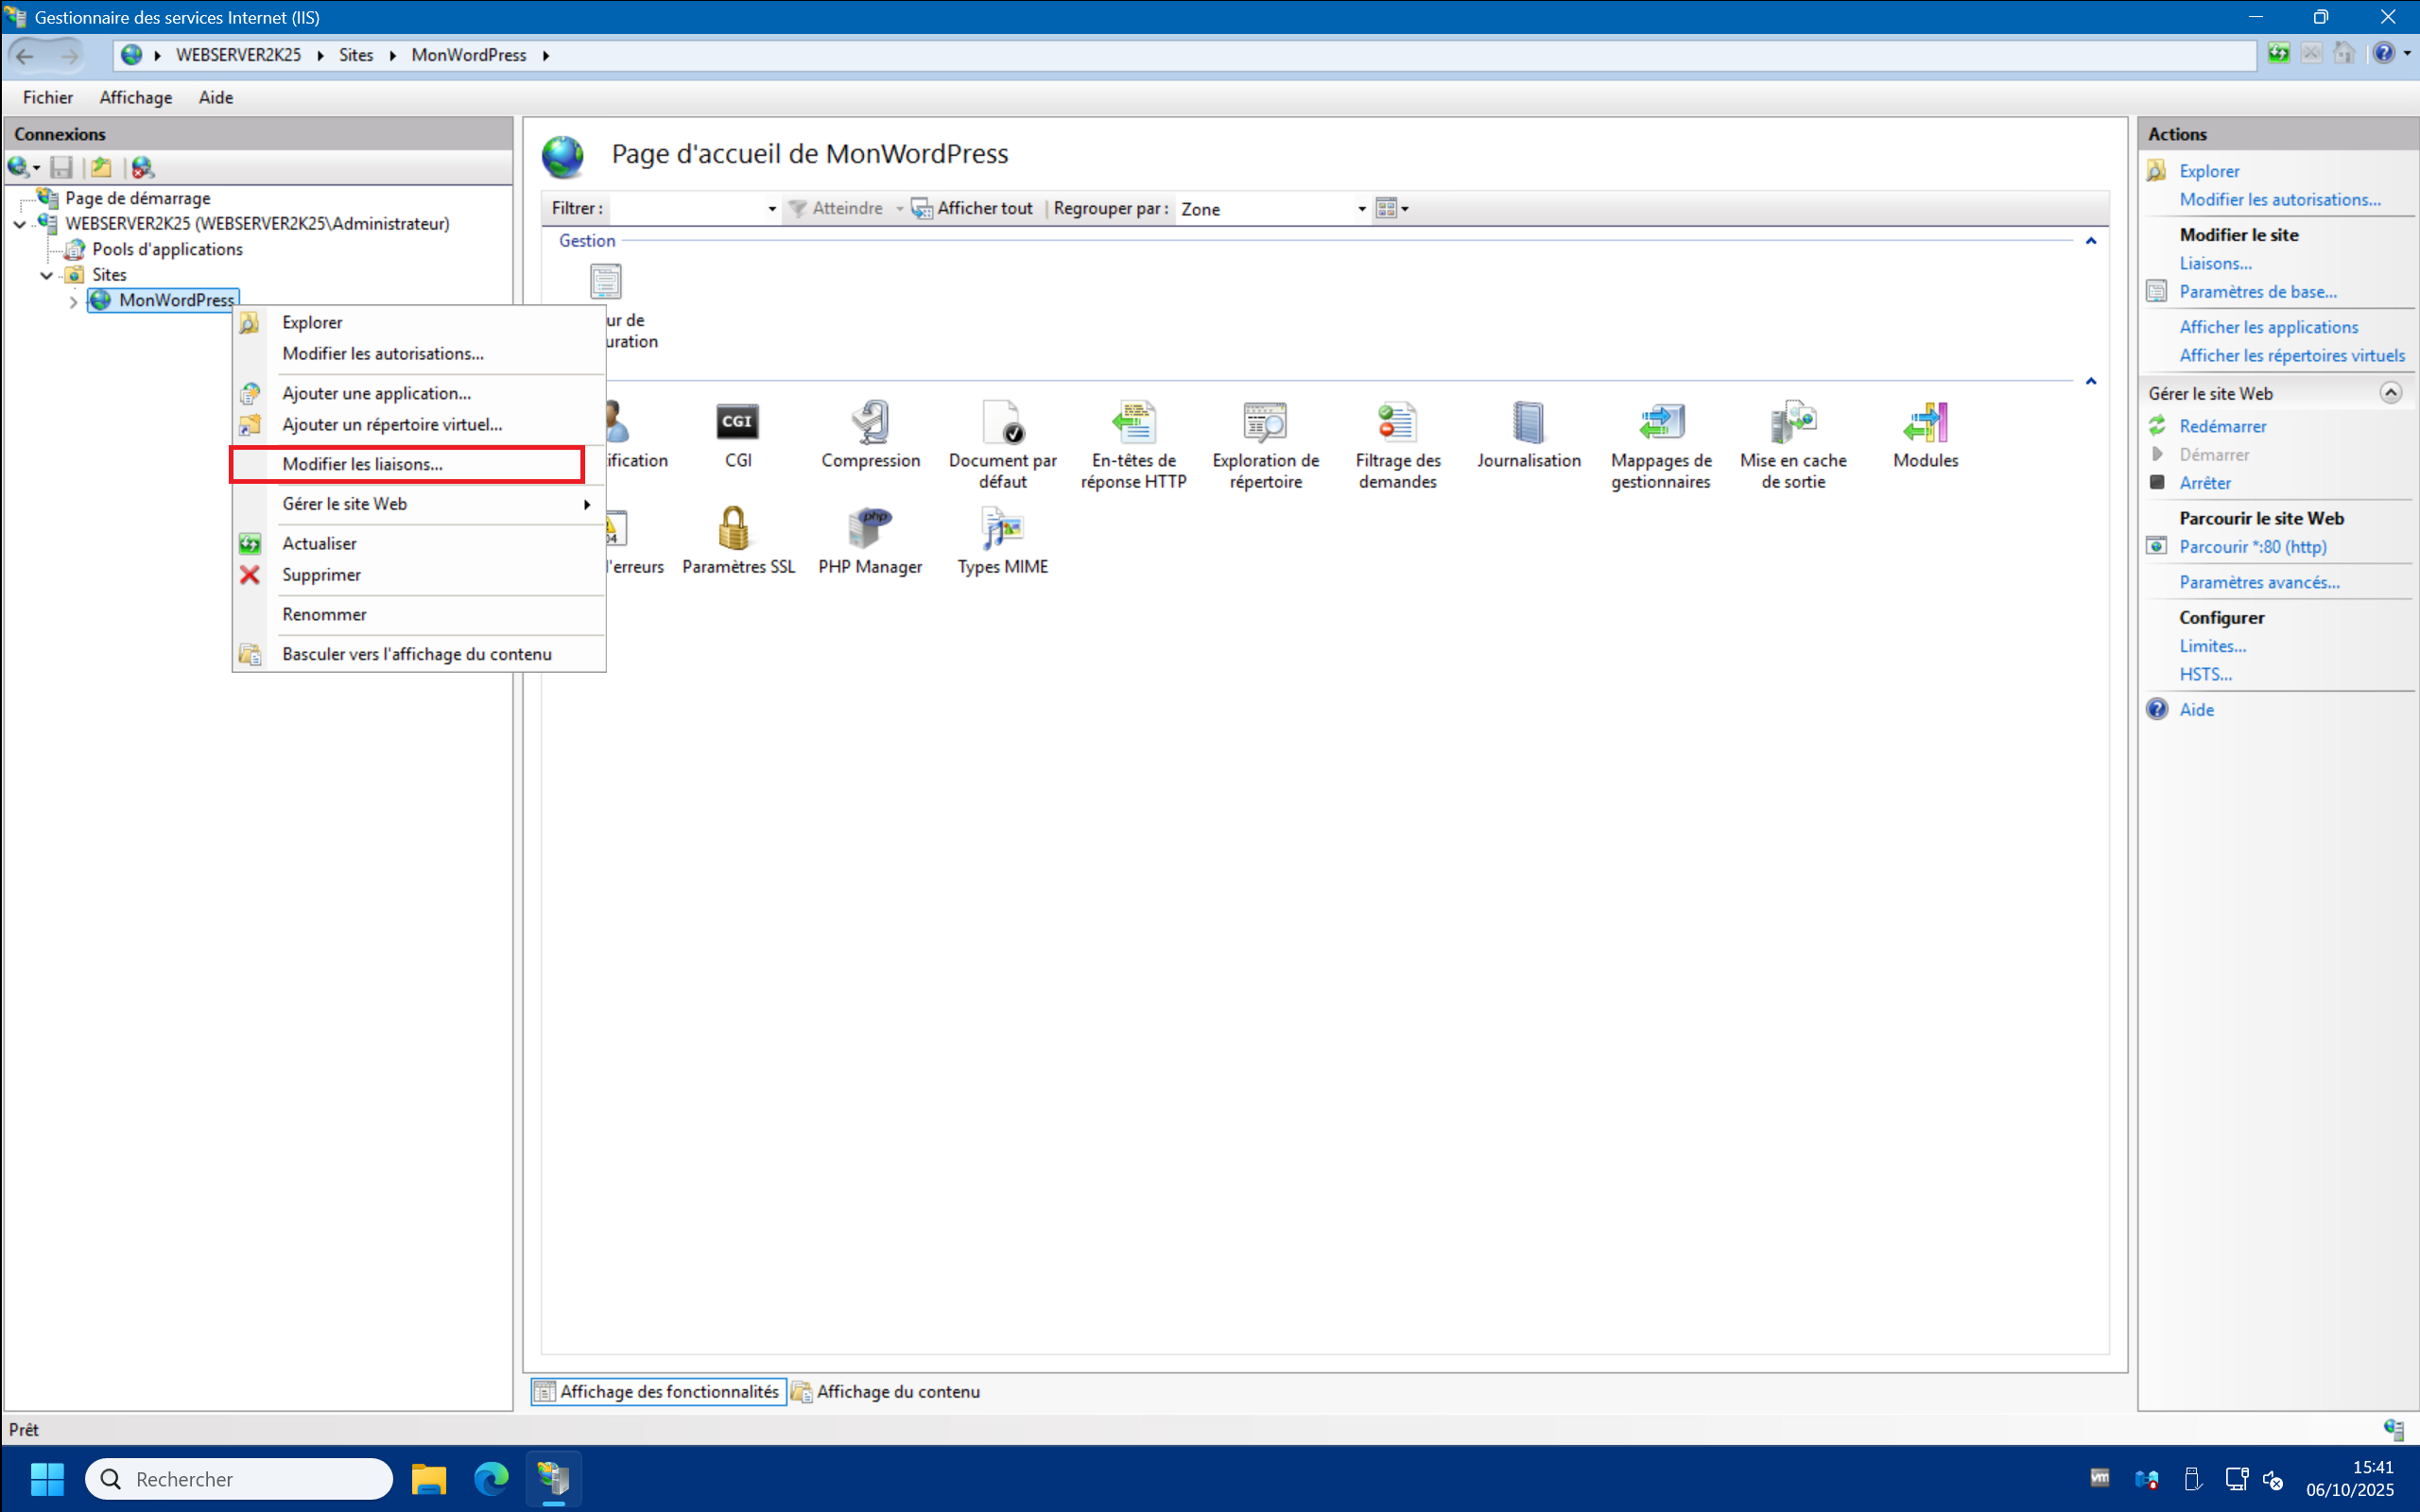
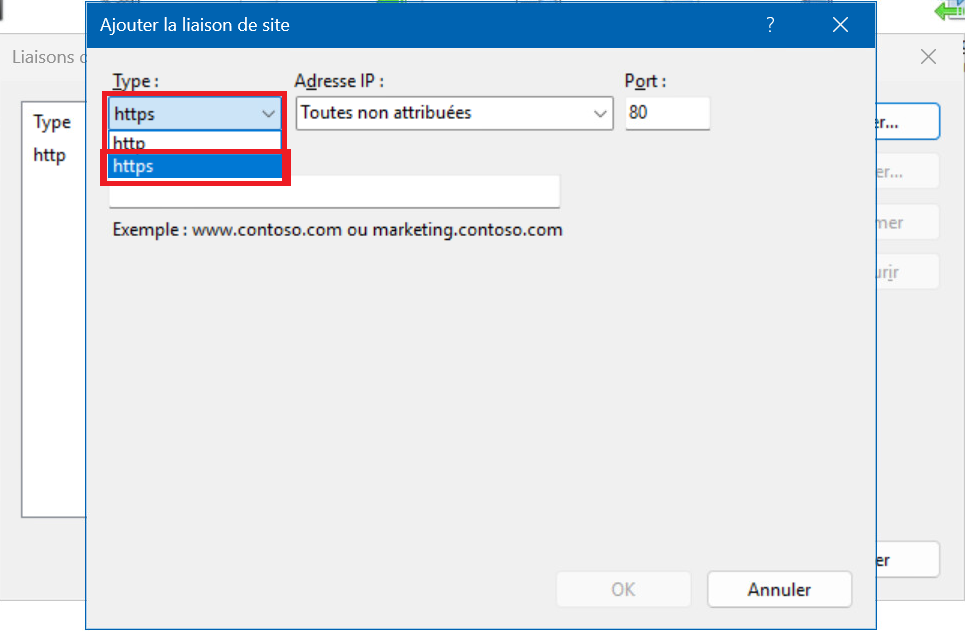
3 – We can now enable the site’s https binding. To do this, right-click on your site and click “Edit Bindings…” :
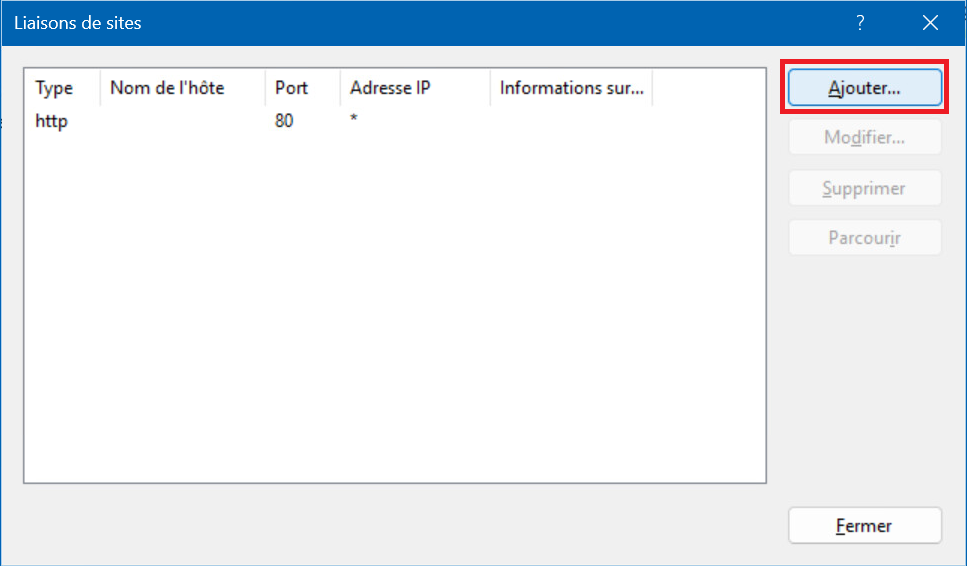
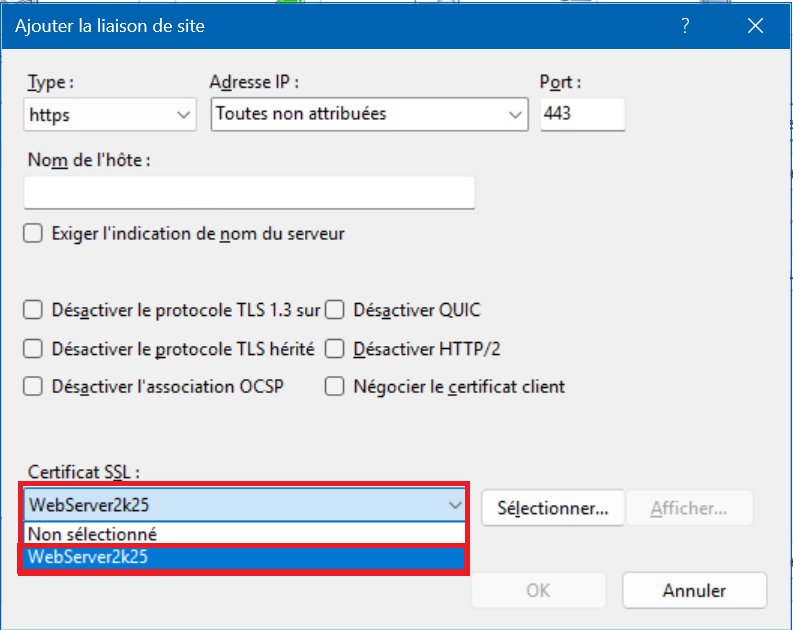
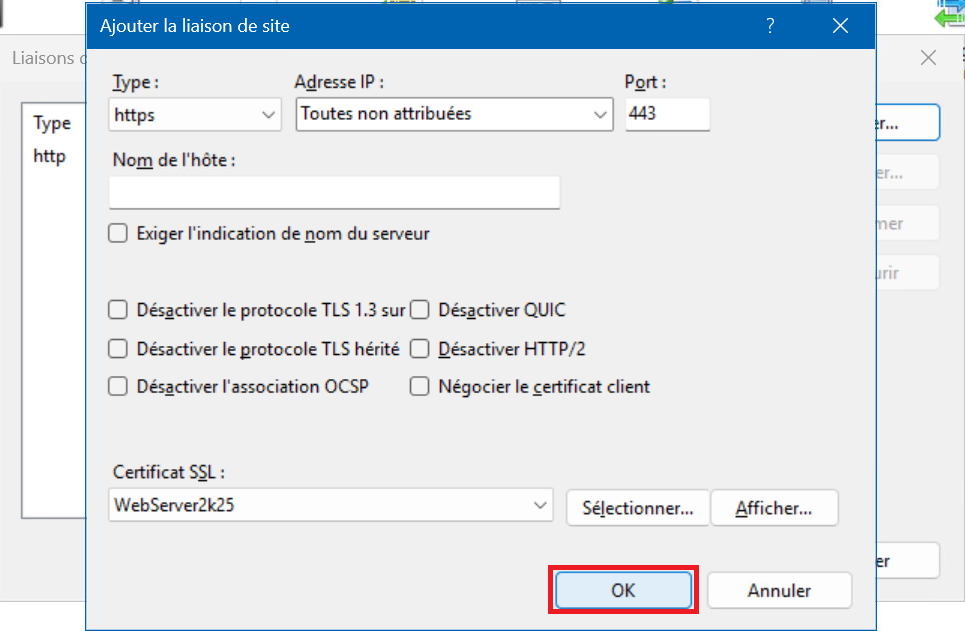
4 – In the “Site Bindings” window, click on “Add…” , then in the “Type :” drop-down menu, select “https” , then in the “SSL certificate:” drop-down menu that appears at the bottom, select the self-signed certificate that you created previously, then click on “OK” and finally “Close” :
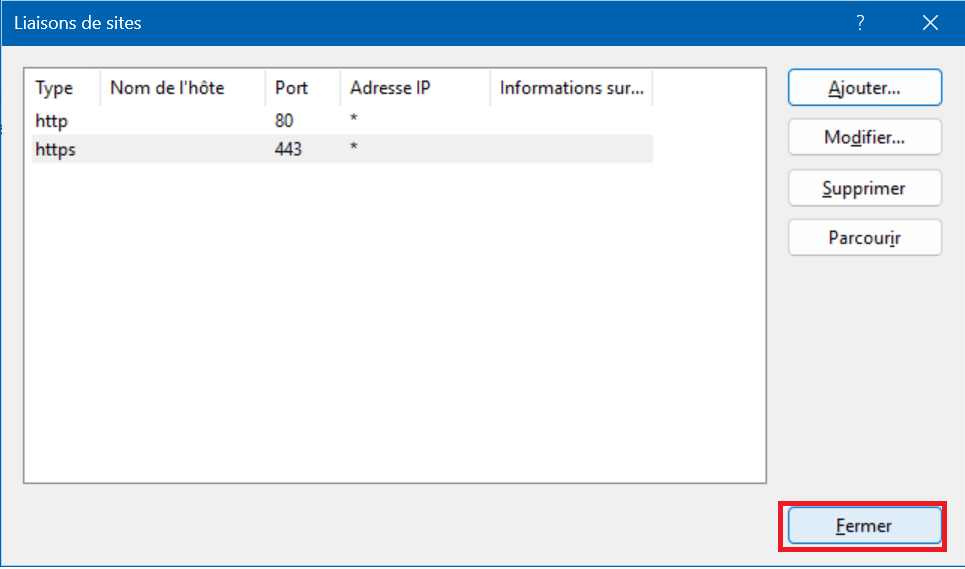
5 – You should see the new https link appear on the right side of the site’s home page :

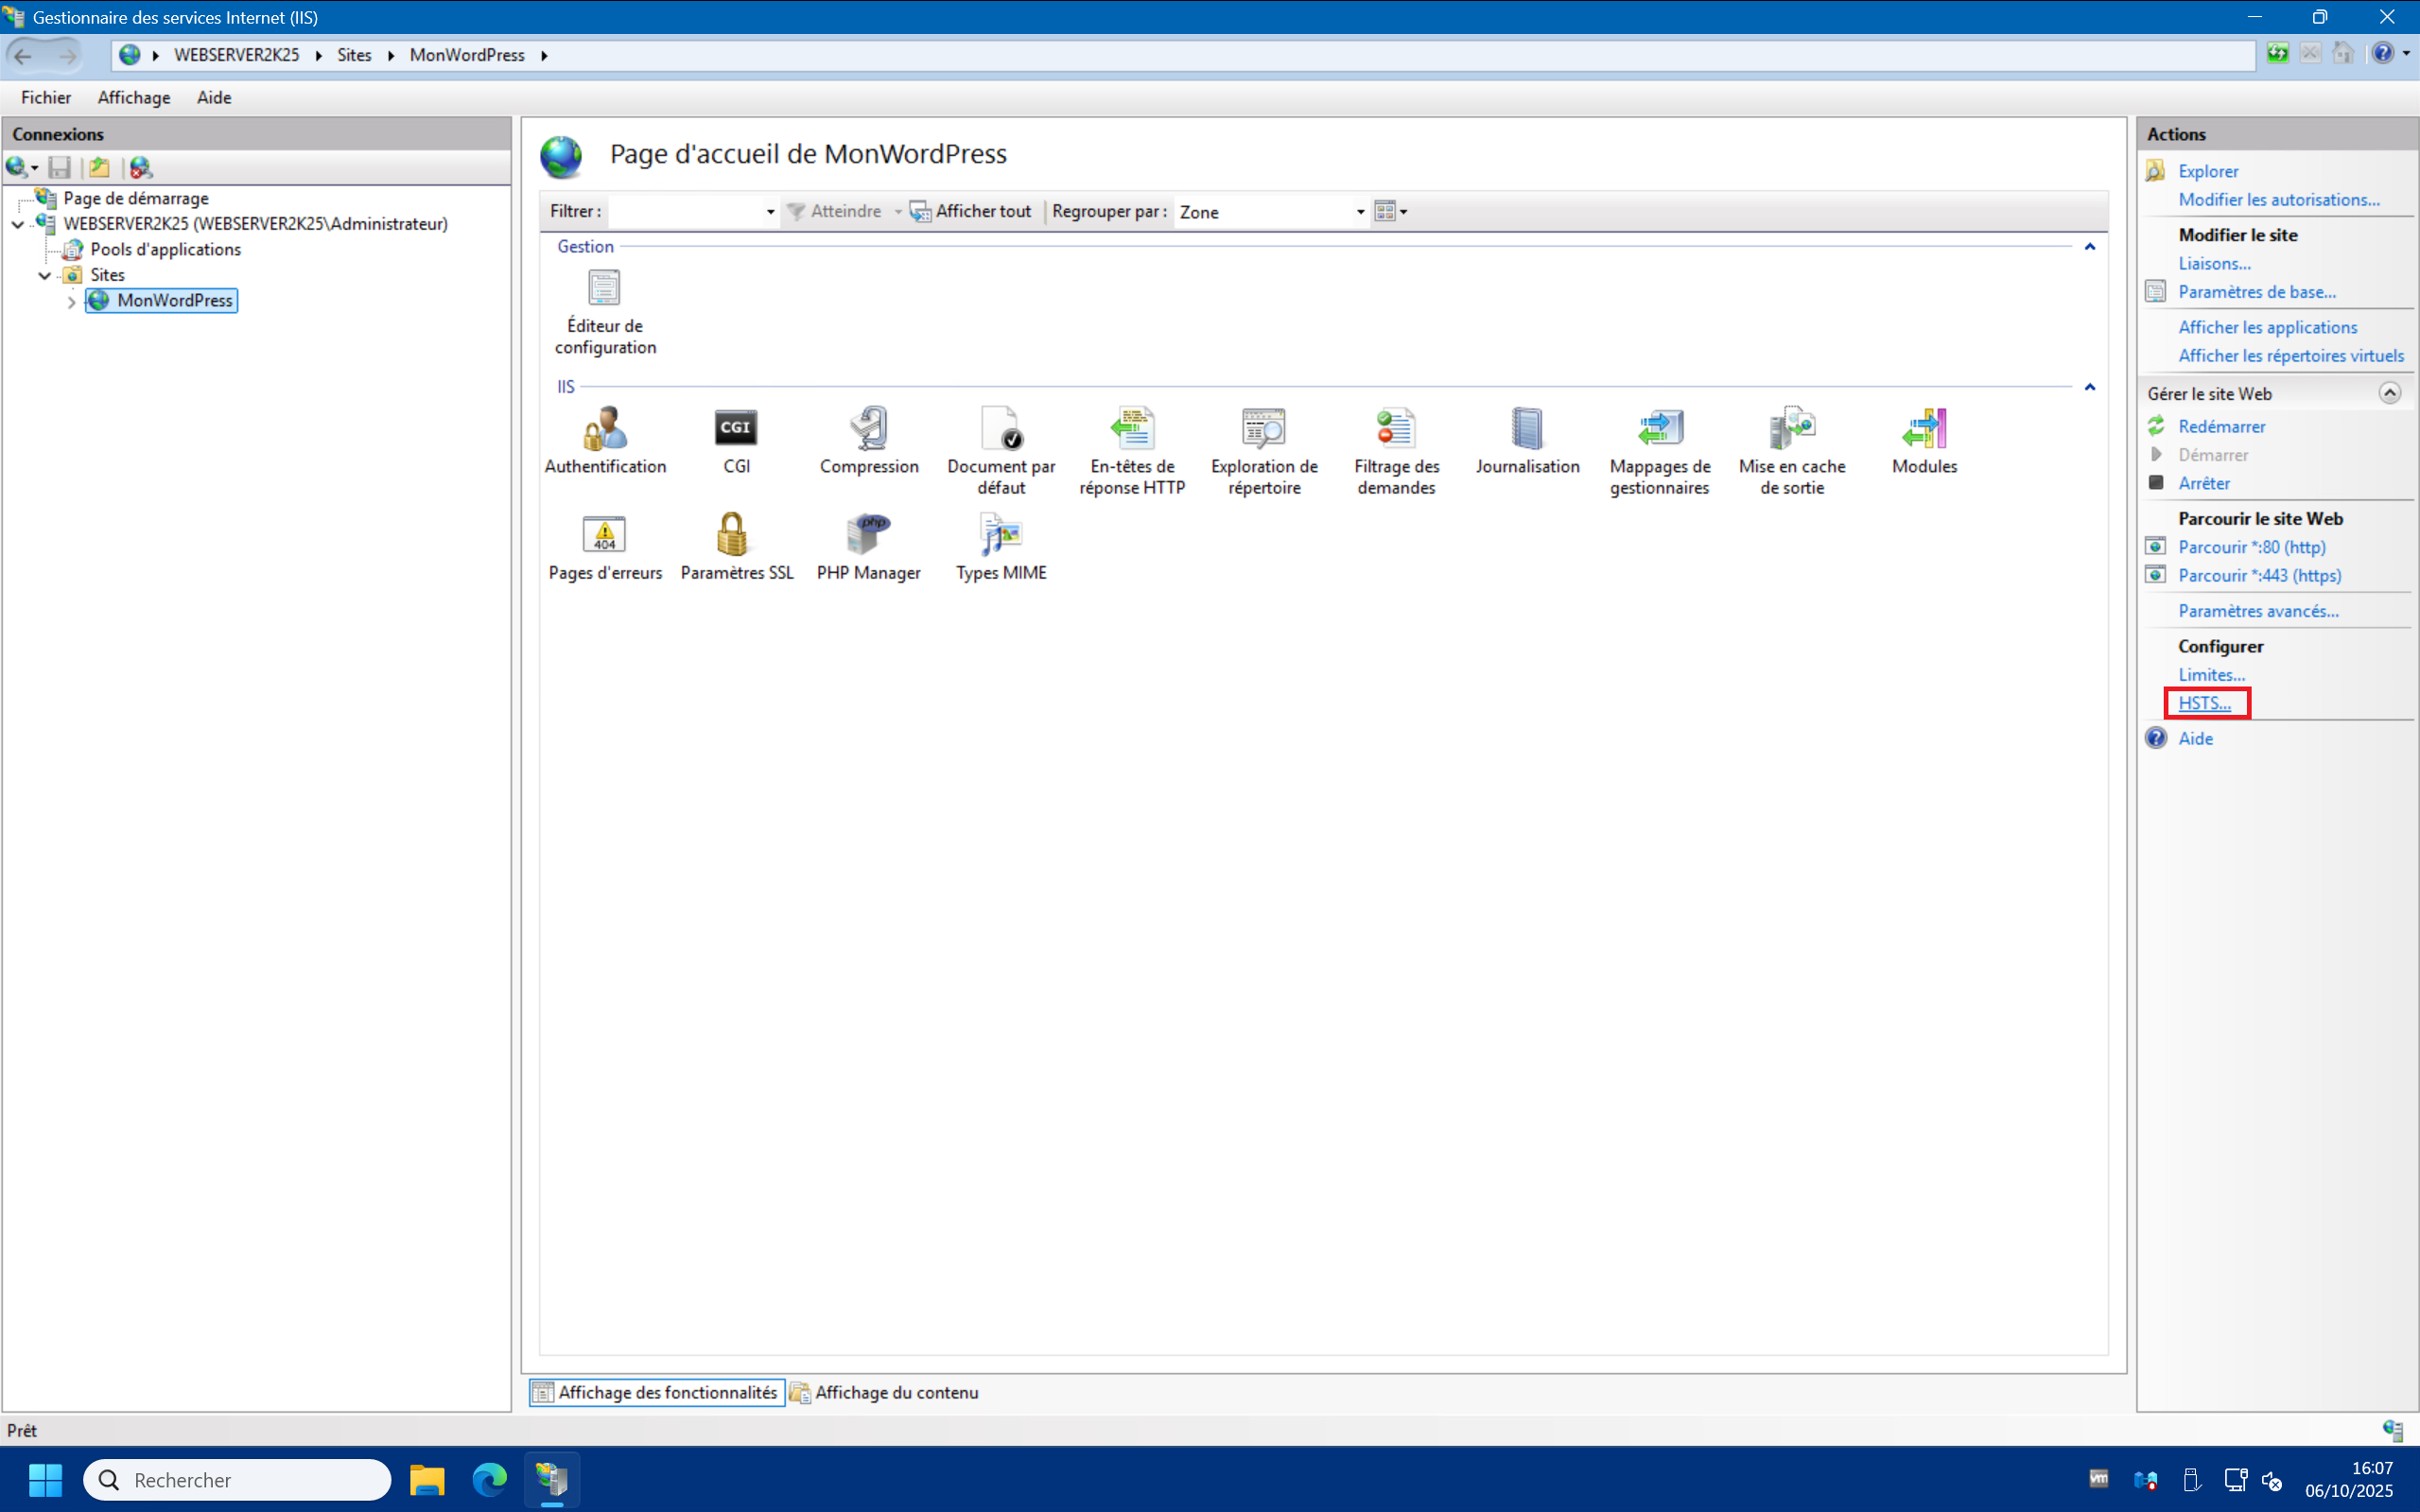
6 – To enable permanent redirection from http to https, click on “HSTS…” in the “Actions” menu on the right :
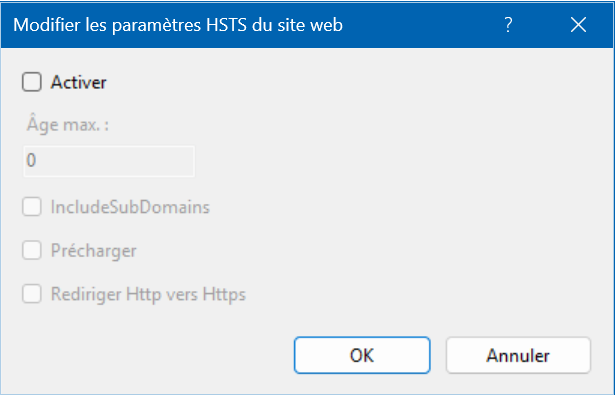
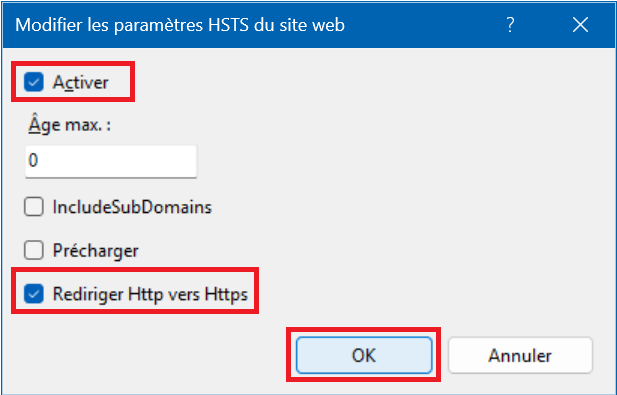
7 – In the “Edit Website HSTS” window, check the “Enable” and “Redirect Http to Https” boxes and finally click “OK” :
B – WordPress https configuration :
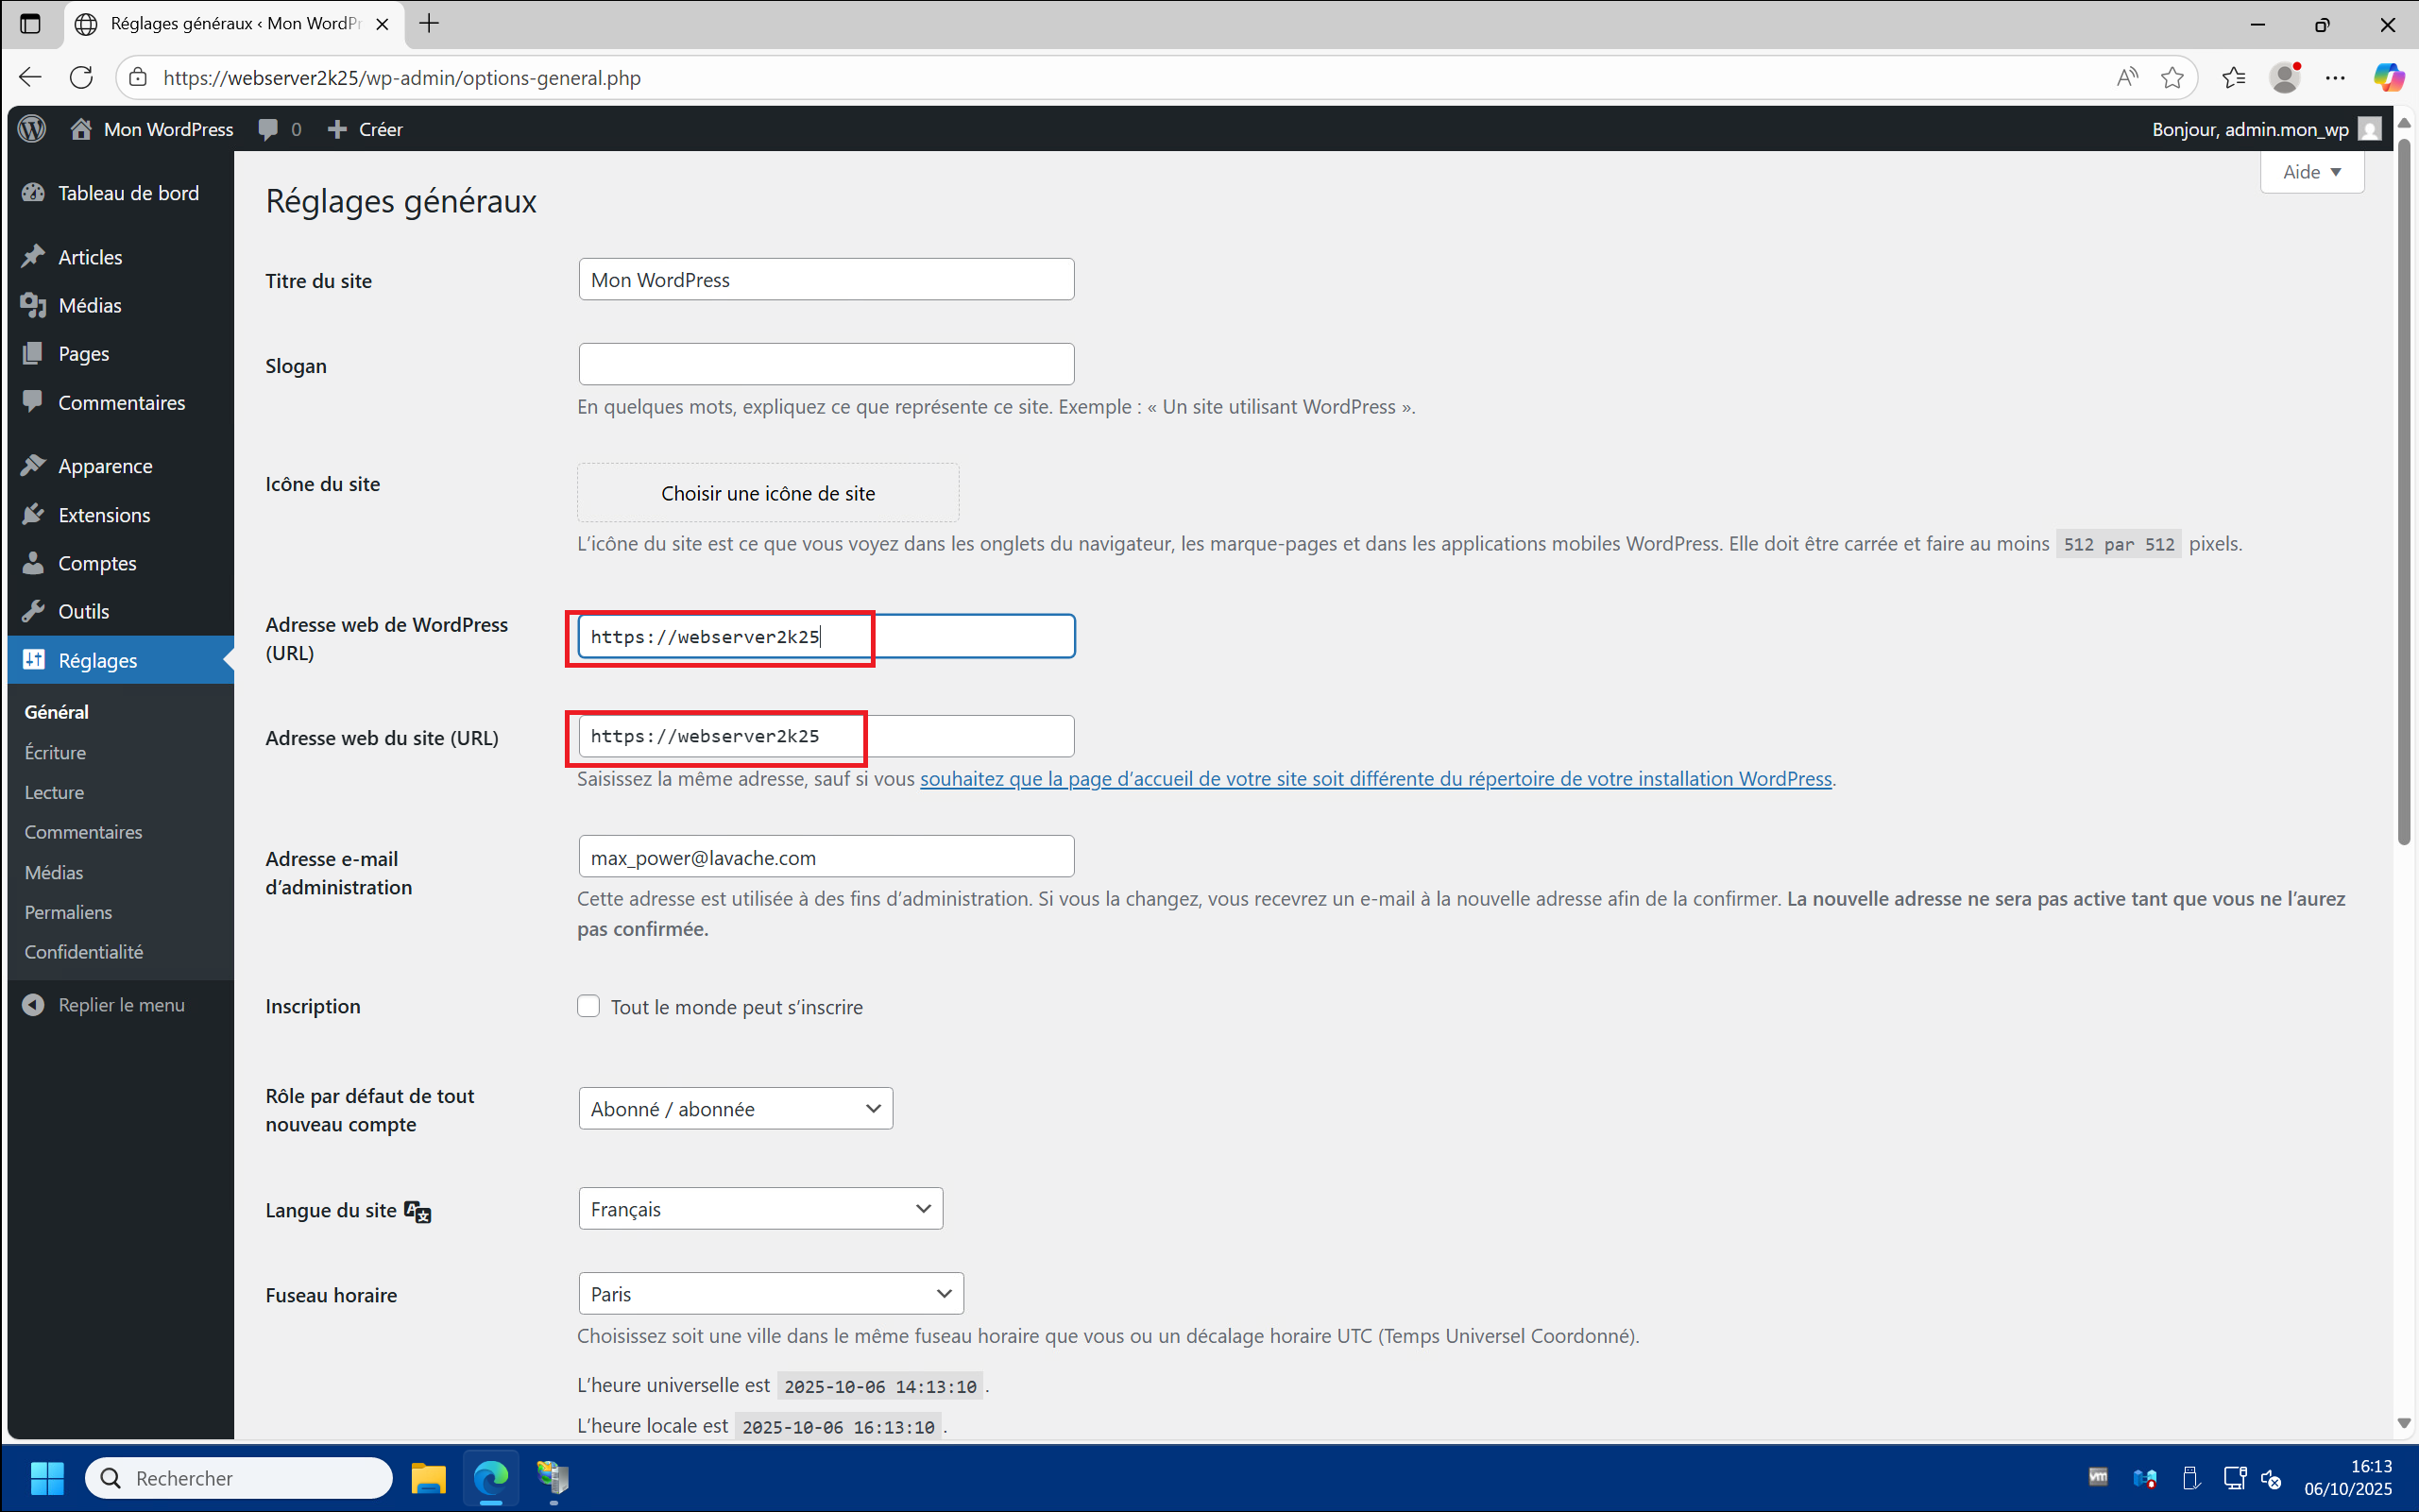
1 – Return to your WordPress site dashboard, then click on “Settings” > “General” :
2 – In the “WordPress address (URL)” et “Web site address (URL)” fields, replace “http” with “https” in your server’s URL, then click “Save Changes” at the bottom of the page :
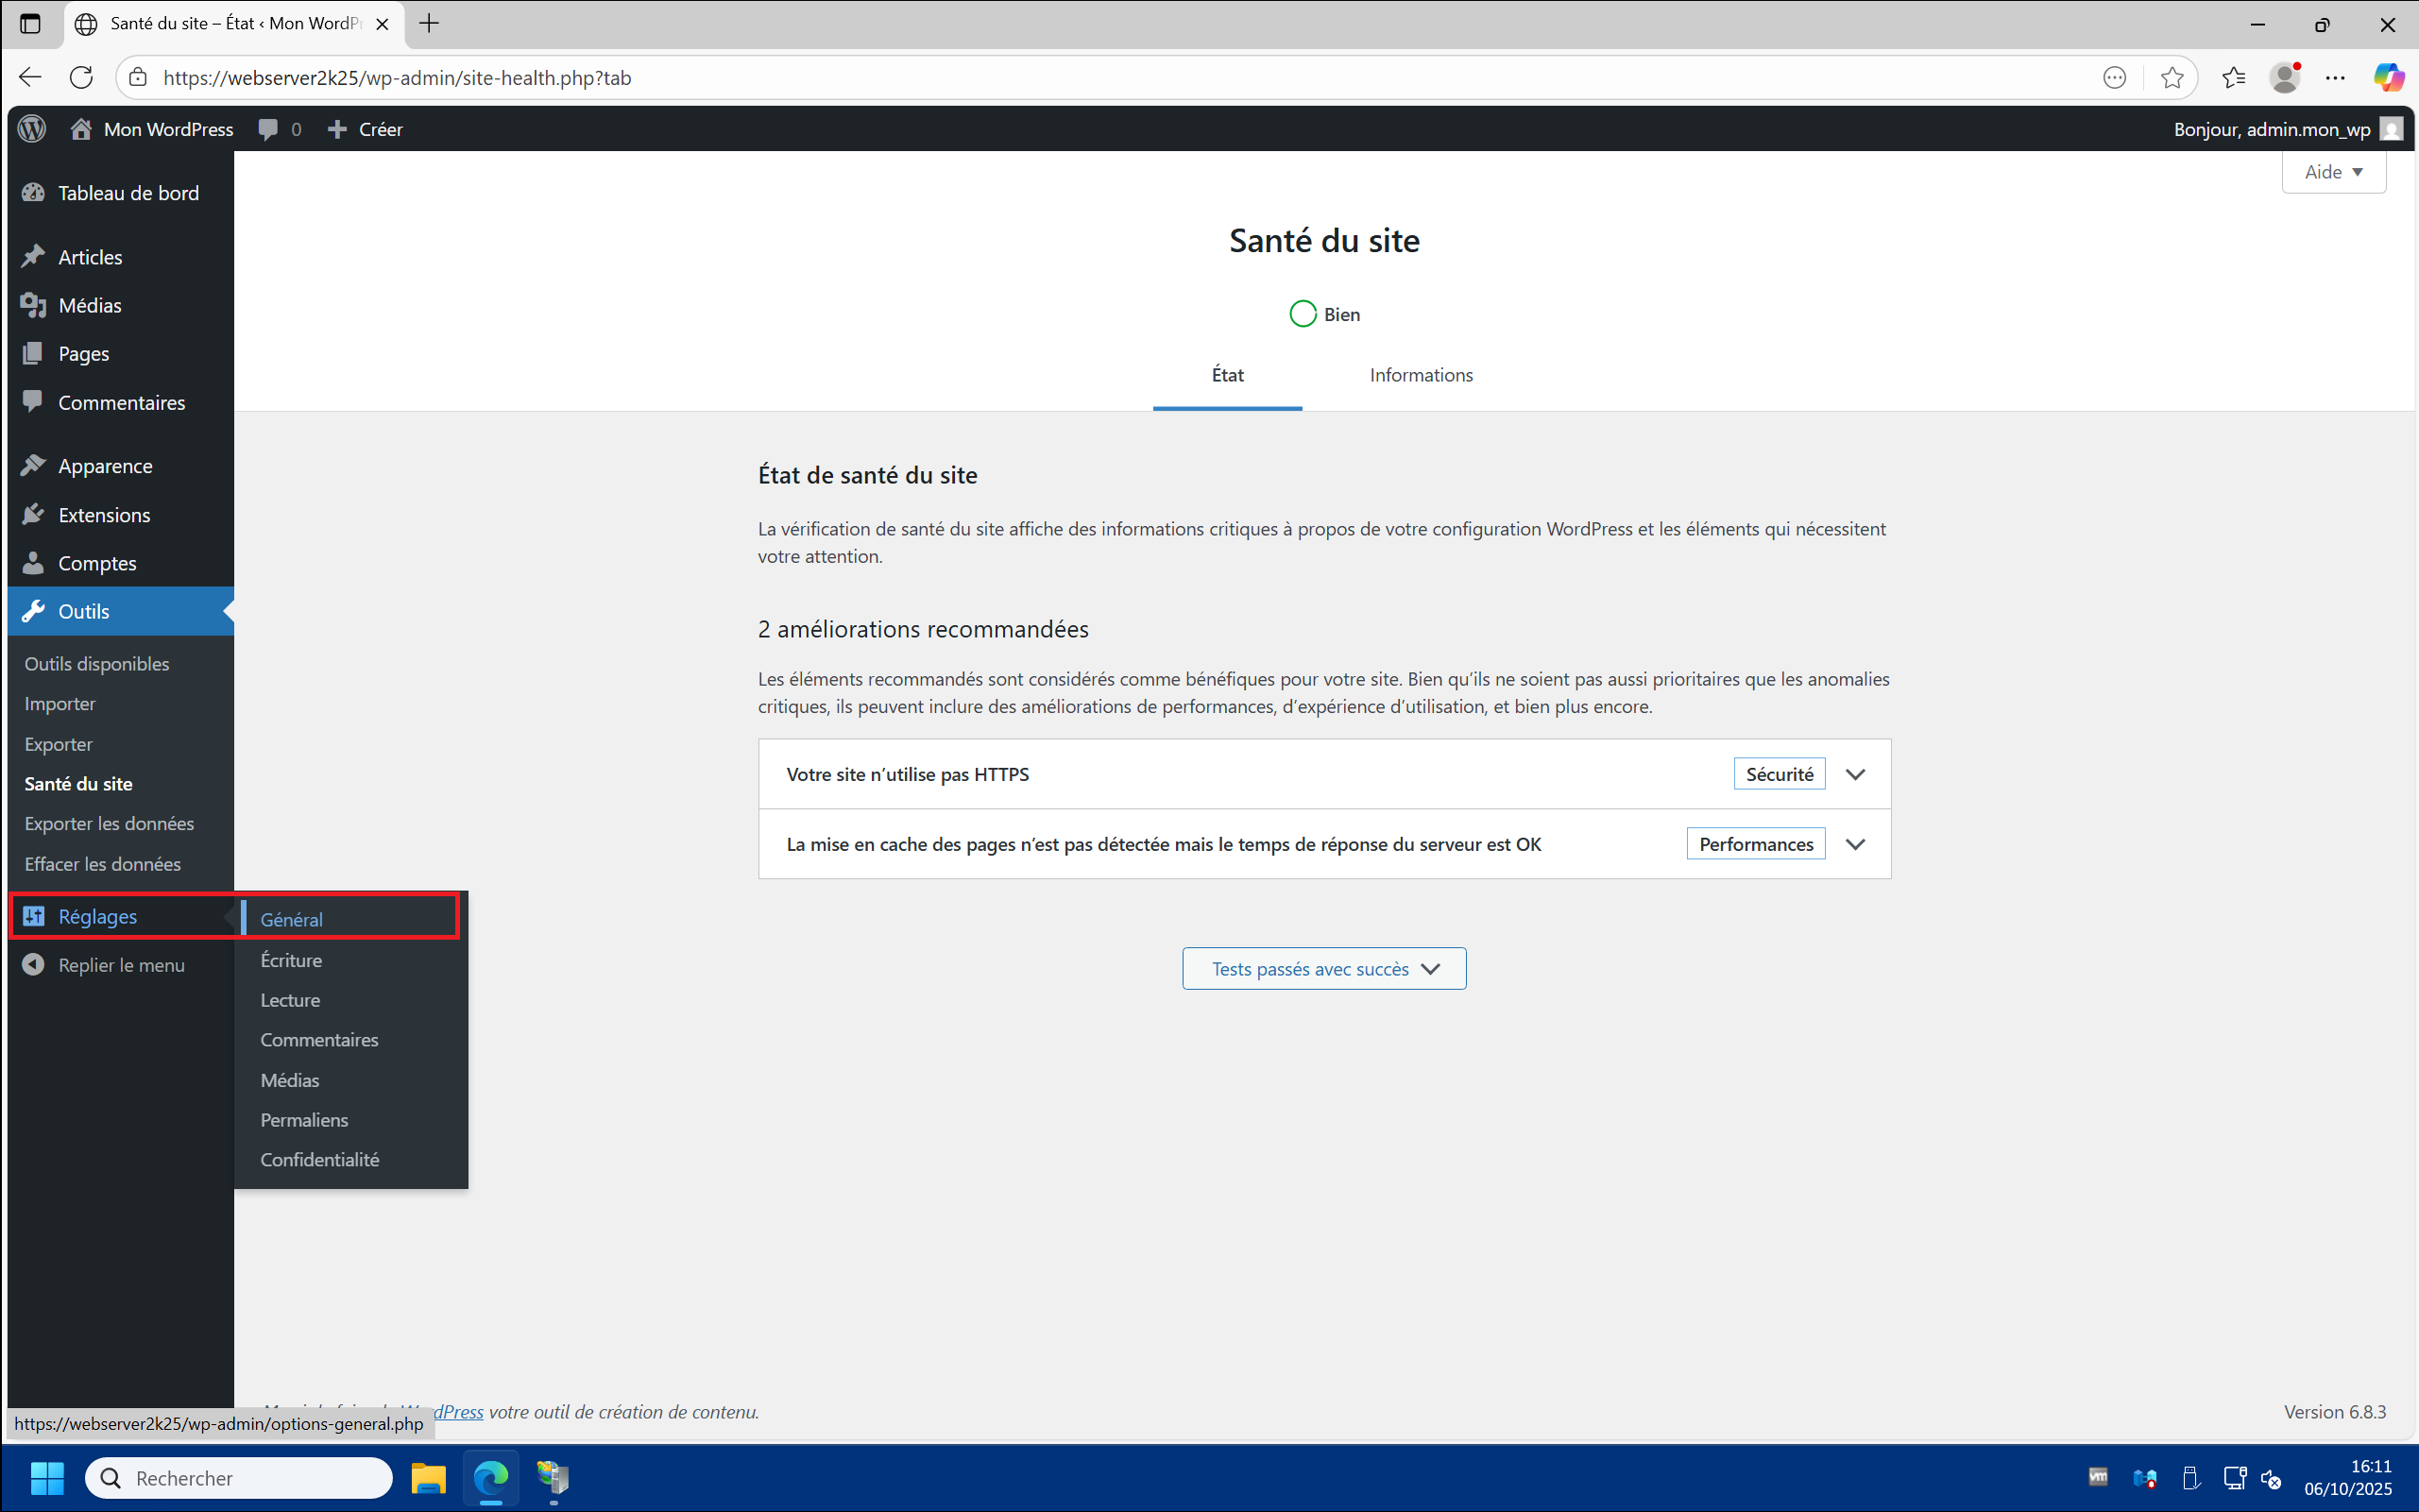
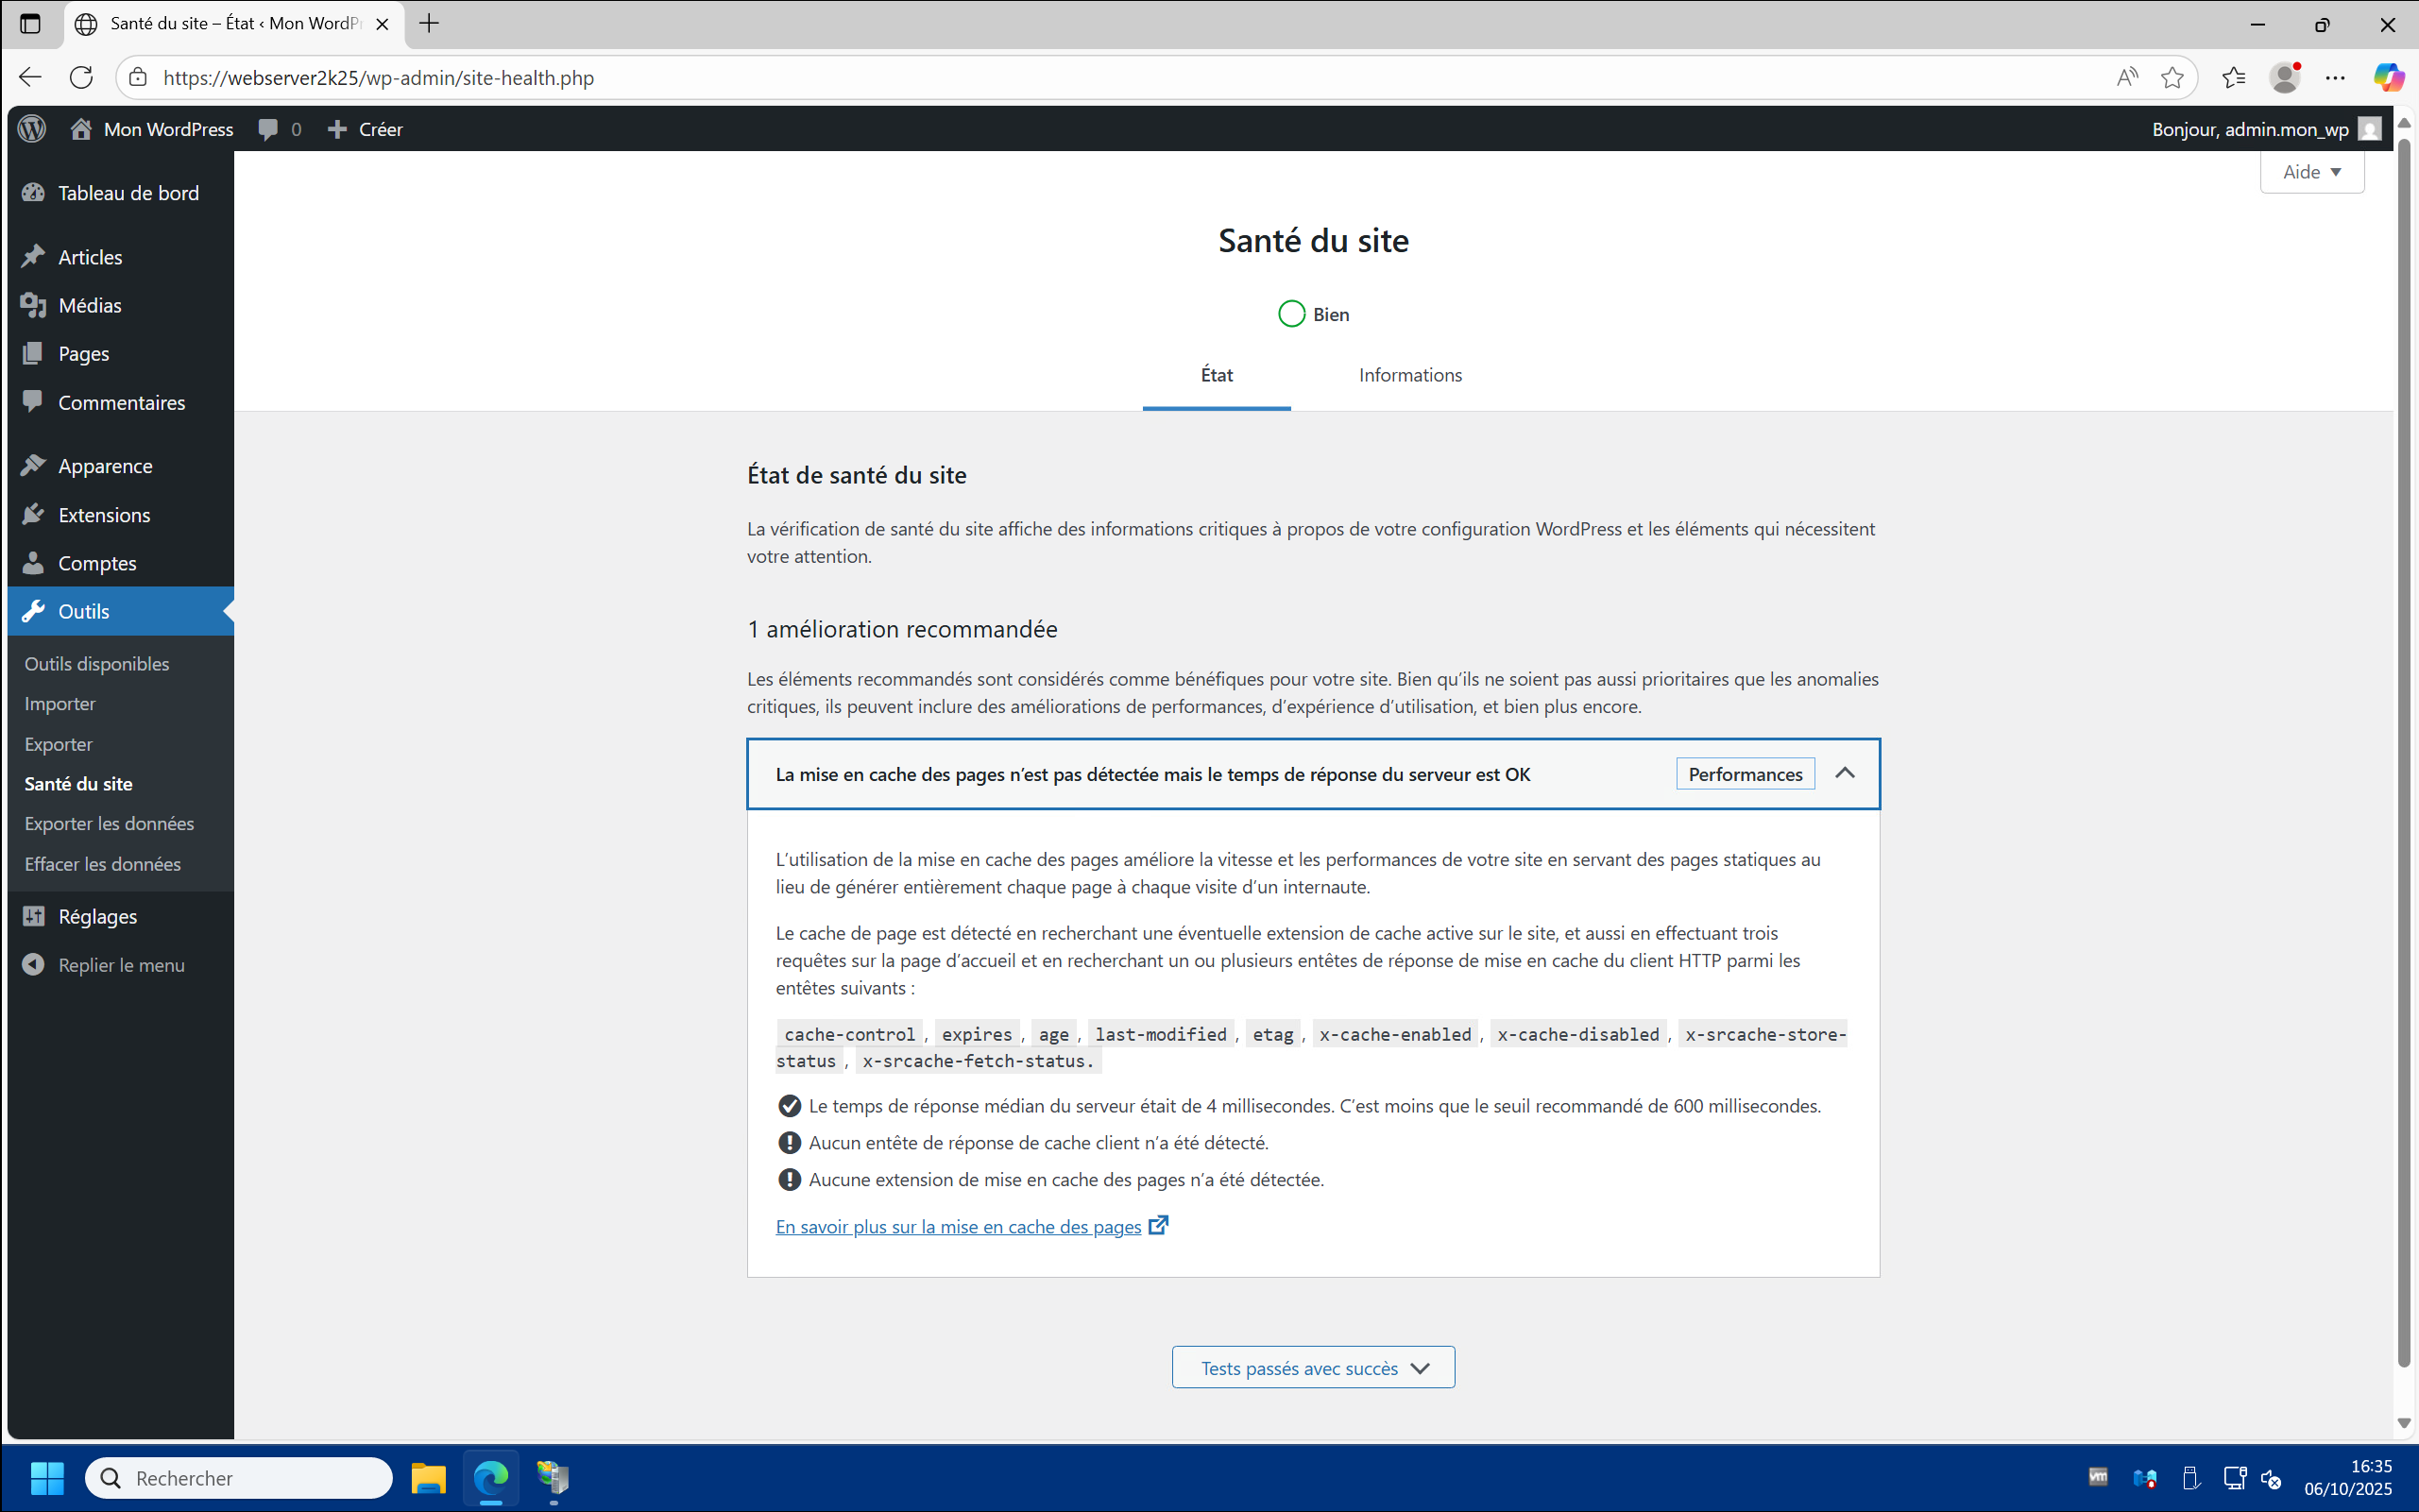
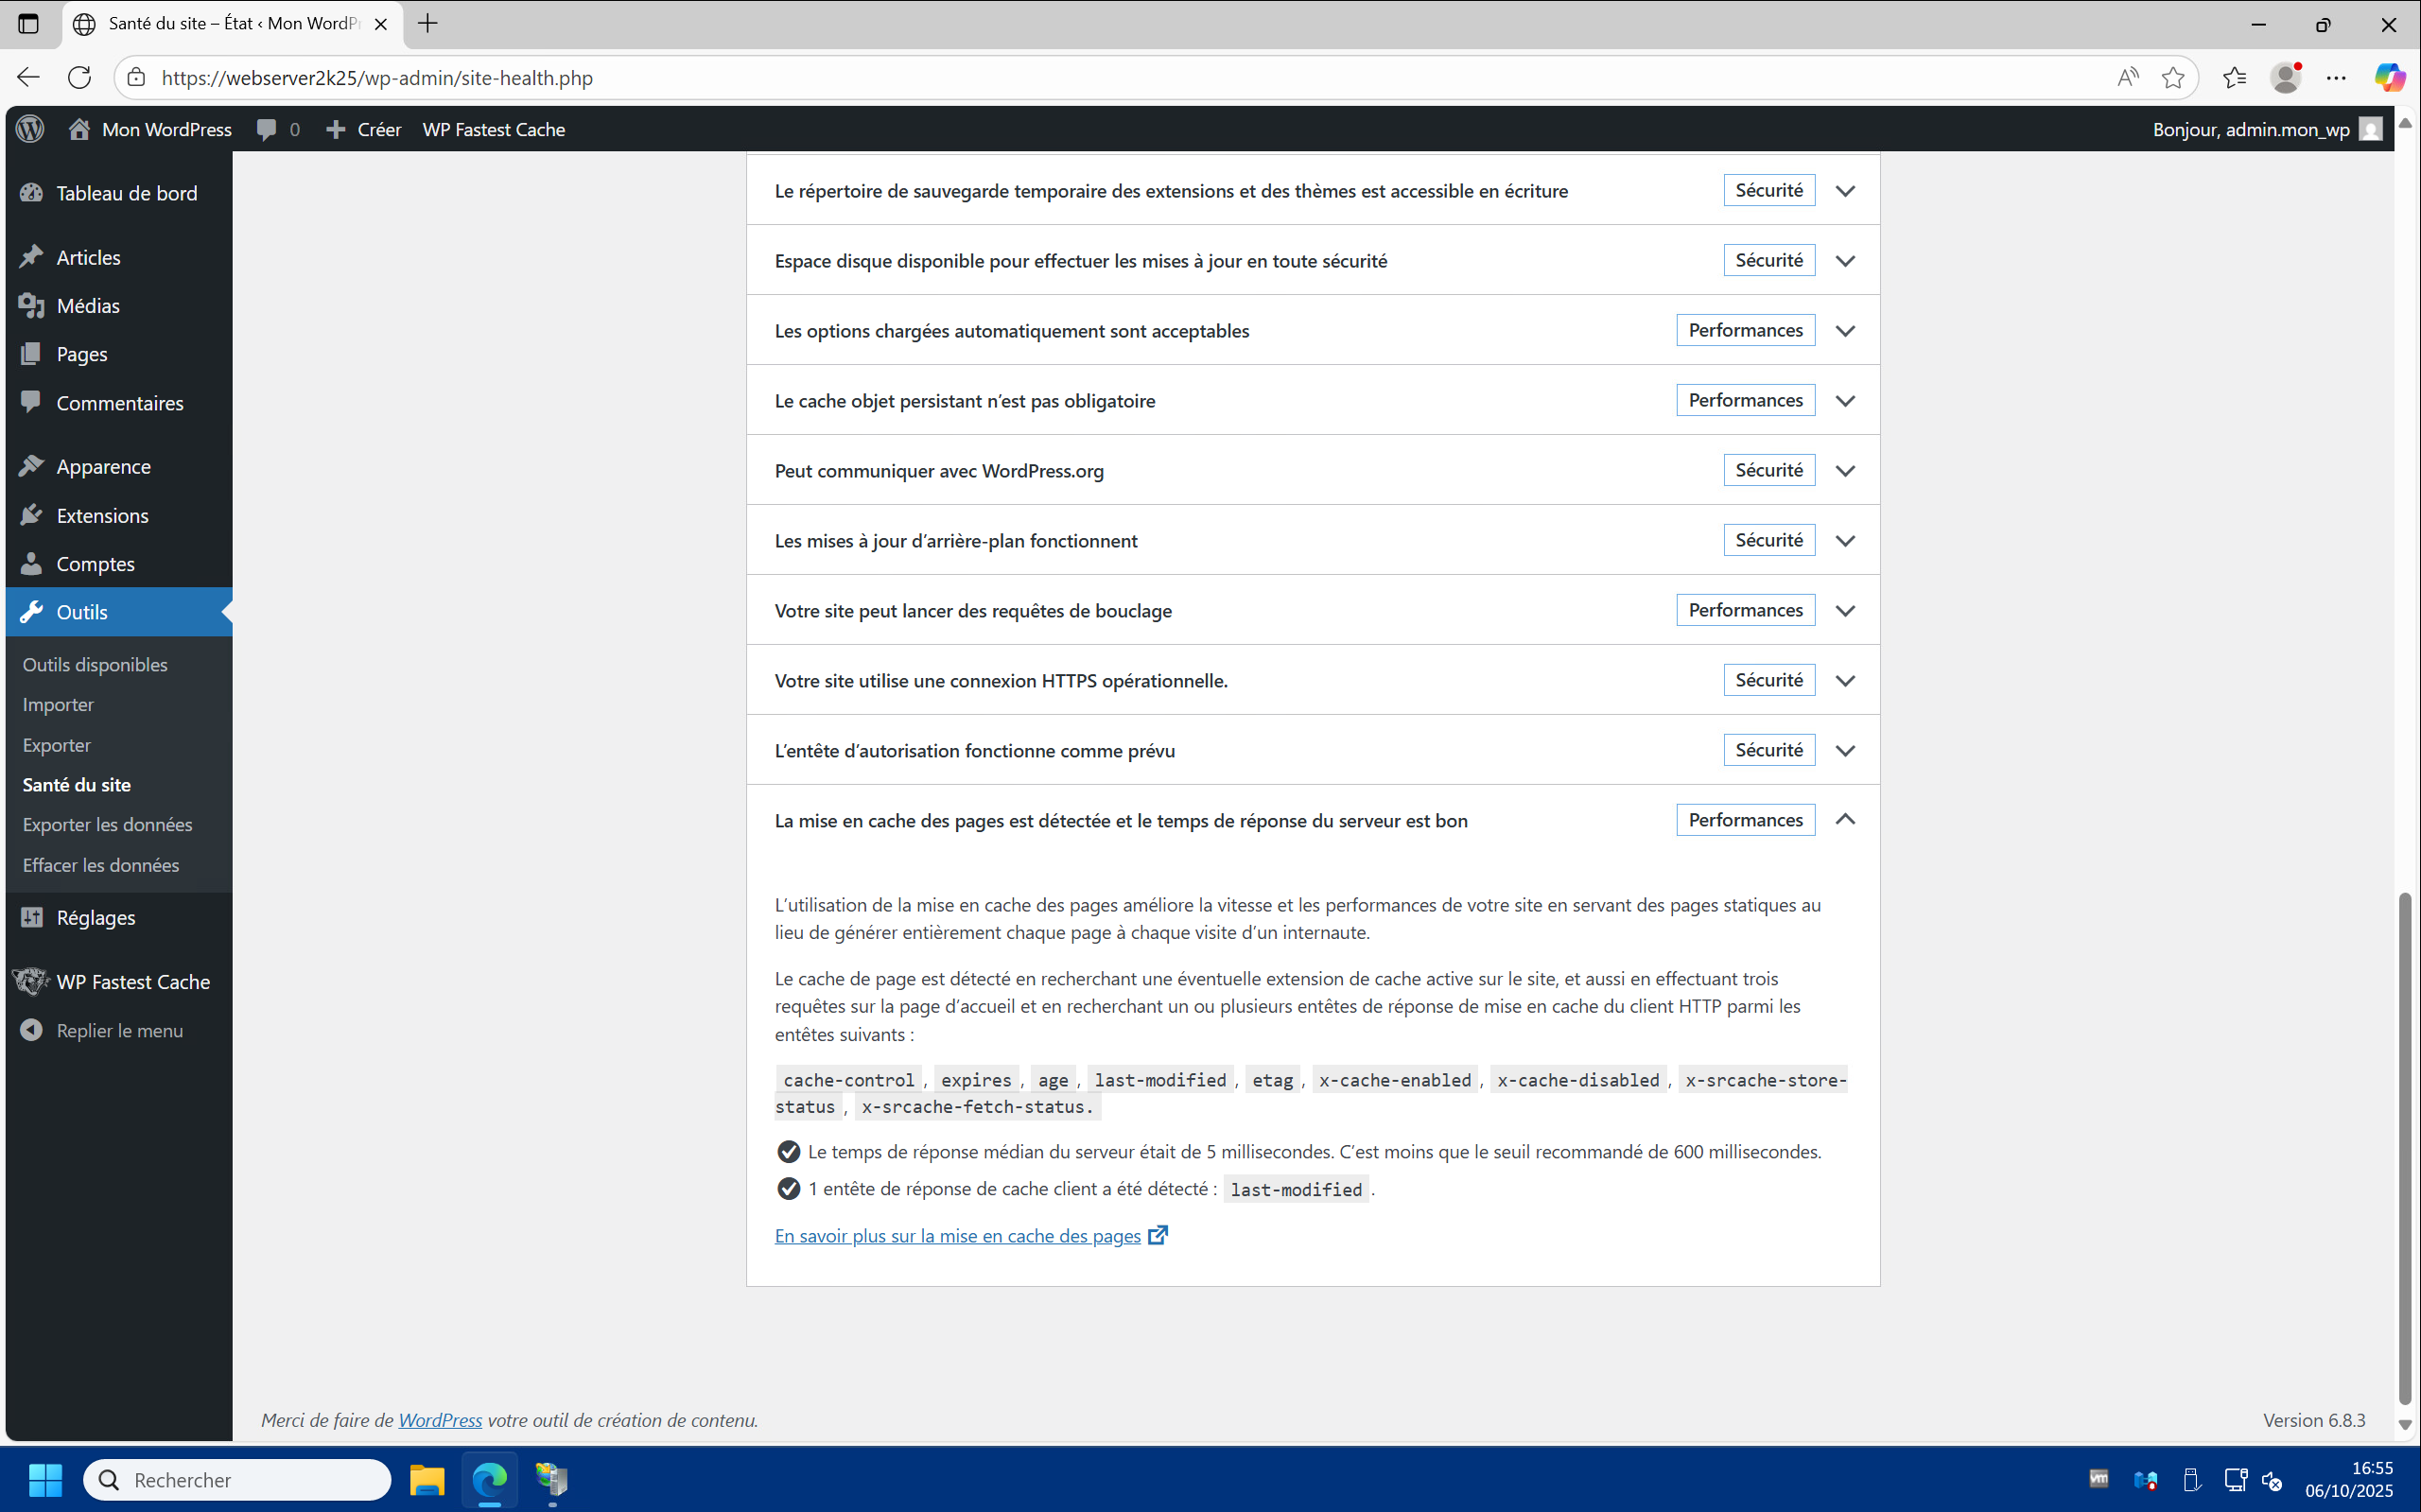
3 – Returning to the “Site Health” page, you should see that the HTTPS protocol recommendation has disappeared. If you expand the “Page caching is not detected, but the server response time is OK” recommendation, you should now see a response time of around a millisecond :
Install and configure the WP Fastest Cache plugin :
To meet the latest WordPress site health recommendation, you should install a caching plugin. Among the free ones, the WP Fastest Cache plugin seemed the easiest and most effective to implement.
A – WP Fastest Cache installation :
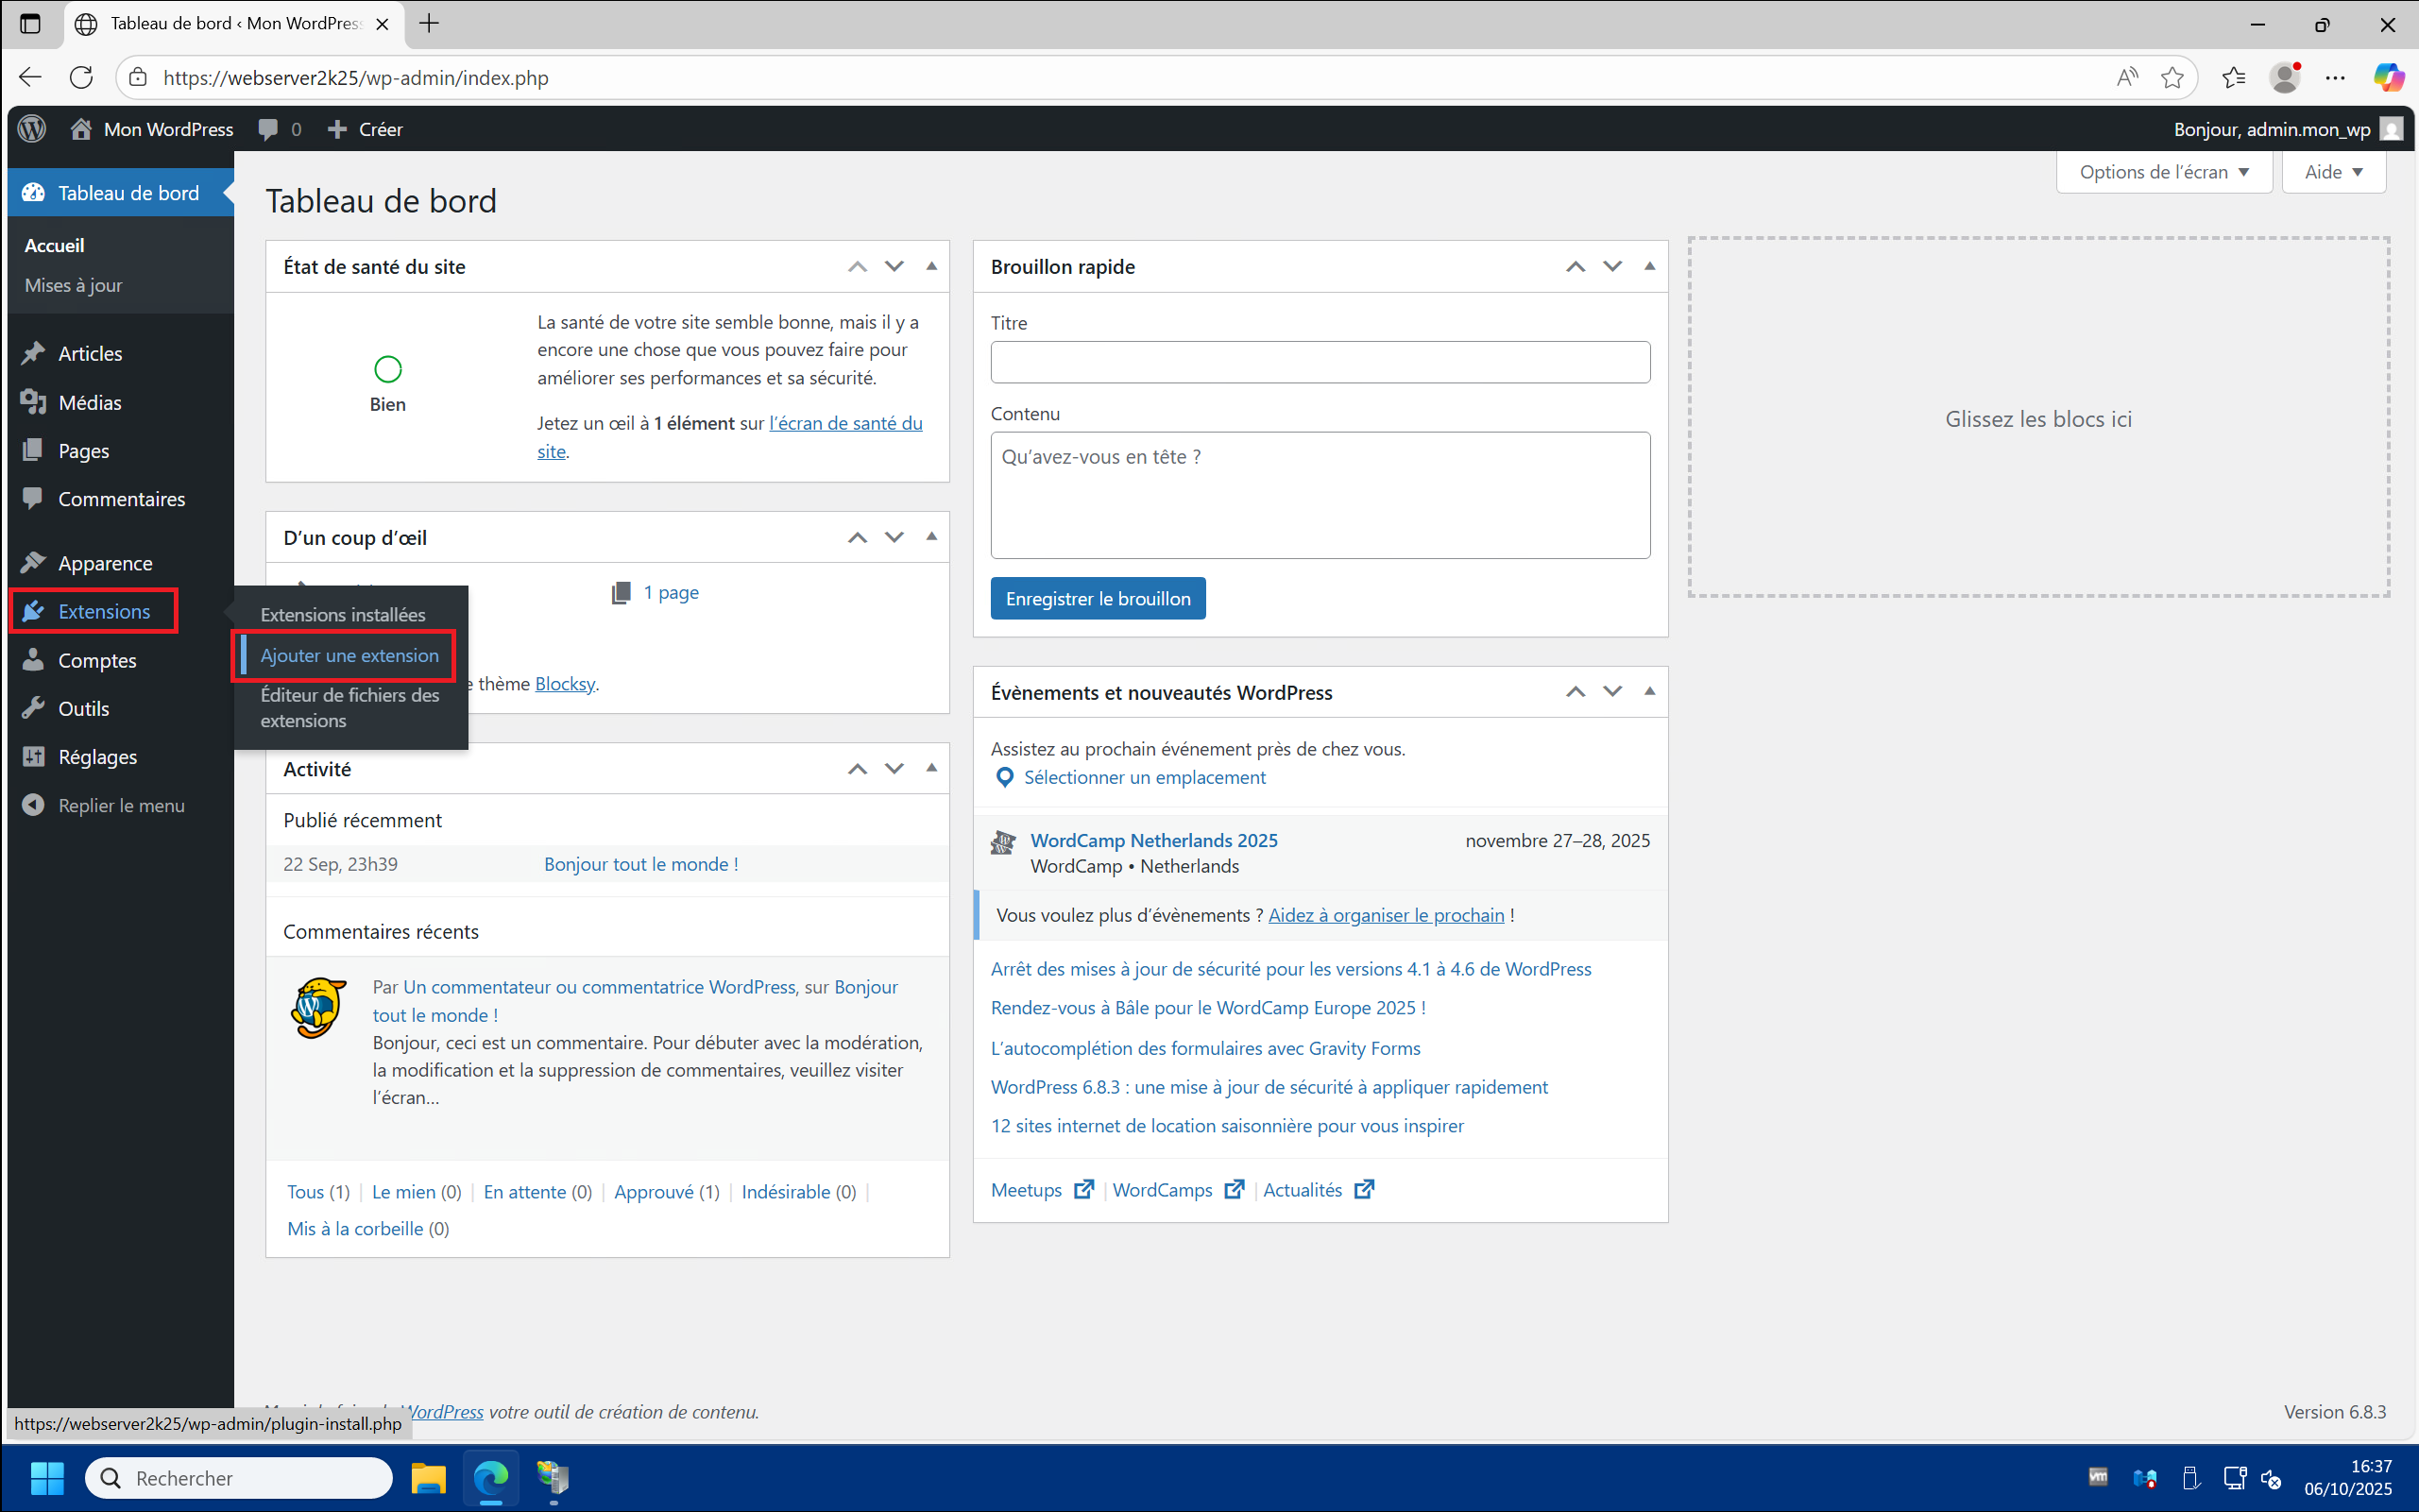
1 – In your WordPress site dashboard, click on “Plugins” > “Add a plugin” :
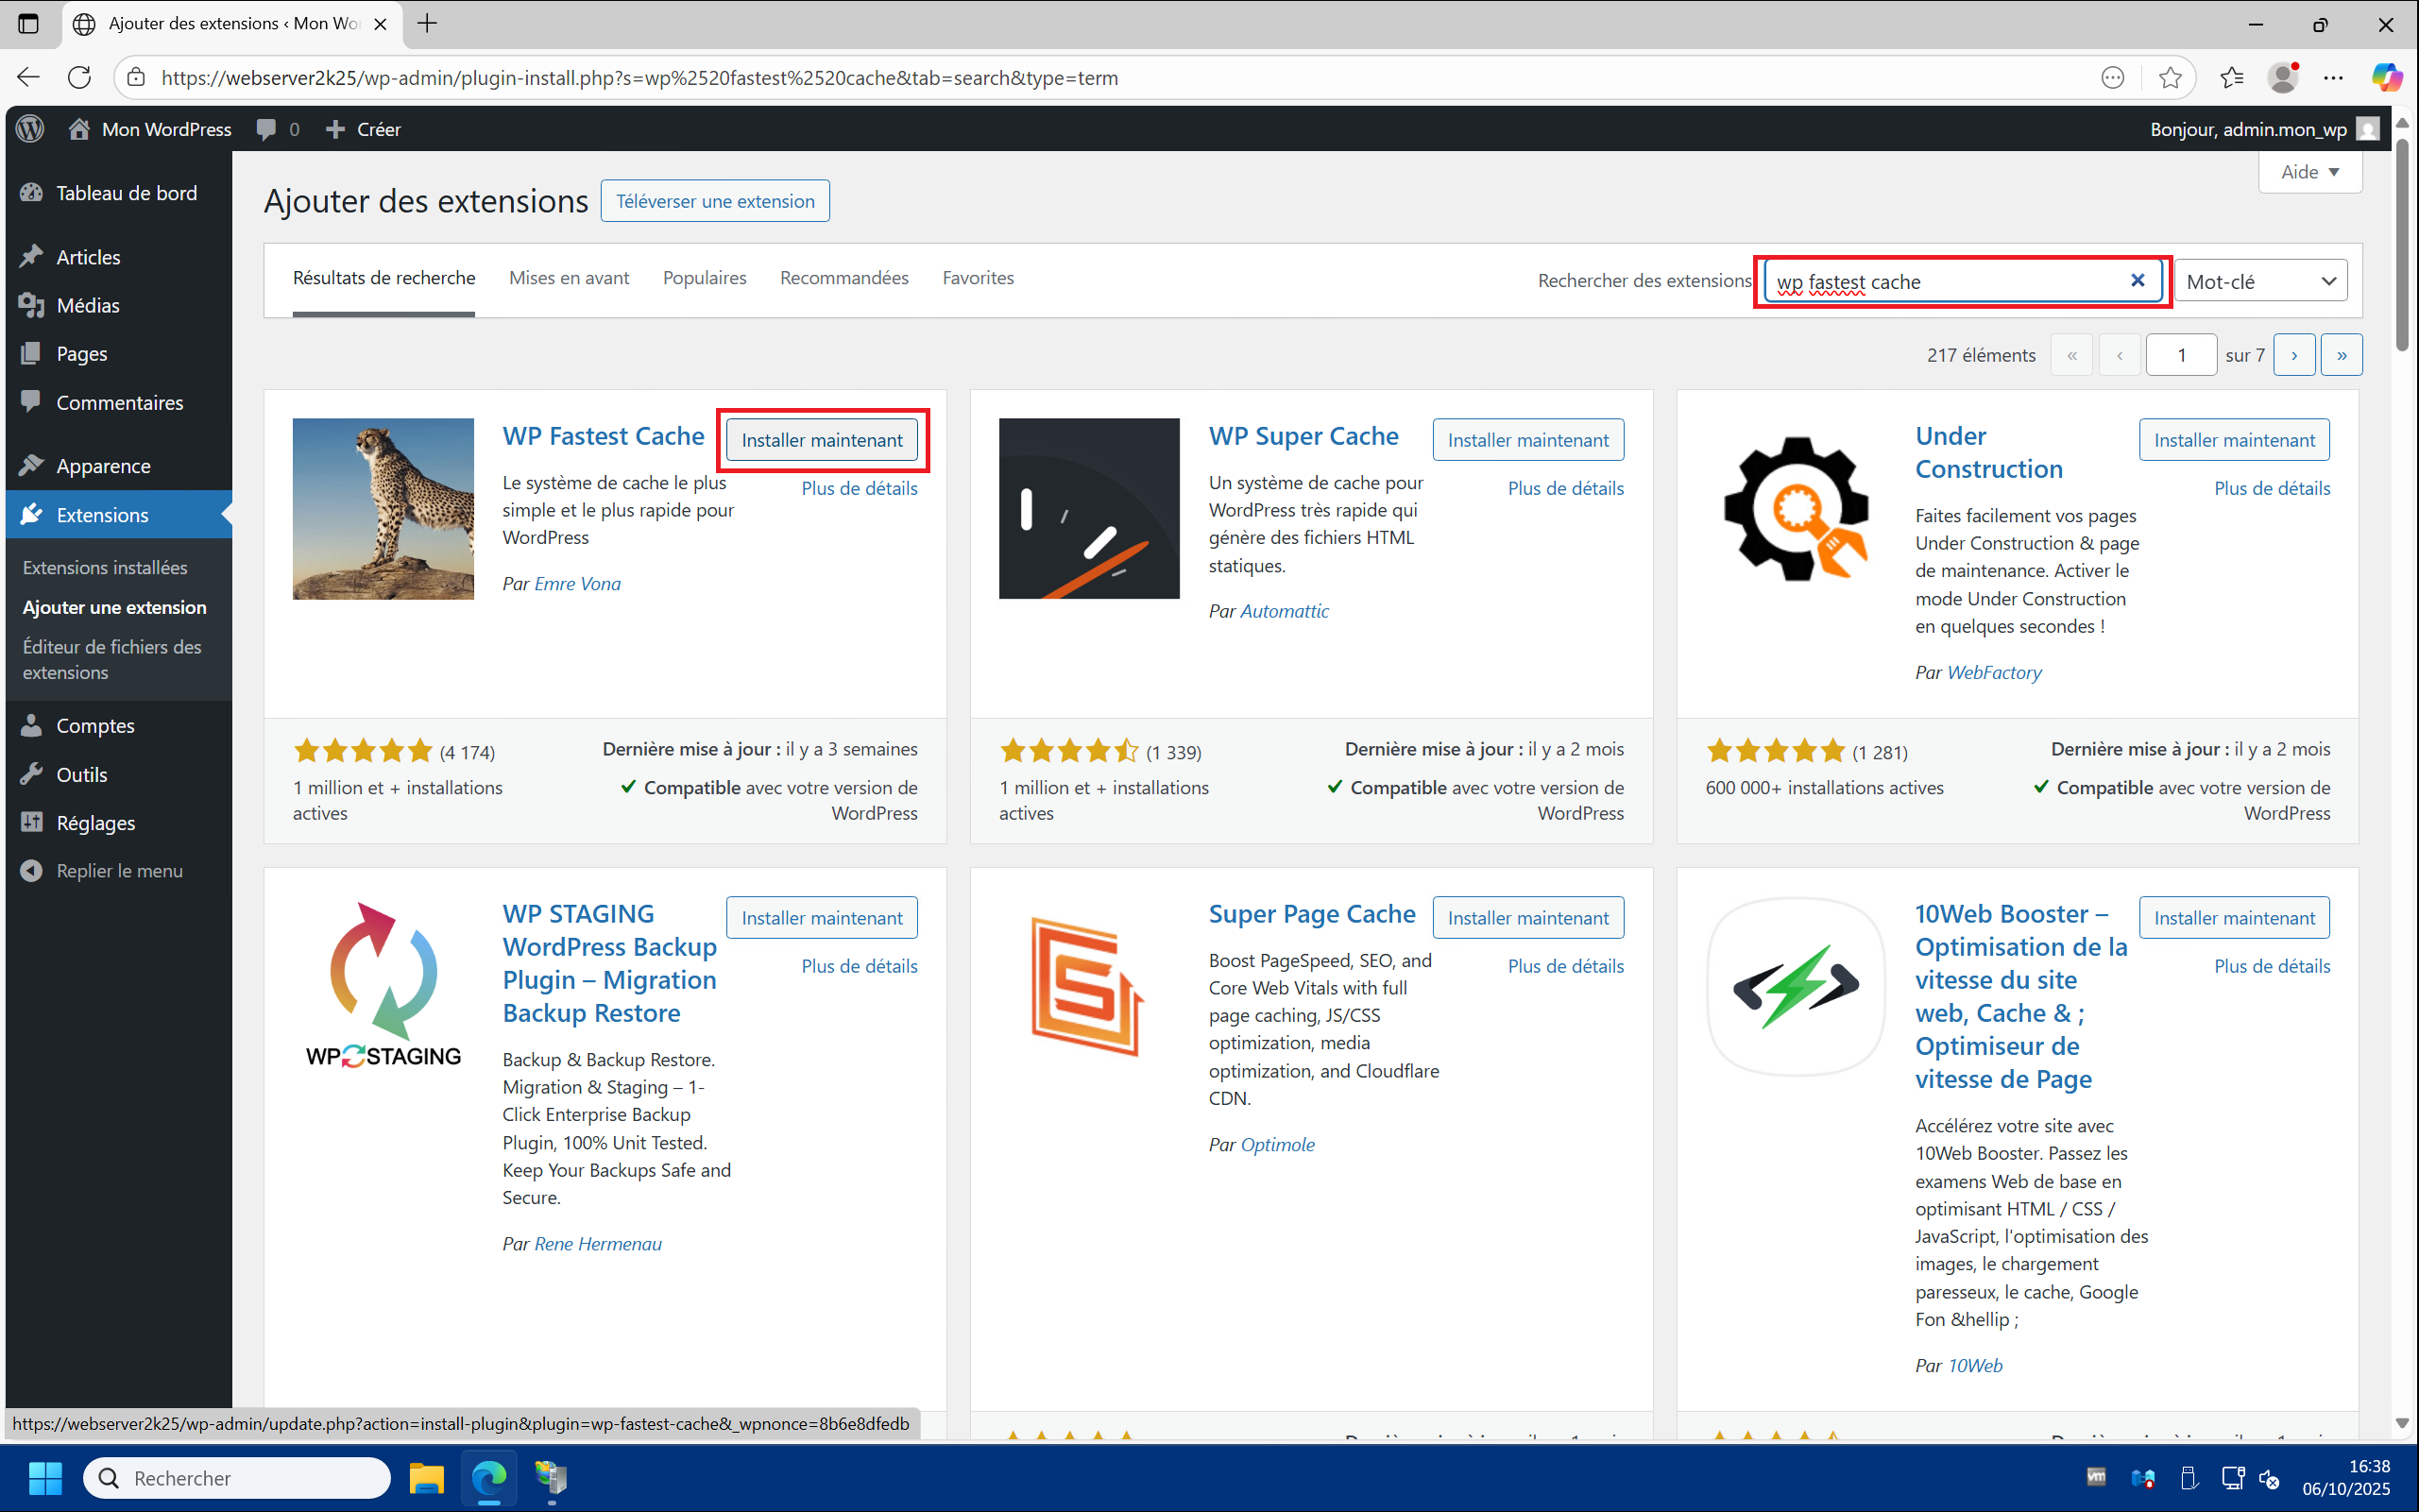
2 – In the “Search for extensions” field, type “wp fastest cache” to bring up “WP Fastest Cache” (by Emre Vona) , then click “Install now” :
3 – Once the plug-in is installed, click on “Enable” :

B – WP Fastest Cache configuration :
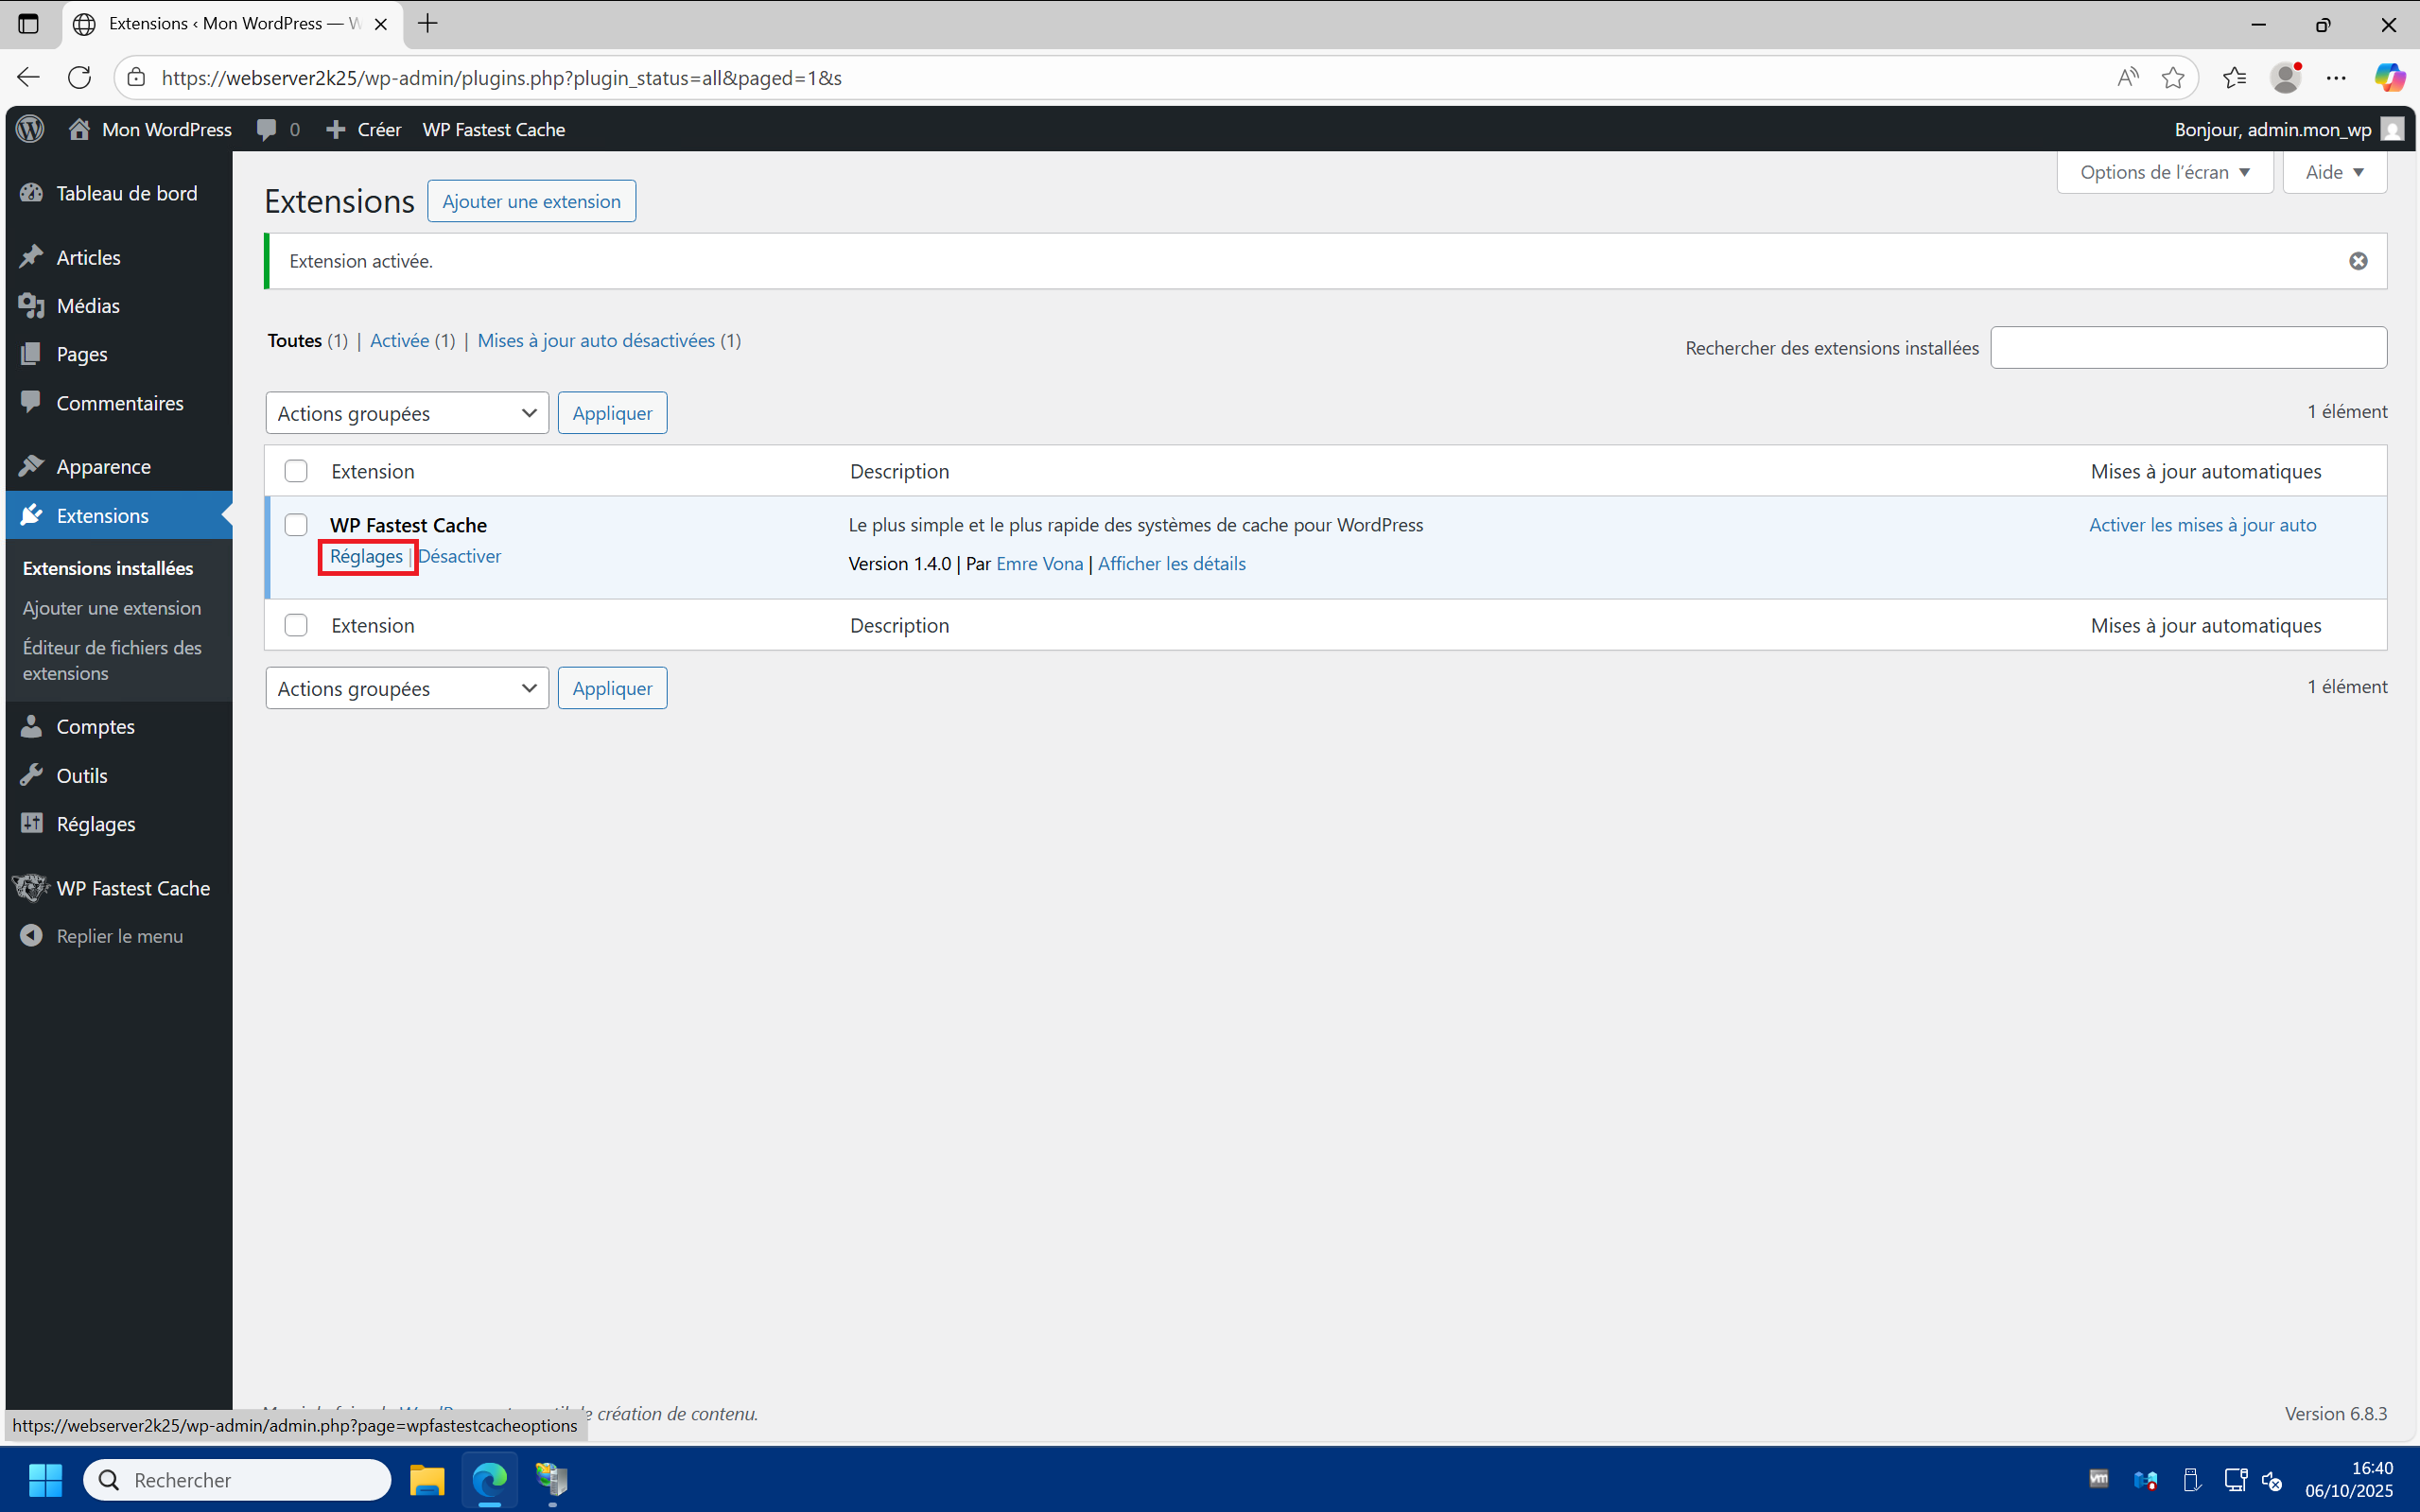
1 – In the “Installed Extensions” menu, click on “Settings” for the WP Fastest Cache plugin :
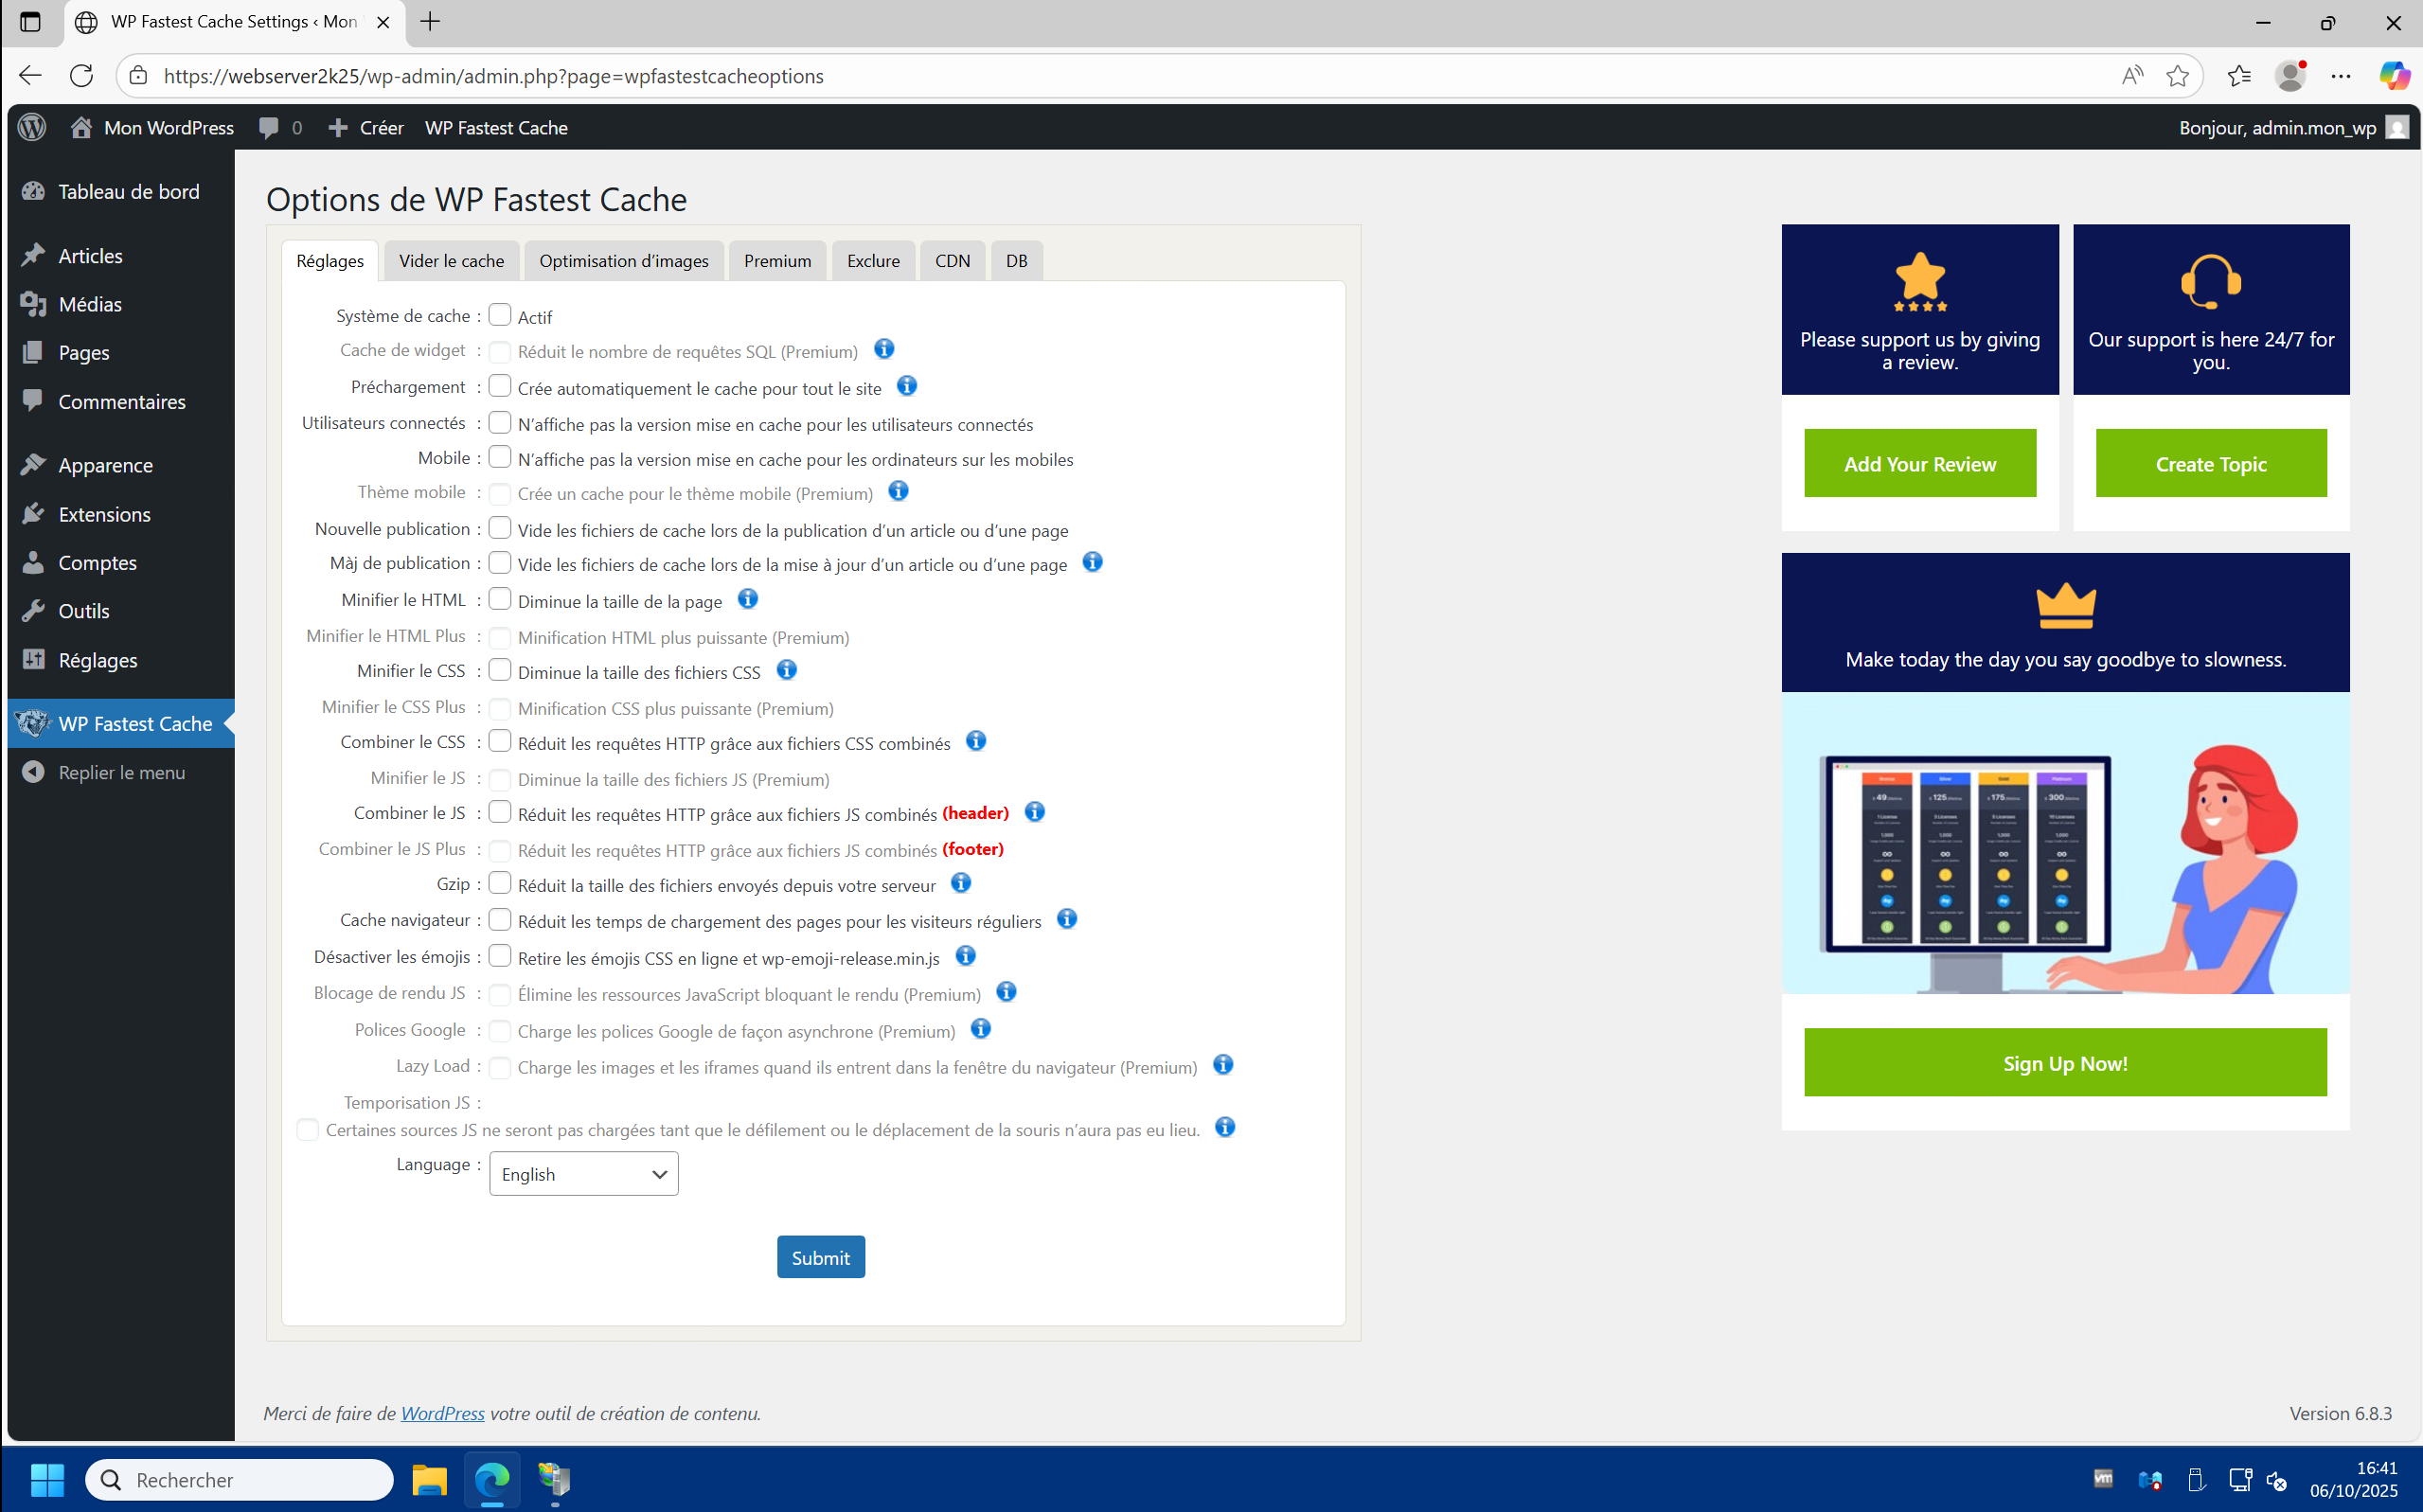
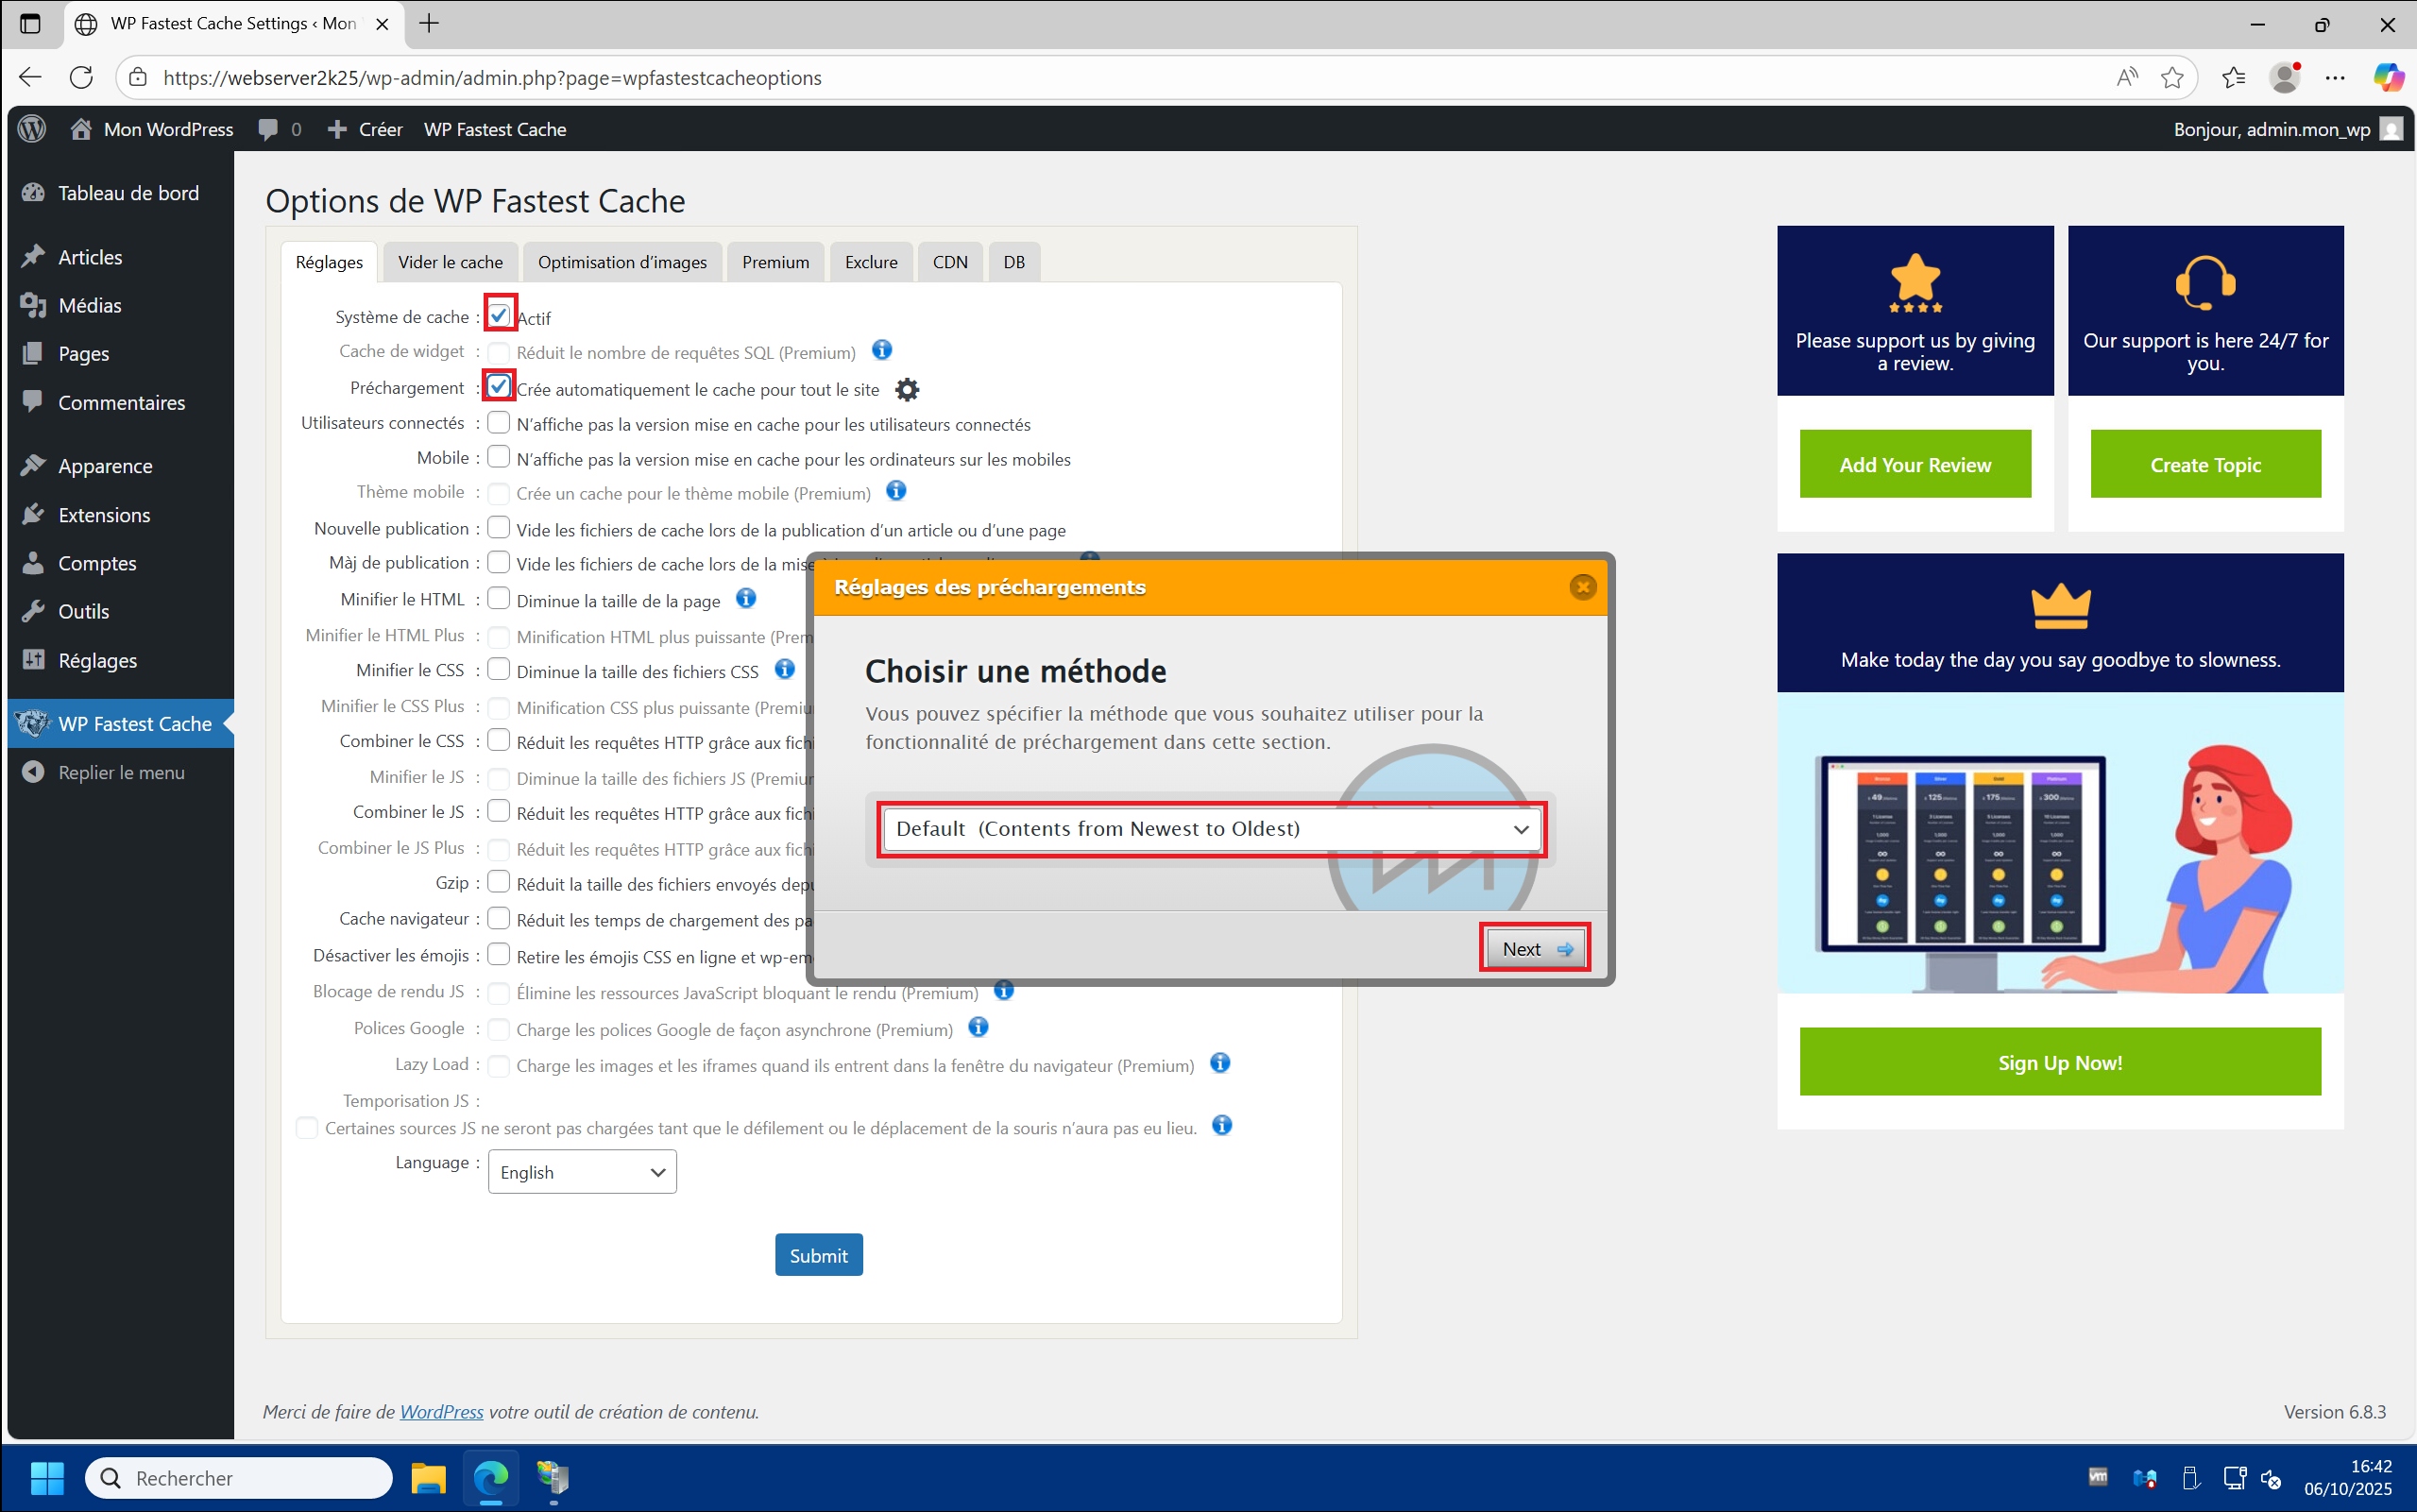
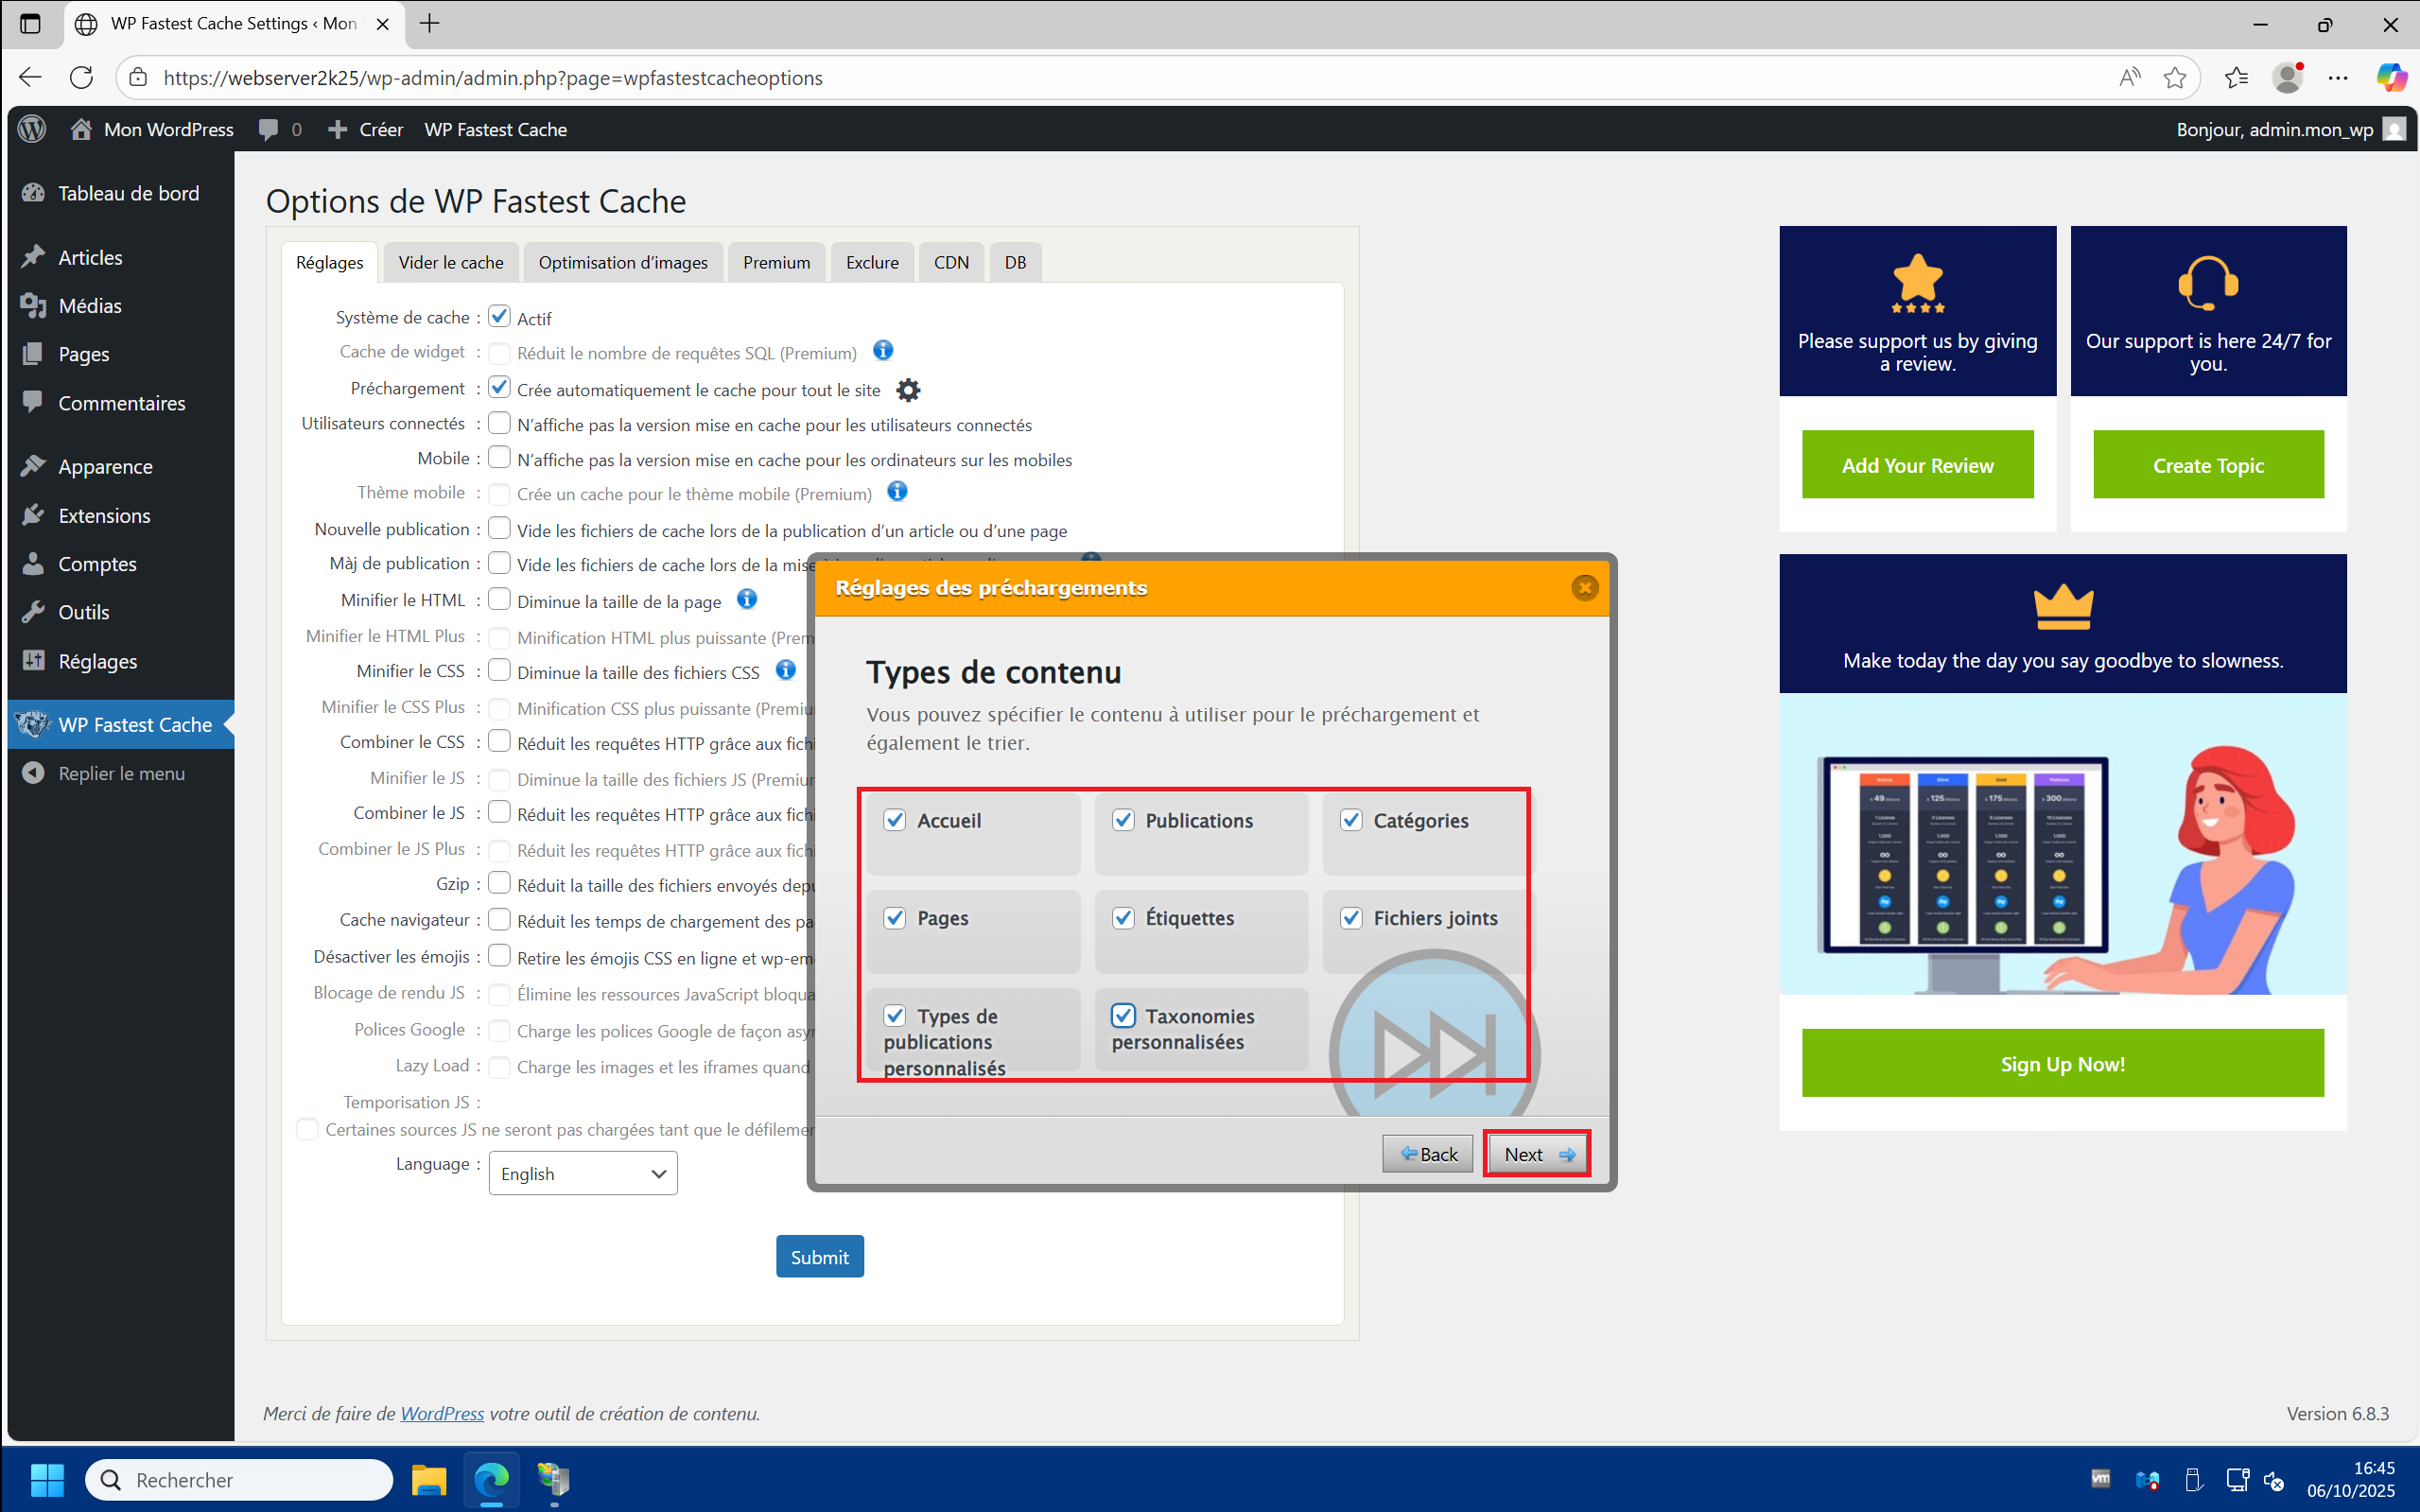
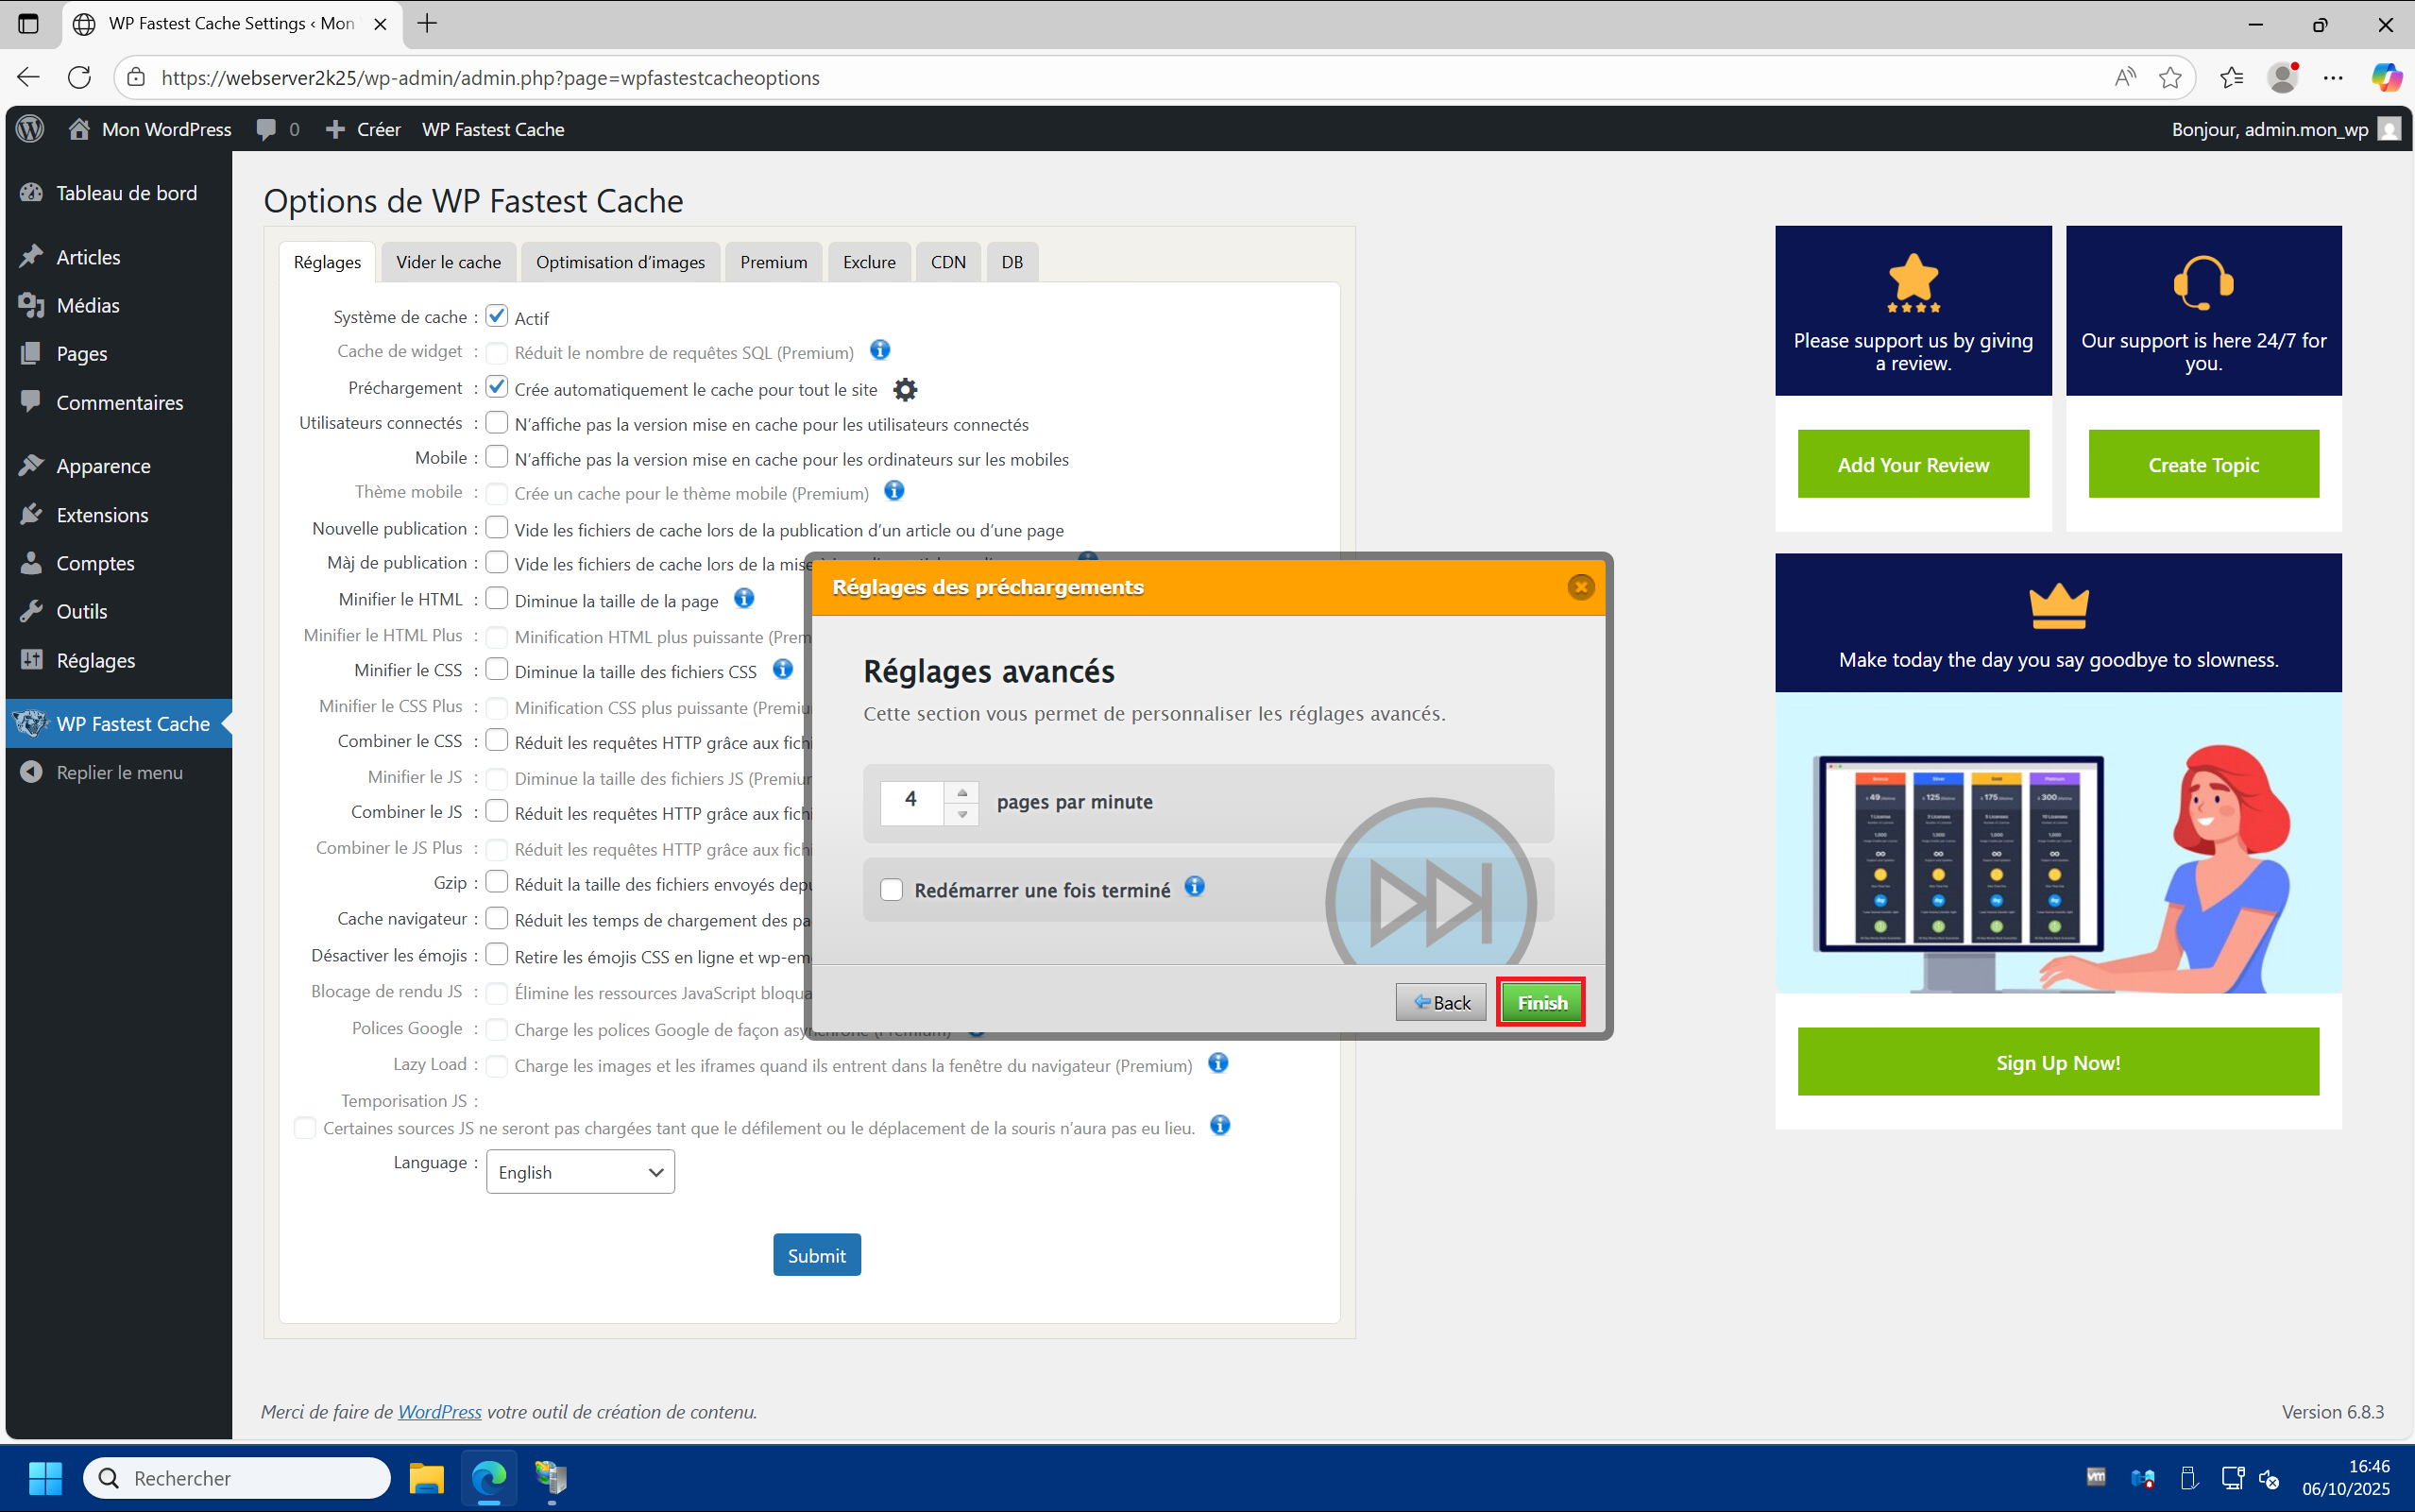
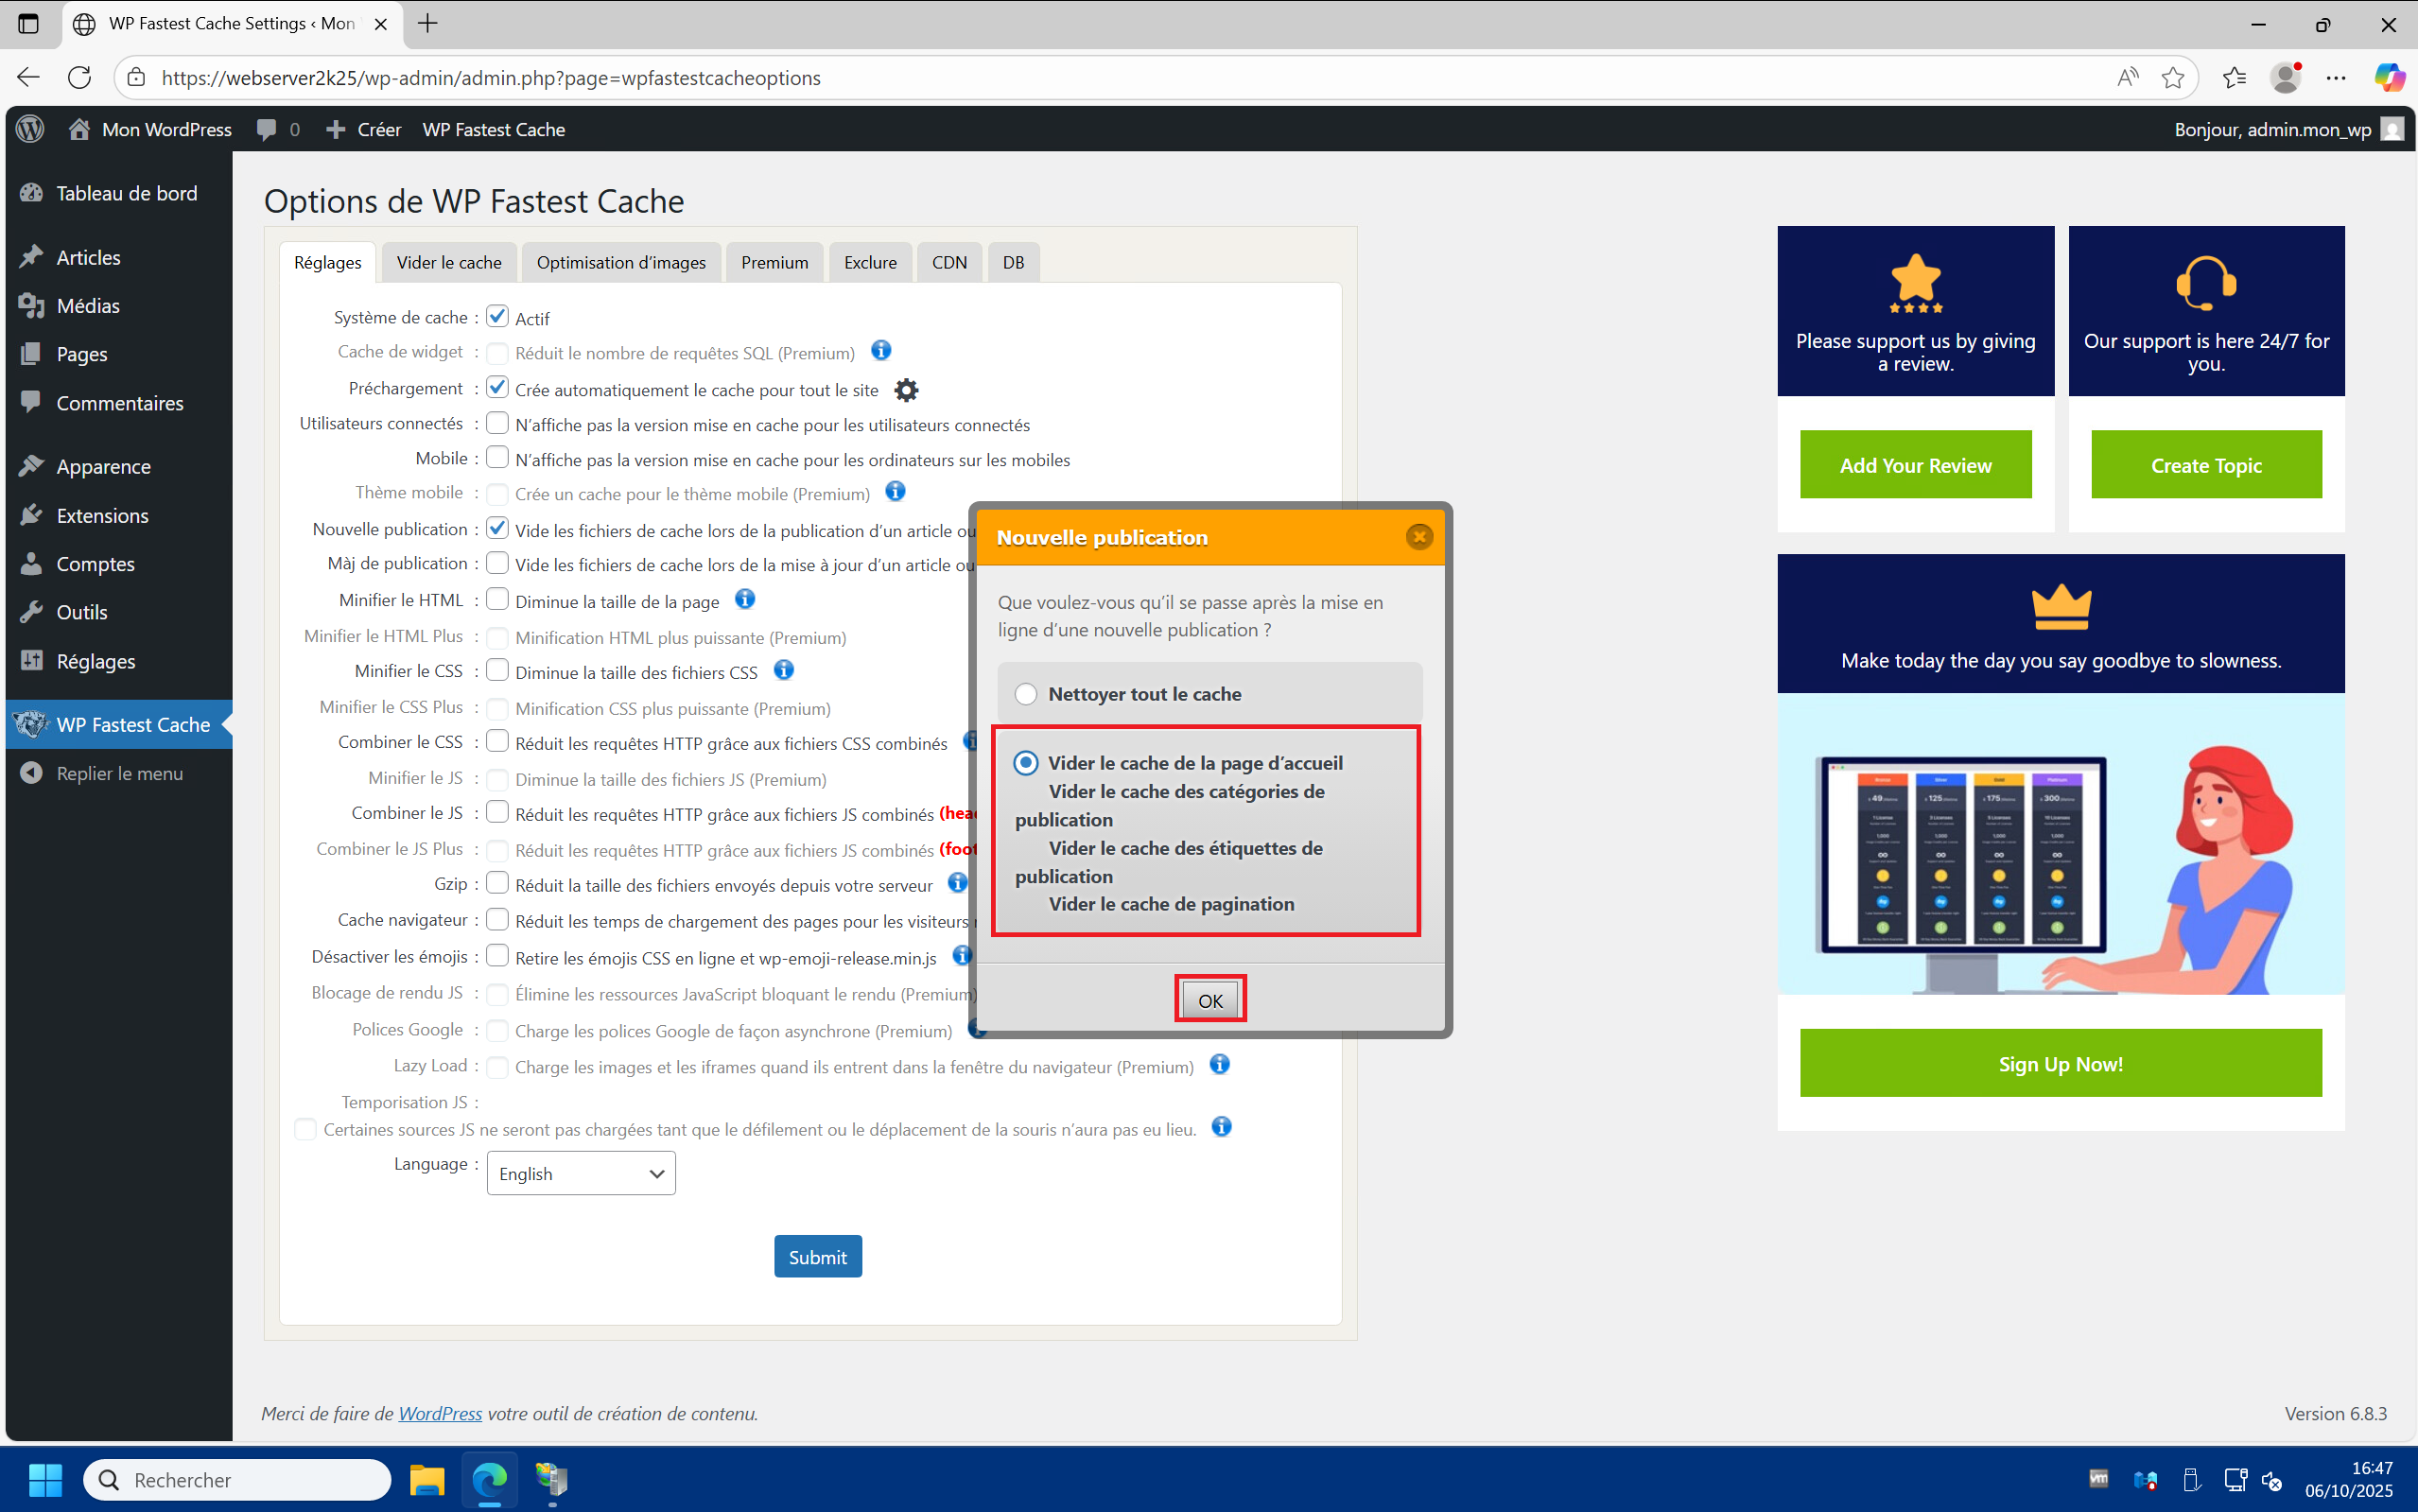
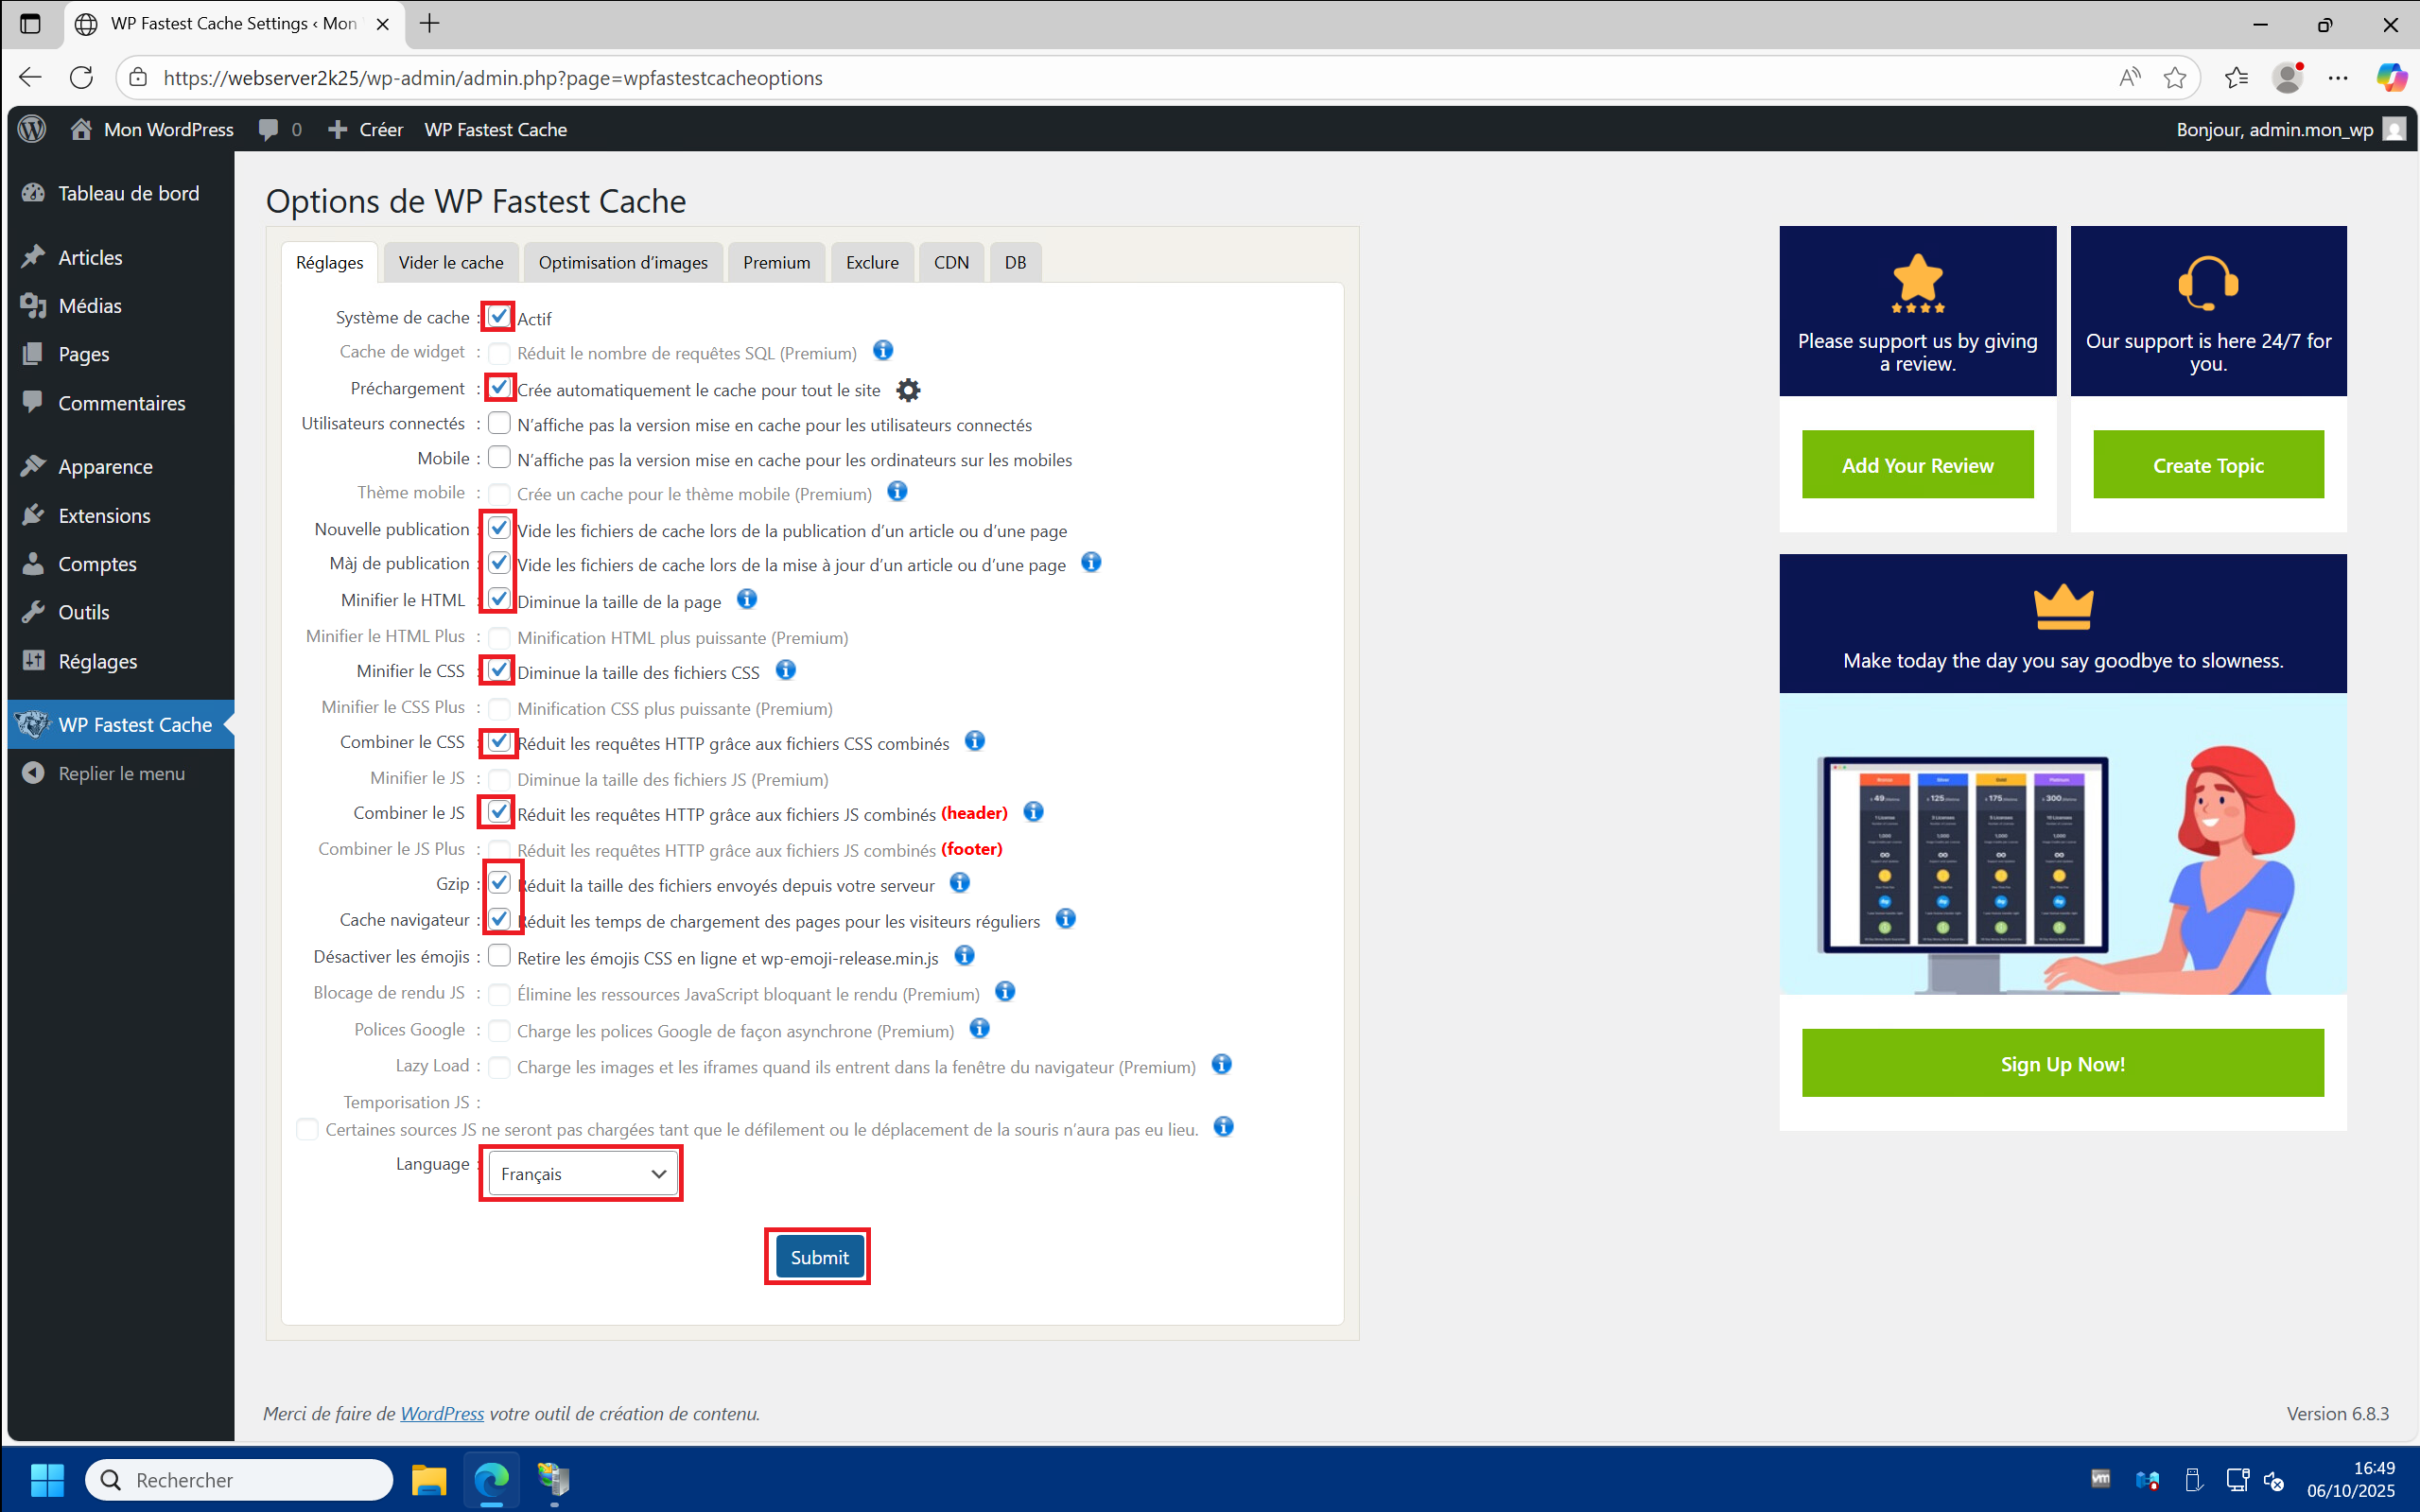
2 – A) Go to the “WP Fastest Cache Options” menu in the “Settings” tab. B) Check the “Caching System” and “Preloading” boxes. At this point a “Preloading Settings” window appears. Select”Default (Contents from Newest to Oldest)” then click “Next” . C) Check all the boxes (Home, Posts, etc…) then click “Next” . D) Click “Finish” . E) Check the “Empty cache files when publishing a post or page” box and select “Empty homepage cache…” then click “OK” . F) Finally, check all the other non-grayed boxes except the last one “Disable emojis” , sselect the language and finally click “Submit” :
3 – You can restart your site from the IIS management console by clicking on “Restart” (it only takes a fraction of a second) :

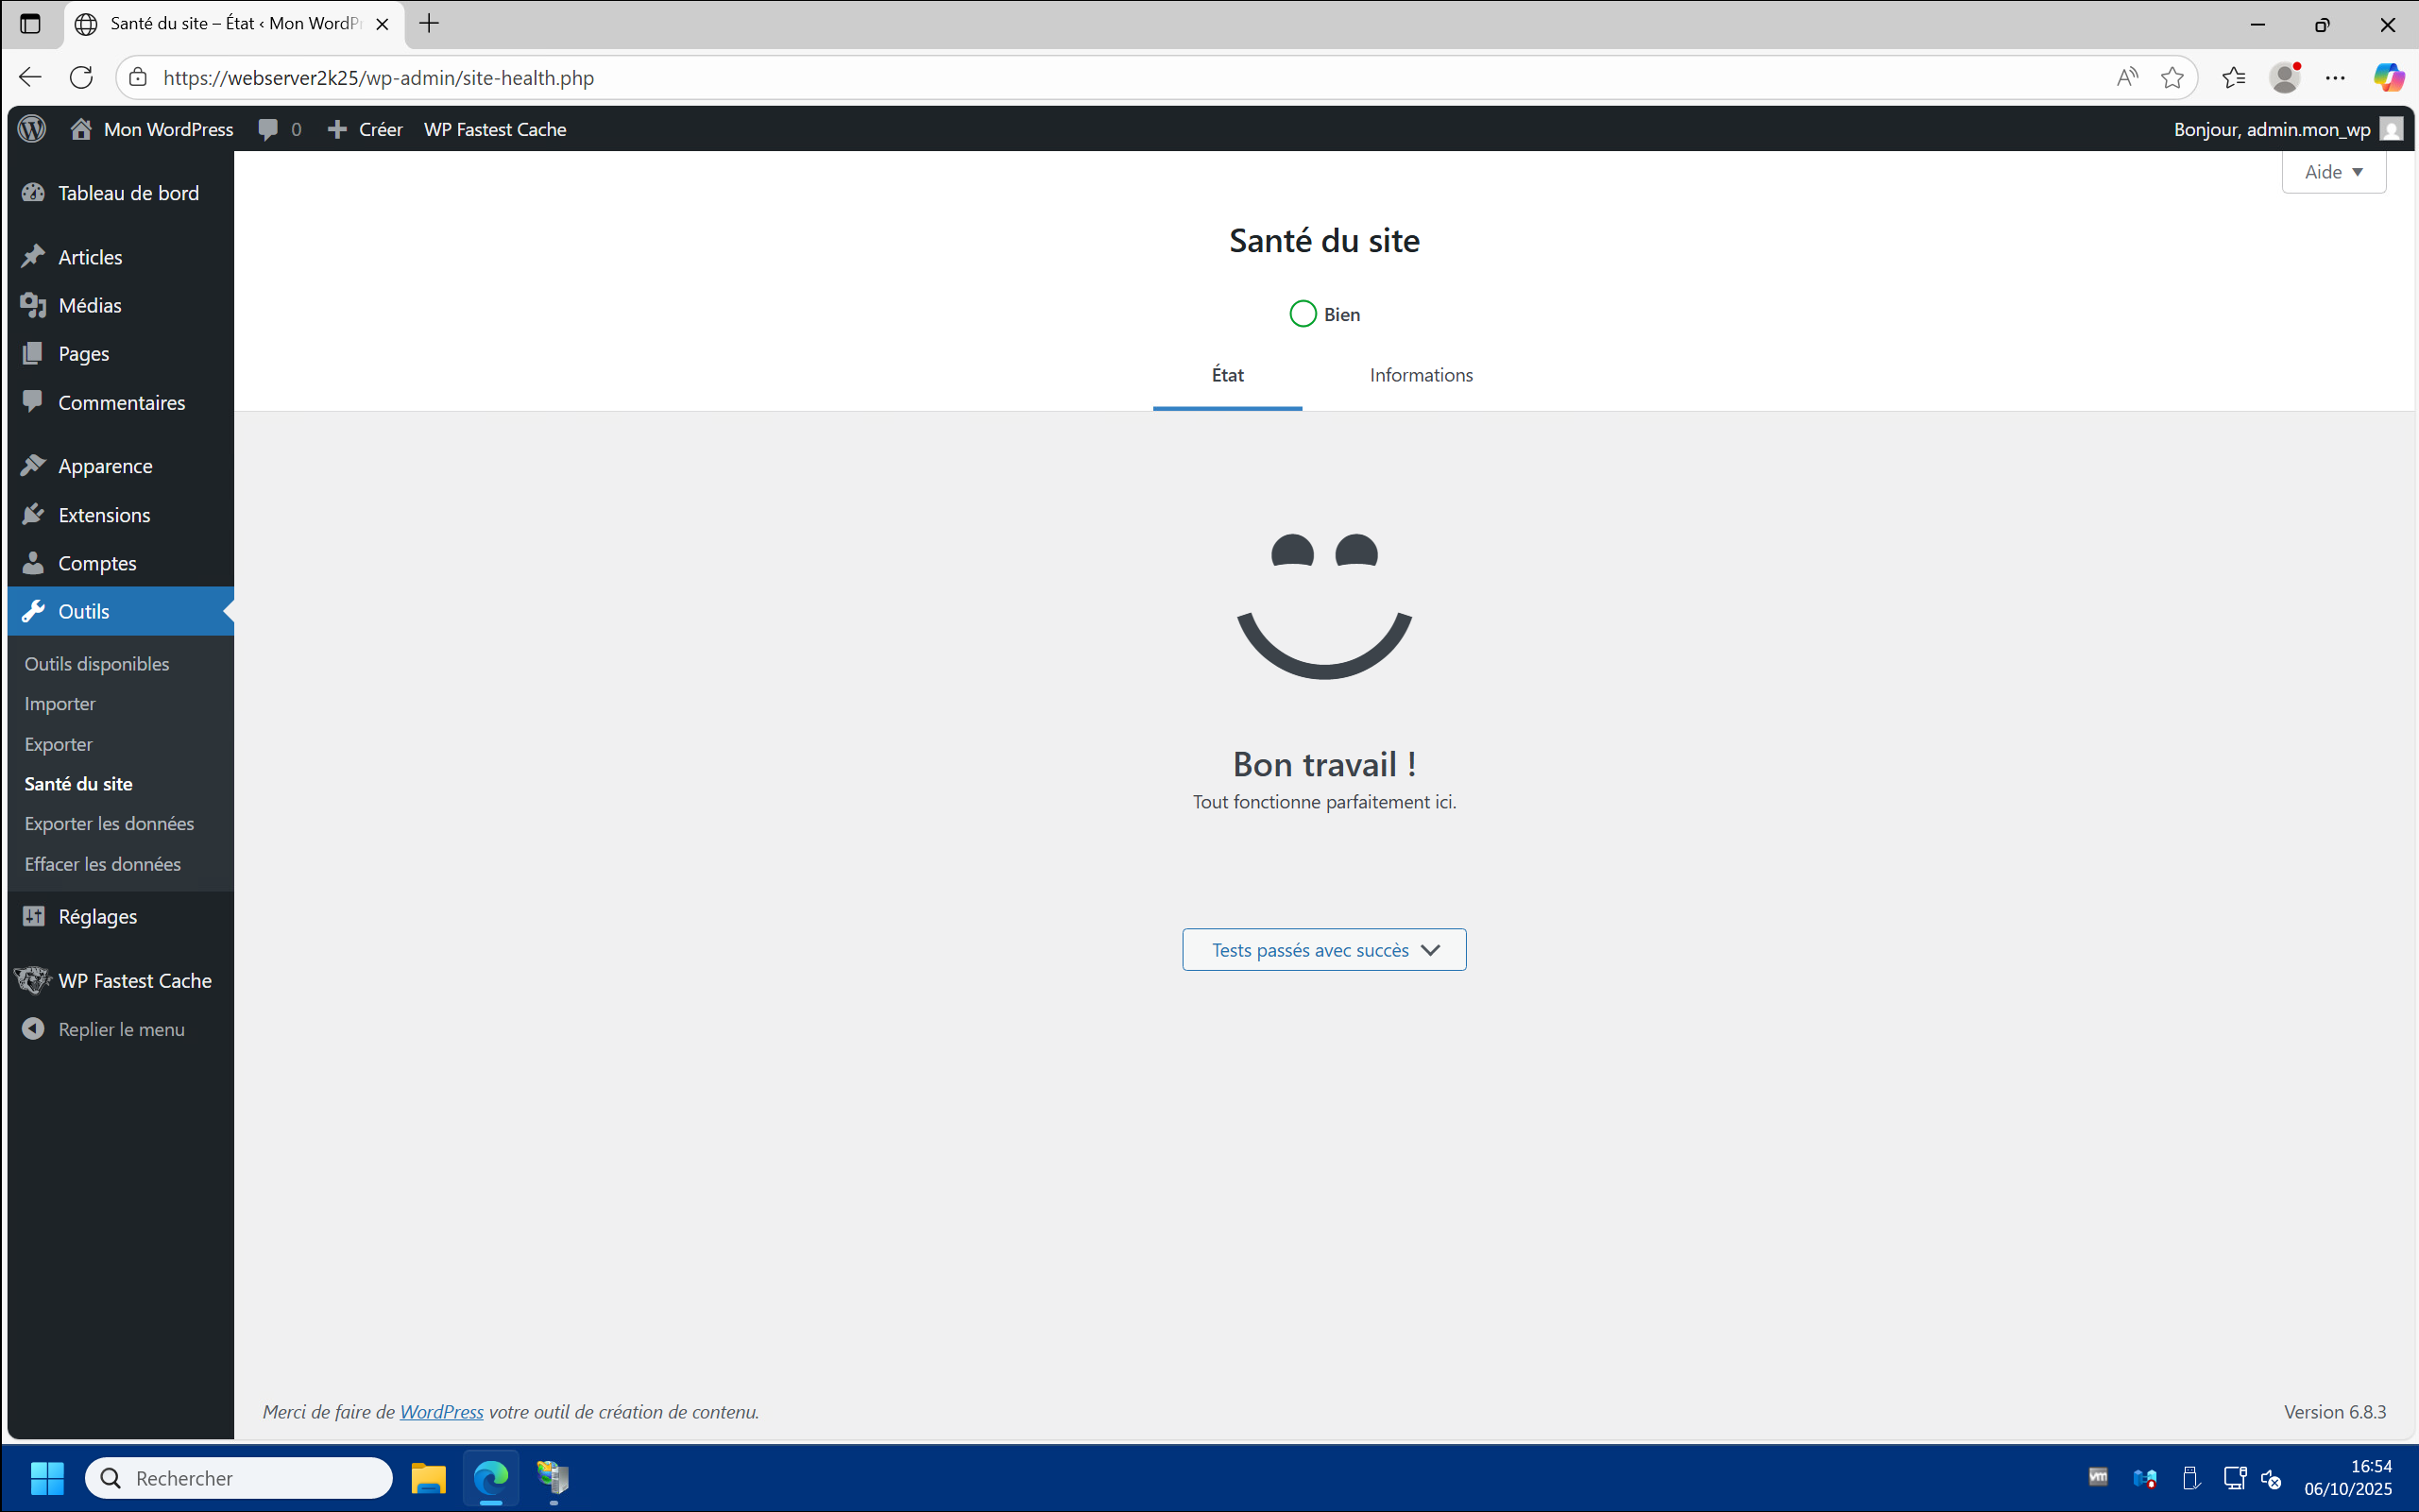
4 – Returning to the “Site Health” page you should see that all recommendations are met and the message “Great job !” appears :
5 – With the different strategies implemented throughout this article, you should see that the site response time is between 1 and 5 milliseconds for cached pages and between 20 and 30 milliseconds for non-cached dynamic pages :
Conclusion
Congratulations if you’ve followed the steps in this article. You should have greatly optimized the performance of your IIS server for WordPress.
In addition to the built-in tools in WordPress and Chrome or Edge browsers (press F12), there are also tools for testing your website’s performance, including wrk on Linux or Apache Jmeter on Windows.
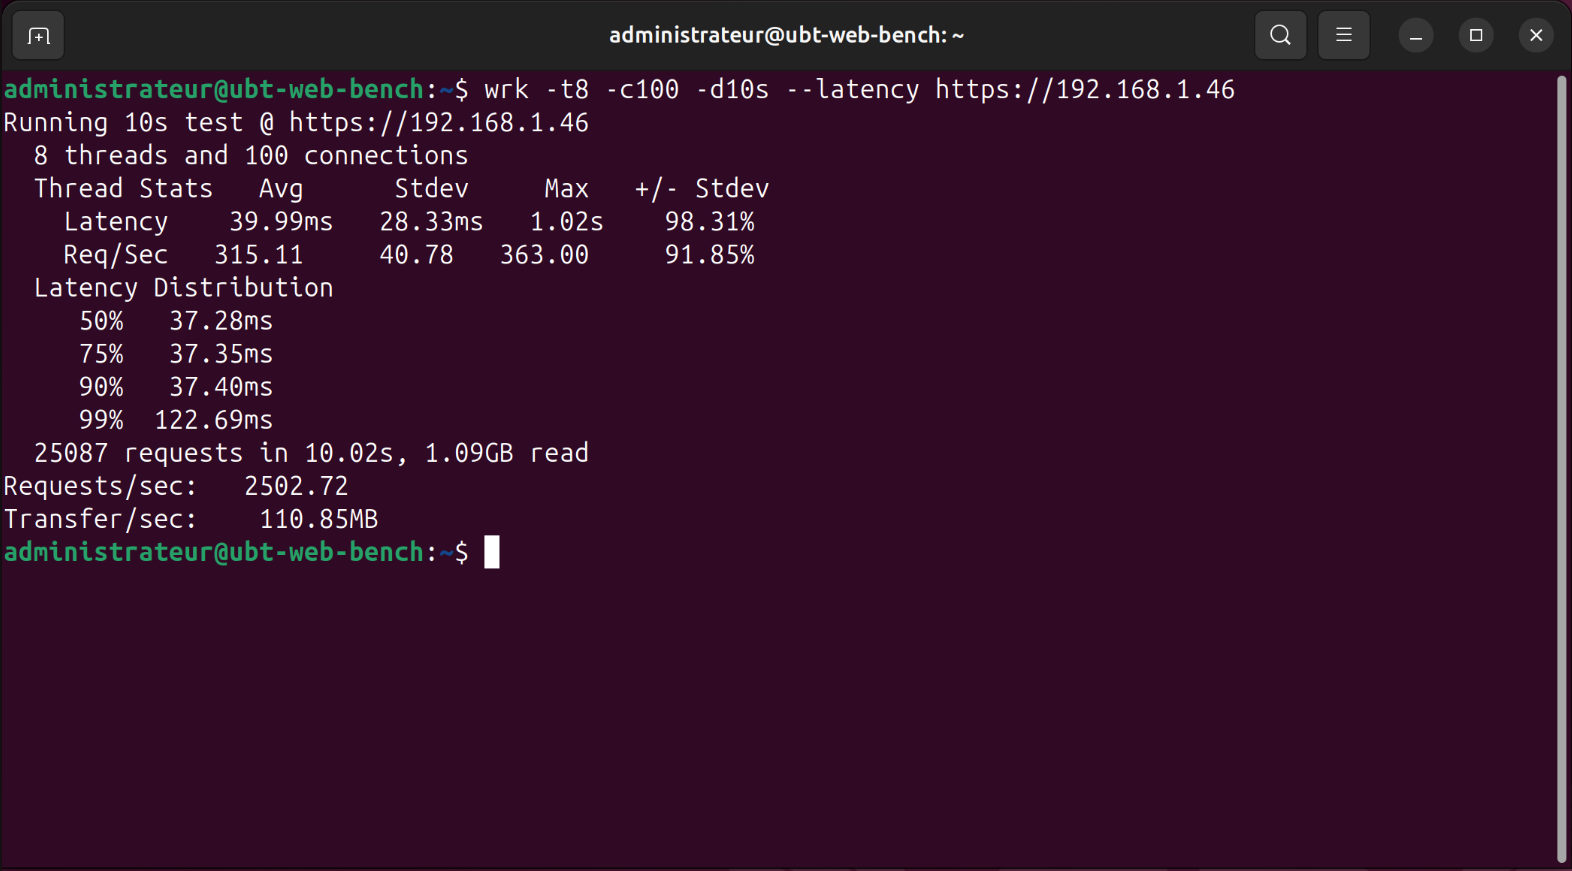
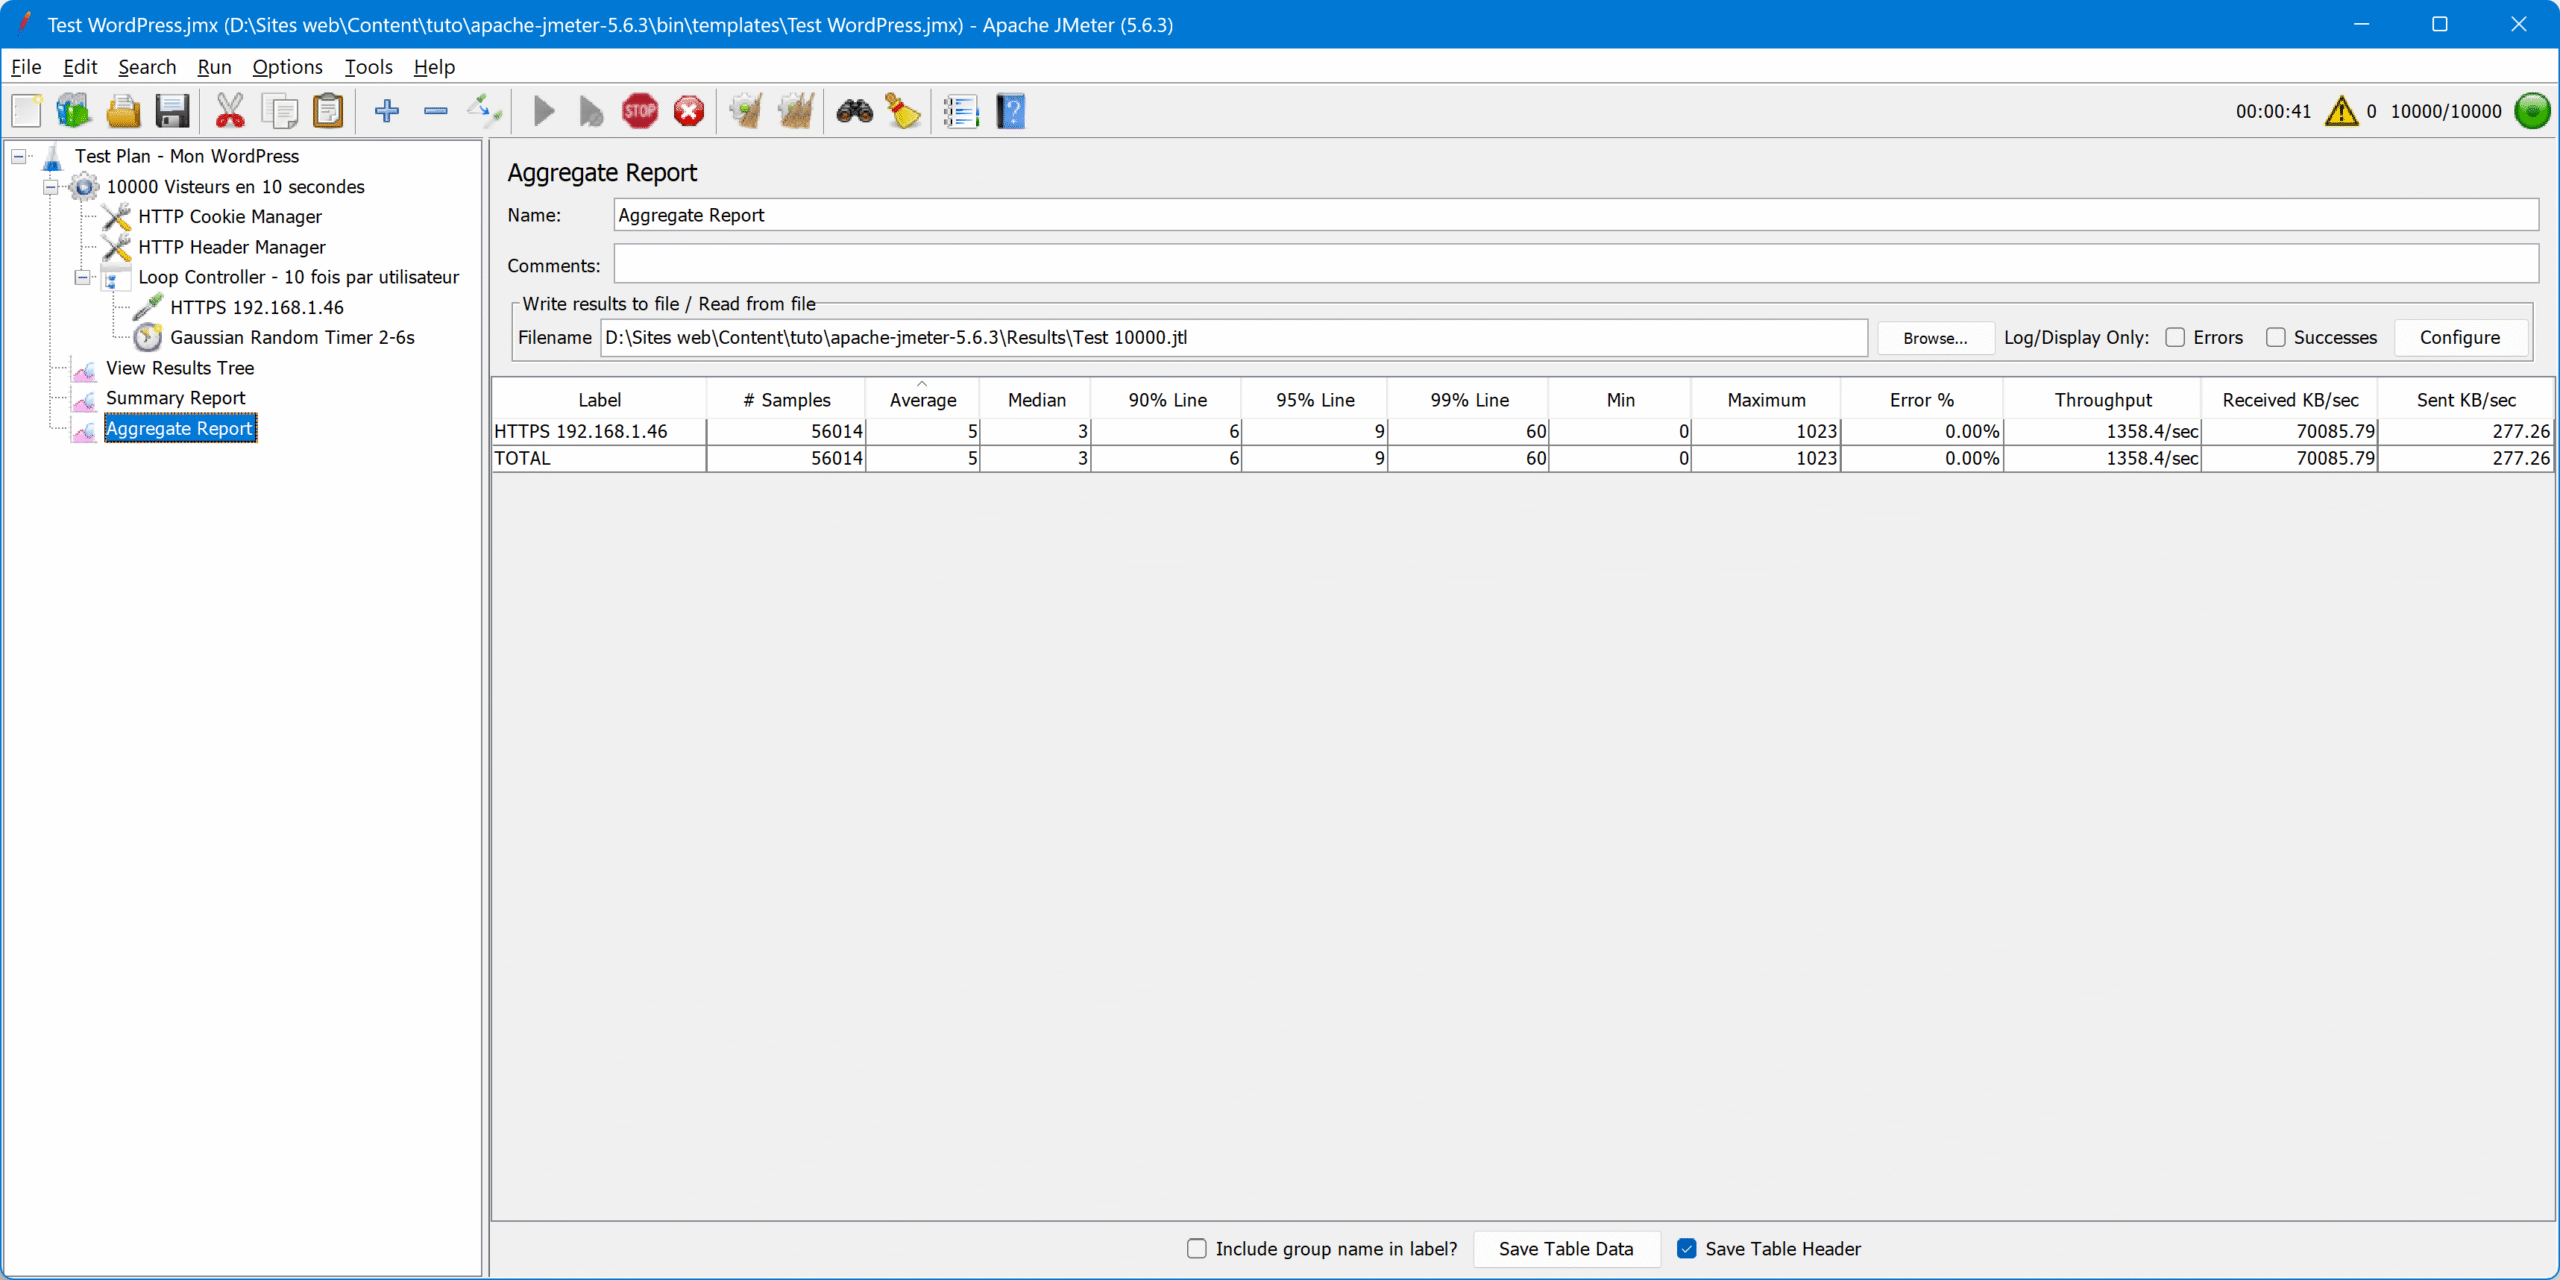
These tests were carried out on a relatively modest and “general public” hardware configuration: an ESXi VM equipped with 8 AMD Ryzen 7 – 3700X CPU cores @ 3.6 GHz, 8 GB of DDR4 RAM, SSD NVMe PCIe 3.0 Samsung 980 Pro (r/w : 3500, 2700 Mo/s) on a 1 Gb/s local network.
Obviously, this is not a multi-server farm infrastructure (which can be done under IIS) backed by a CDN capable of handling several million visits per day, but this should be more than enough for a personal blog generating between 100,000 and 400,000 visitors per day depending on the richness of the content. The limiting factor will very clearly be the internet bandwidth available at home or at your hosting provider.
You can easily rent a dedicated server from a hosting provider for an affordable price as an individual (from €11.99 including tax per month with 300 to 500 Mb/s of bandwidth at OVH for example) and a lifetime Windows Server 2025 Standard license (up to 24 cores) can easily be found for less than €50 at specialist resellers such as G2A ou Destock Informatique.
