Introduction
The web is a powerful tool for expressing ideas. It allows you to reach a wide audience with relatively little resources and a certain independence.
You can, of course, rent or even get website hosting for free from your ISP. But these offers generally limit your ability to store and publish all the content you want. This is where choosing self-hosting or bare-metal hosting may be more relevant.
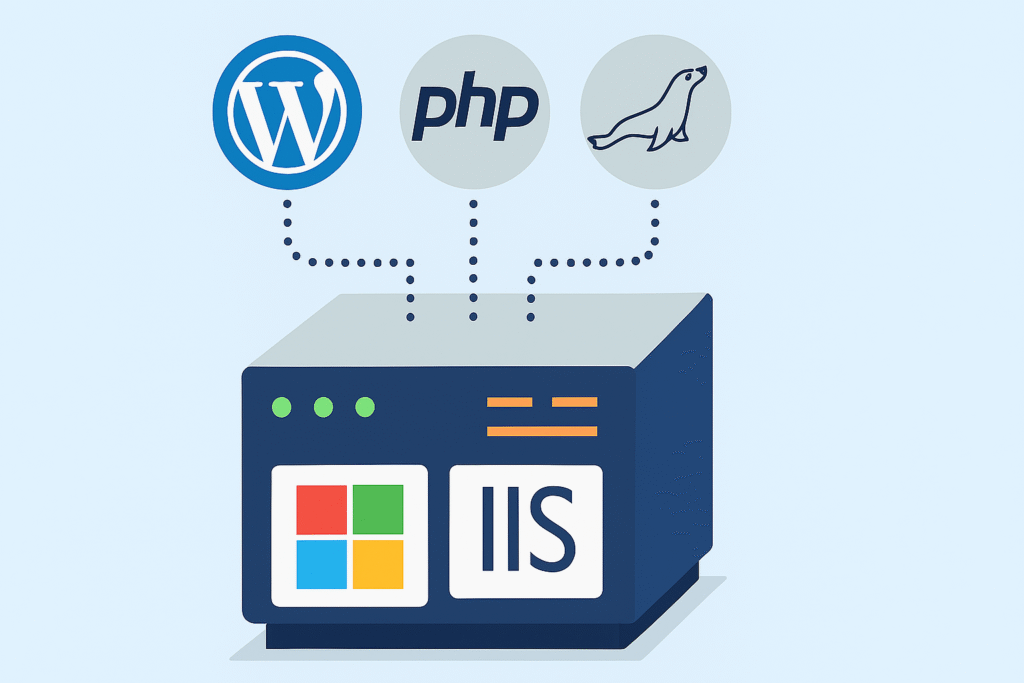
So why choose WordPress? Because it’s a turnkey framework that allows anyone to start publishing text, images, and video to the web, without having to code. And why IIS on Windows? For roughly the same reasons. To be able to manage the web server and its content efficiently and intuitively. The key is your ideas and your content, not becoming a super-expert at web development or being dependent on “Cloud” proponents.
So here’s a step-by-step guide in 4 major steps to install and configure your own WordPress blog from A to Z on a Windows server. You’ll see that it’s ultimately very simple. Enjoy!
Summary
- Prerequisites
- Step 1: Install and configure the IIS role
- Step 2: Install and configure the MariaDB database
- Step 3 : Install PHP
- Step 4 : Install and configure WordPress
- Conclusion
Prerequisites
- Physical or virtual machine running Windows Server 2025
- MariaDB 12
- Microsoft Visual C++ Redistribuable (vcredist)
- PHP Manager 2.12 for IIS
- PHP 8.4 NTS
- WordPress 6.8
Step 1: Install and configure the IIS role
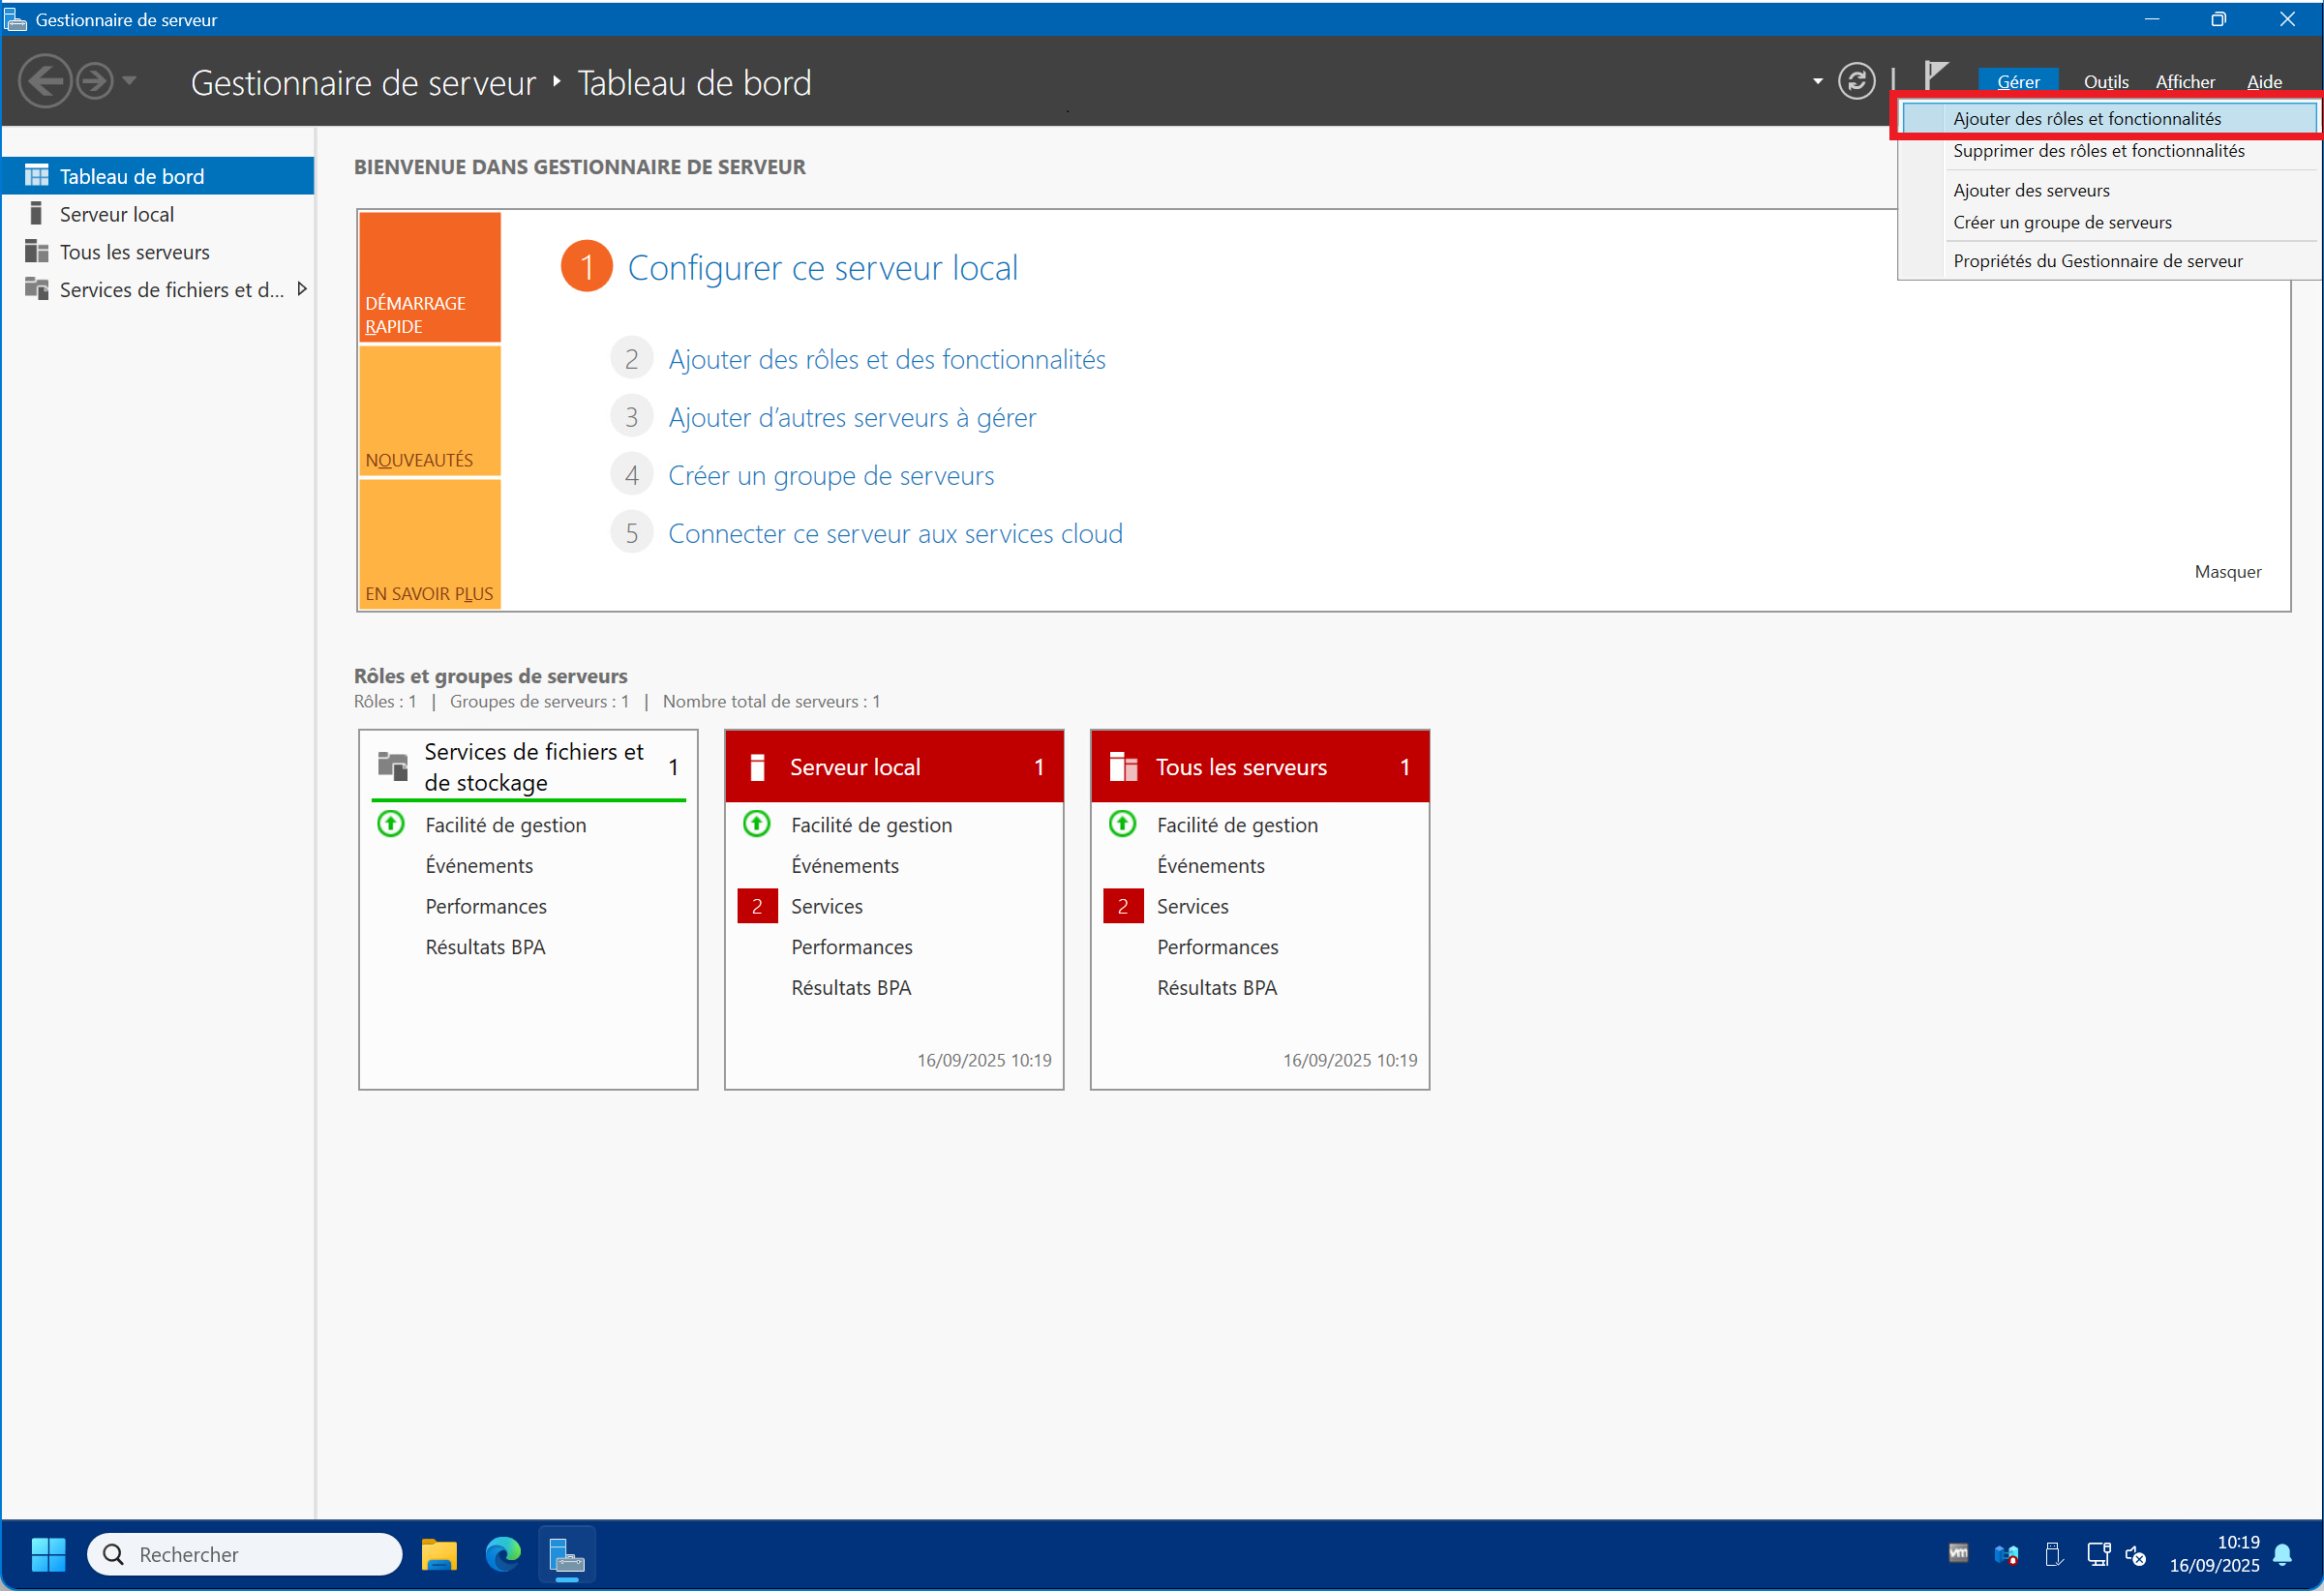
1 – If you haven’t already, launch the “Server Manager” , then click on “Manage” in the top right corner, then on “Add roles and features” :
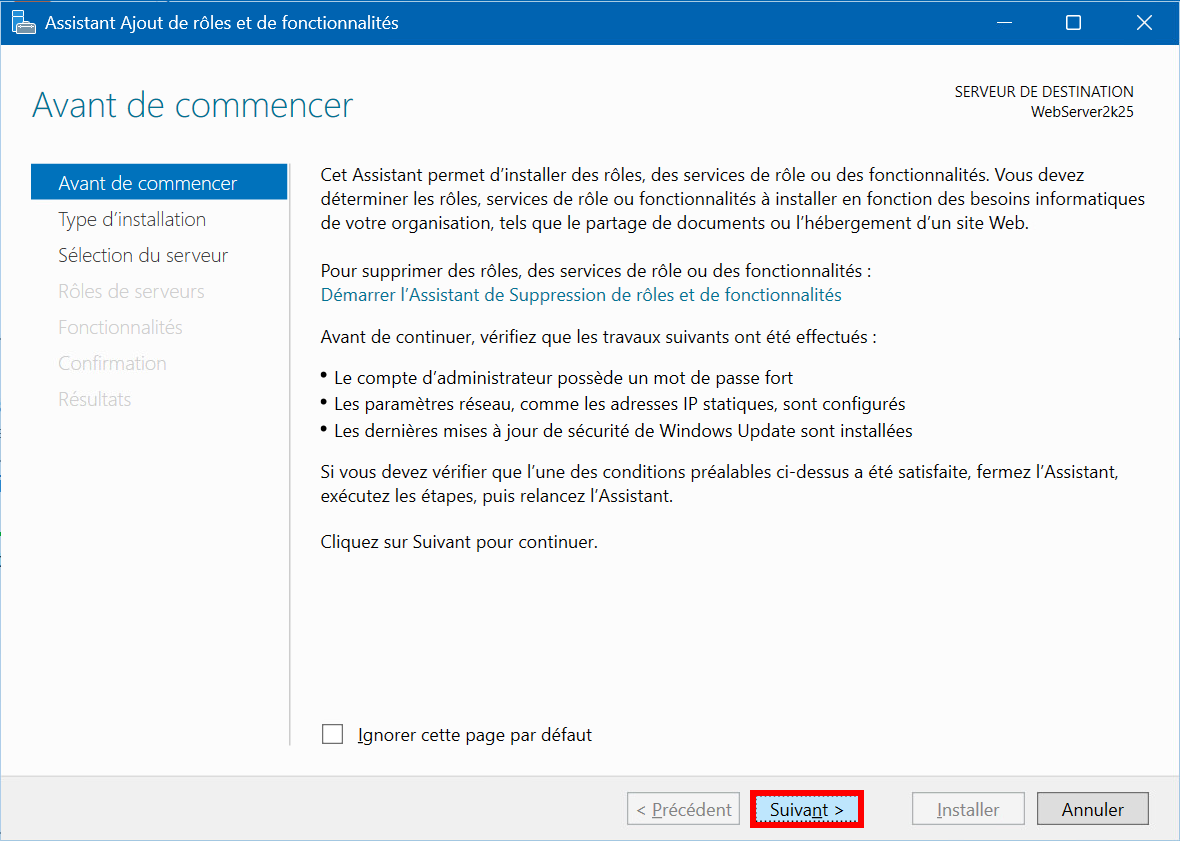
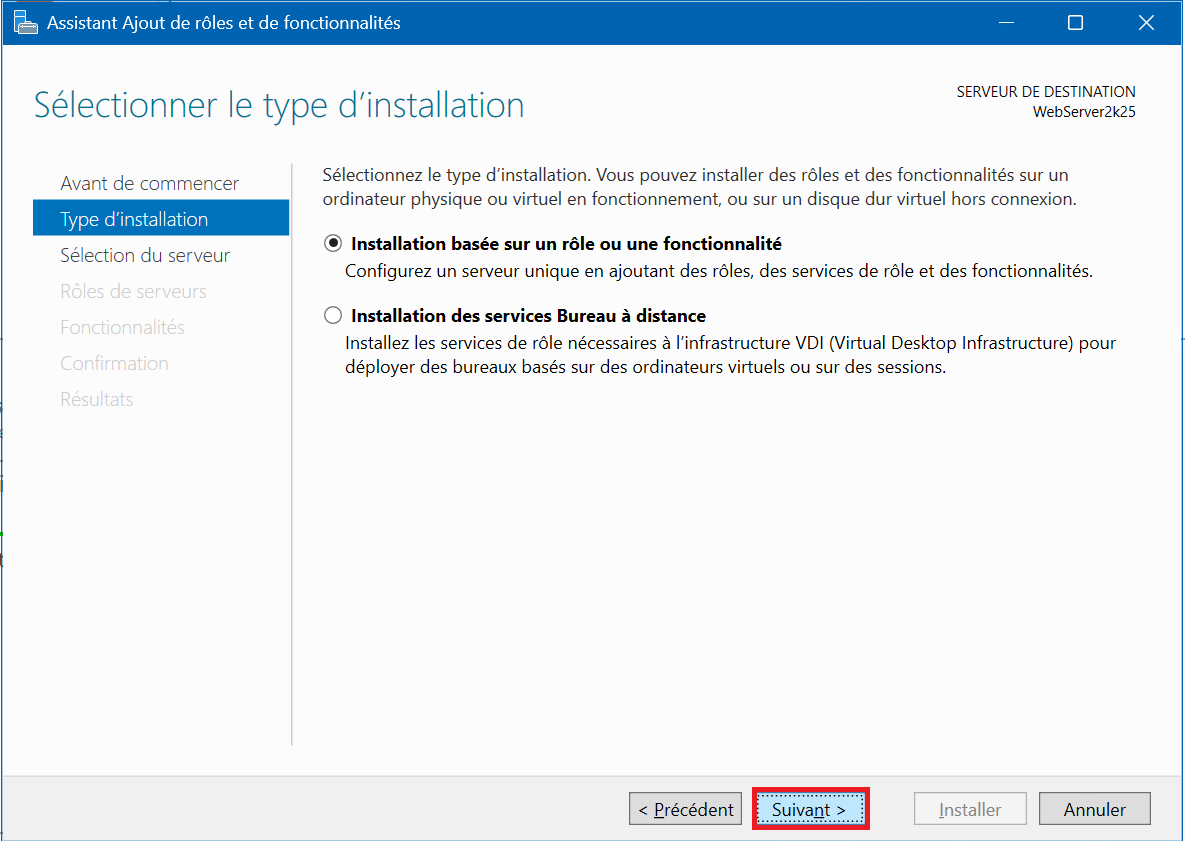
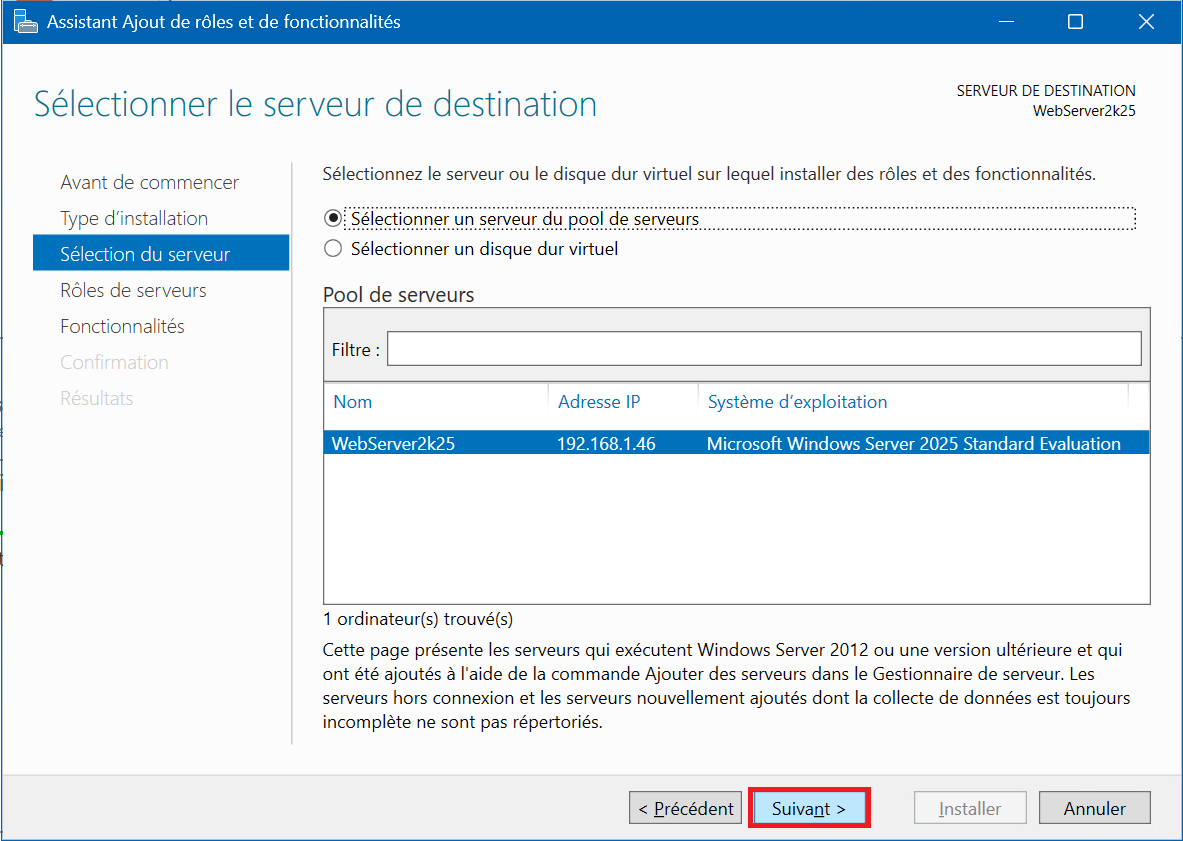
2 – Click on “Next” , then select “Role-based or feature-based installation” then click “Next” and finally select “Select a server from the server pool” , then click “Next” :
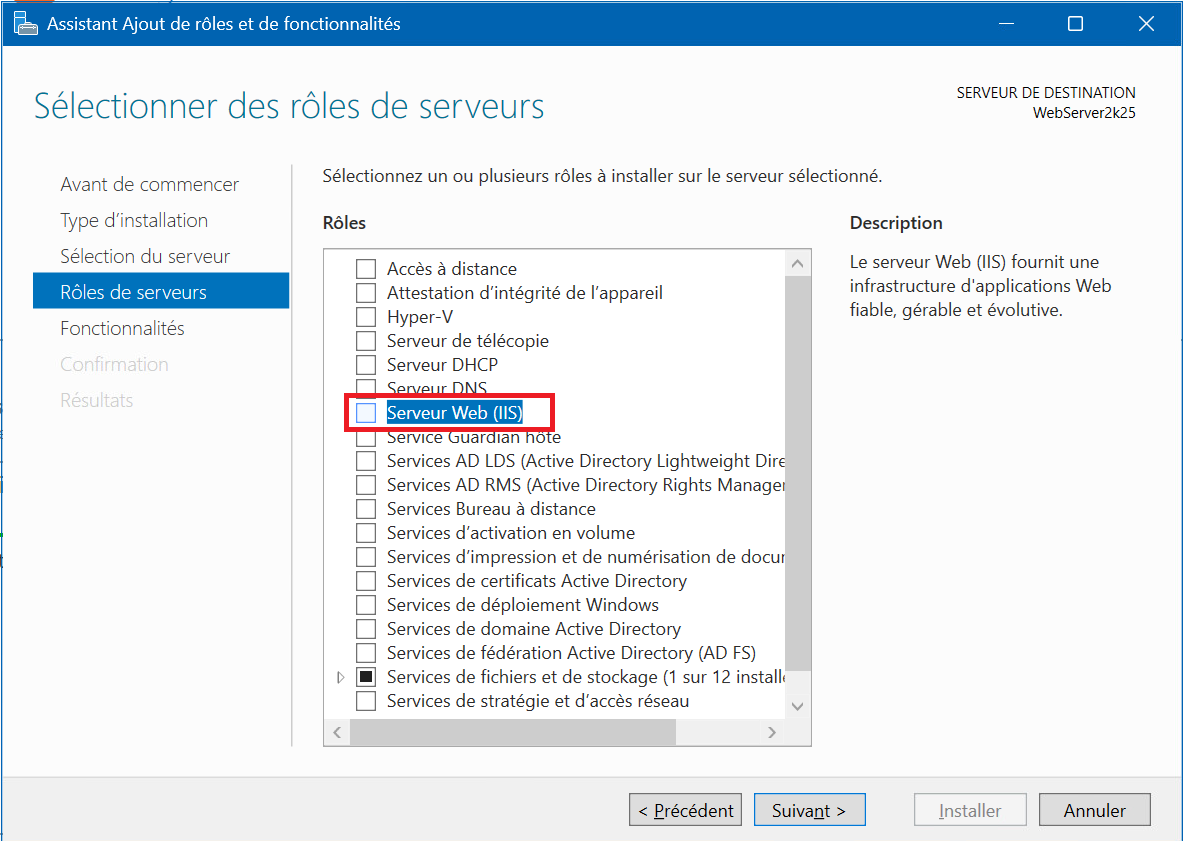
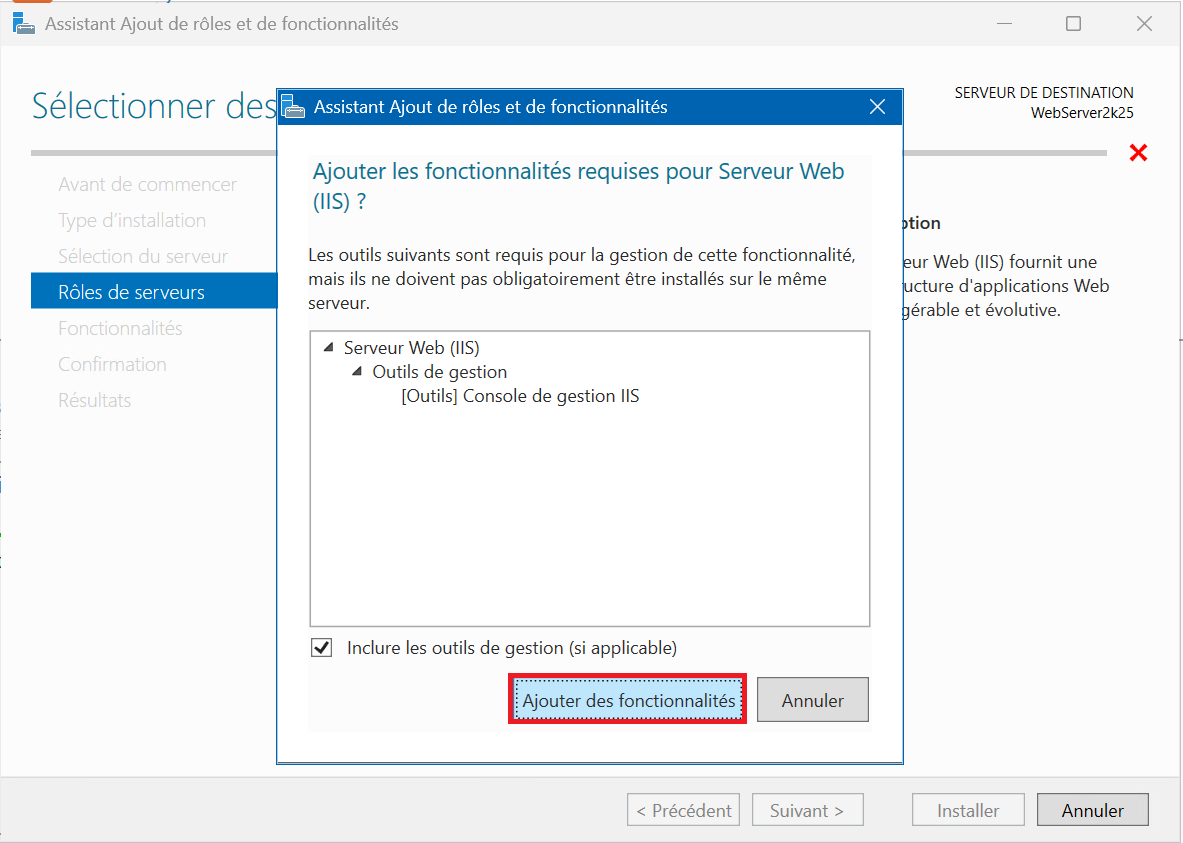
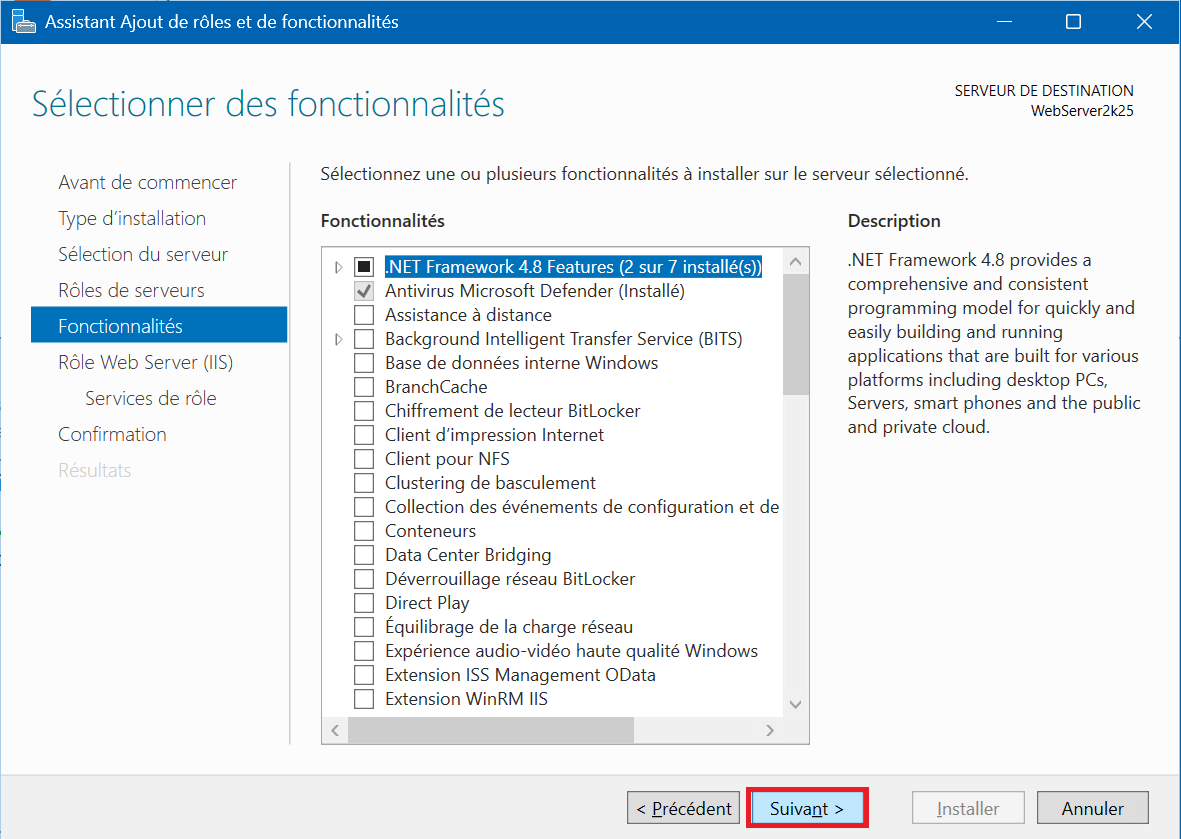
3 – In the “Roles” menu check the “Web Server (IIS)” box, then in the pop-up that appears, click on “Add features” , and finally in the “Features” section, click on “Next” :
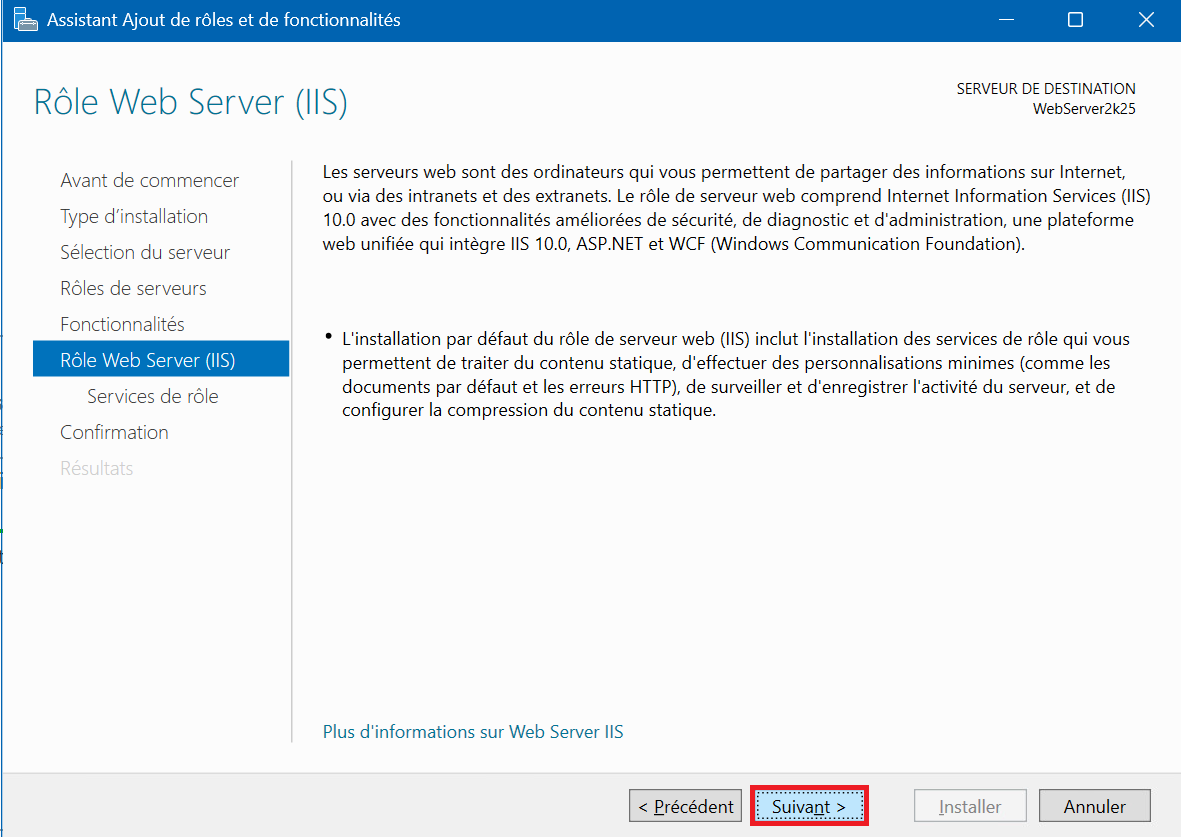
4 – In the “Web Server Role (IIS)” section click on “Next” :
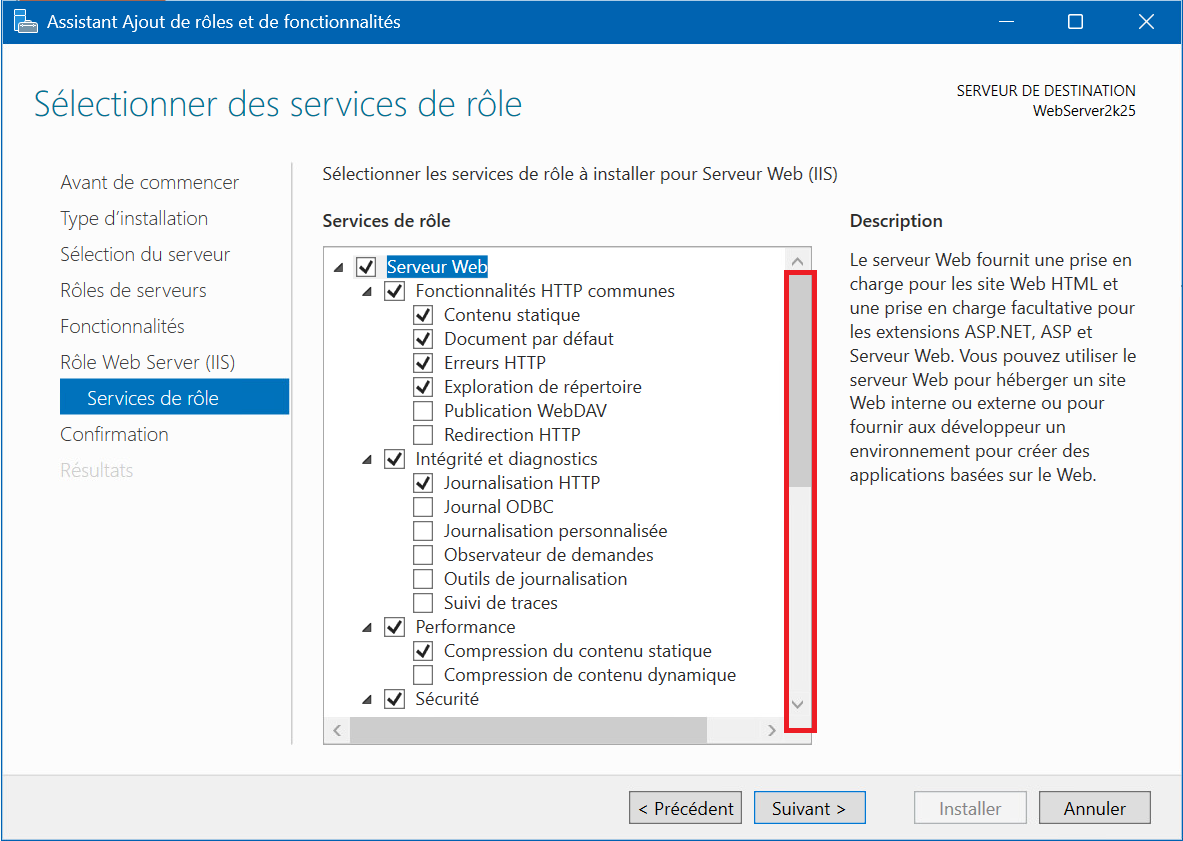
5 – In the “Role Services” section, scroll down the menu, expand the “Application Development” submenu, then check “CGI” , then click “Next” :

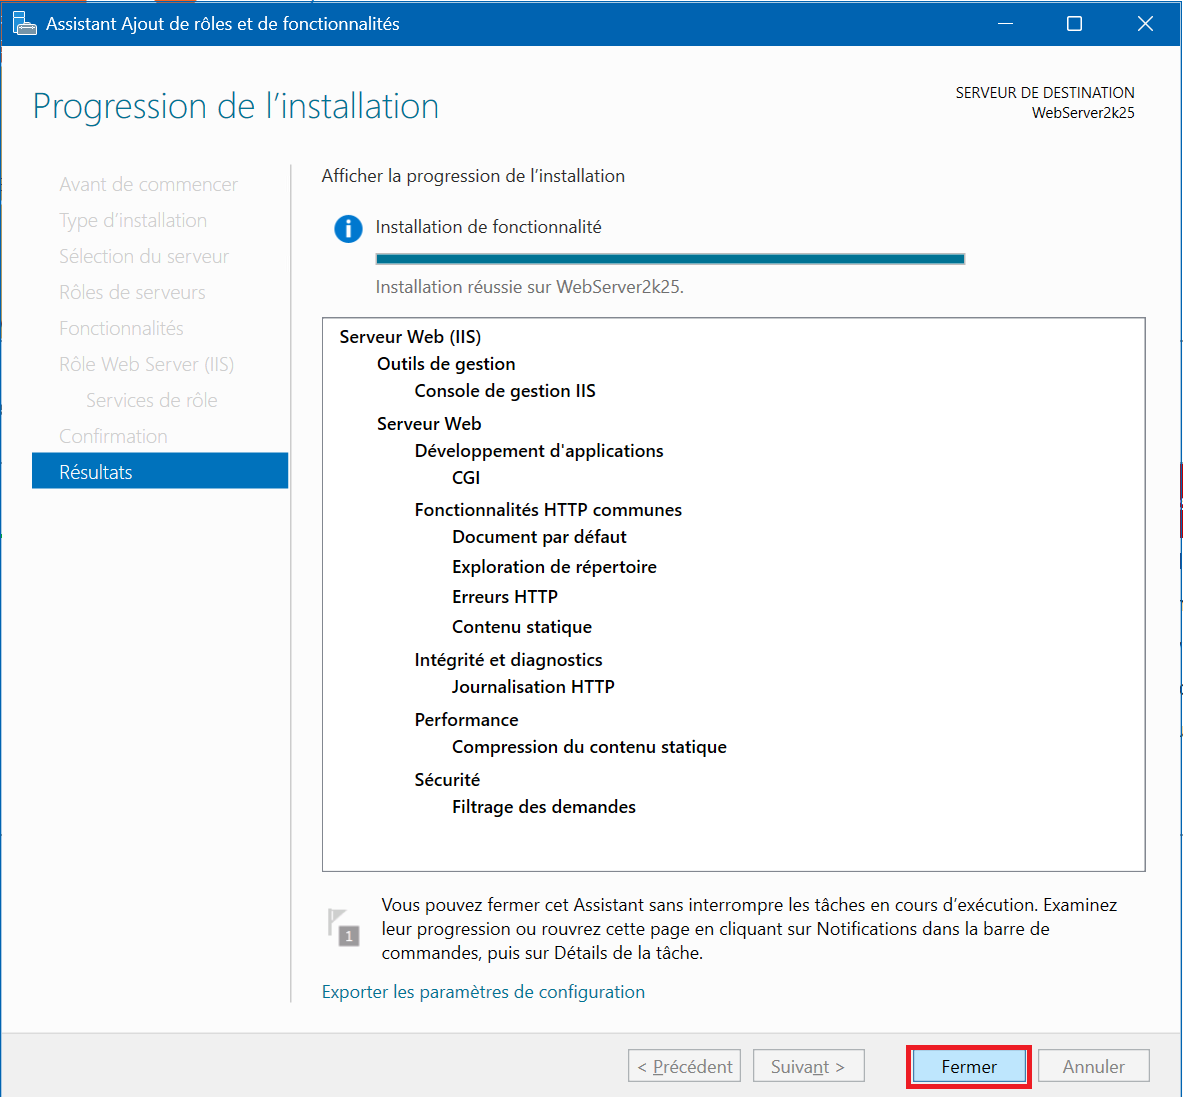
6 – In the “Confirmation” section, click on “Install” then on “Close” once the installation is complete :

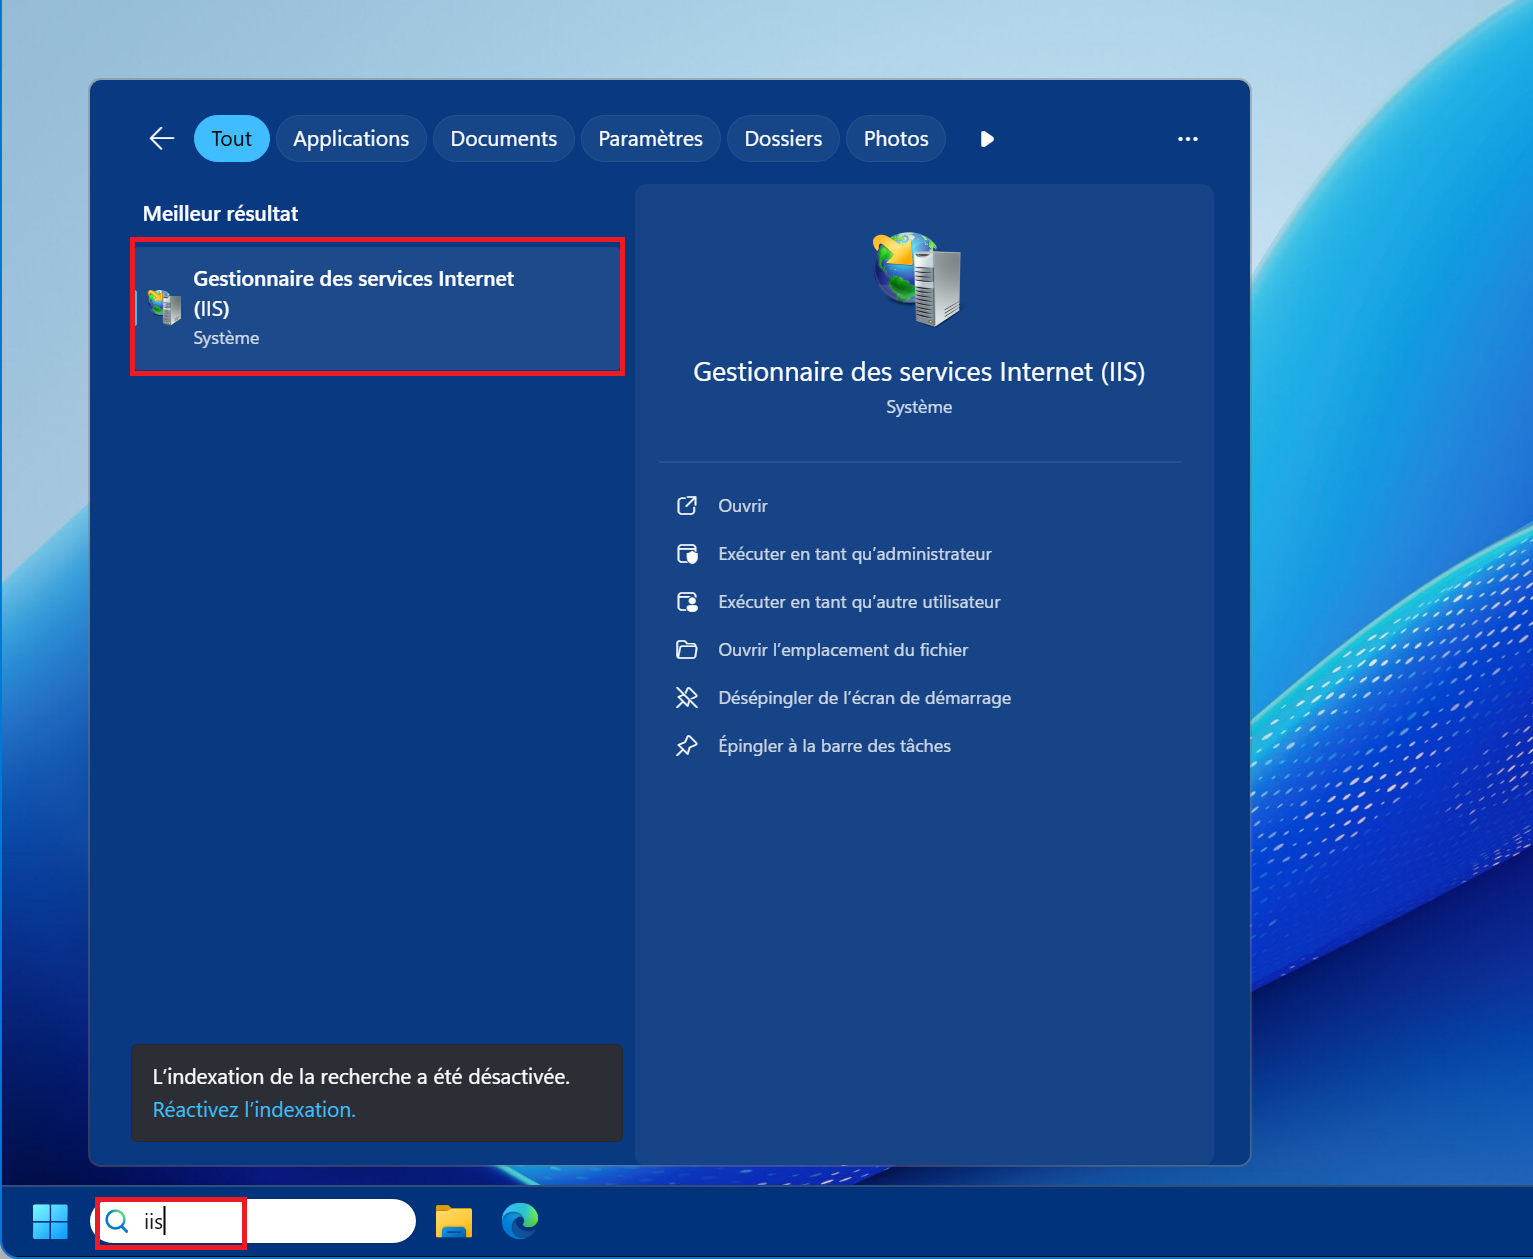
7 – You can now launch the “Internet Information Services (IIS) Manager” from the Start Menu or search bar :
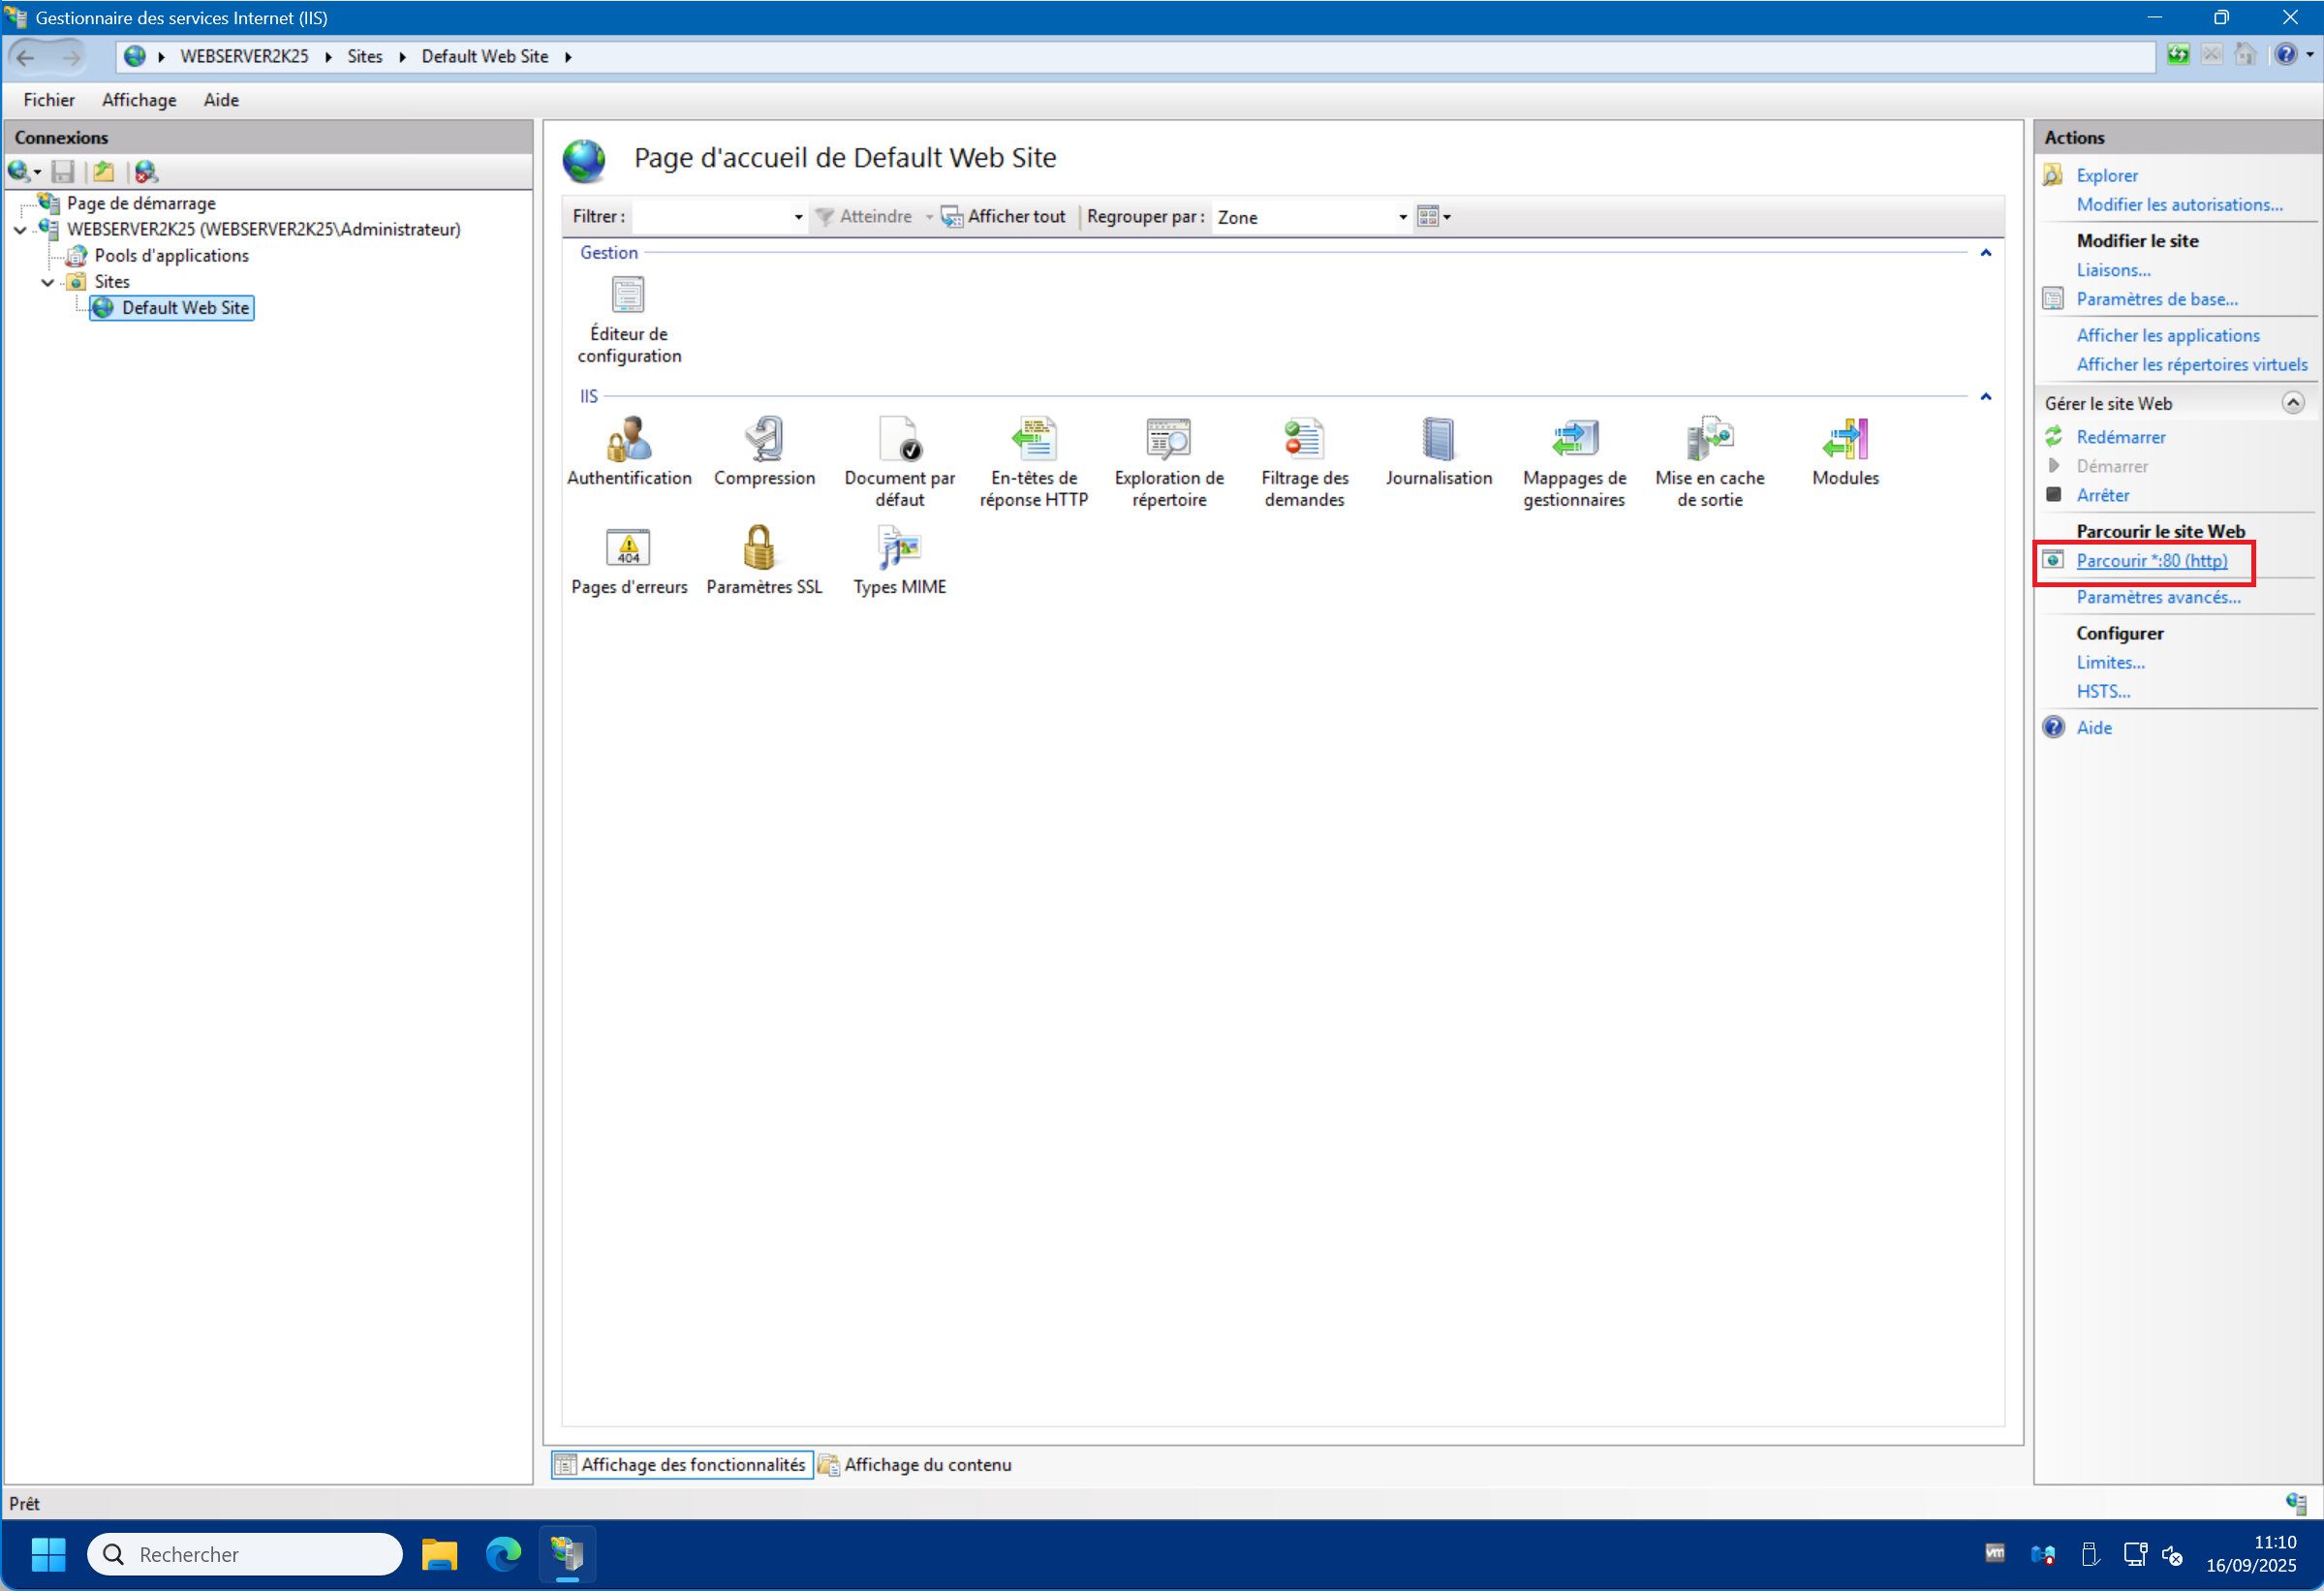
8 – In the “Internet Information Services (IIS) Manager” you can already see a first default website by unrolling the tree below the server and “Sites” . Click on “Default Web Site” , then on “Browse *:80 (http)” to view the site :
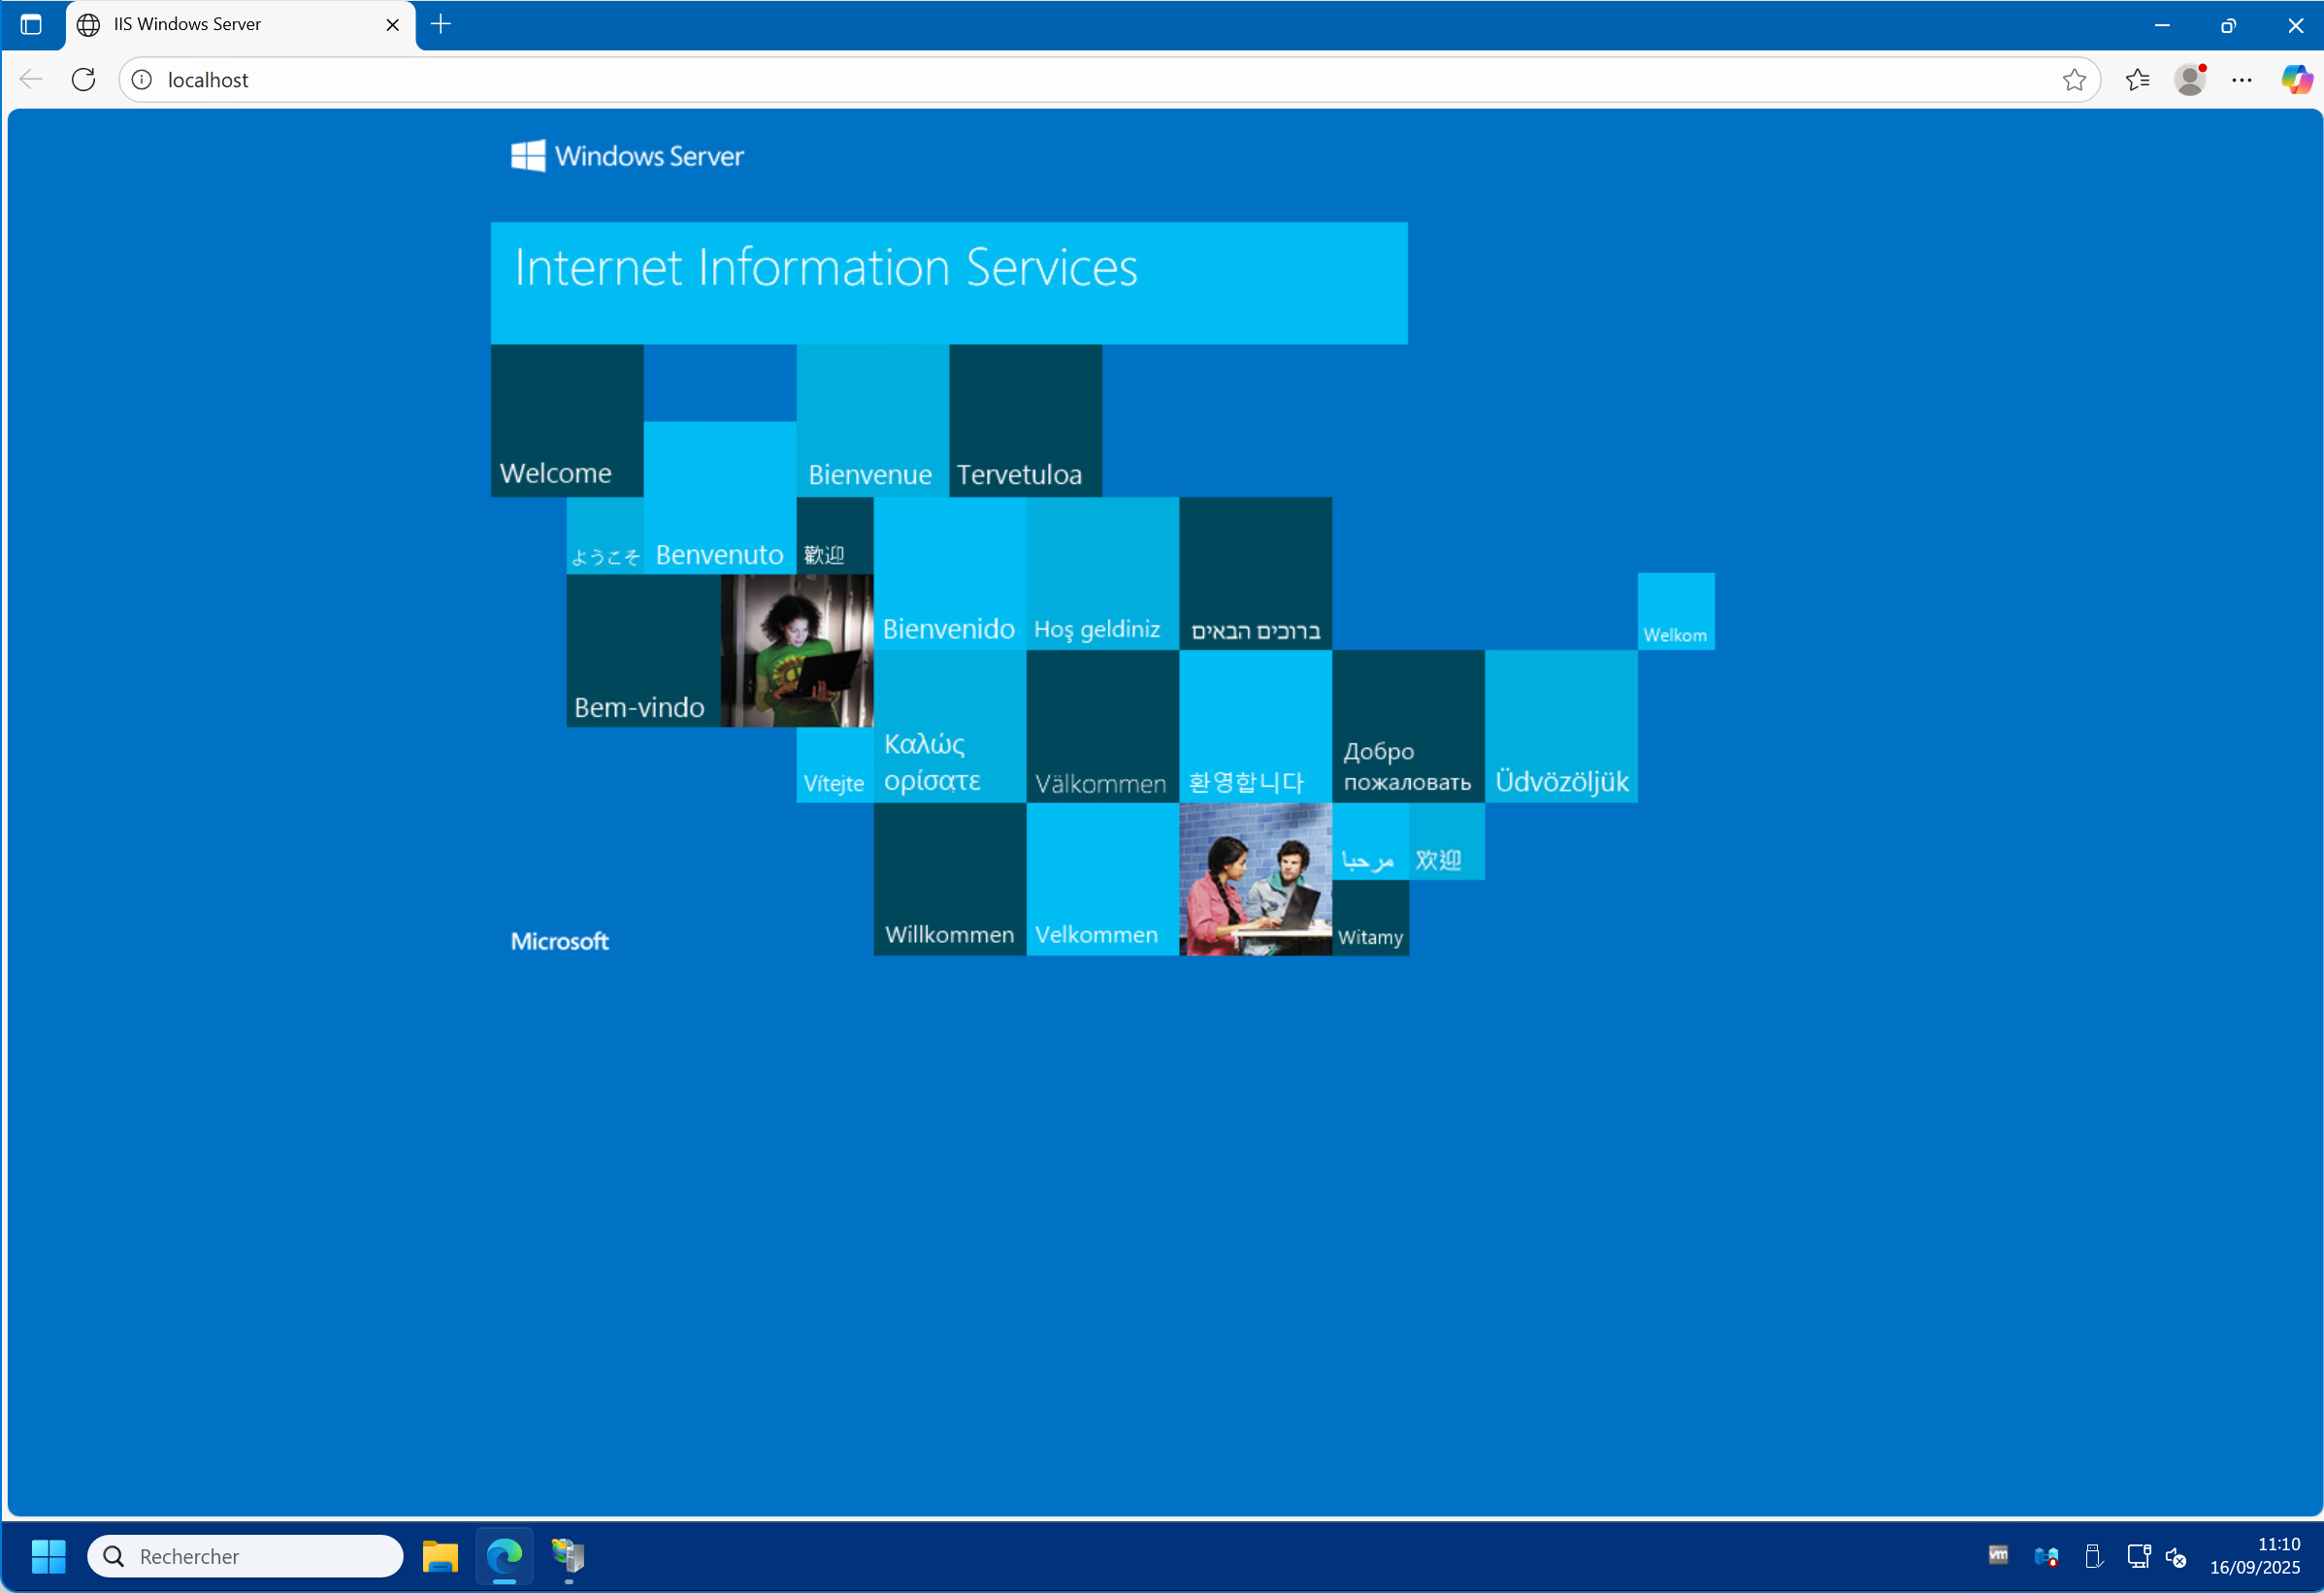
9 – In your web browser, the default page should appear at “http://localhost” , confirming the successful installation of the IIS role. Congratulations! You have completed step 1.
Step 2: Install and configure the MariaDB database
A – MariaDB Installation :
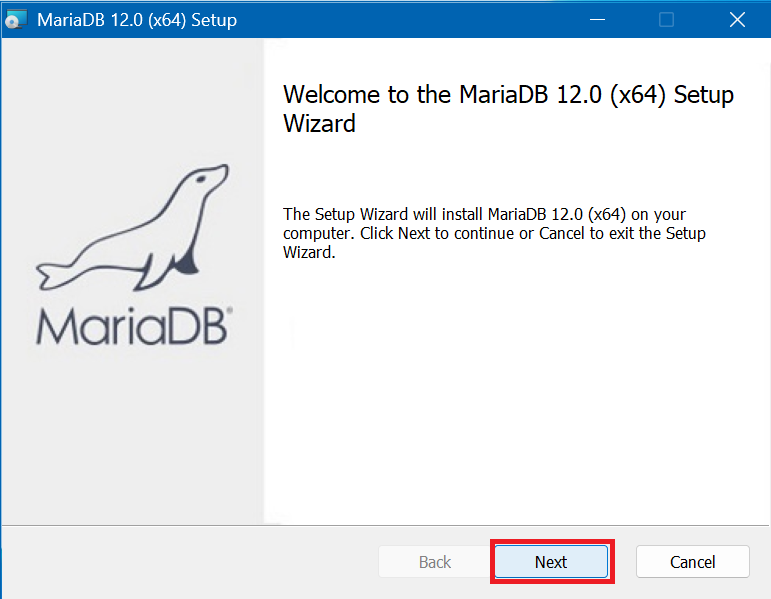
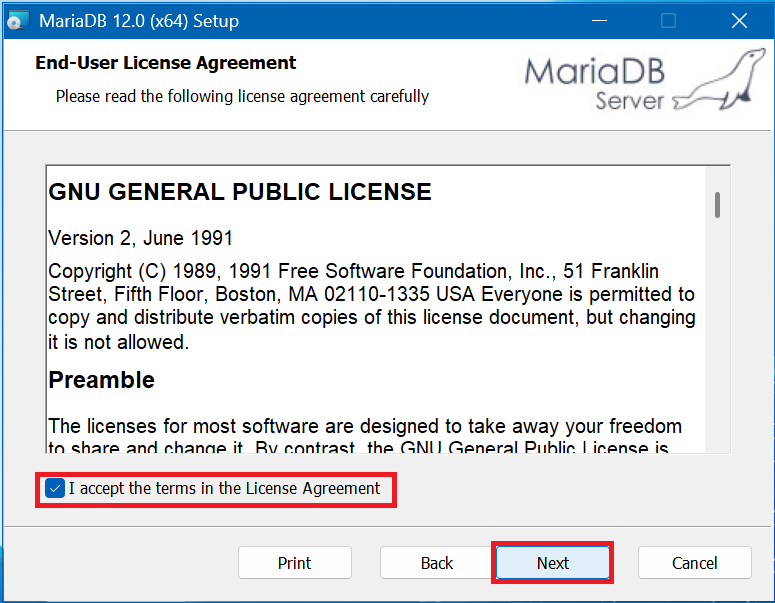
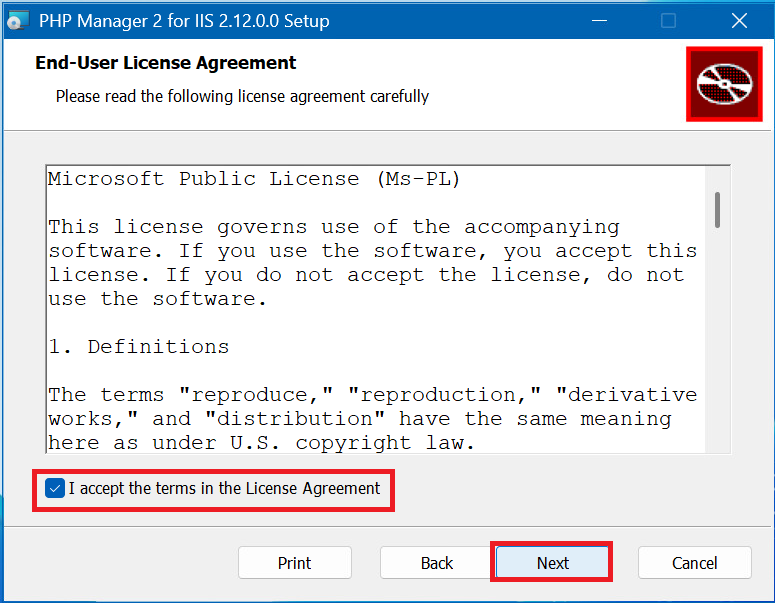
1 – Launch the MariaDB installation package (mariadb-12.0.2-winx64.msi) and click “Next” . Then check the box “I accept the terms in the License Agreement » , then click “Next” . Leave the default choices (by default install everything, including “HeidiSQL” which will be useful later) and click “Next” :

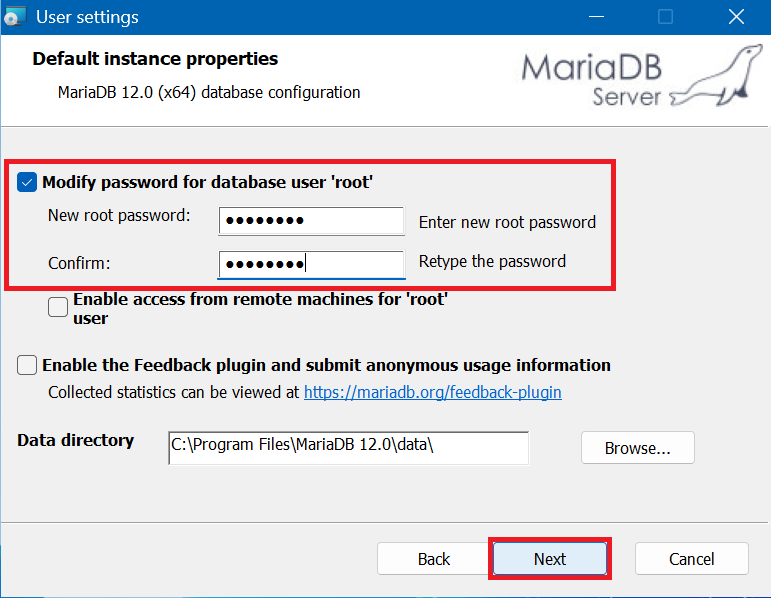
2 – Check “Modify password for database user ‘root’ » , then enter and confirm a password of your choice (write this password down for later) and finally click “Next” :
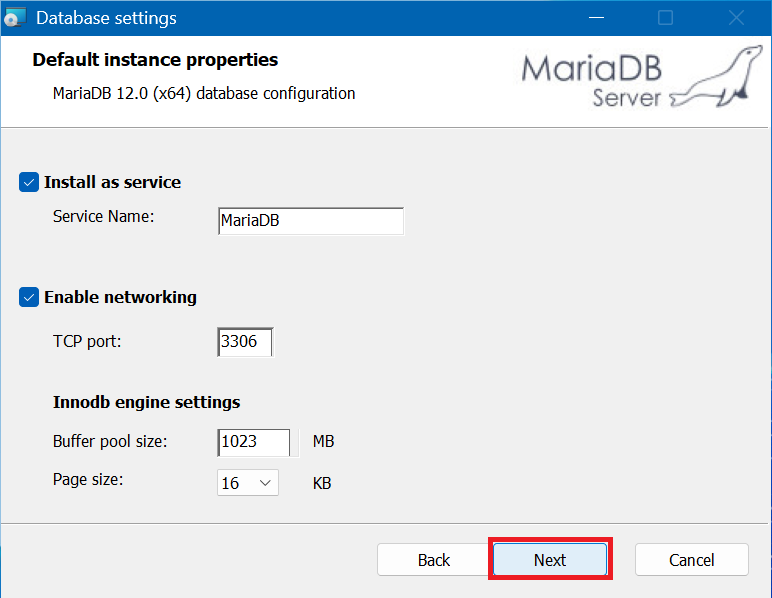
3 – Leave the default options and click “Next” :
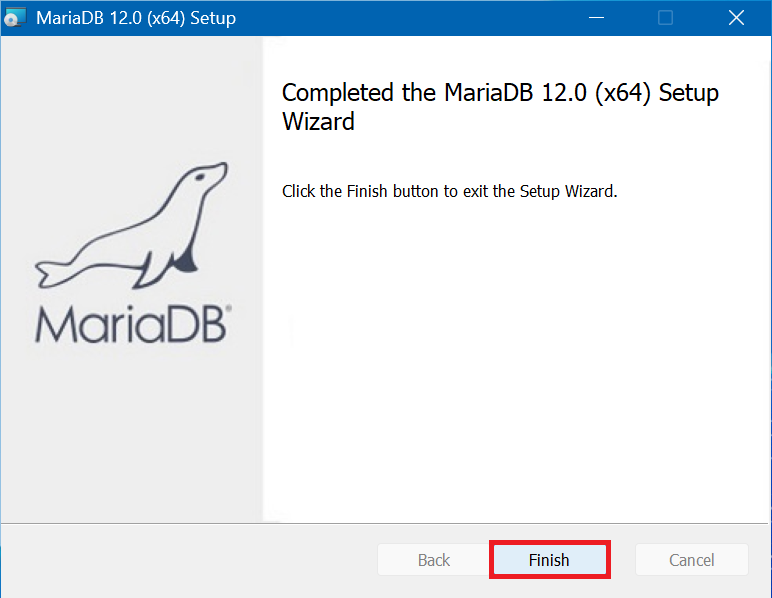
4 – Click “Install” , then “Finish” at the end of the installation :

B – Database configuration :
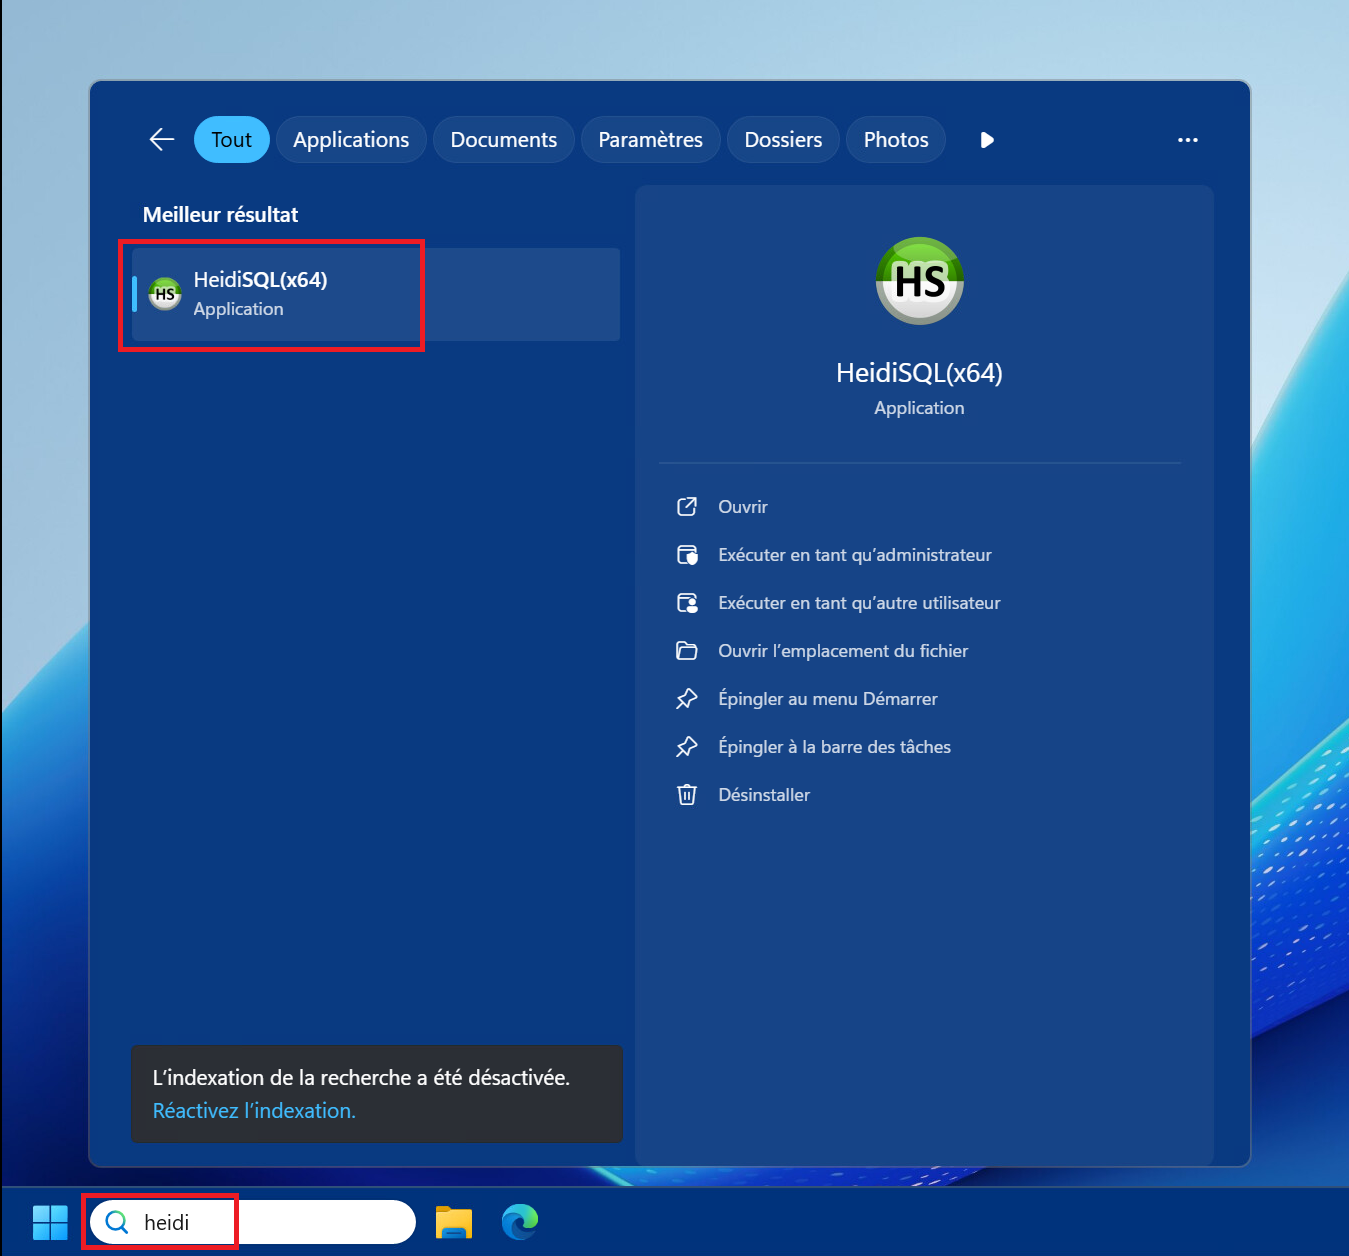
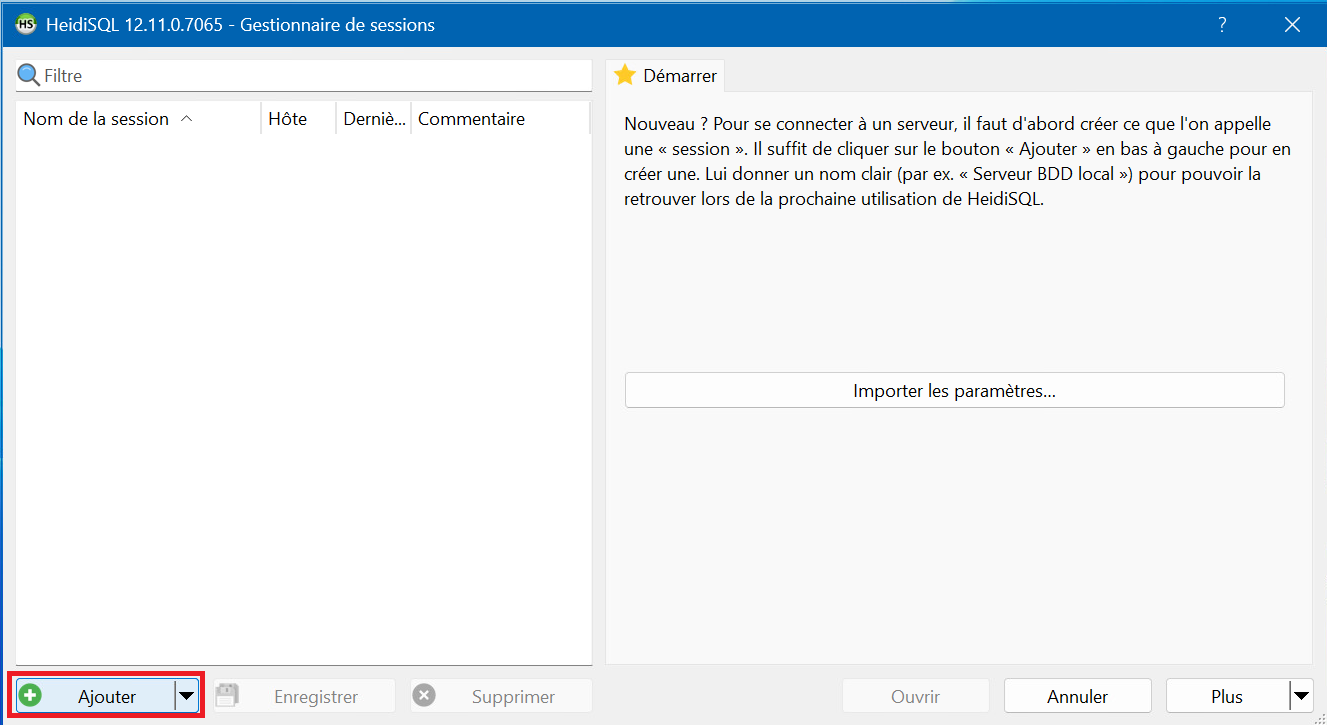
1 – Launch “HeidiSQL” (Start Menu or search) :
2 – Click on the “New” button :
3 – You can rename the newly added session by pressing F2 key :
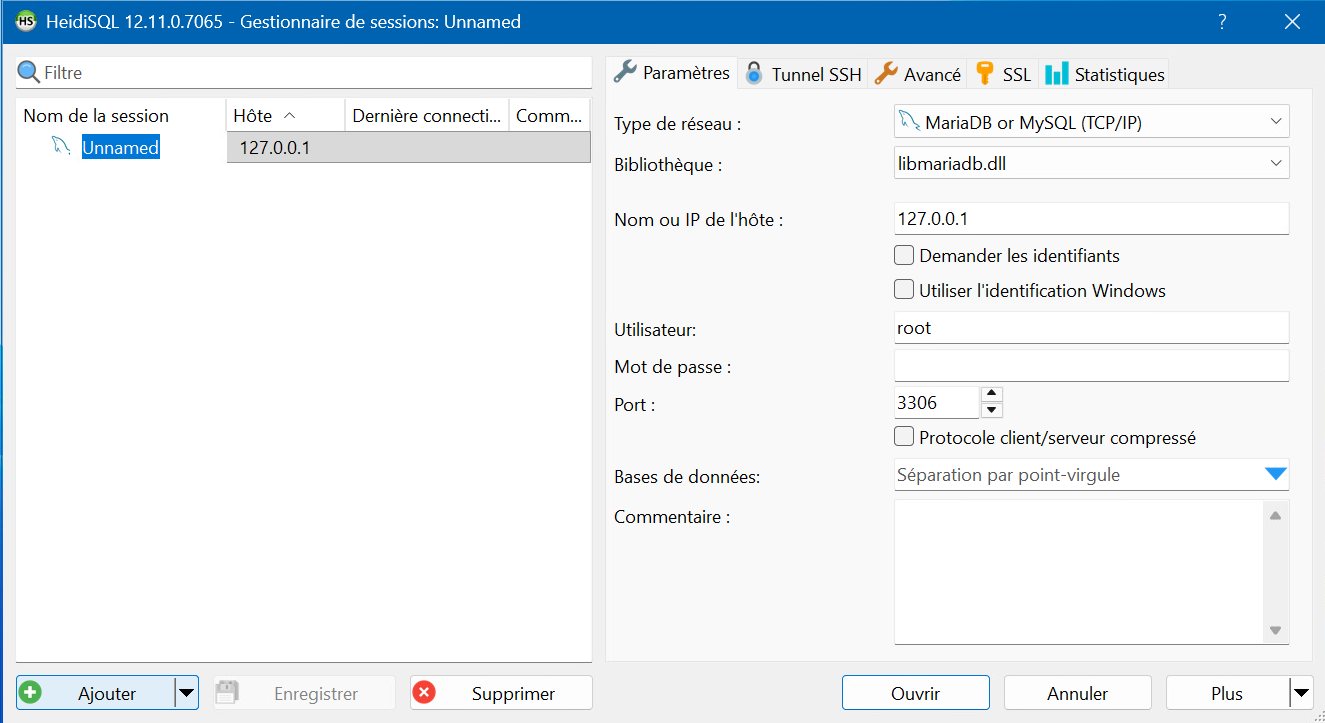
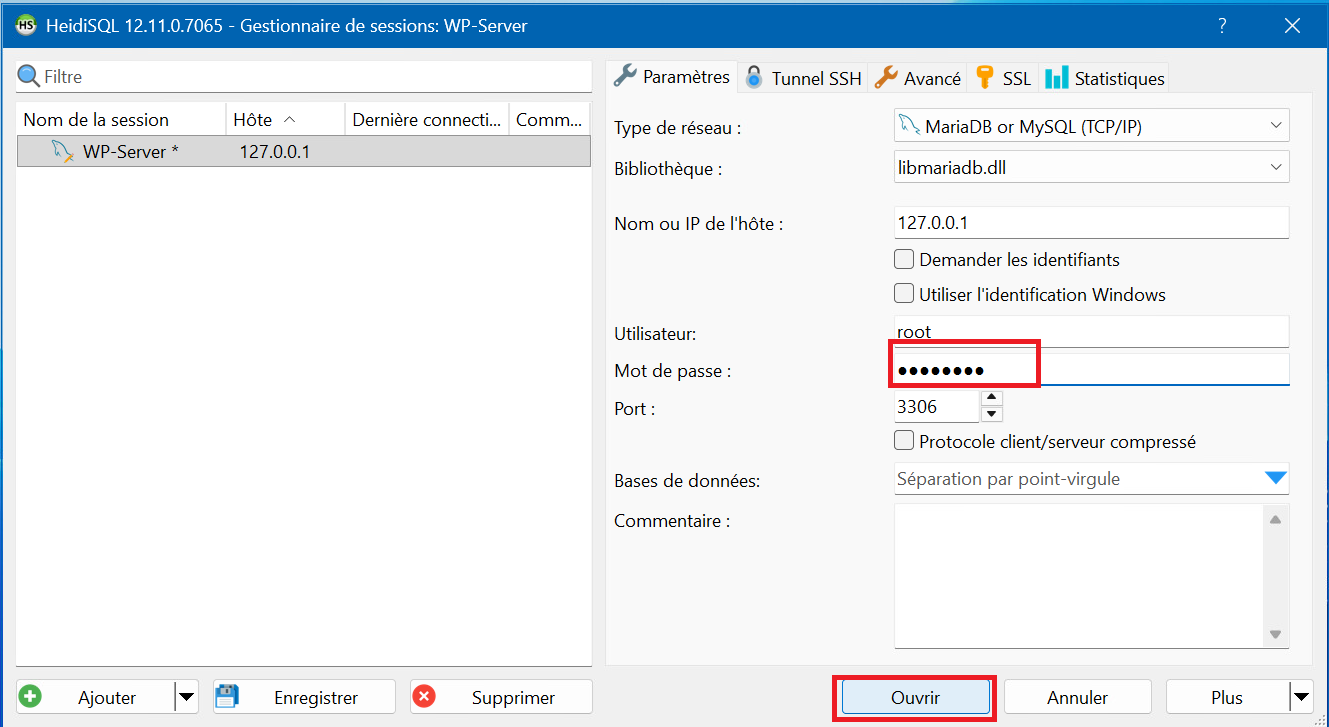
4 – Enter the root account password you set when you installed MariaDB and click “Open” :
5 – Once the session is open, right-click on the session name, then select “Create new” and click on “Database” :
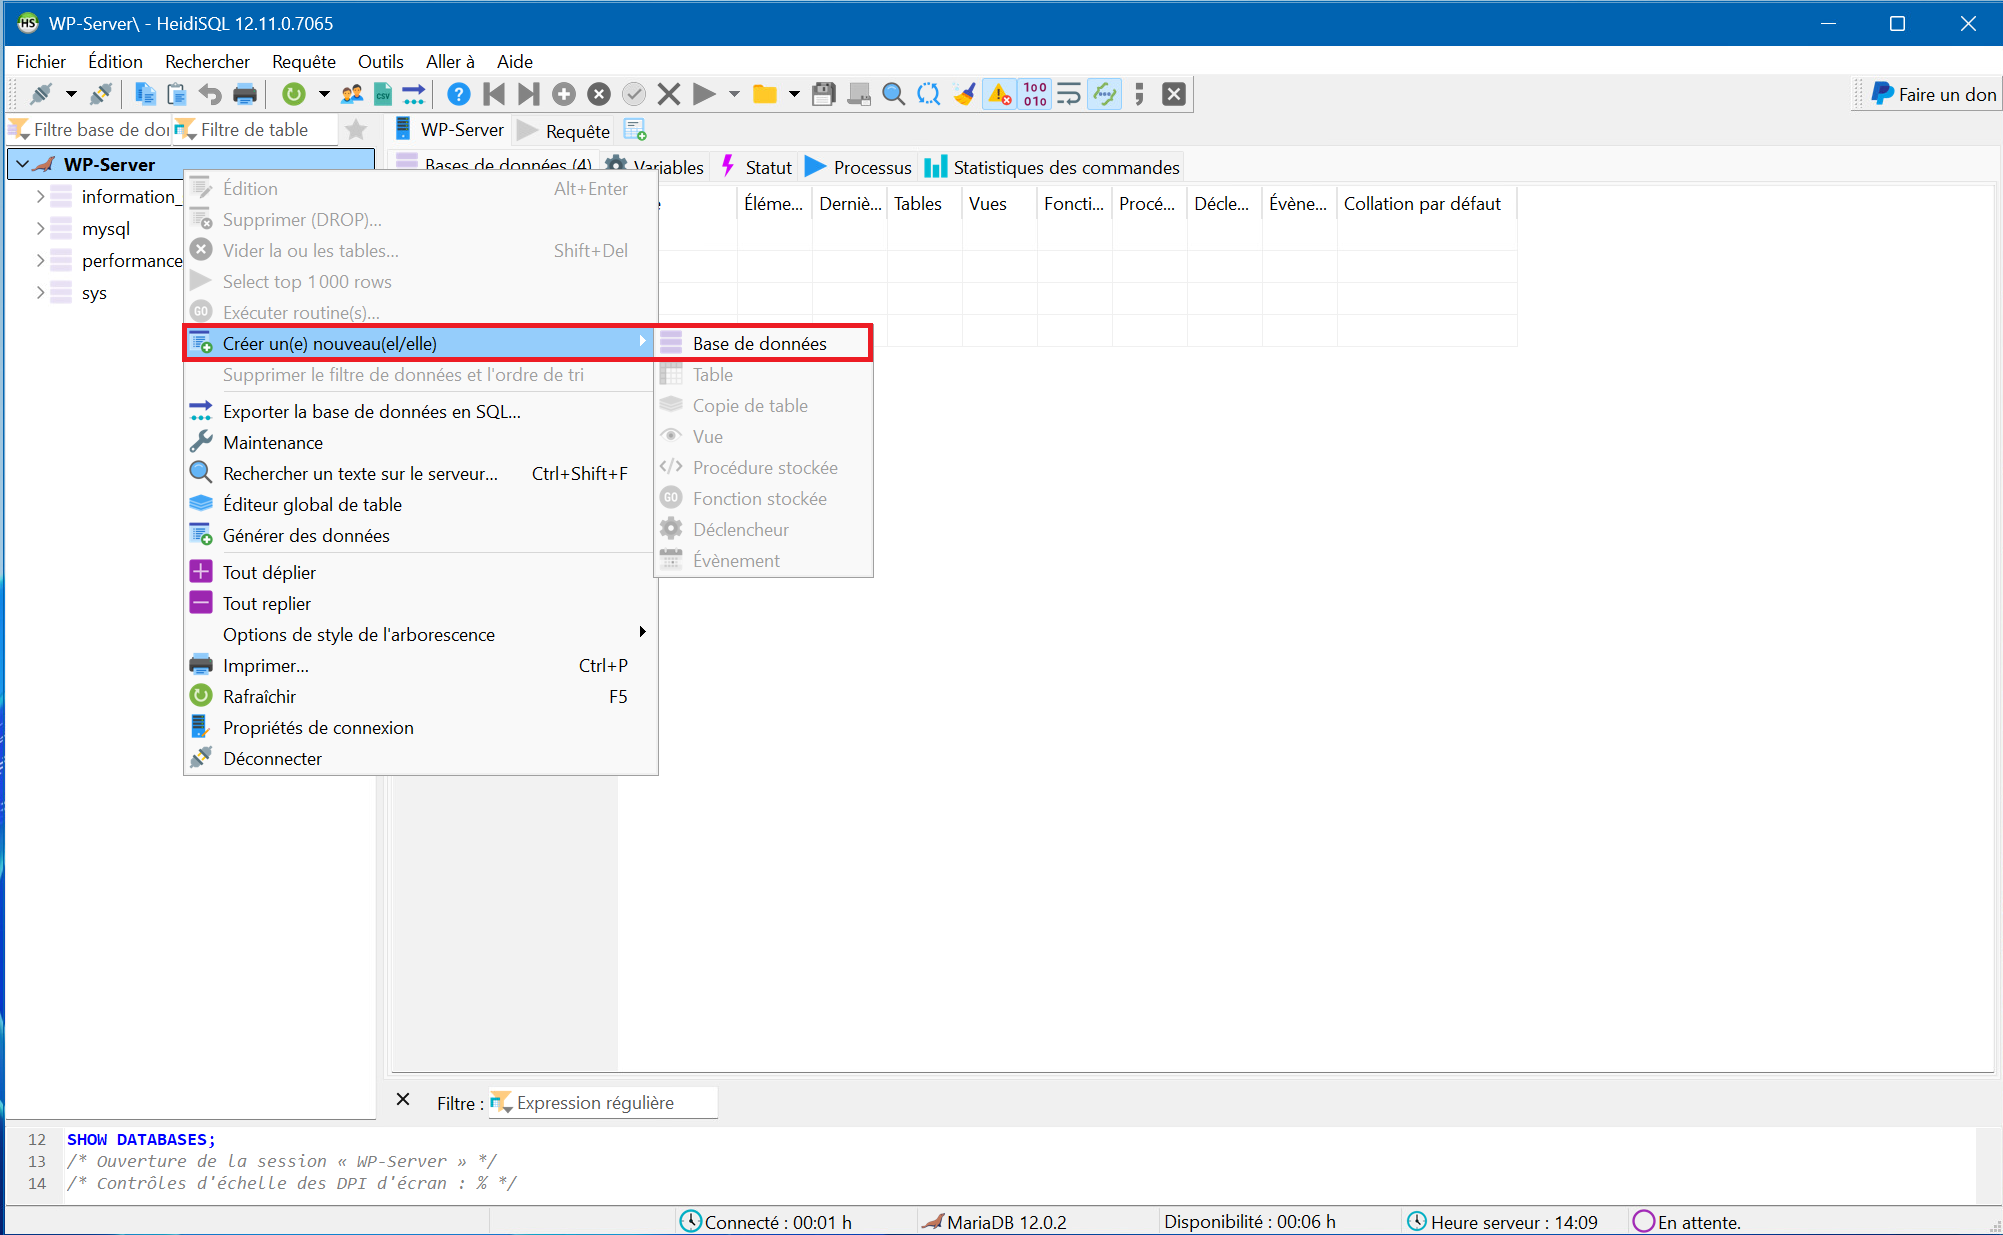
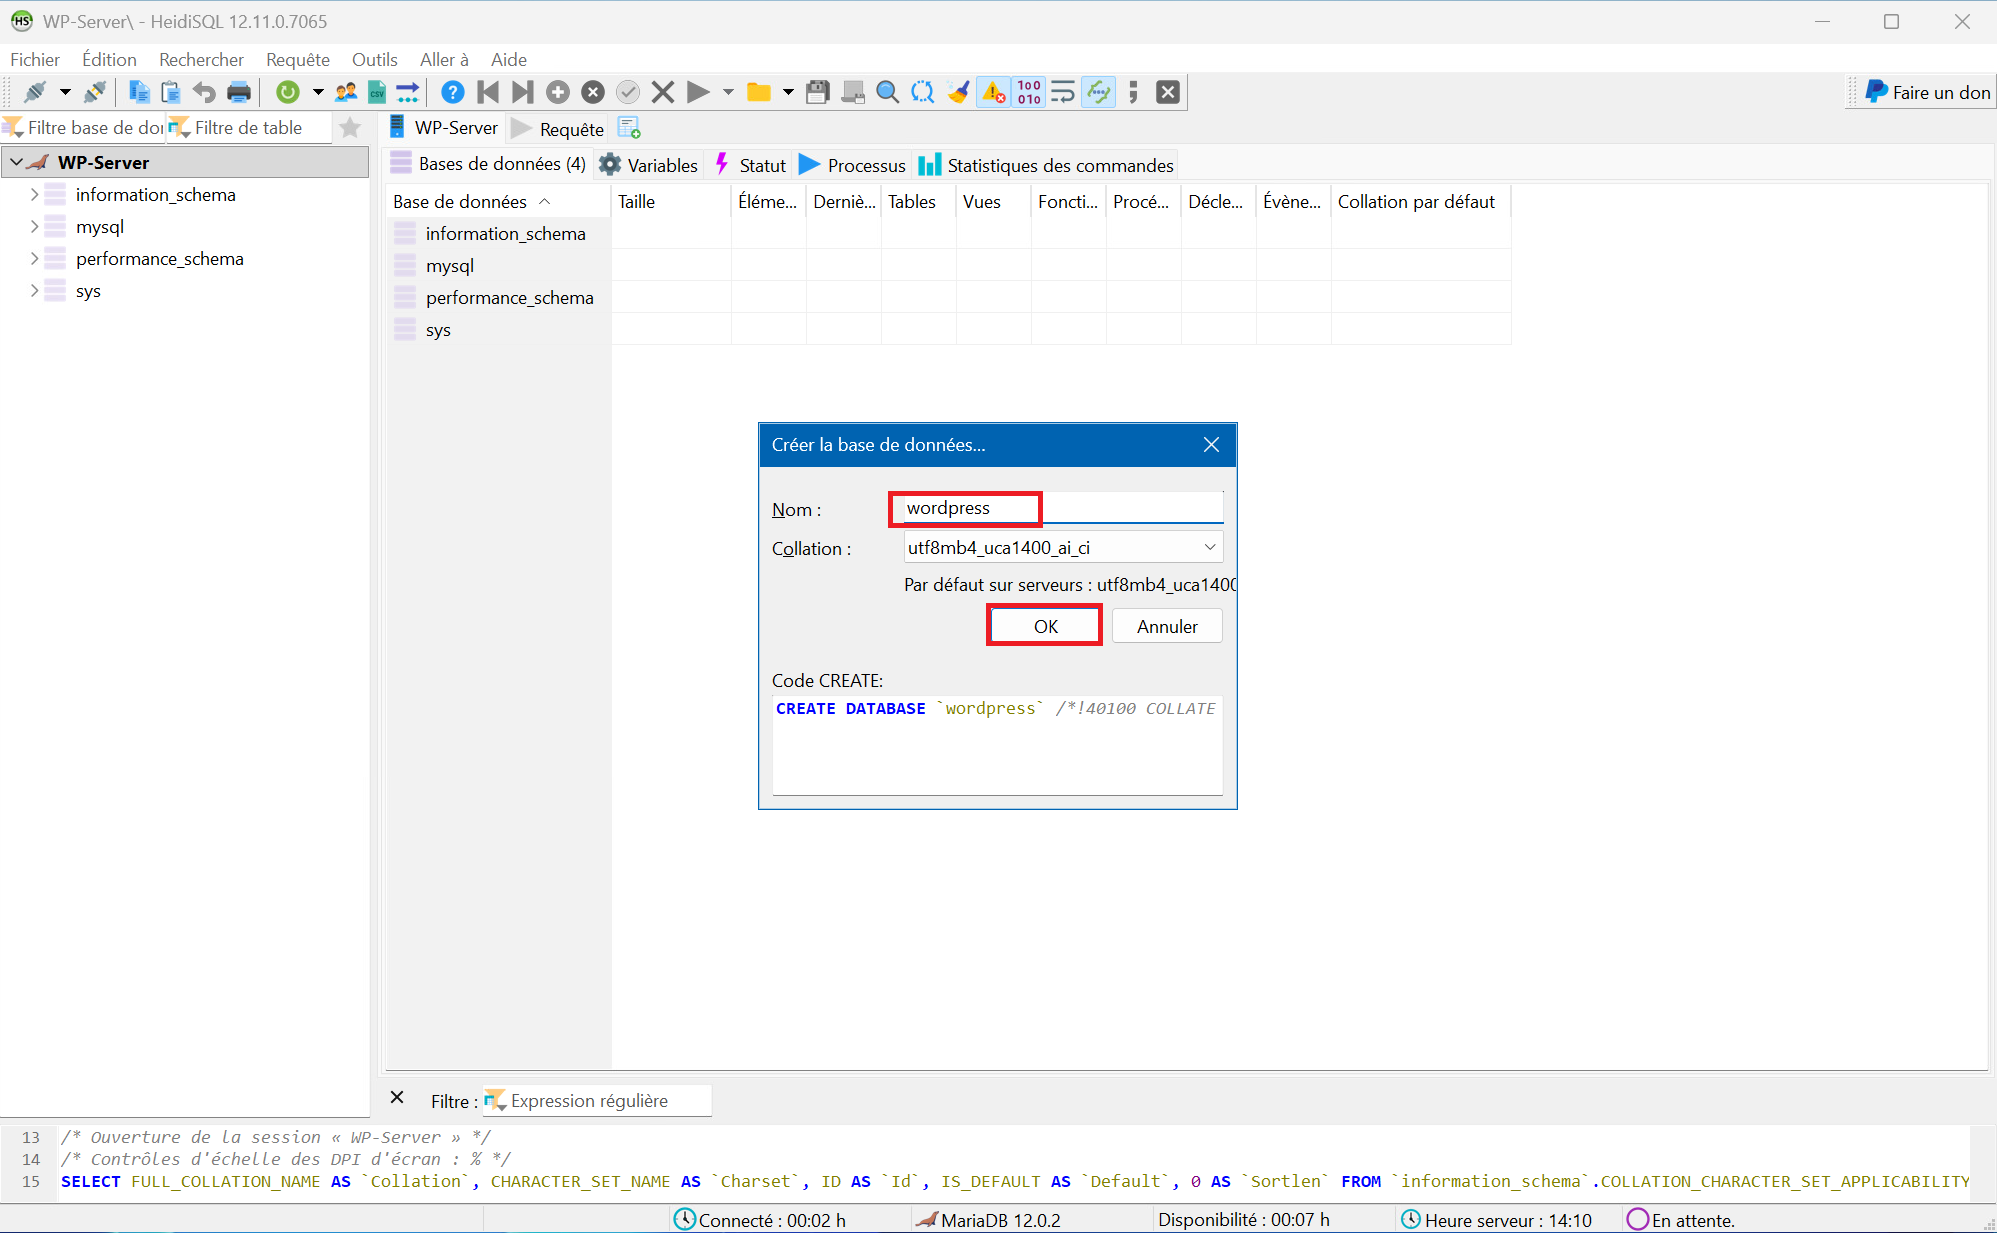
6 – Enter a name of your choice for your database in the “Name: ” field then click “OK” :
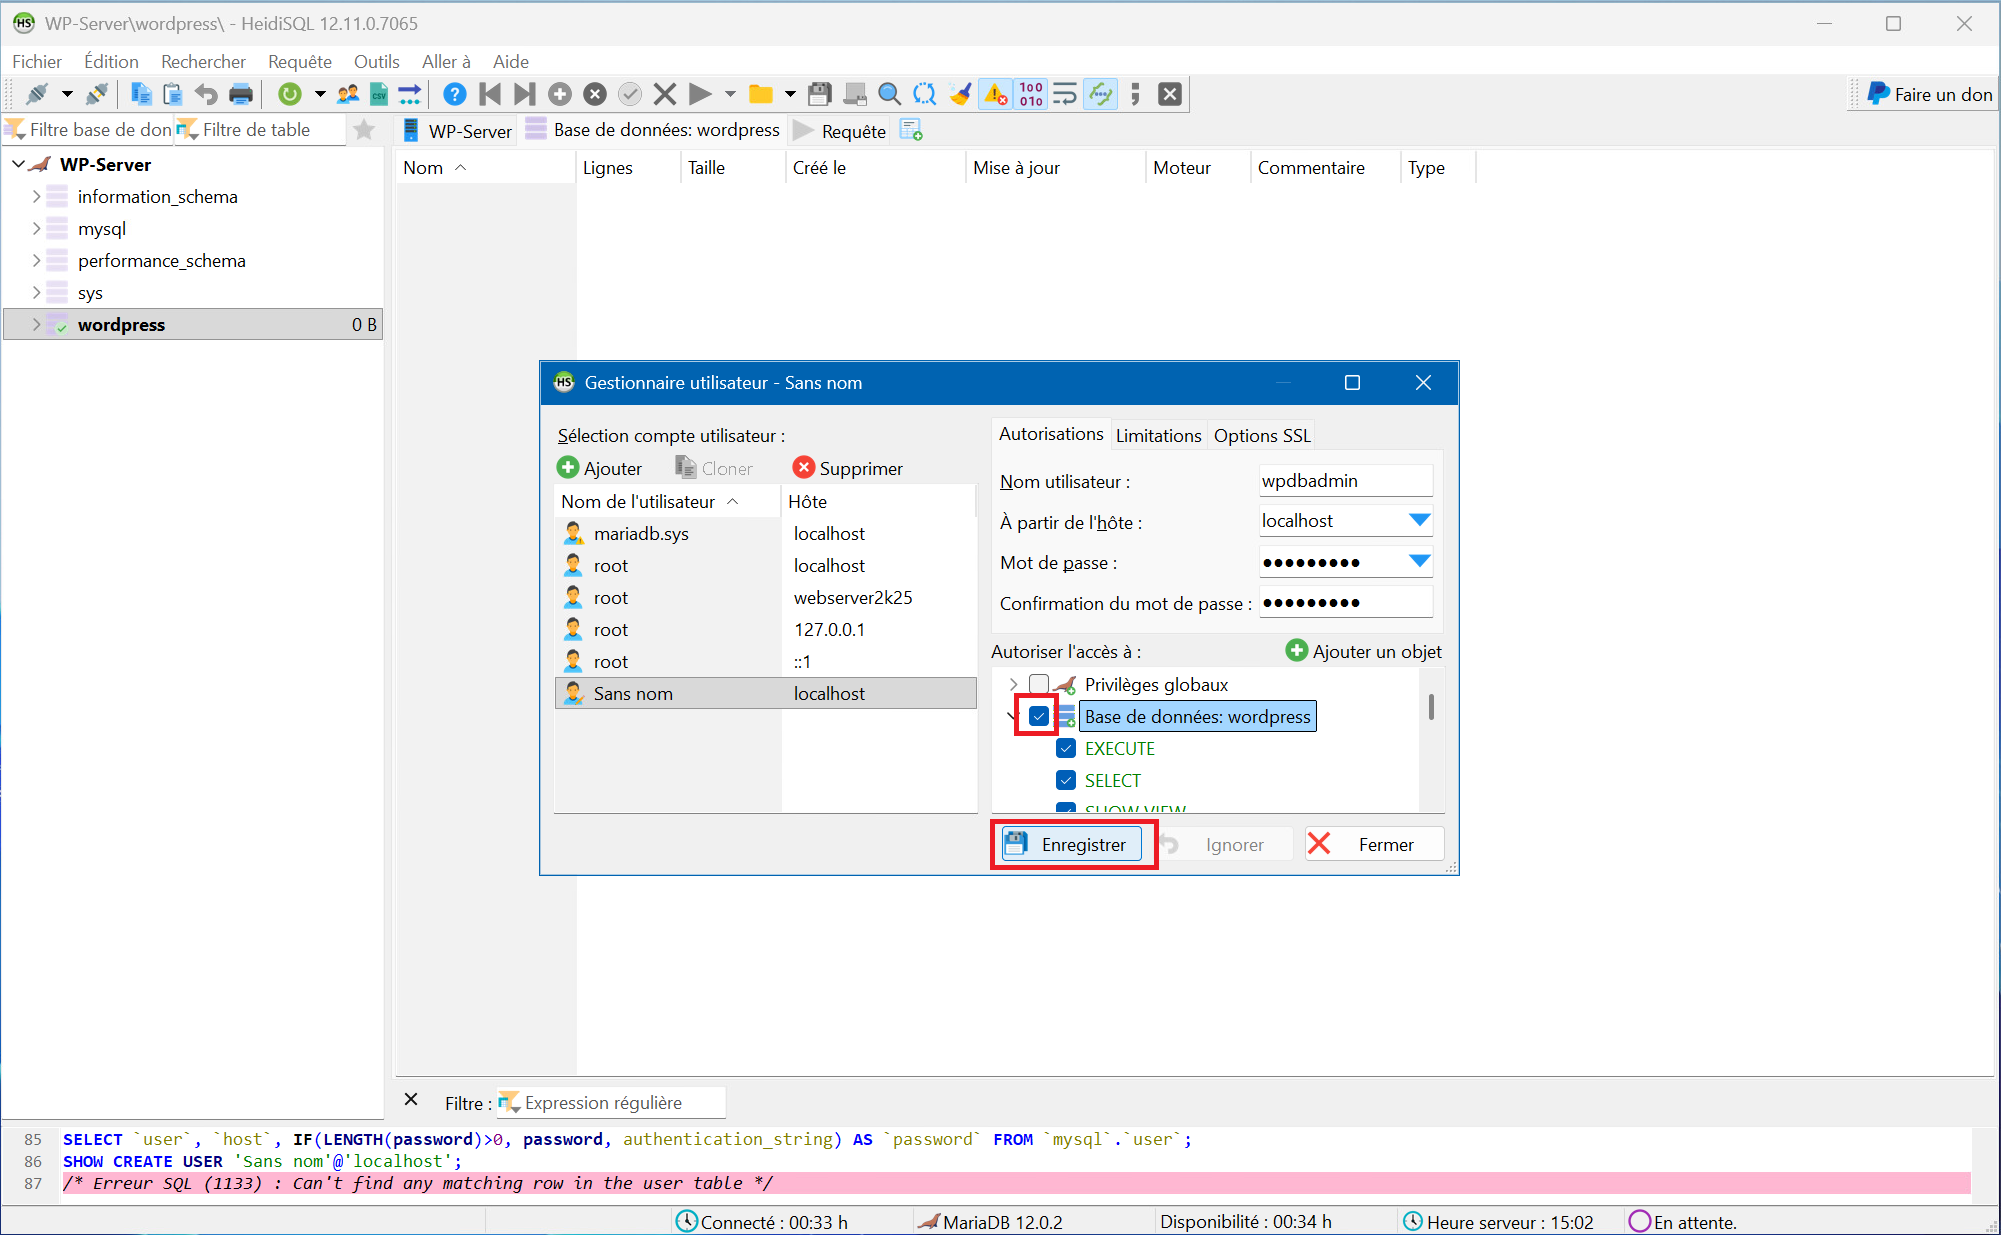
7 – Click on the newly created database and then on the “User manager” button (icon with two characters) :

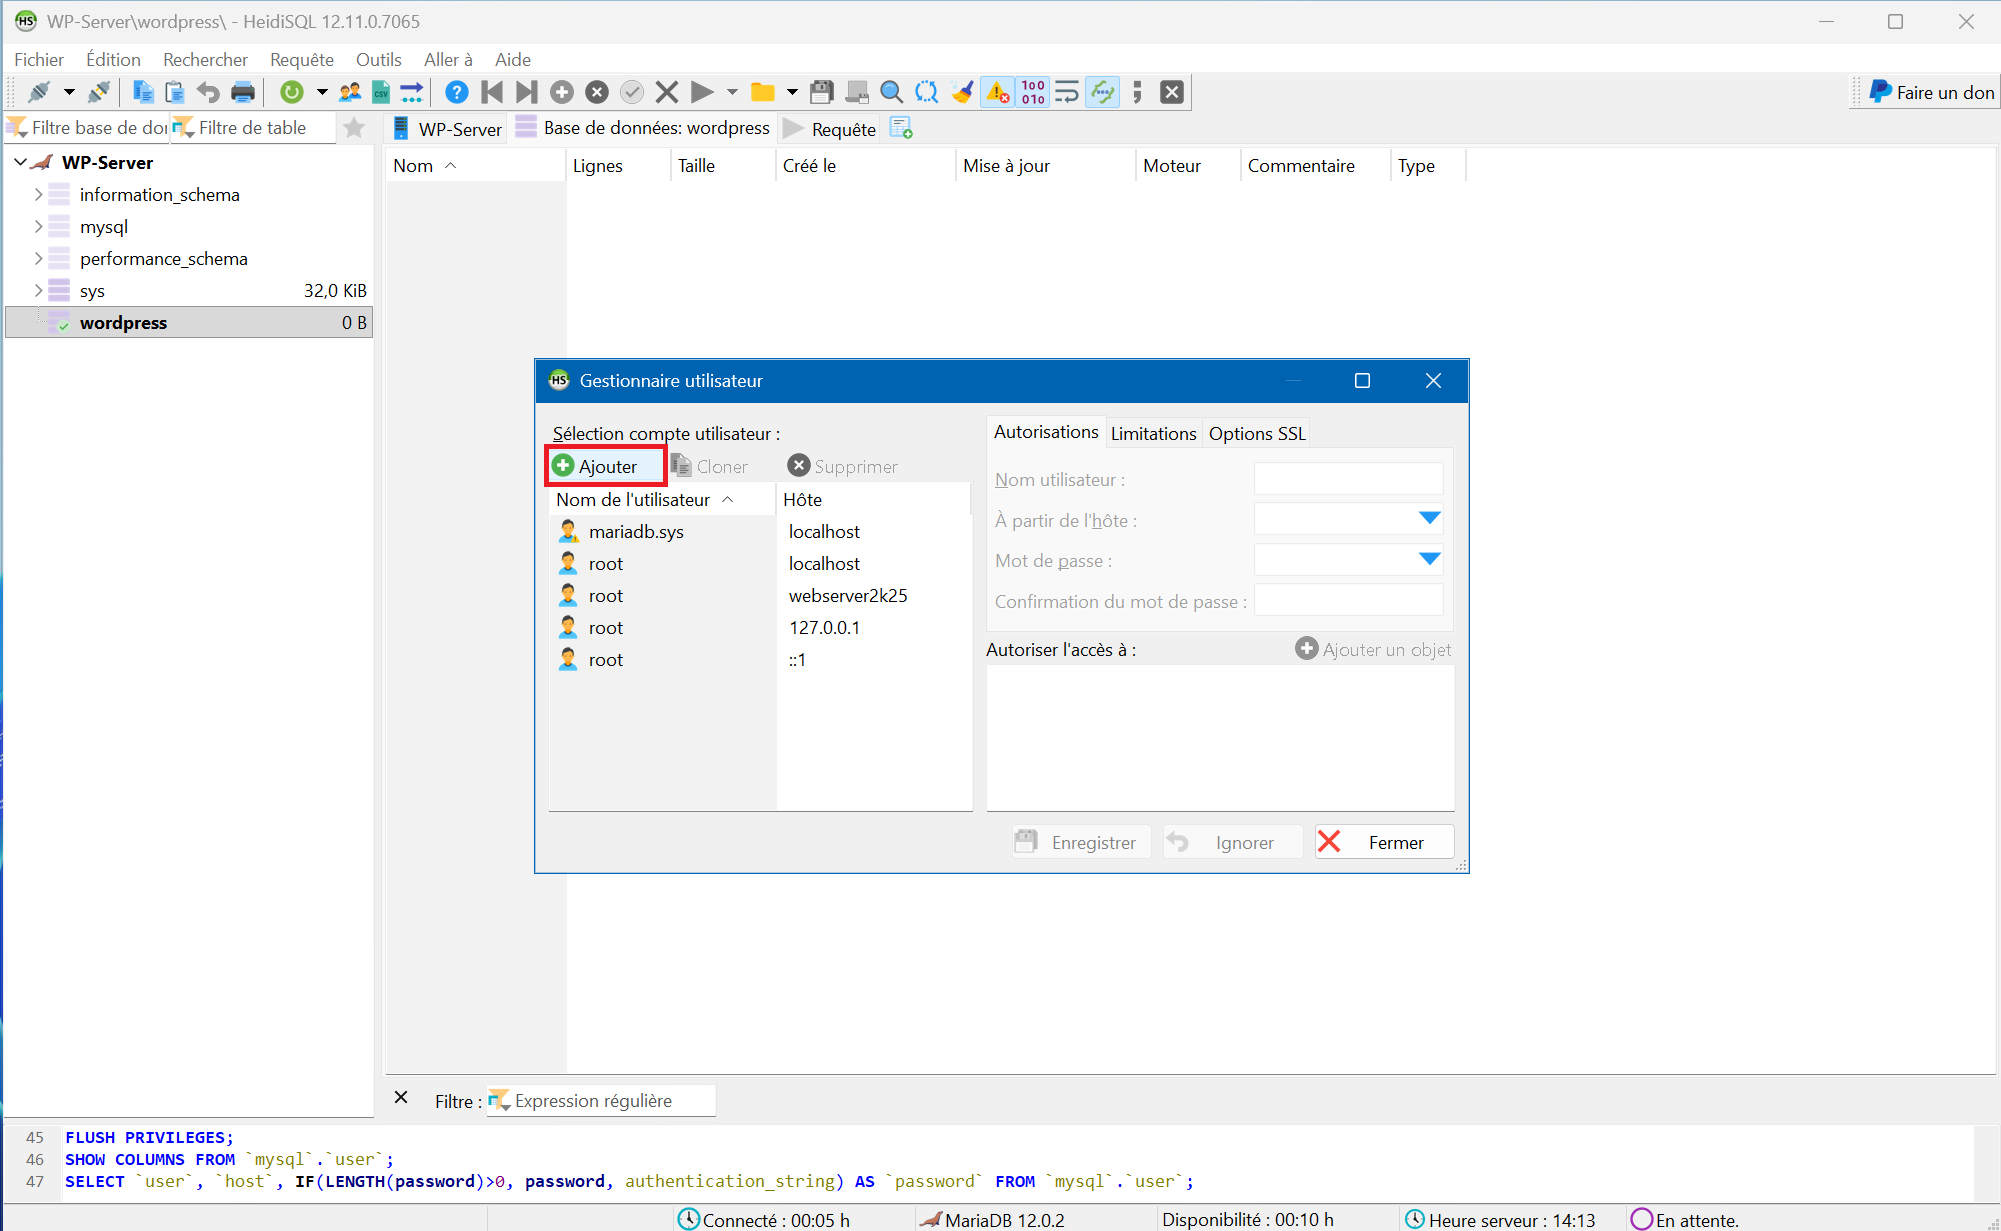
8 – In the “User manager” window, click “Add” :
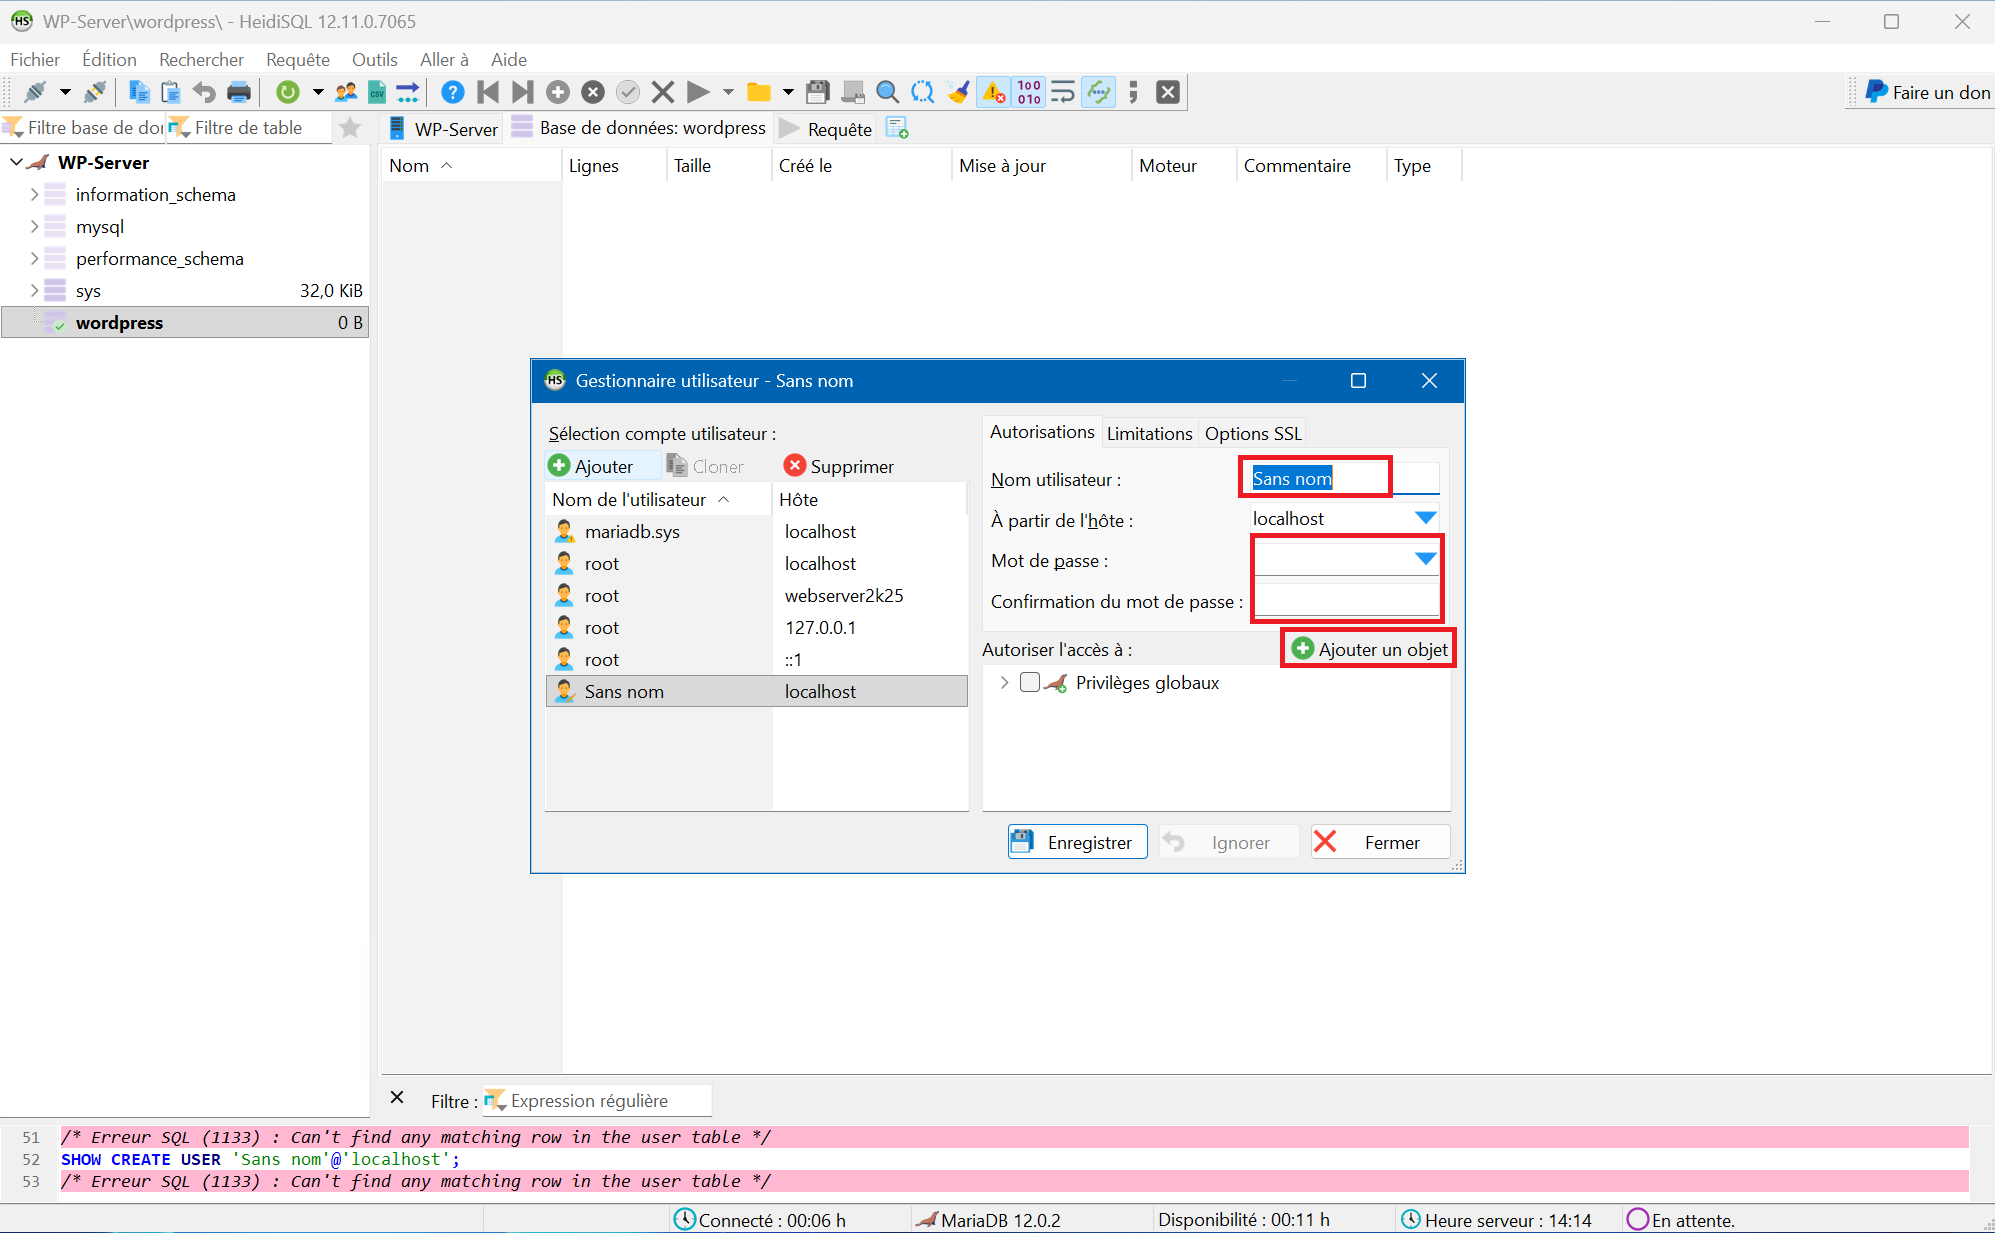
9 – First, enter a username of your choice in the “User name” field. Then, in the “From host” field, leave “localhost” as default. Then, in the following fields, enter a password of your choice and confirm it. And finally, click the “Add object” button.
10 – Click on the database you created (“wordpress” in our example) then on “OK” :
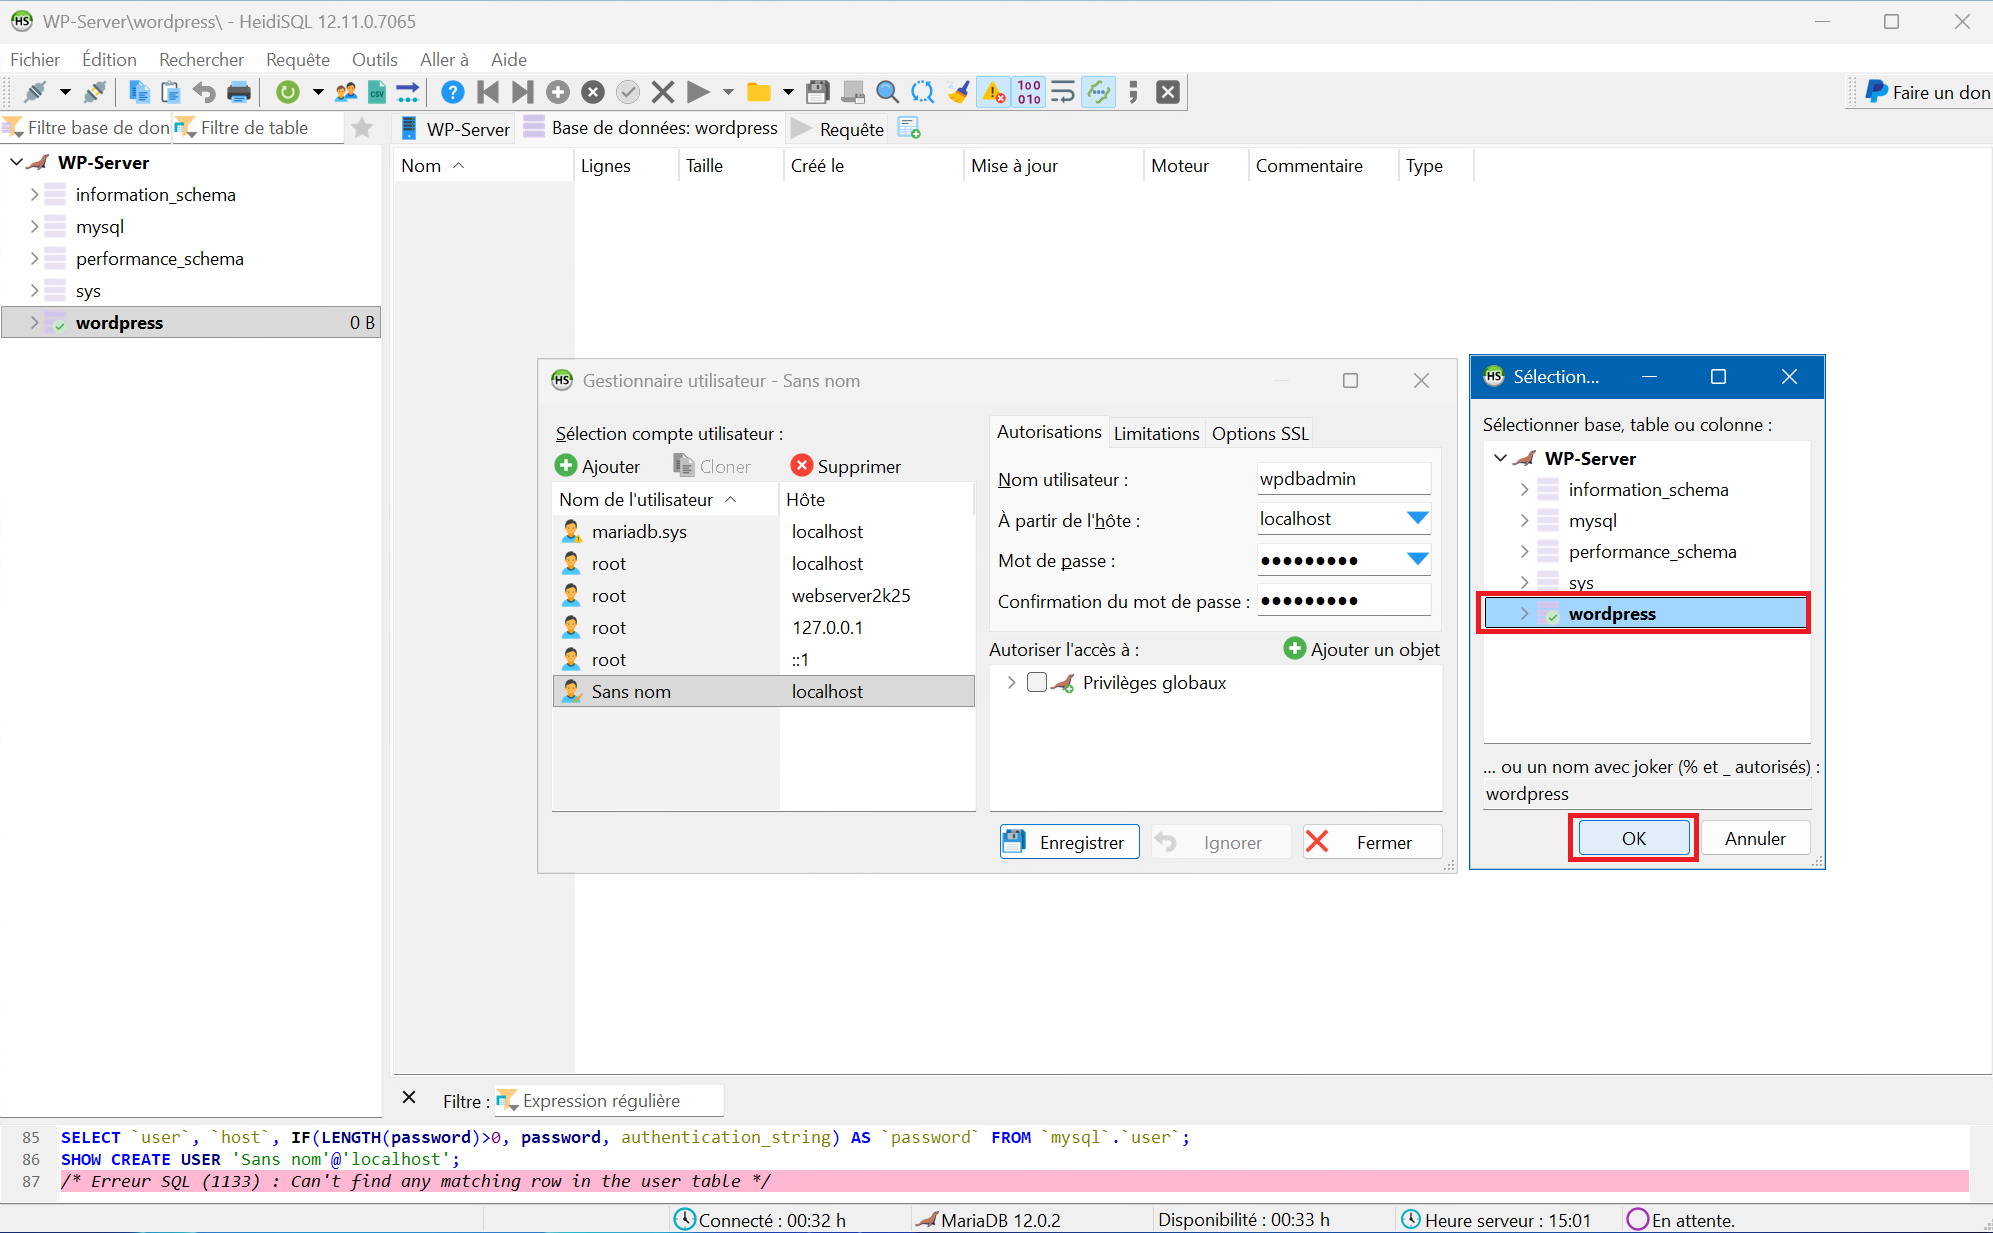
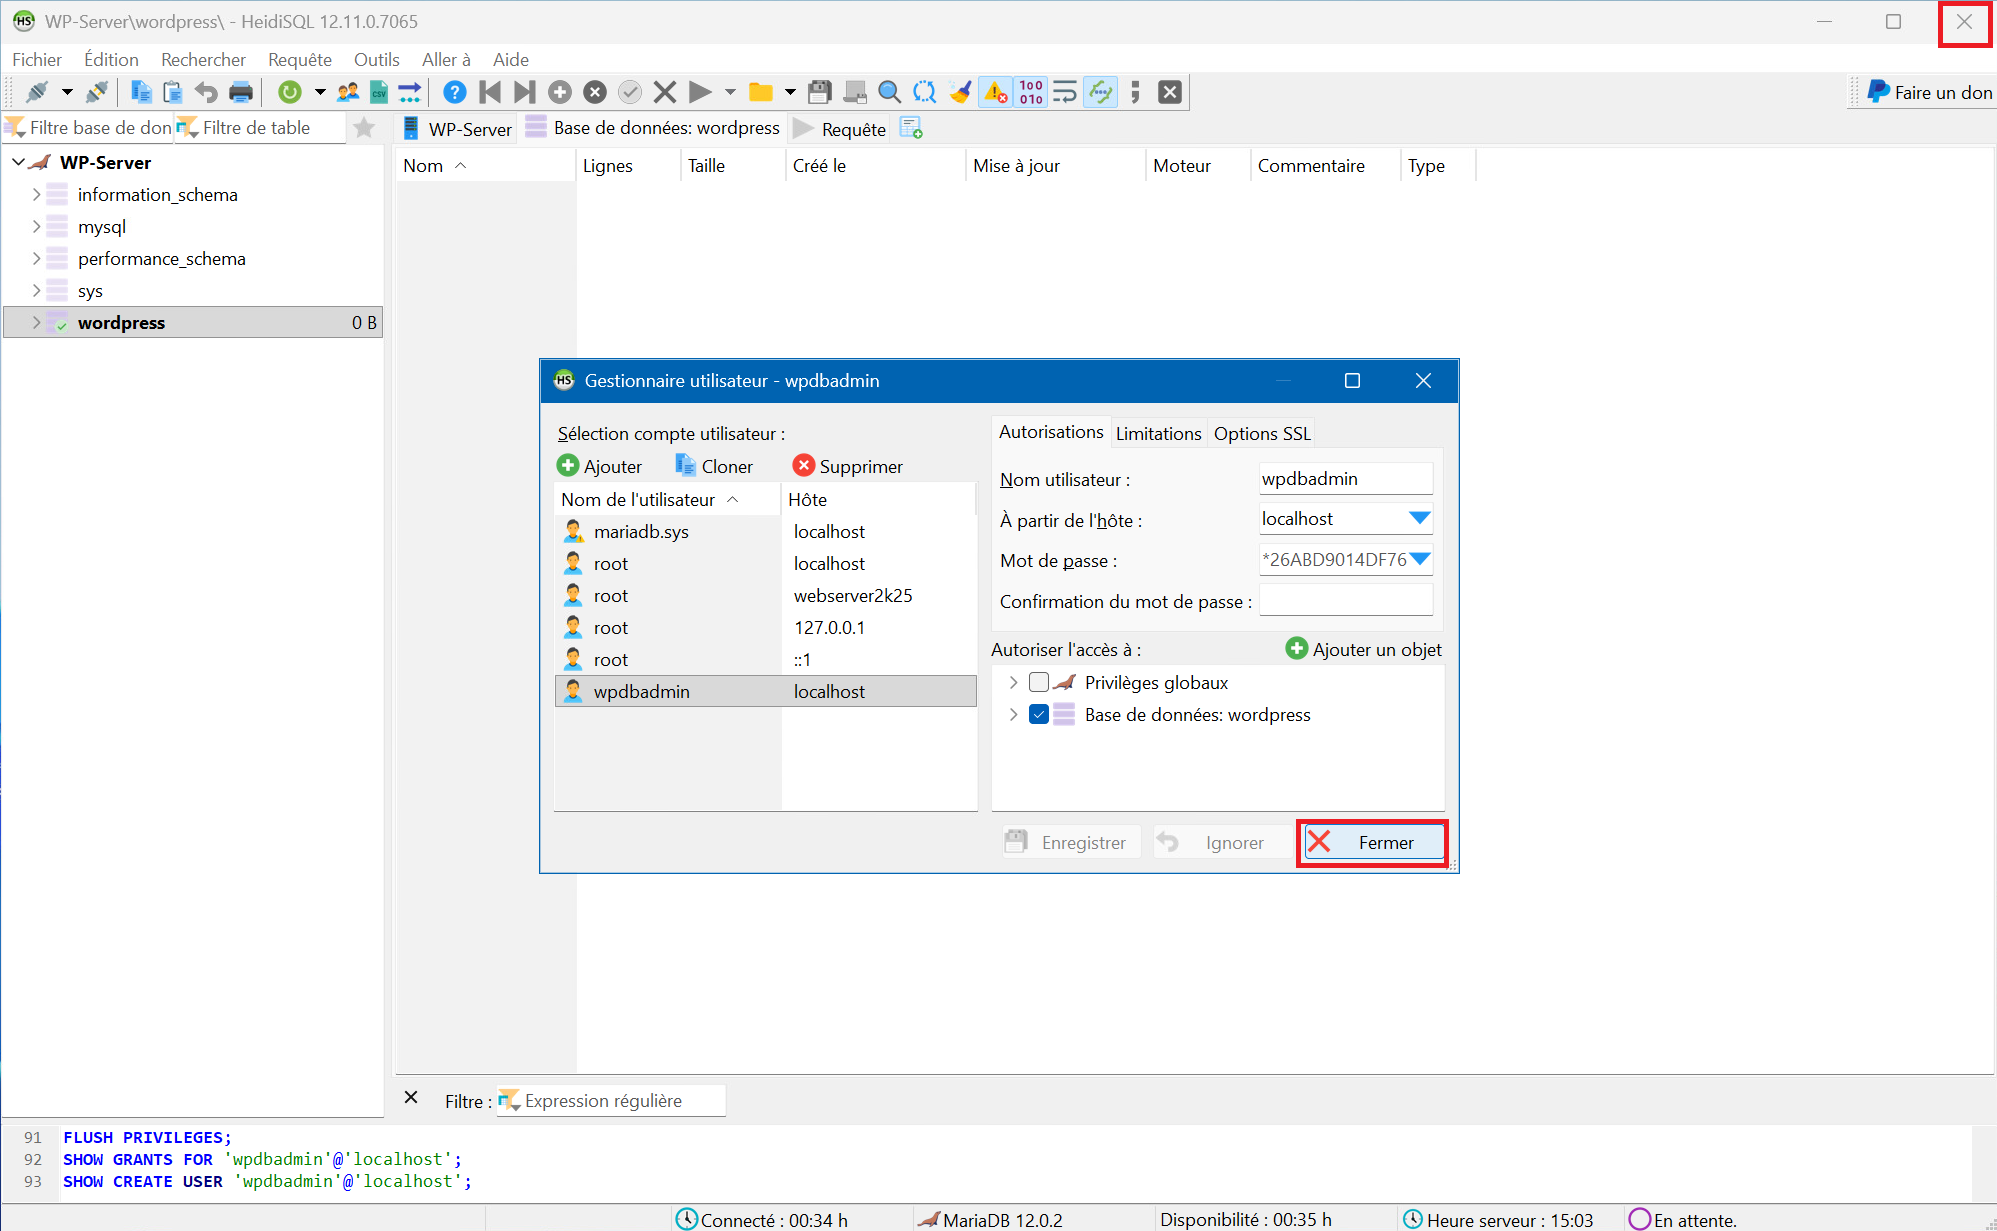
11 – Check “Database: wordpress” hen click the “Save” button :
12 – You can click “Close” and close HeidiSQL as well. Your database is ready!
Step 3 : Install PHP
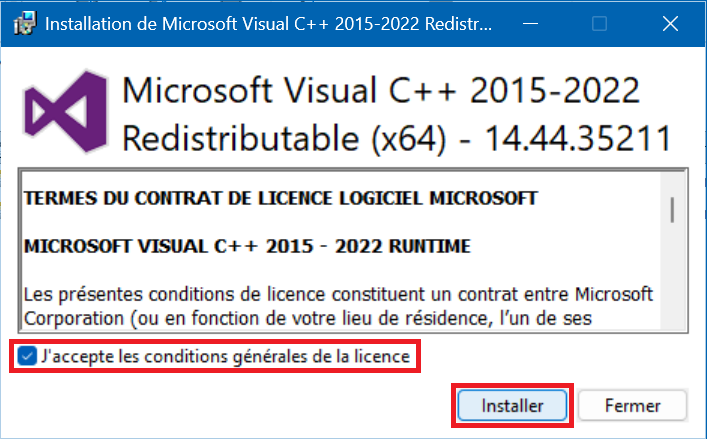
1 – Launch and install the “VC_redist.x64.exe” package :

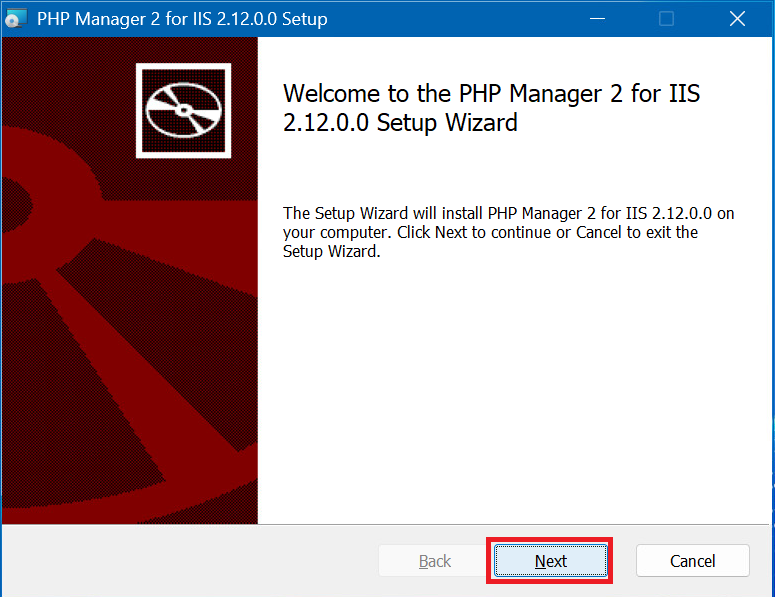
2 – Launch and install the “PHPManagerForIIS_x64.msi” package :

3 – Unzip the archive “php-8.4.12-nts-Win32-vs17-x64.zip” by right-clicking on it, then click “Extract all…” then define a path and directory (for example “C:\php-8.4.12” ) and finally click “Extract” . The contents of the archive will be located in the folder you defined :


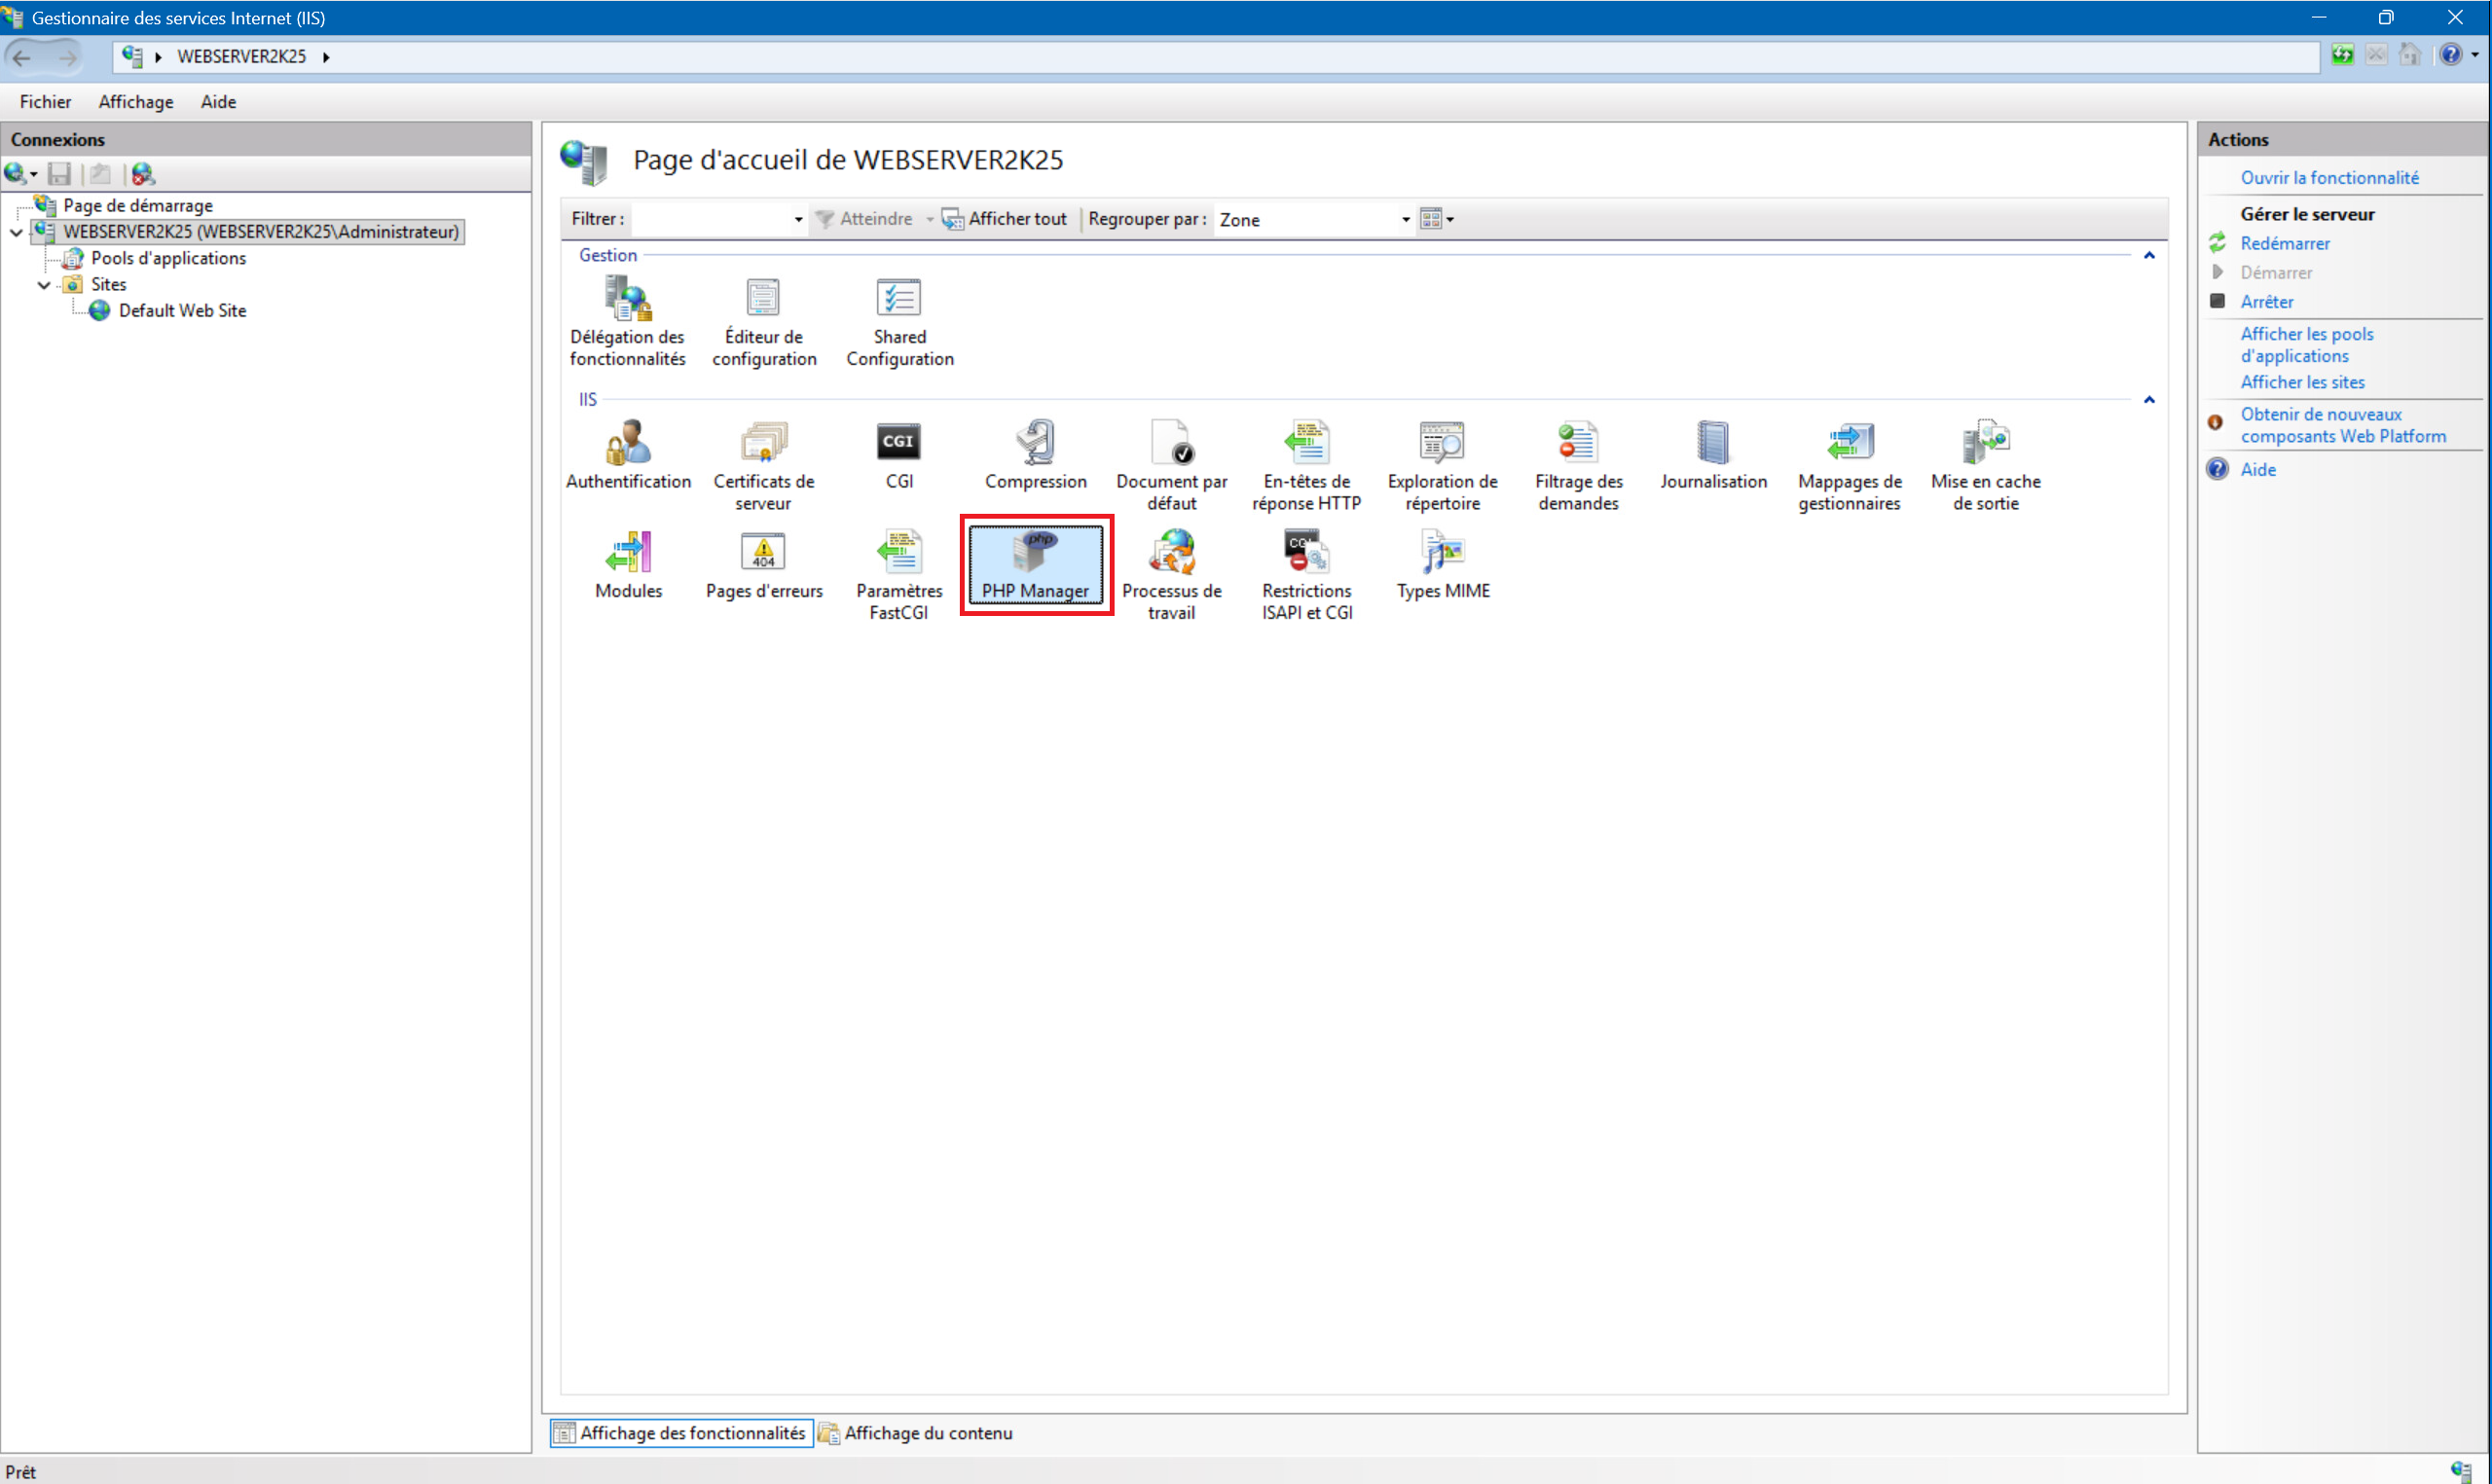
4 – In the IIS management console you should now have the “PHP Manager” désormais. icon. PHP is installed on your server !
Step 4 : Install and configure WordPress
A – WordPress files installation :
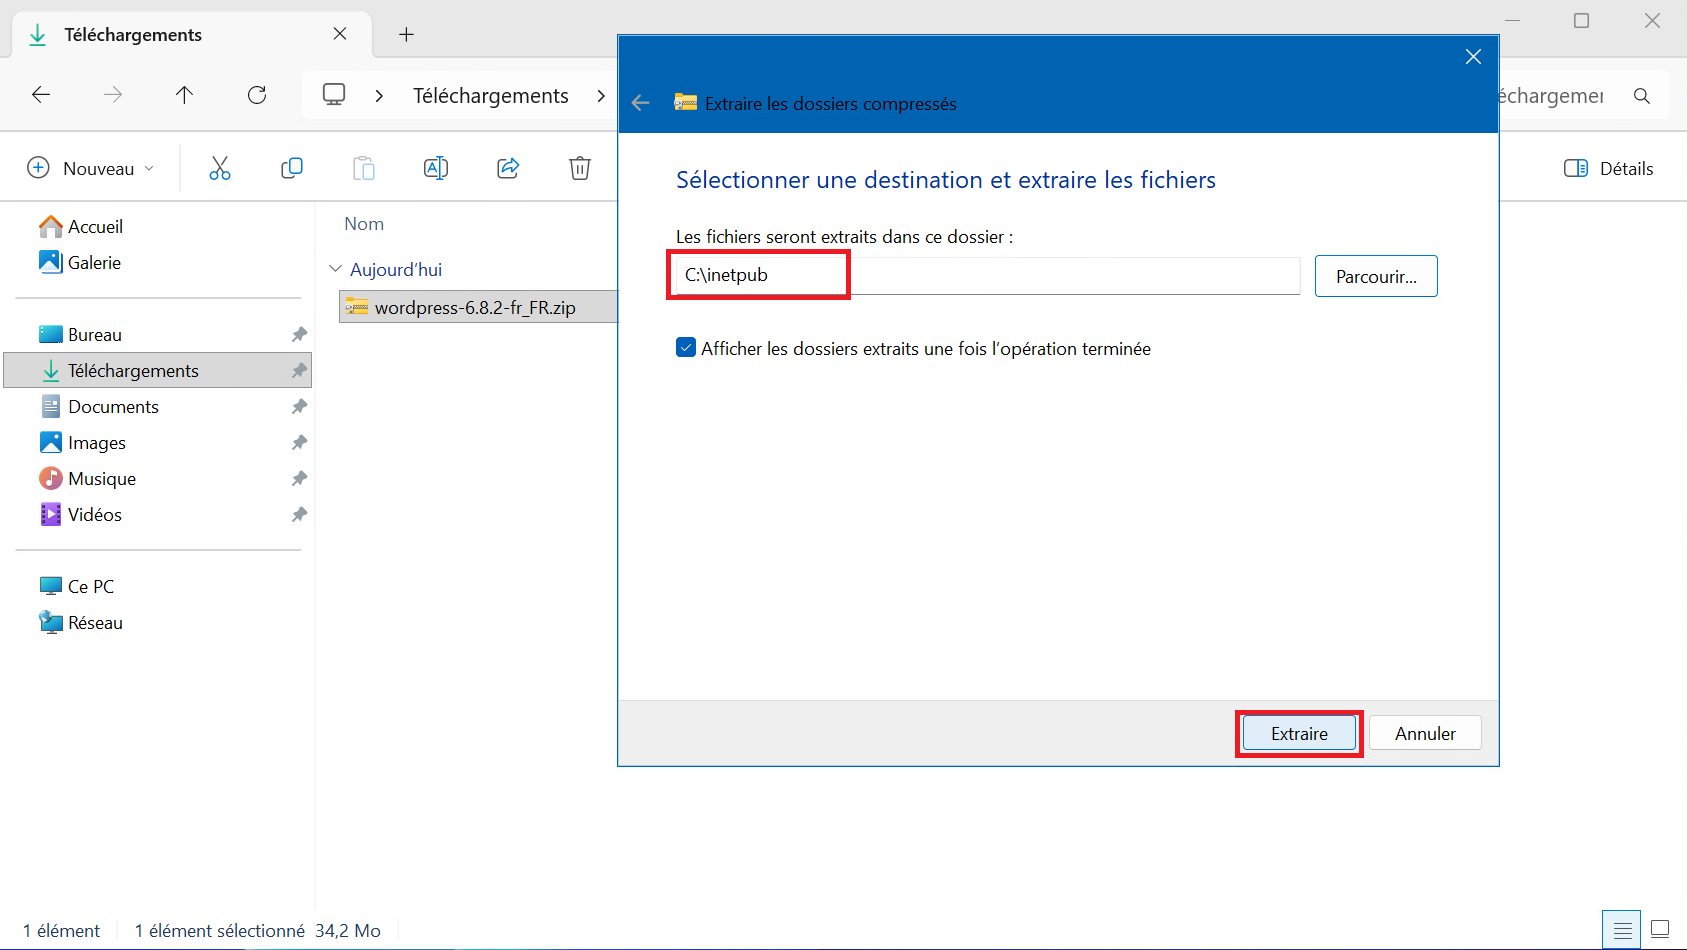
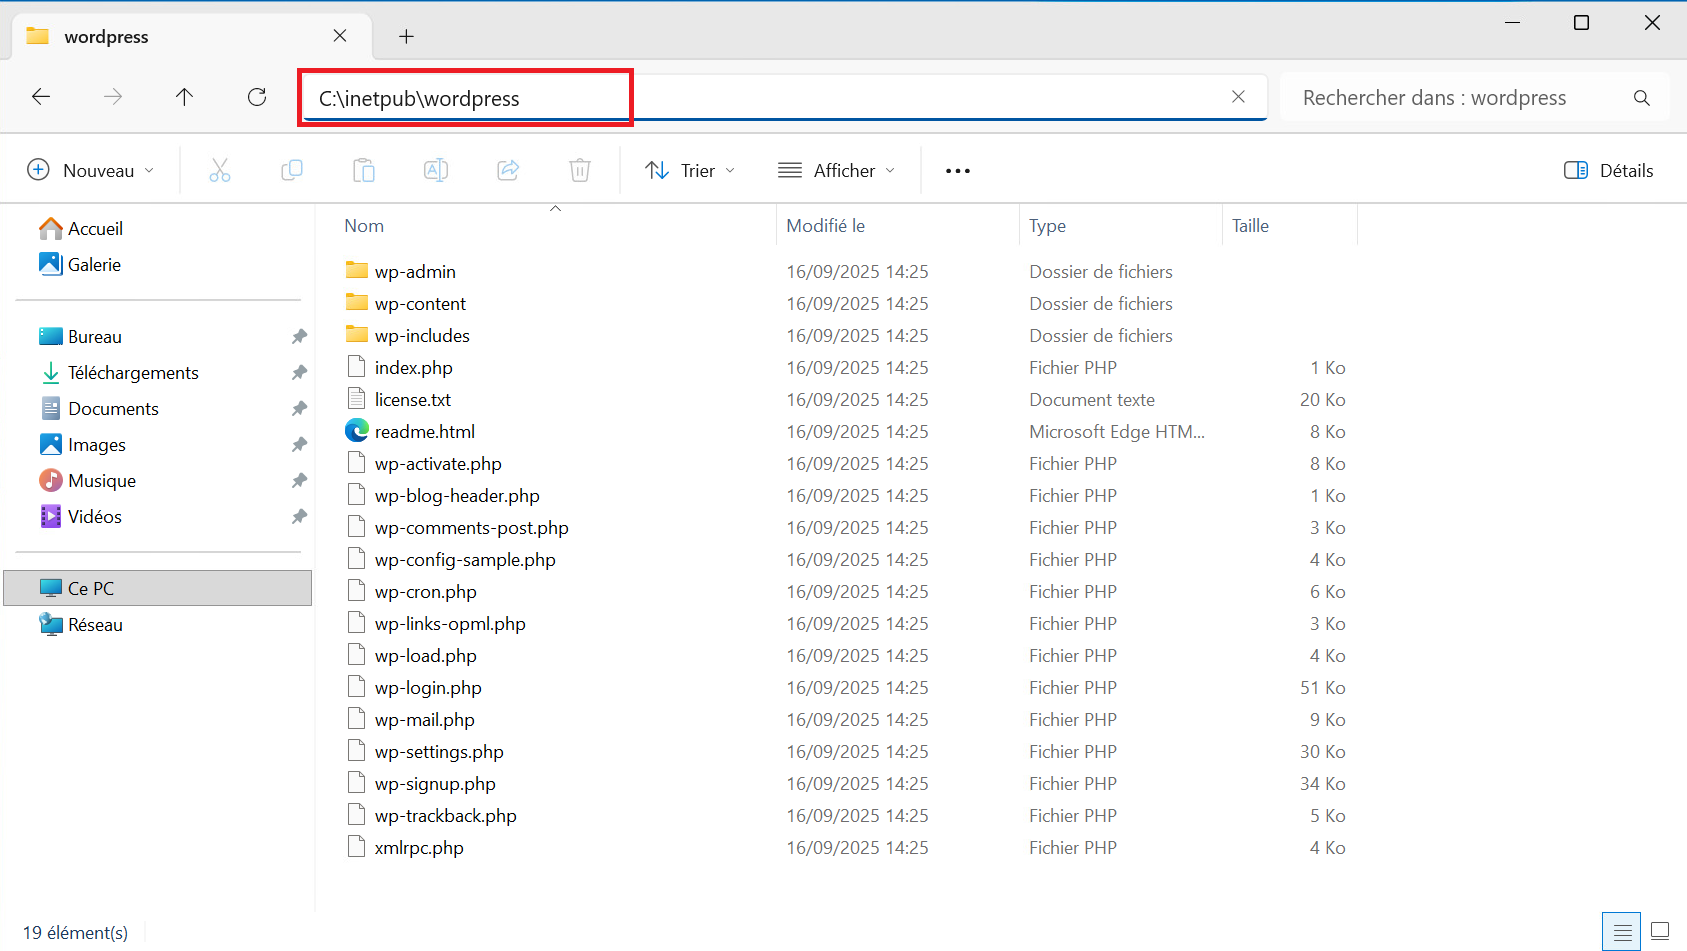
1 – Unzip the “wordpress-6.8.2.zip” archive. The unzipped files should be located in “C:\inetpub\wordpress” :
B – Creation of the IIS site :
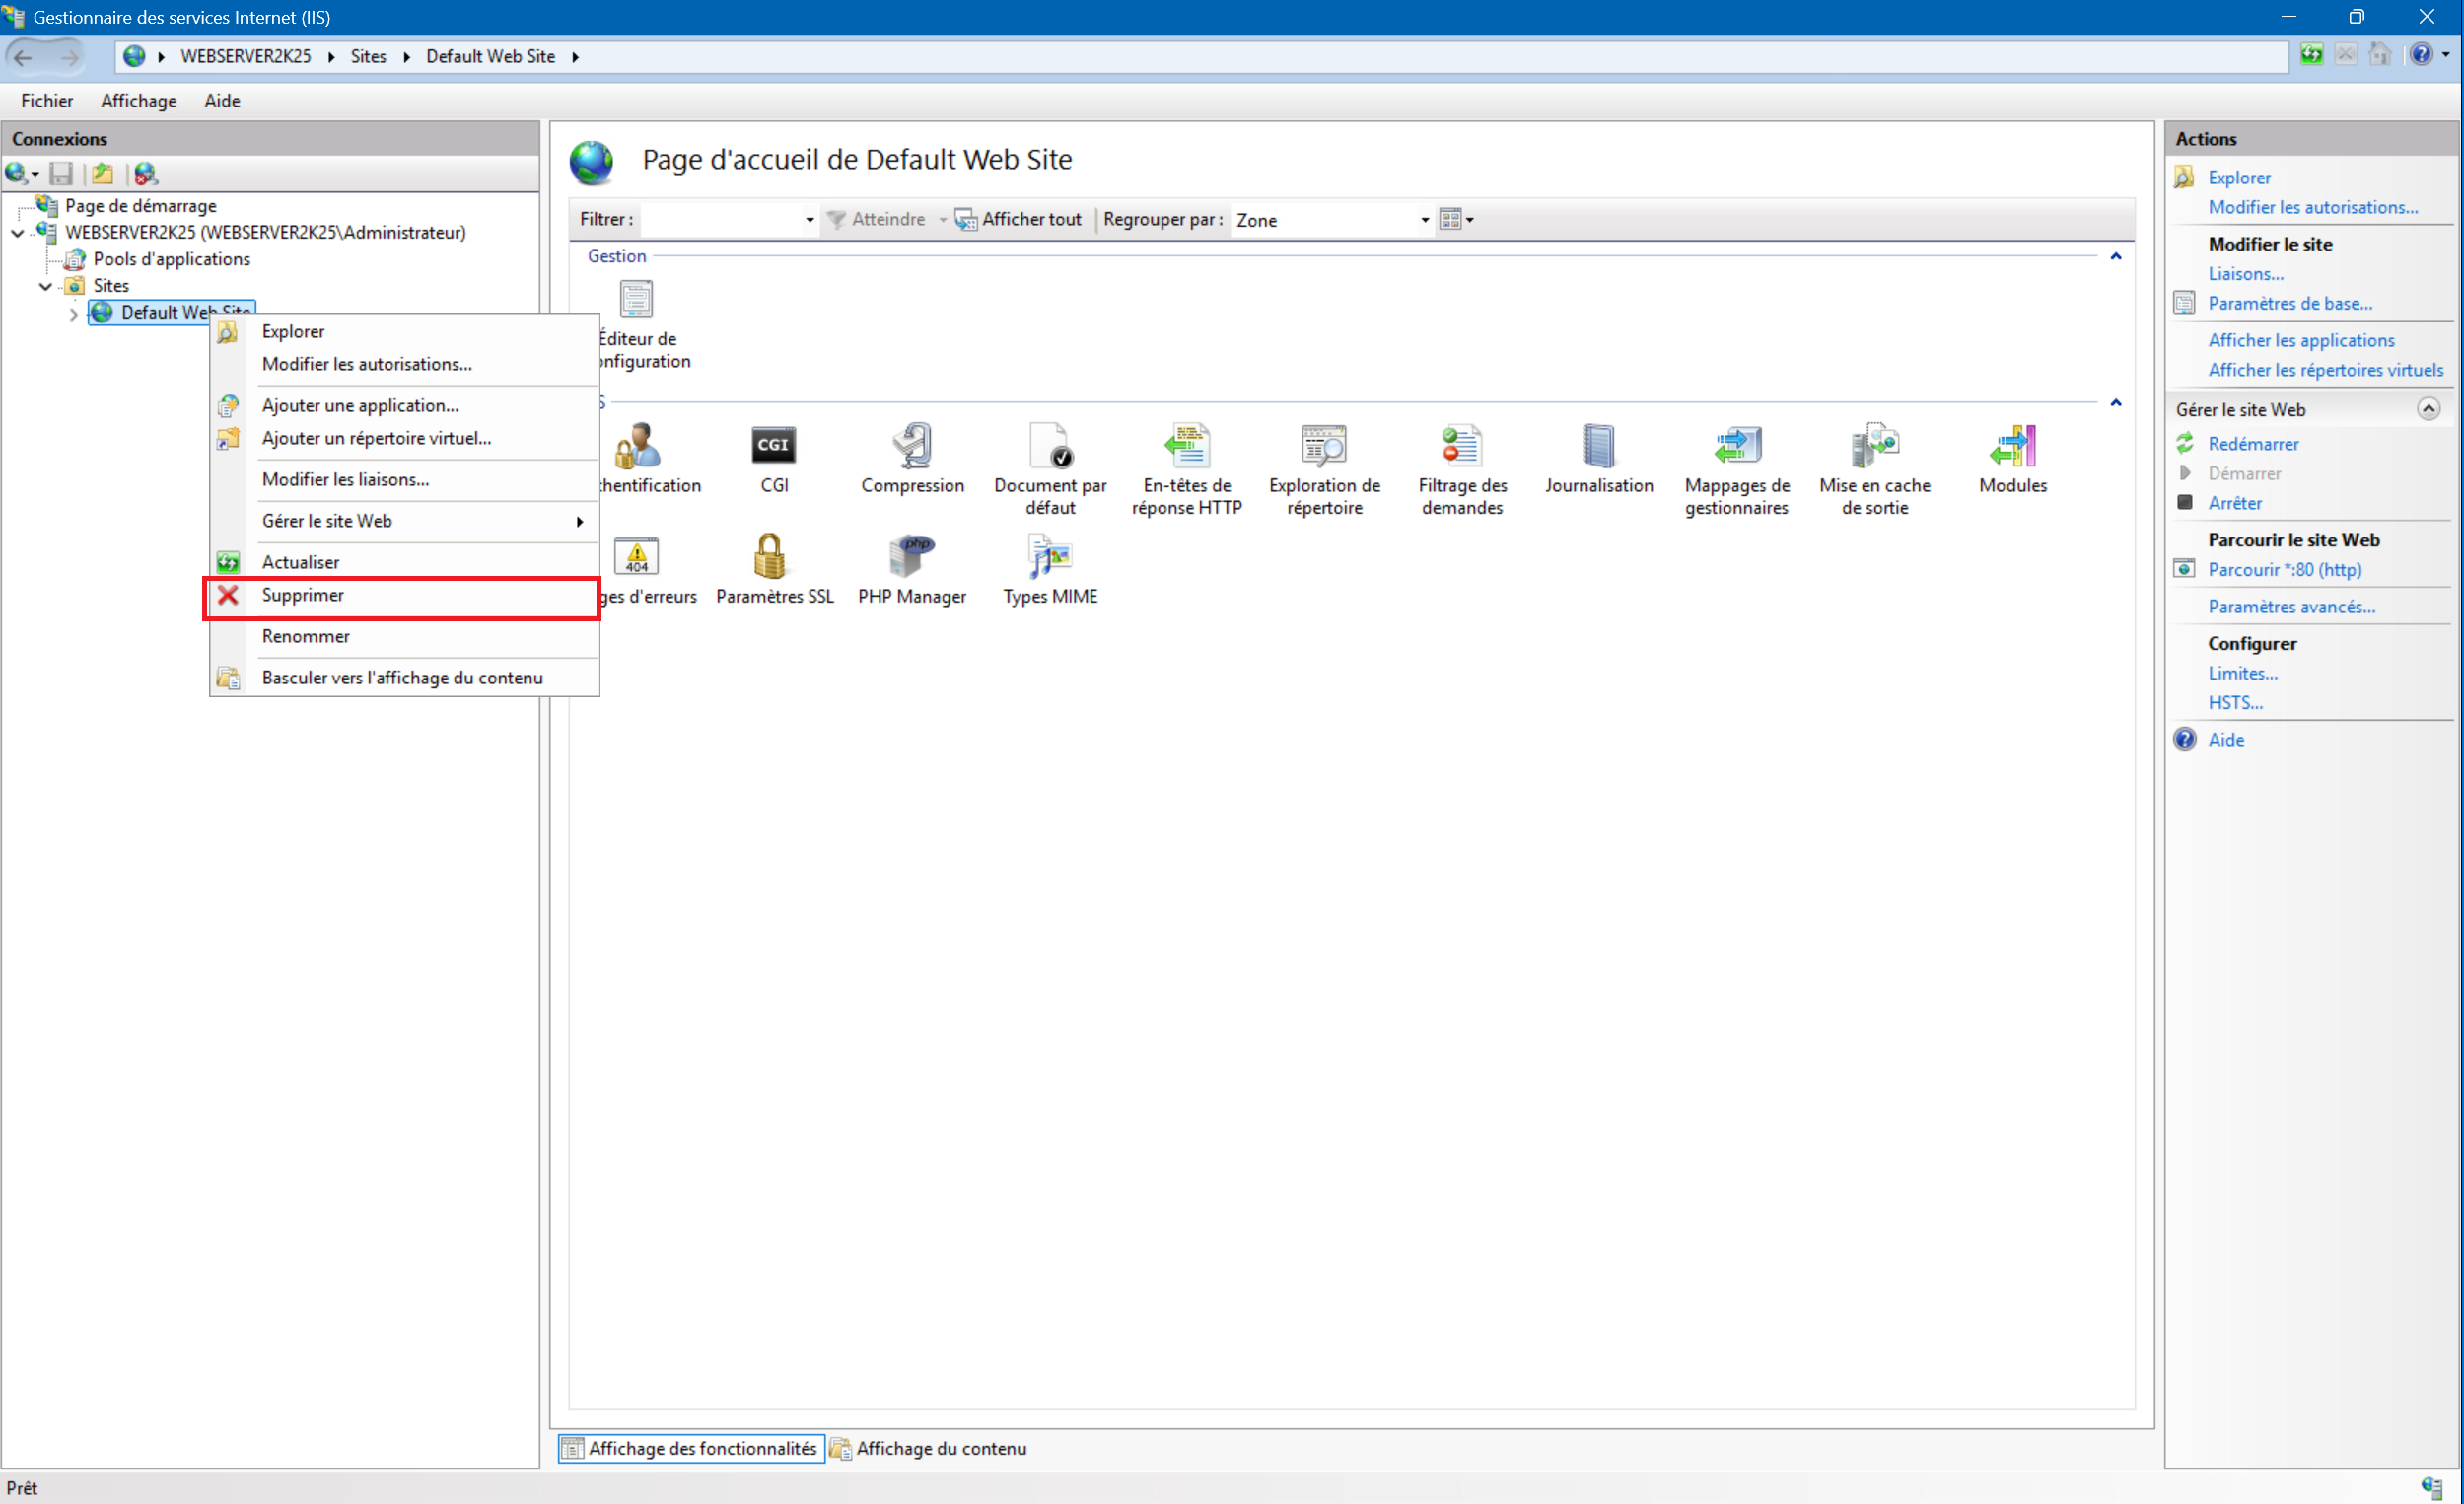
1 – Go back to Internet Services Manager, expand the Connections menu on the left, SERVERNAME> Sites, then right-click on the “Default Web Site” site and click “Remove” :
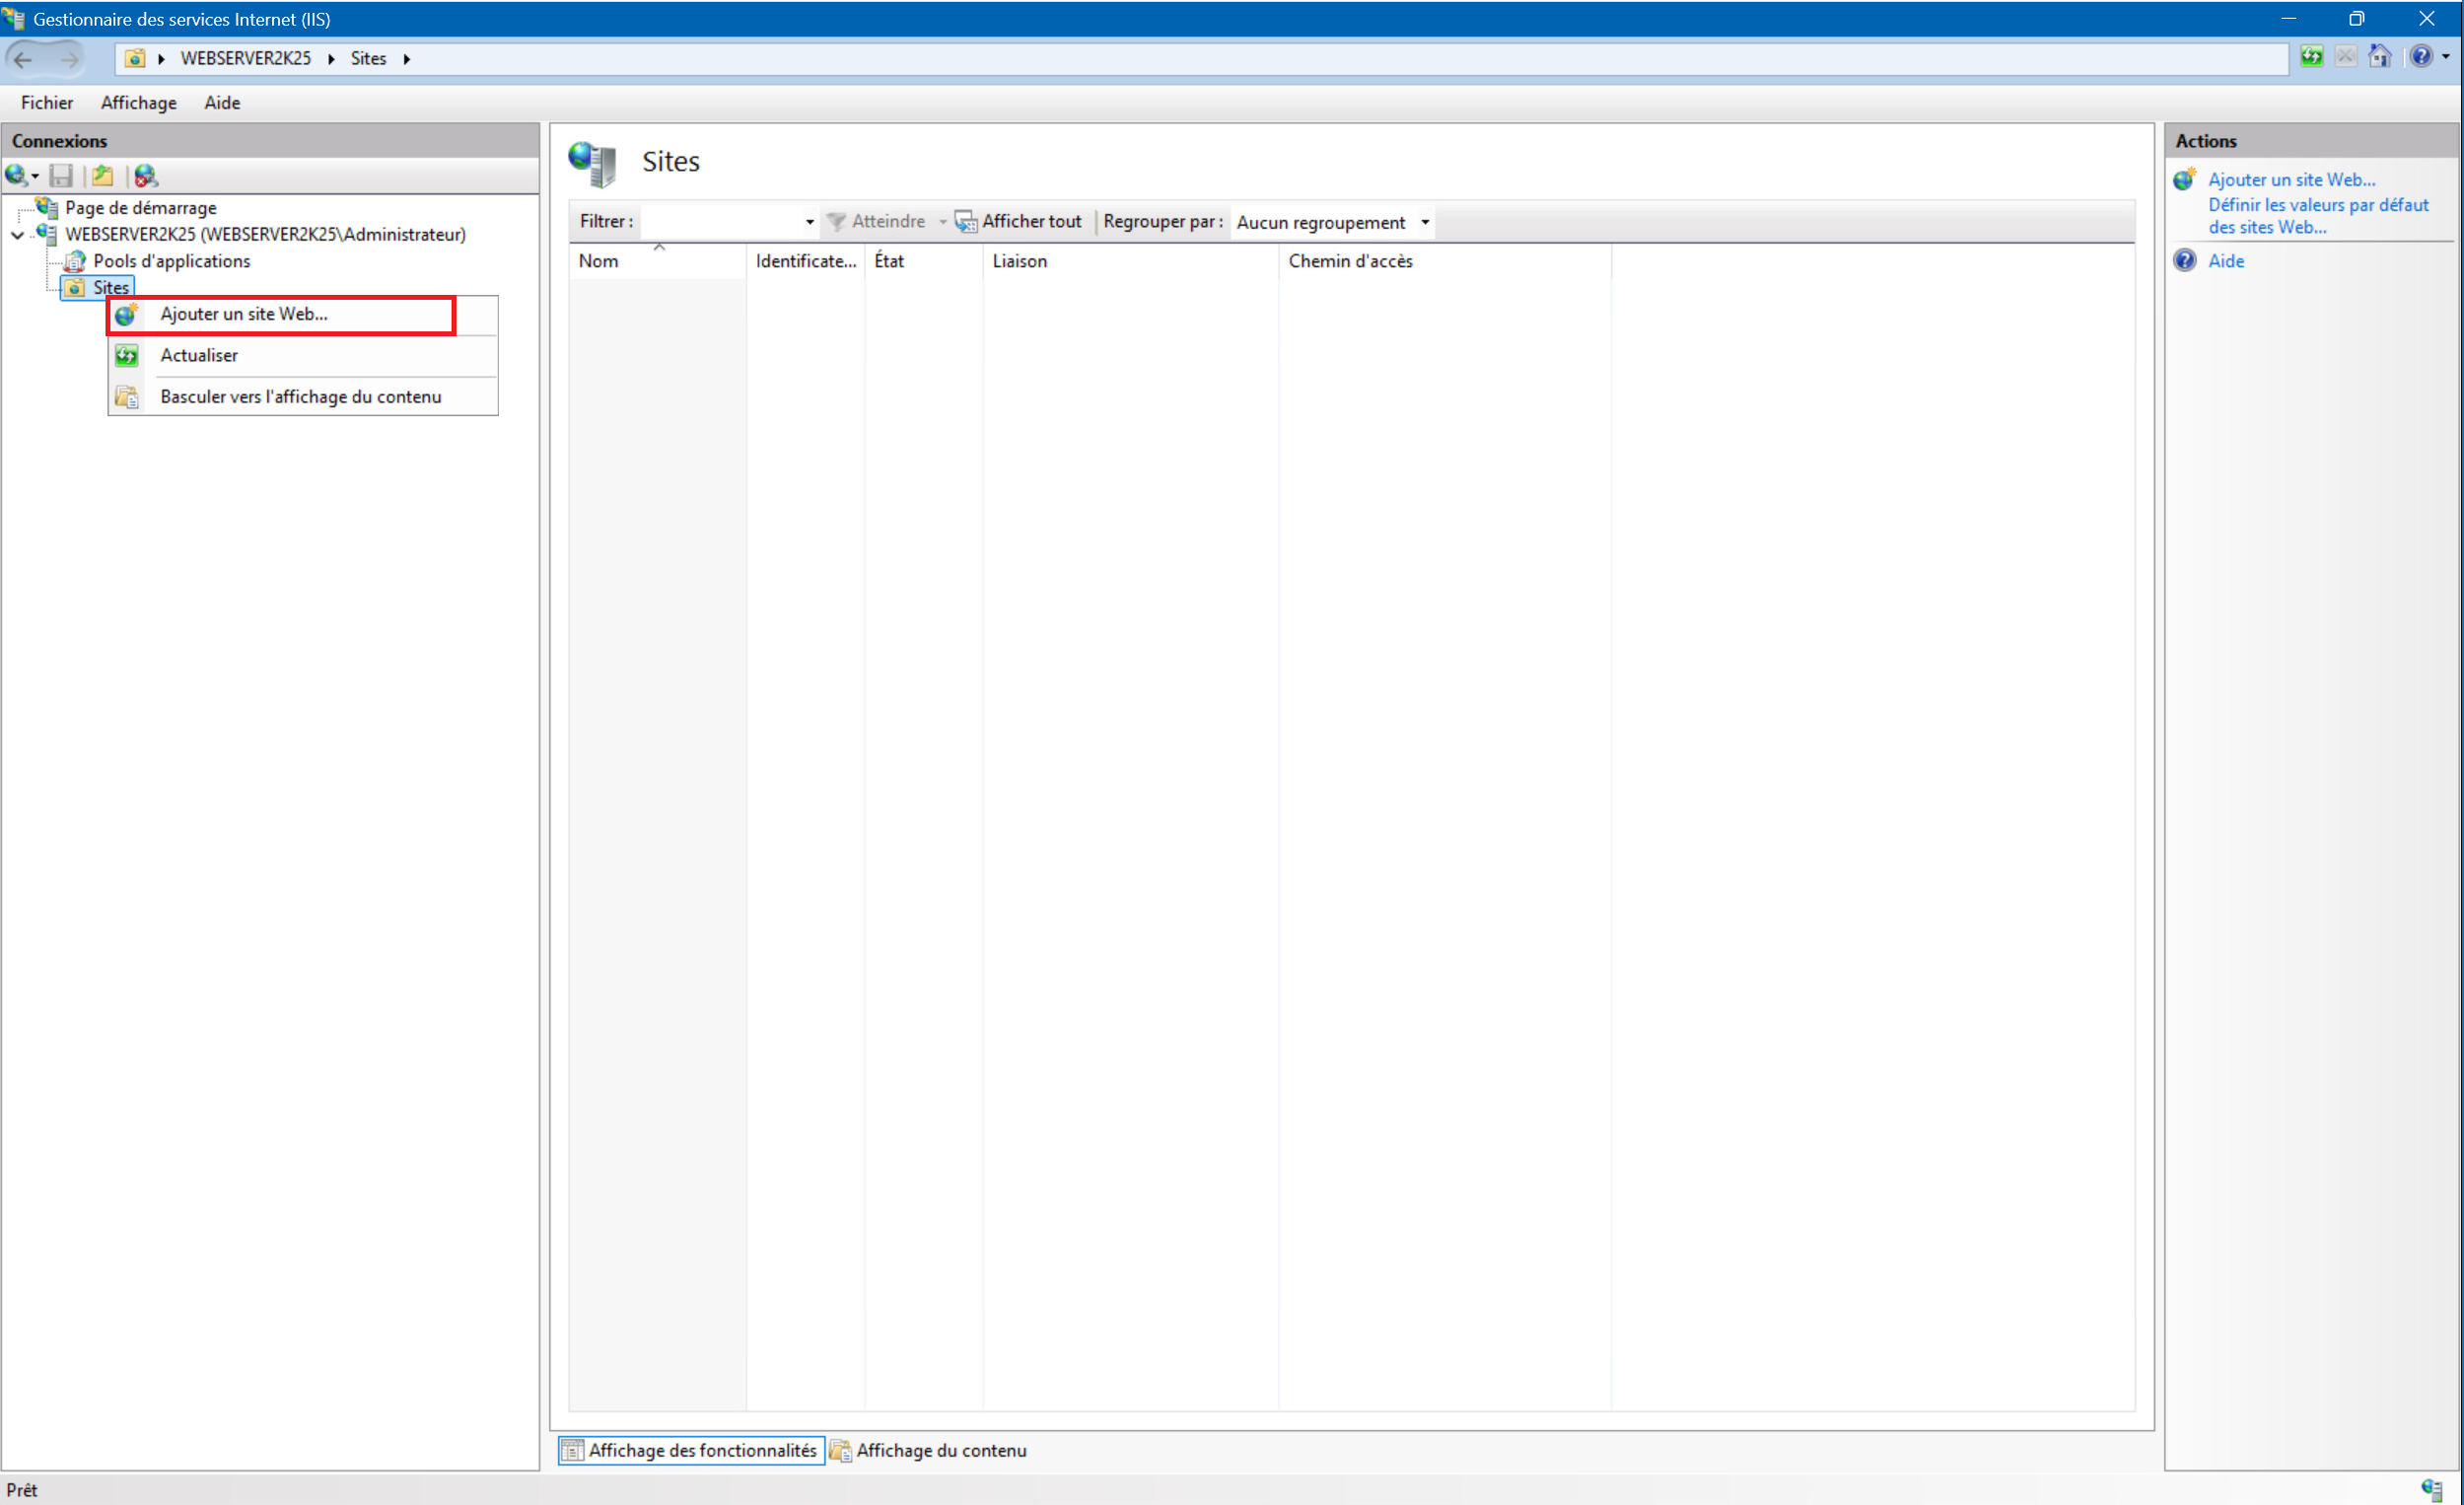
2 – Right-click on “Sites” , then click on “Add website…” :
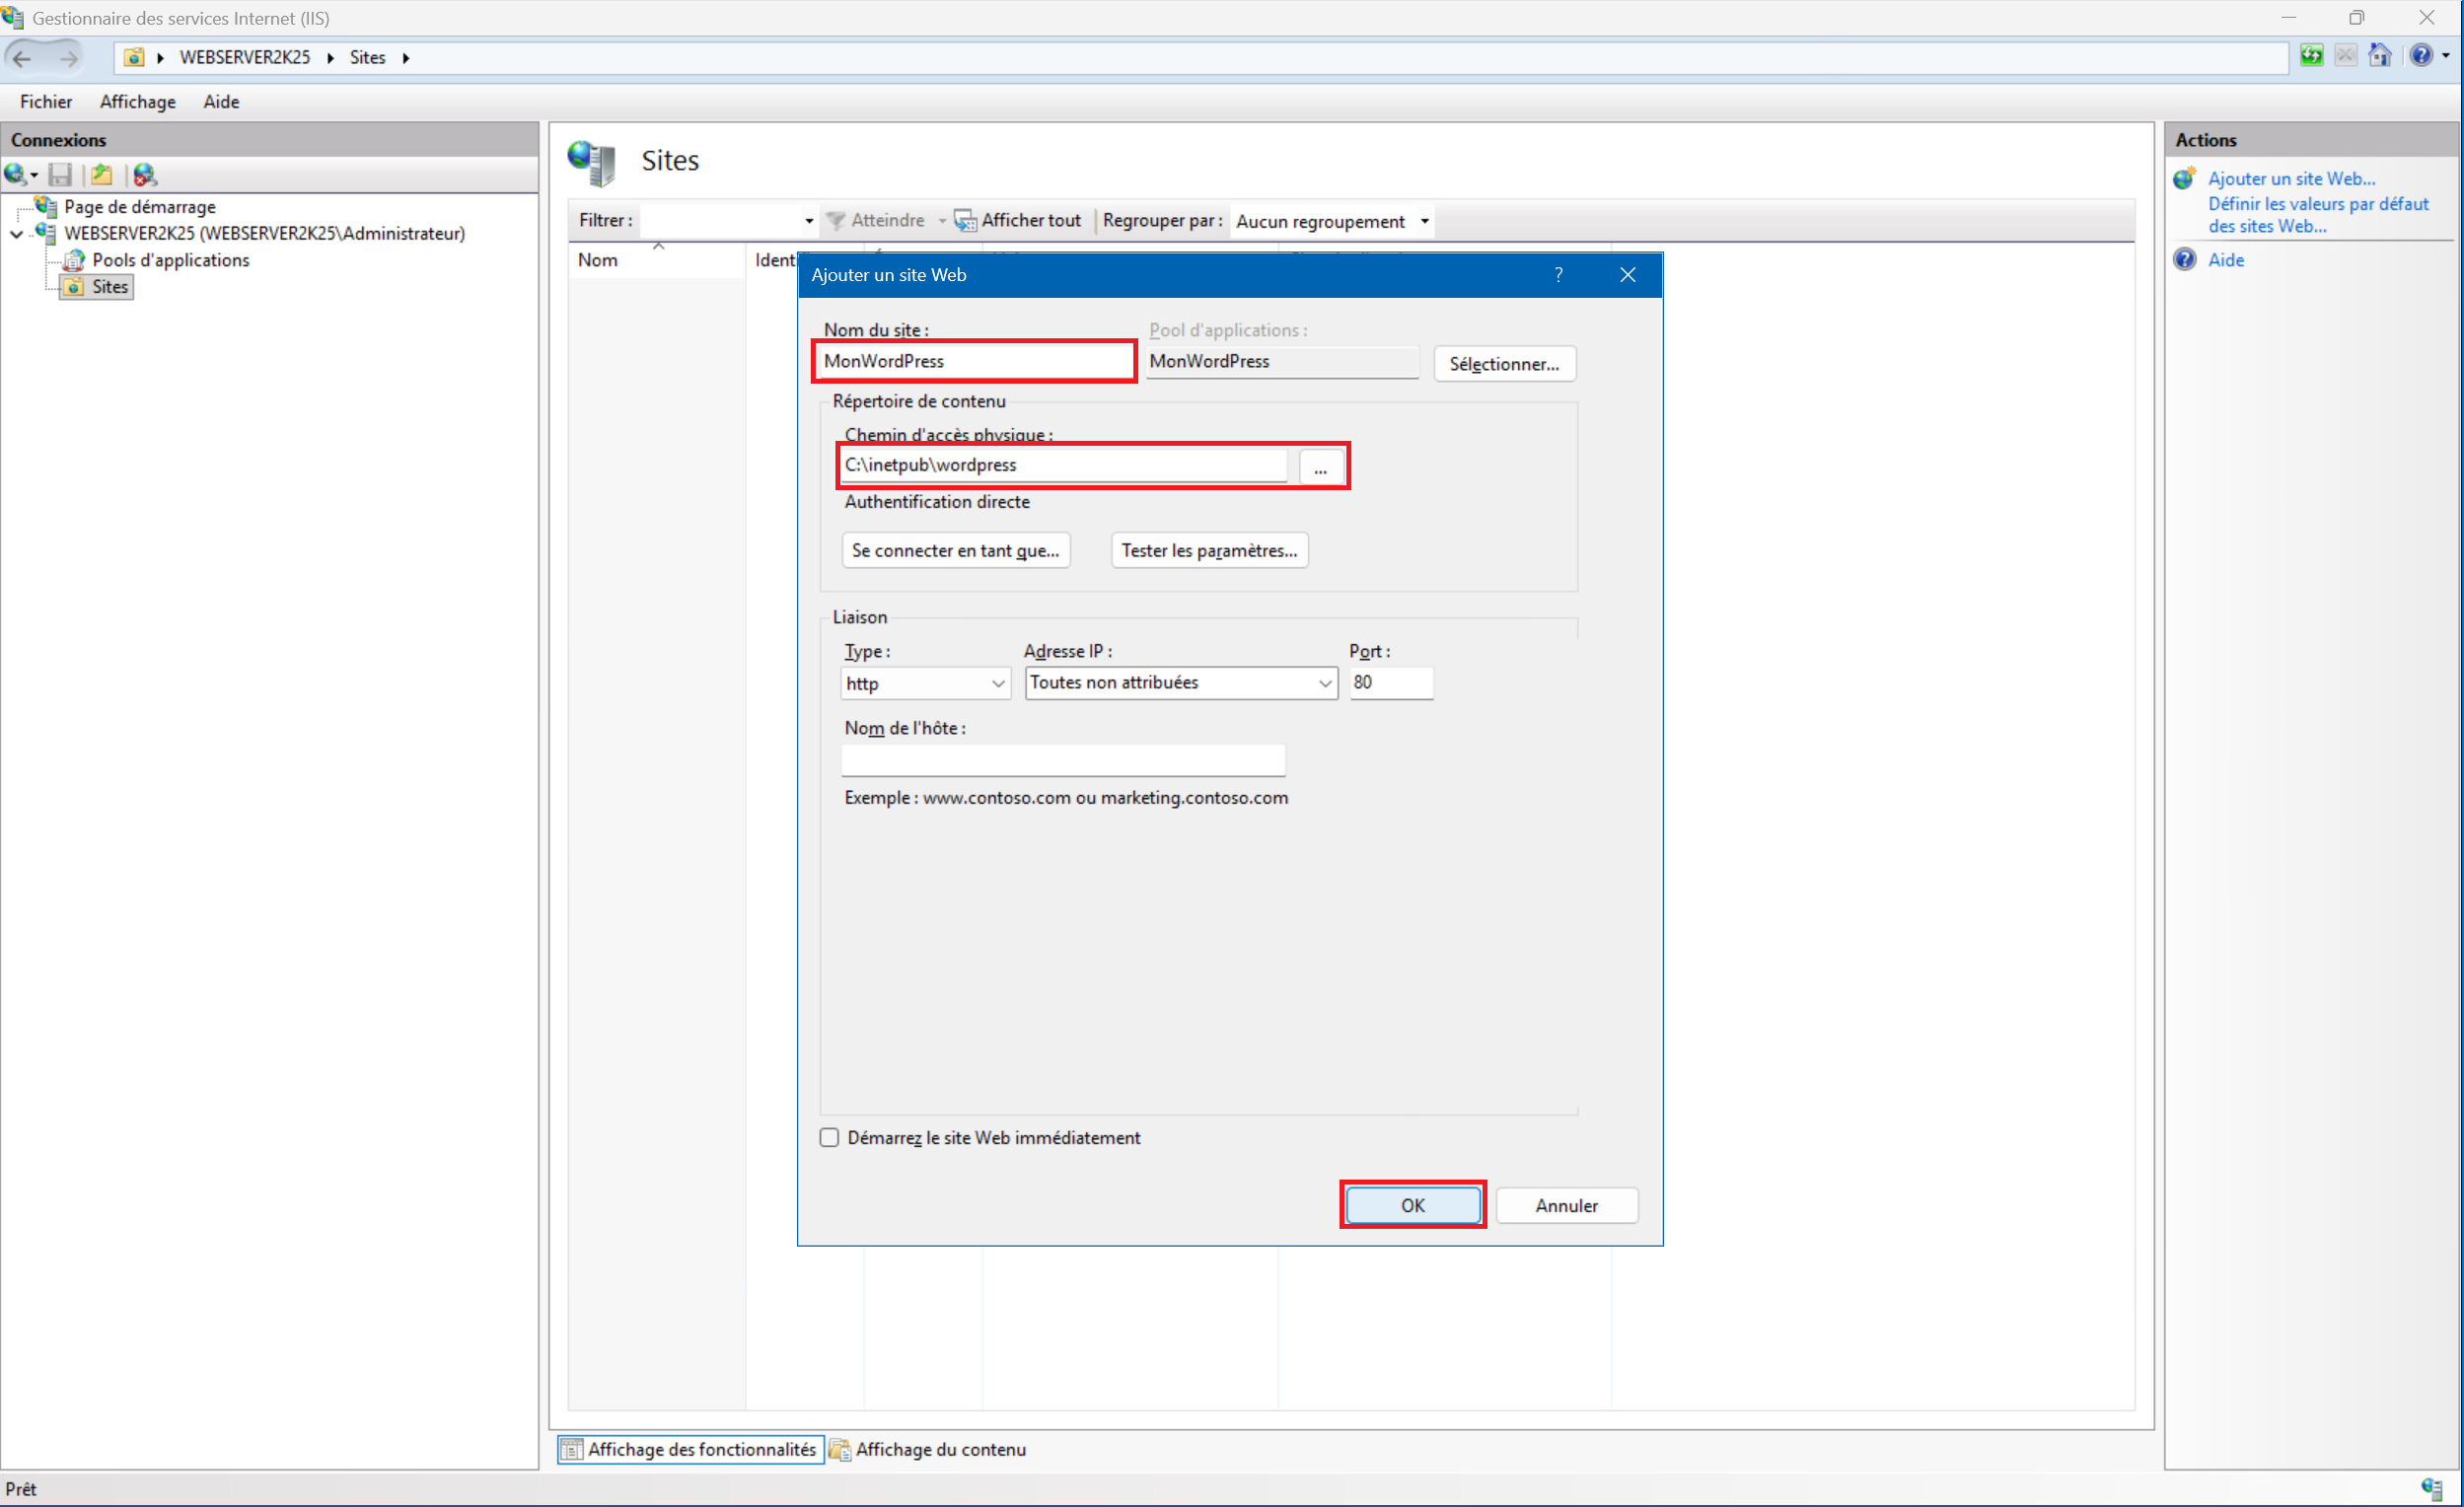
3 – Give your site a name in the “Site name: ” , field, then in the “Physical path:” field define the directory where the WordPress archive was previously unzipped. Here in our example “C:\inetpub\wordpress” (you can browse the files by clicking on the “…” button or enter the path directly in the field). And finally click on “OK” to validate the creation of the site :
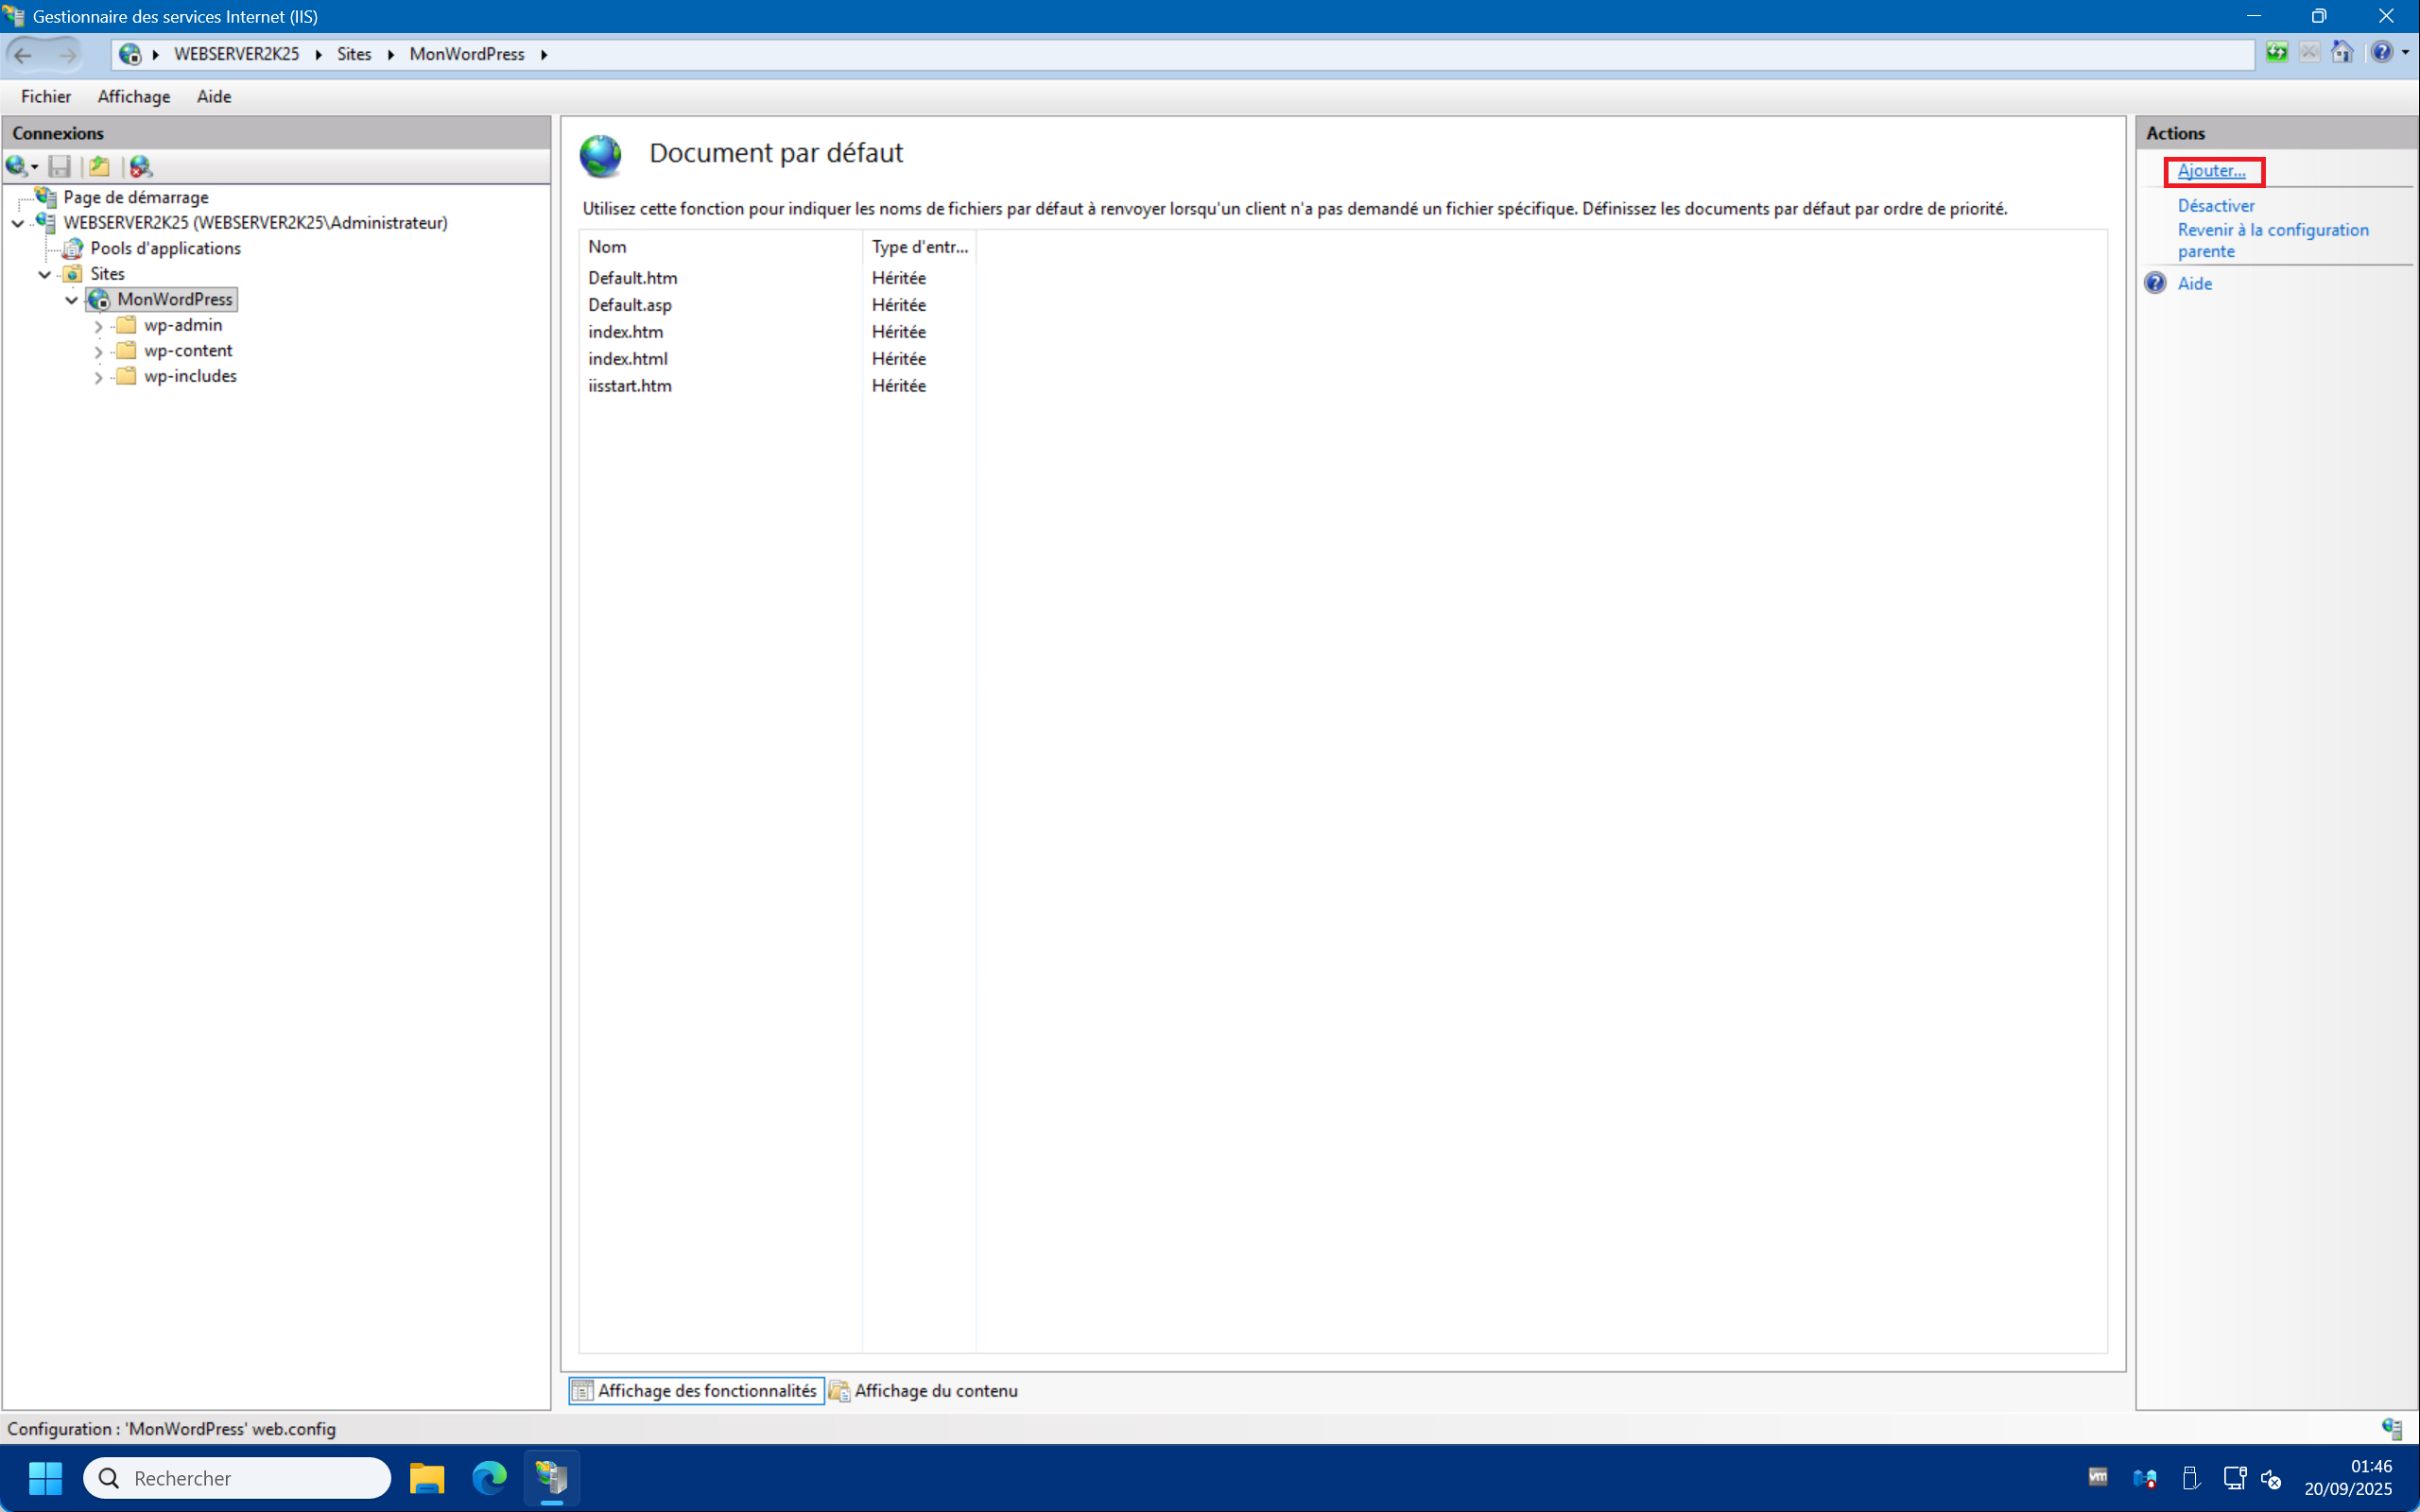
4 – That’s it, your WordPress site is created! You should see the “wp- ” . directories appear. Double-click on “Default Document” , then on “Add…” at the top right if the “index.php” file is not already in the list :

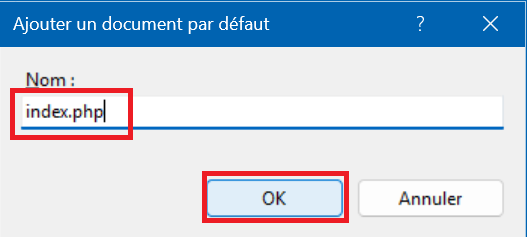
5 – Type “index.php” in the “Name:” field and click “OK” :
C – Permissions Settings :
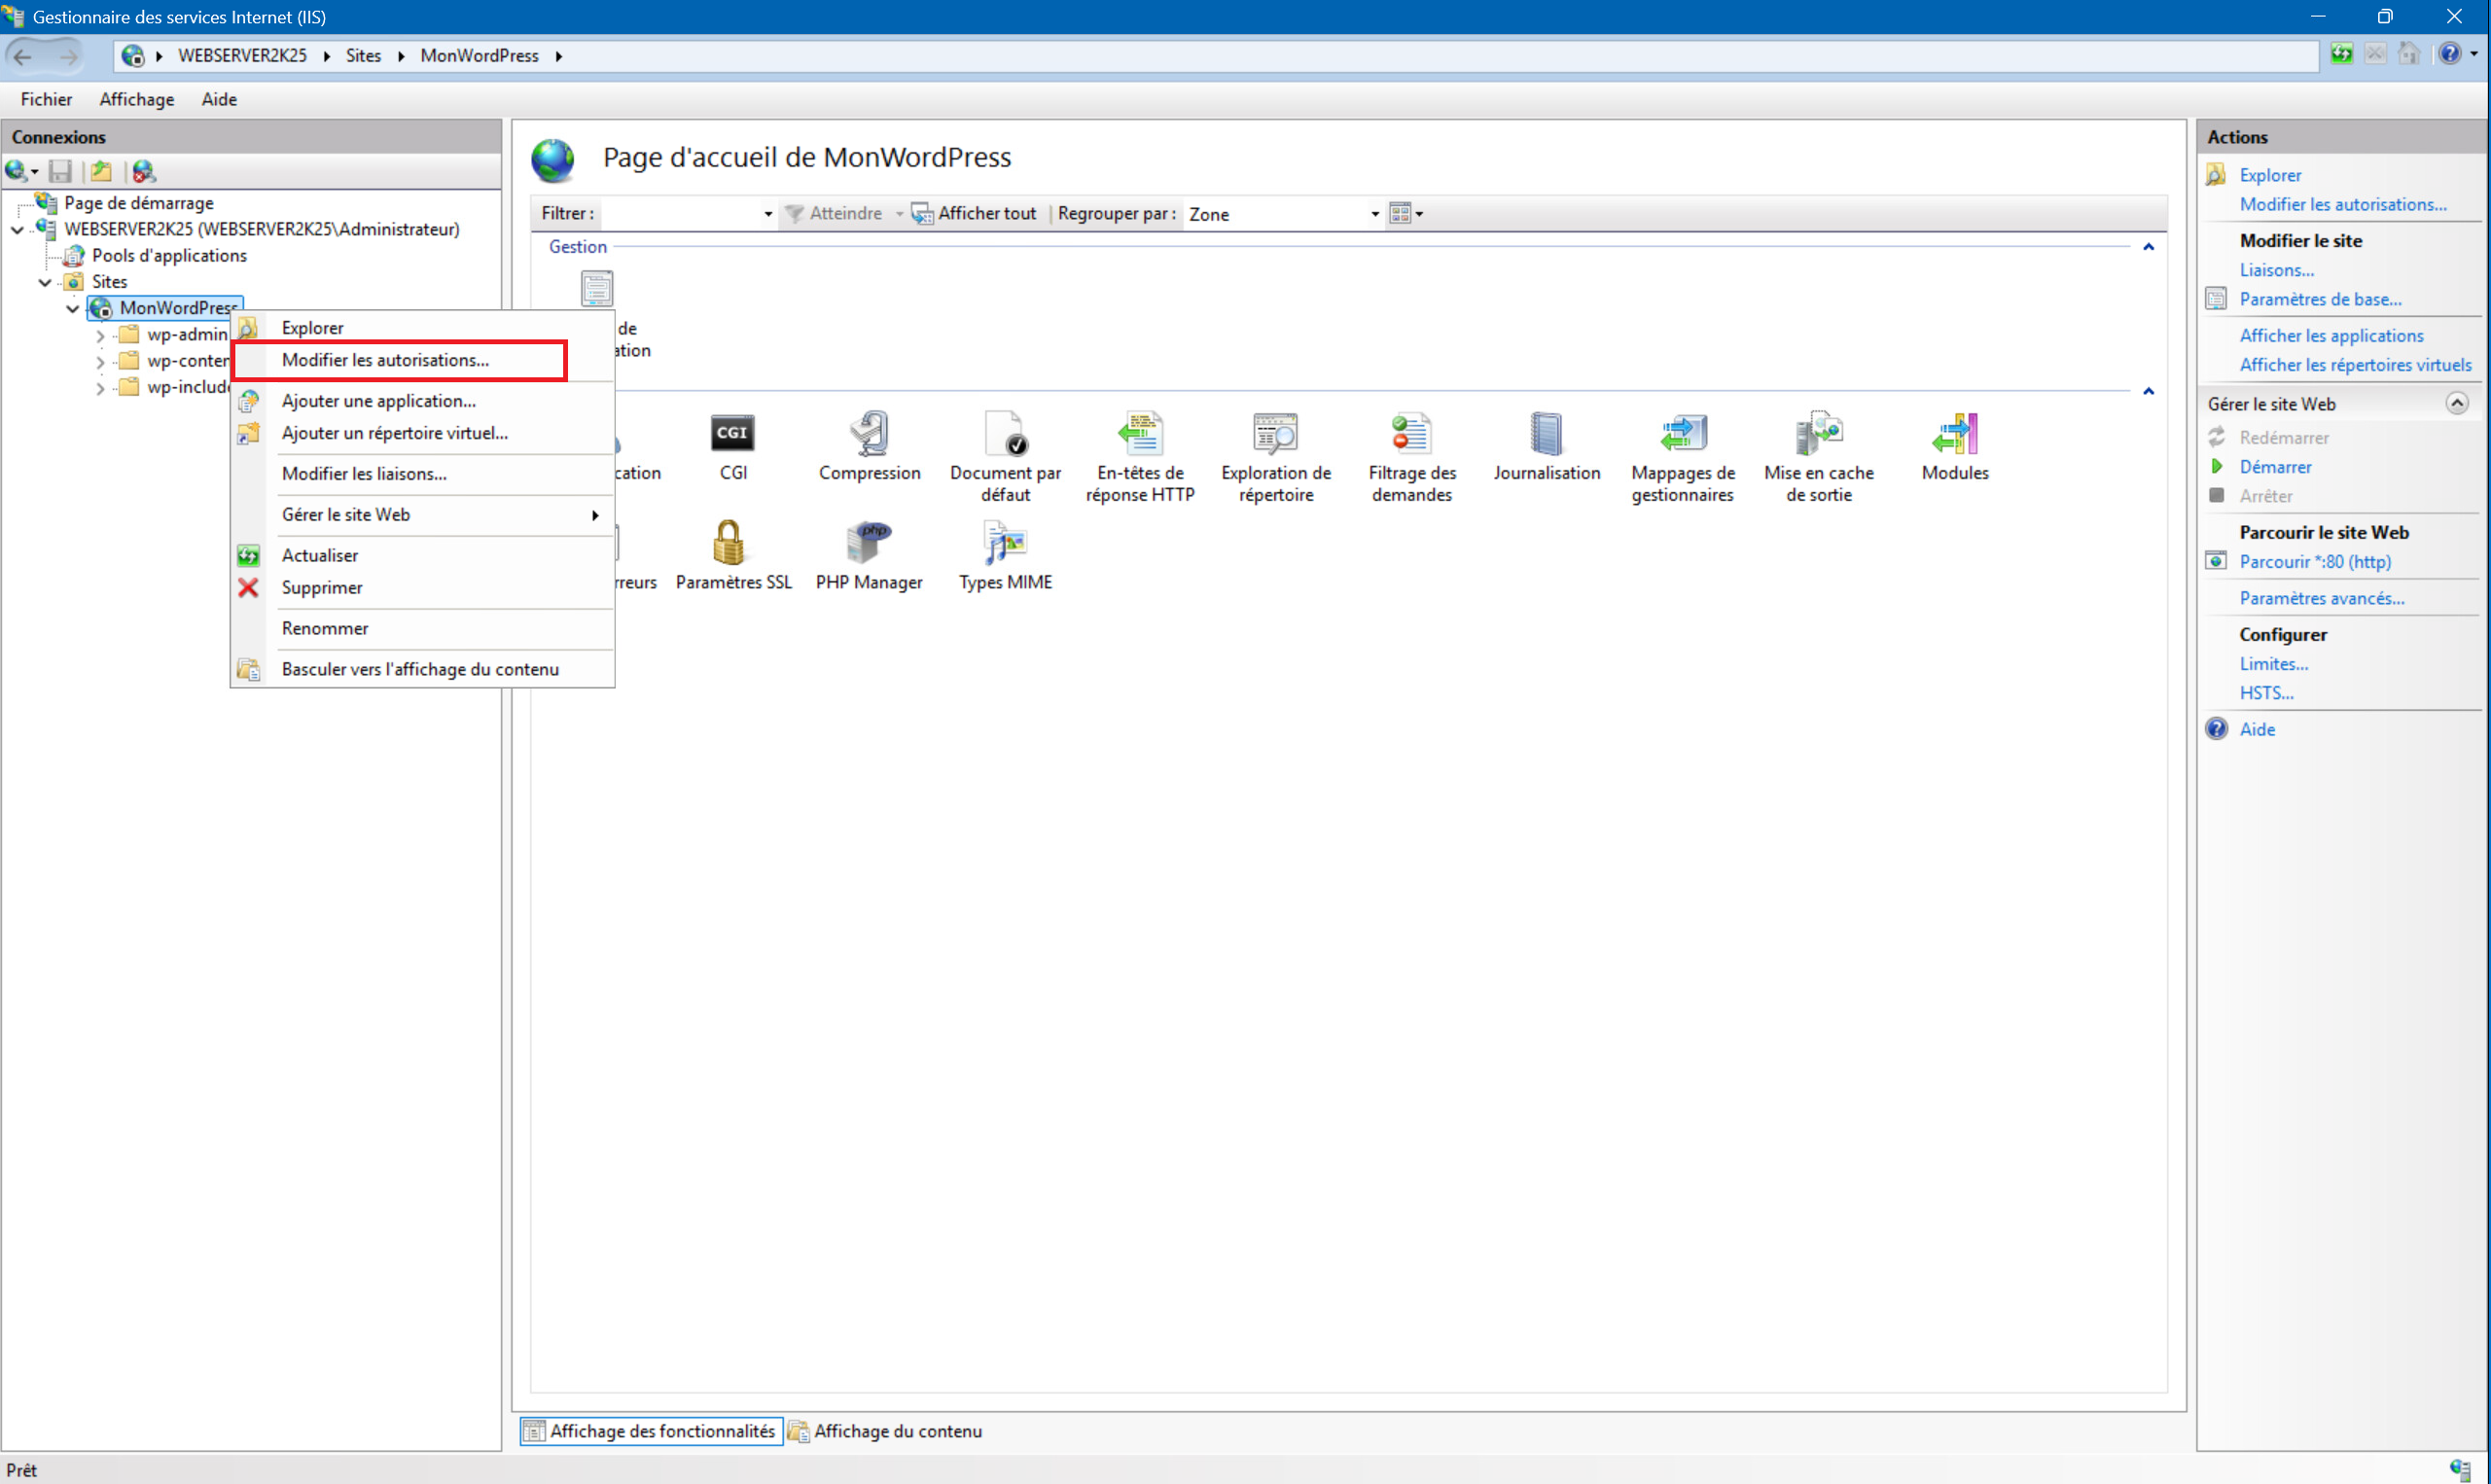
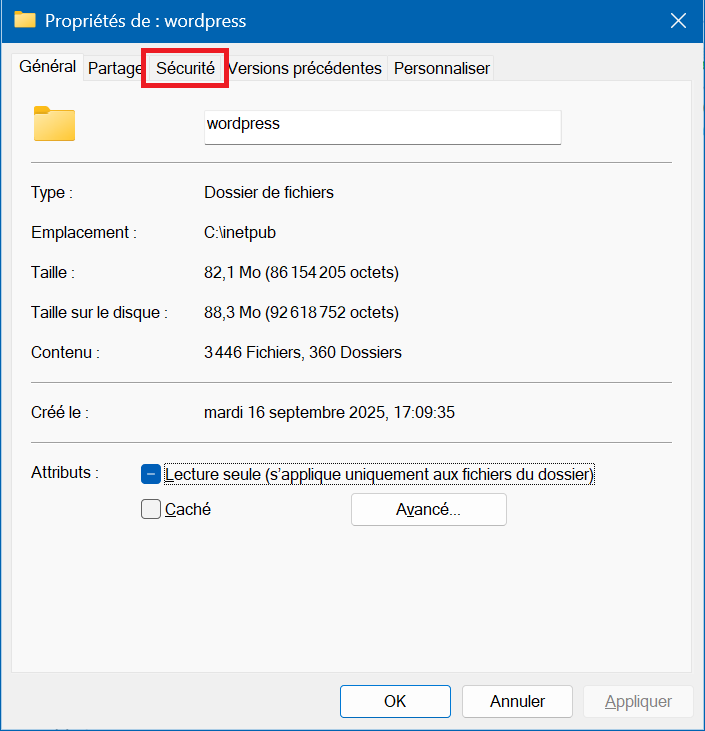
1 – Right-click on your site and then click “Edit permissions…” :
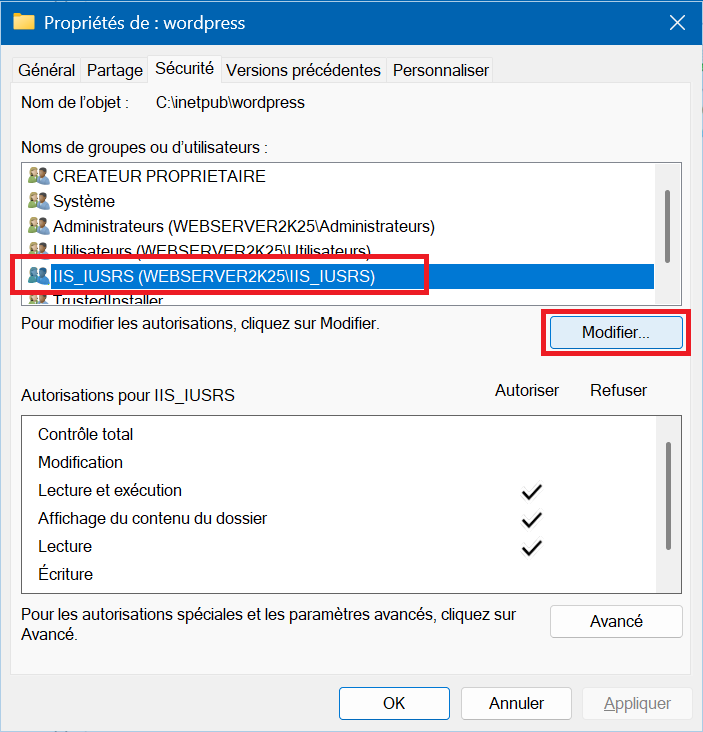
2 – Click on the “Security” tab then select the “IIS_IUSRS” group and click on “Edit…” . Then in the “Permission for wordpress” window check “Modifiy” then “Apply” and close the properties.

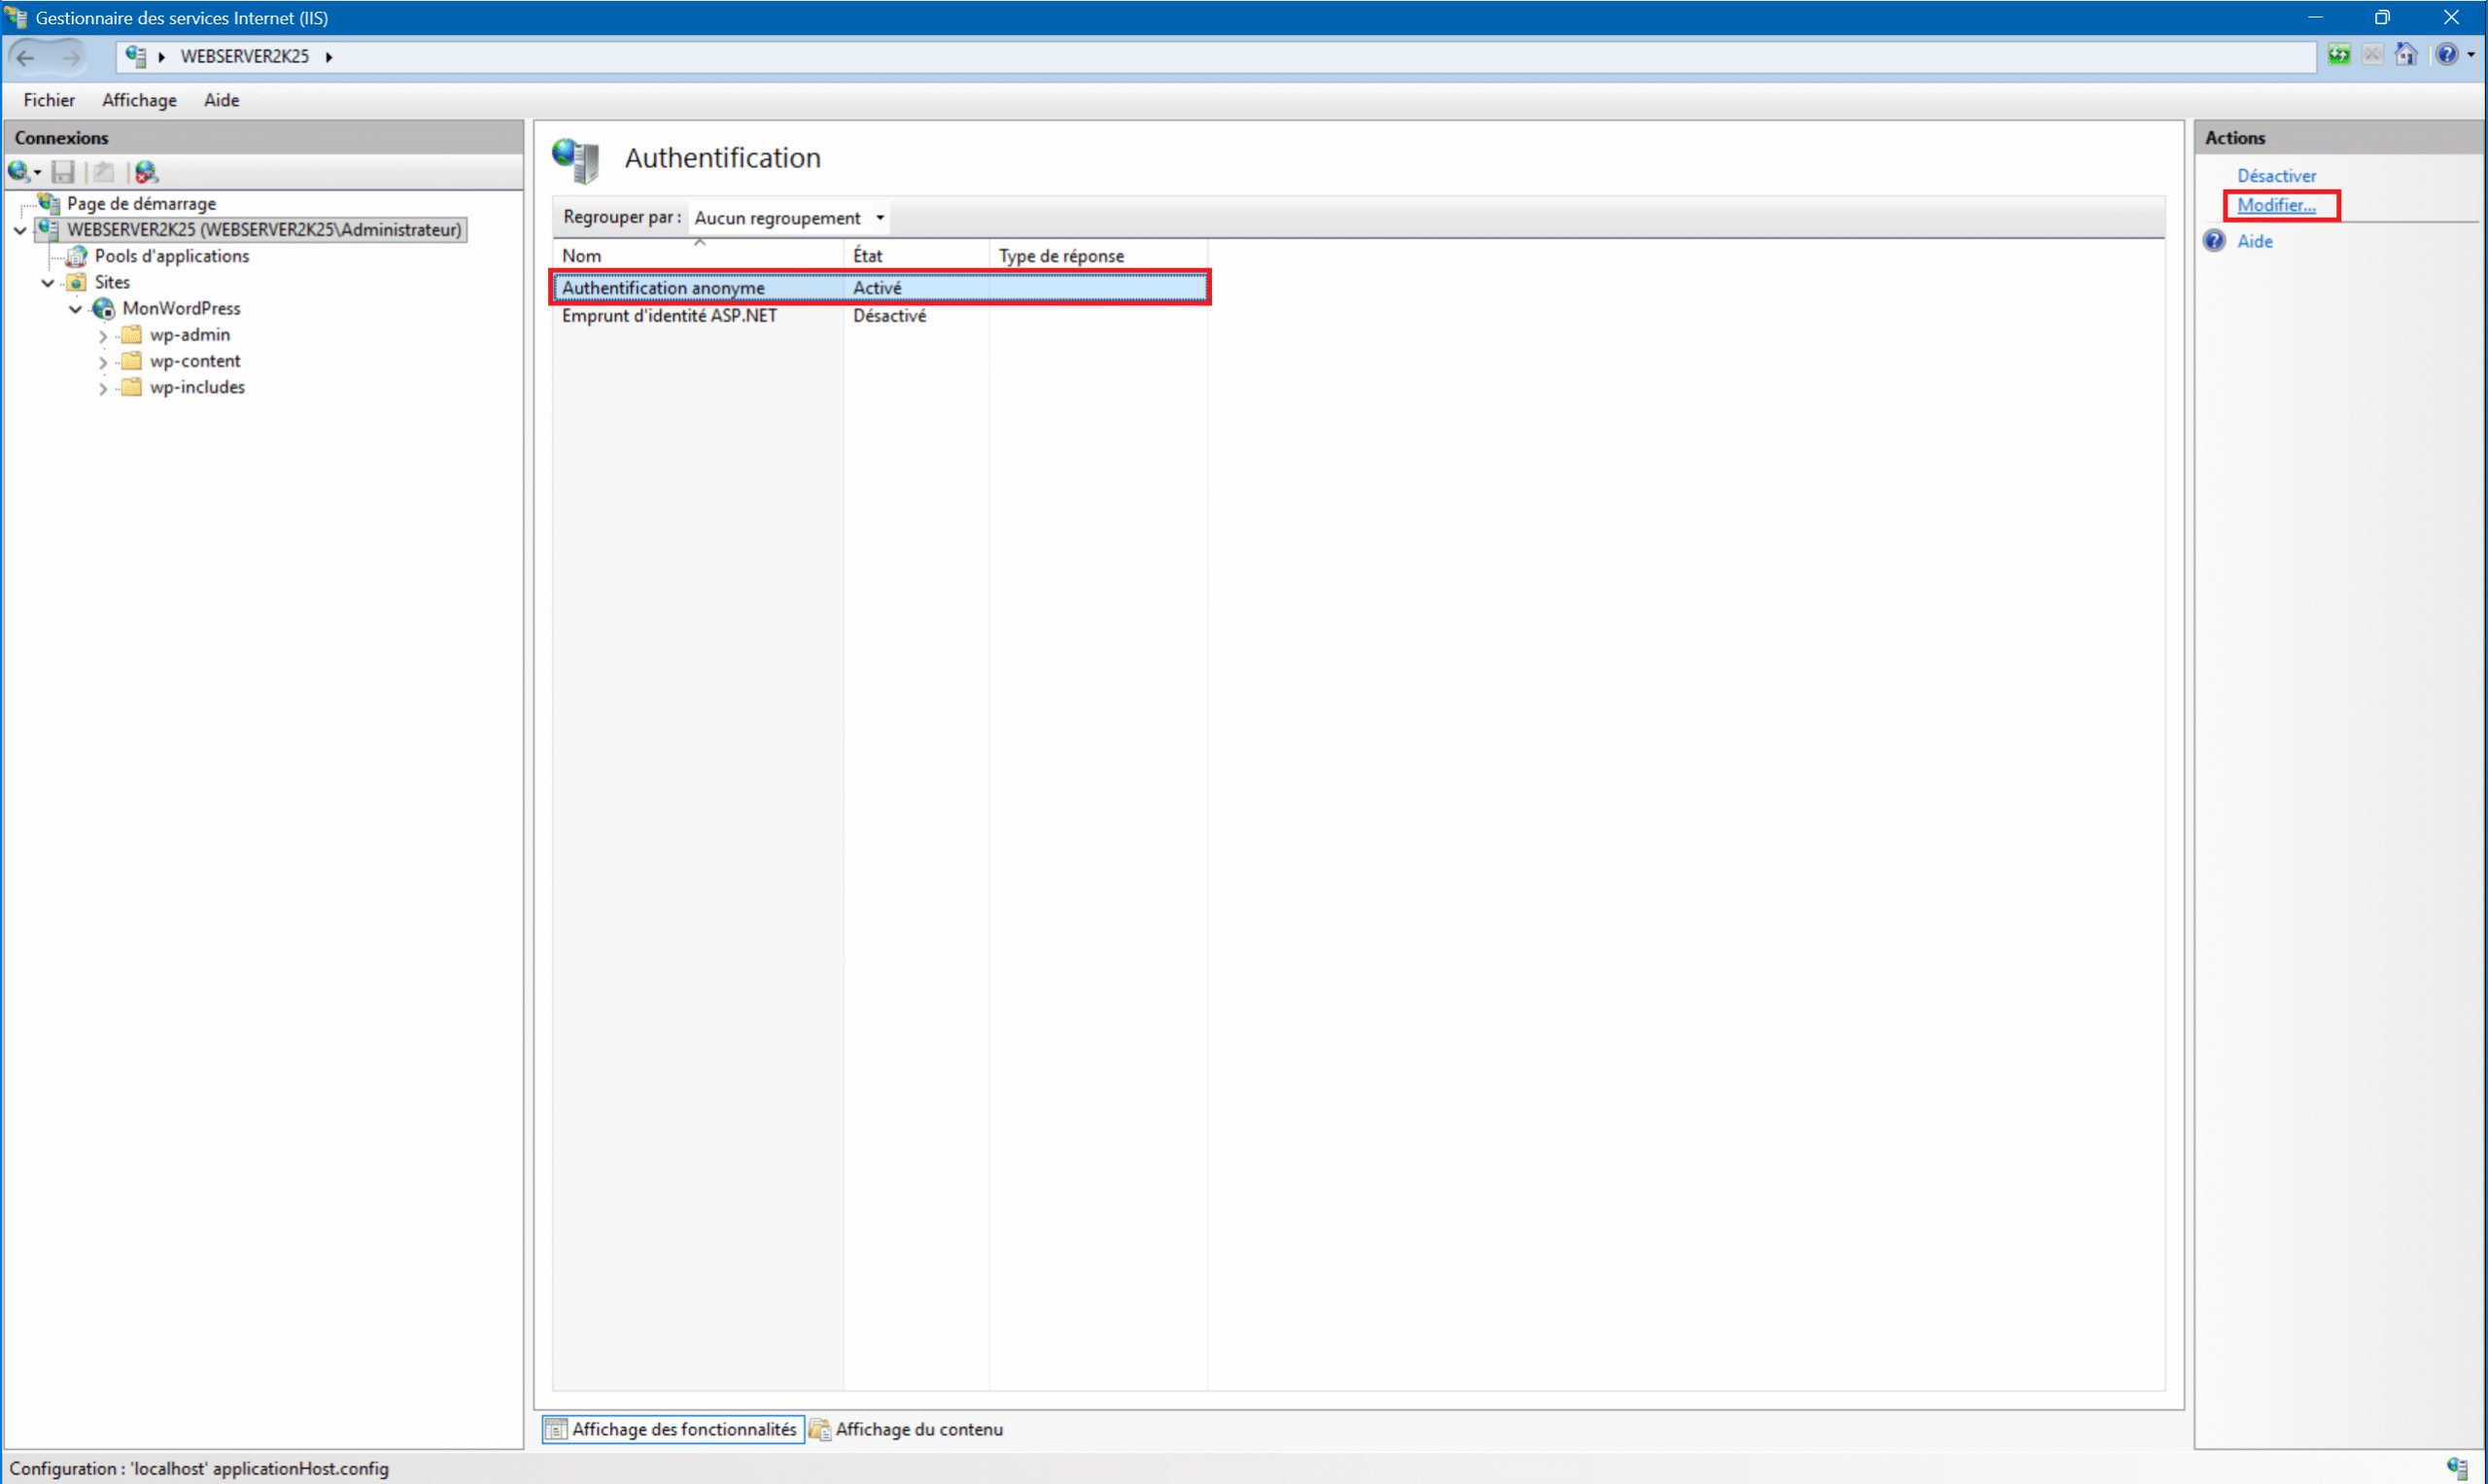
3 – Return to the home page, then select your server at the top of the “Connections” menu on the left, then double-click on the “Authentication” icon :

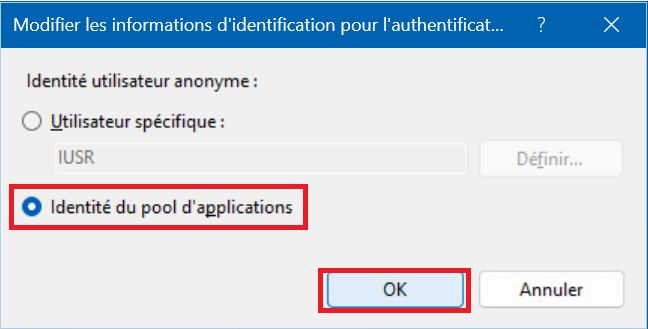
4 – Select “Anonymous Authentication” then click “Edit…” :
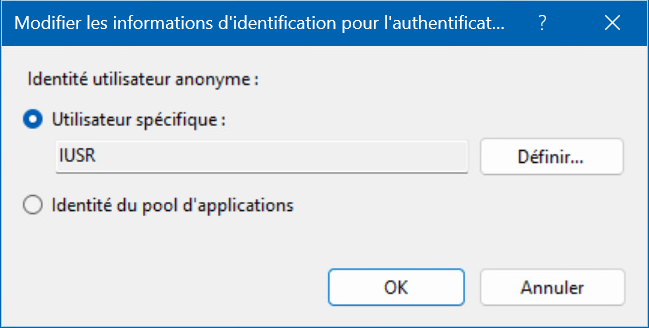
5 – In the window that appears, select “Application pool identity” and click “OK” . That’s it, your permissions are correctly configured.
D – PHP configuration of the site :
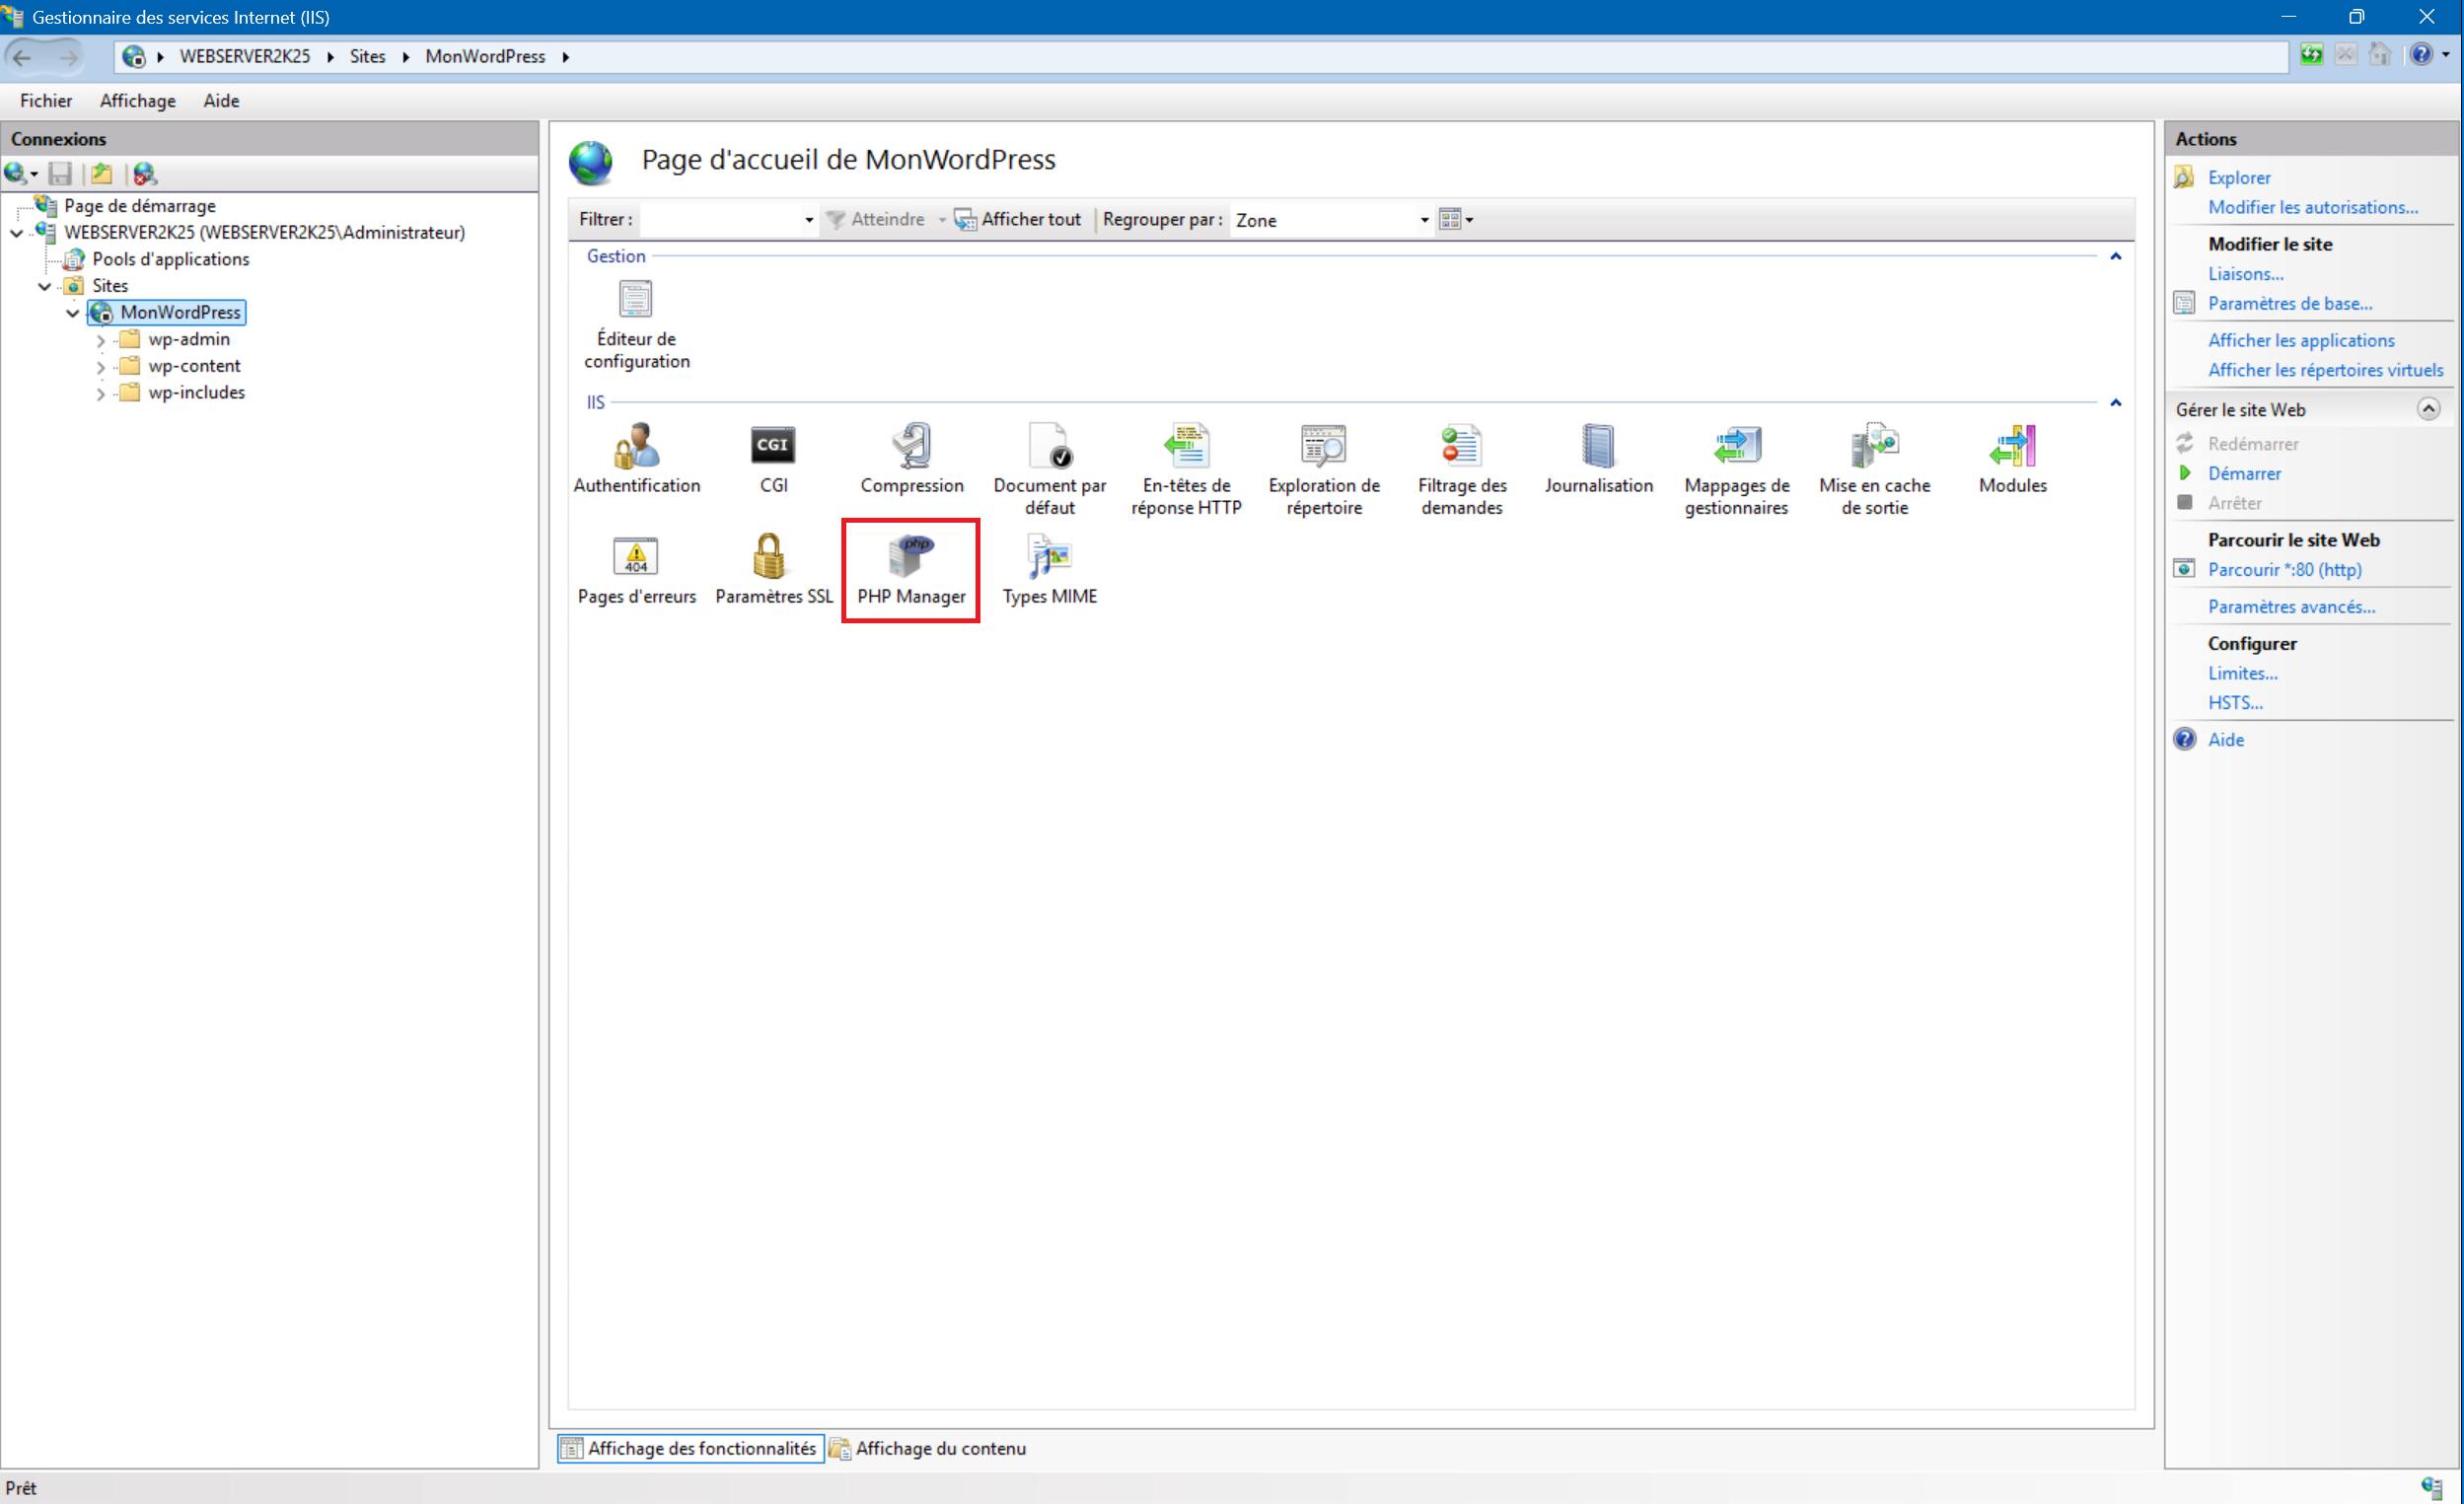
1 – Return to the site’s home page and launch “PHP Manager” :
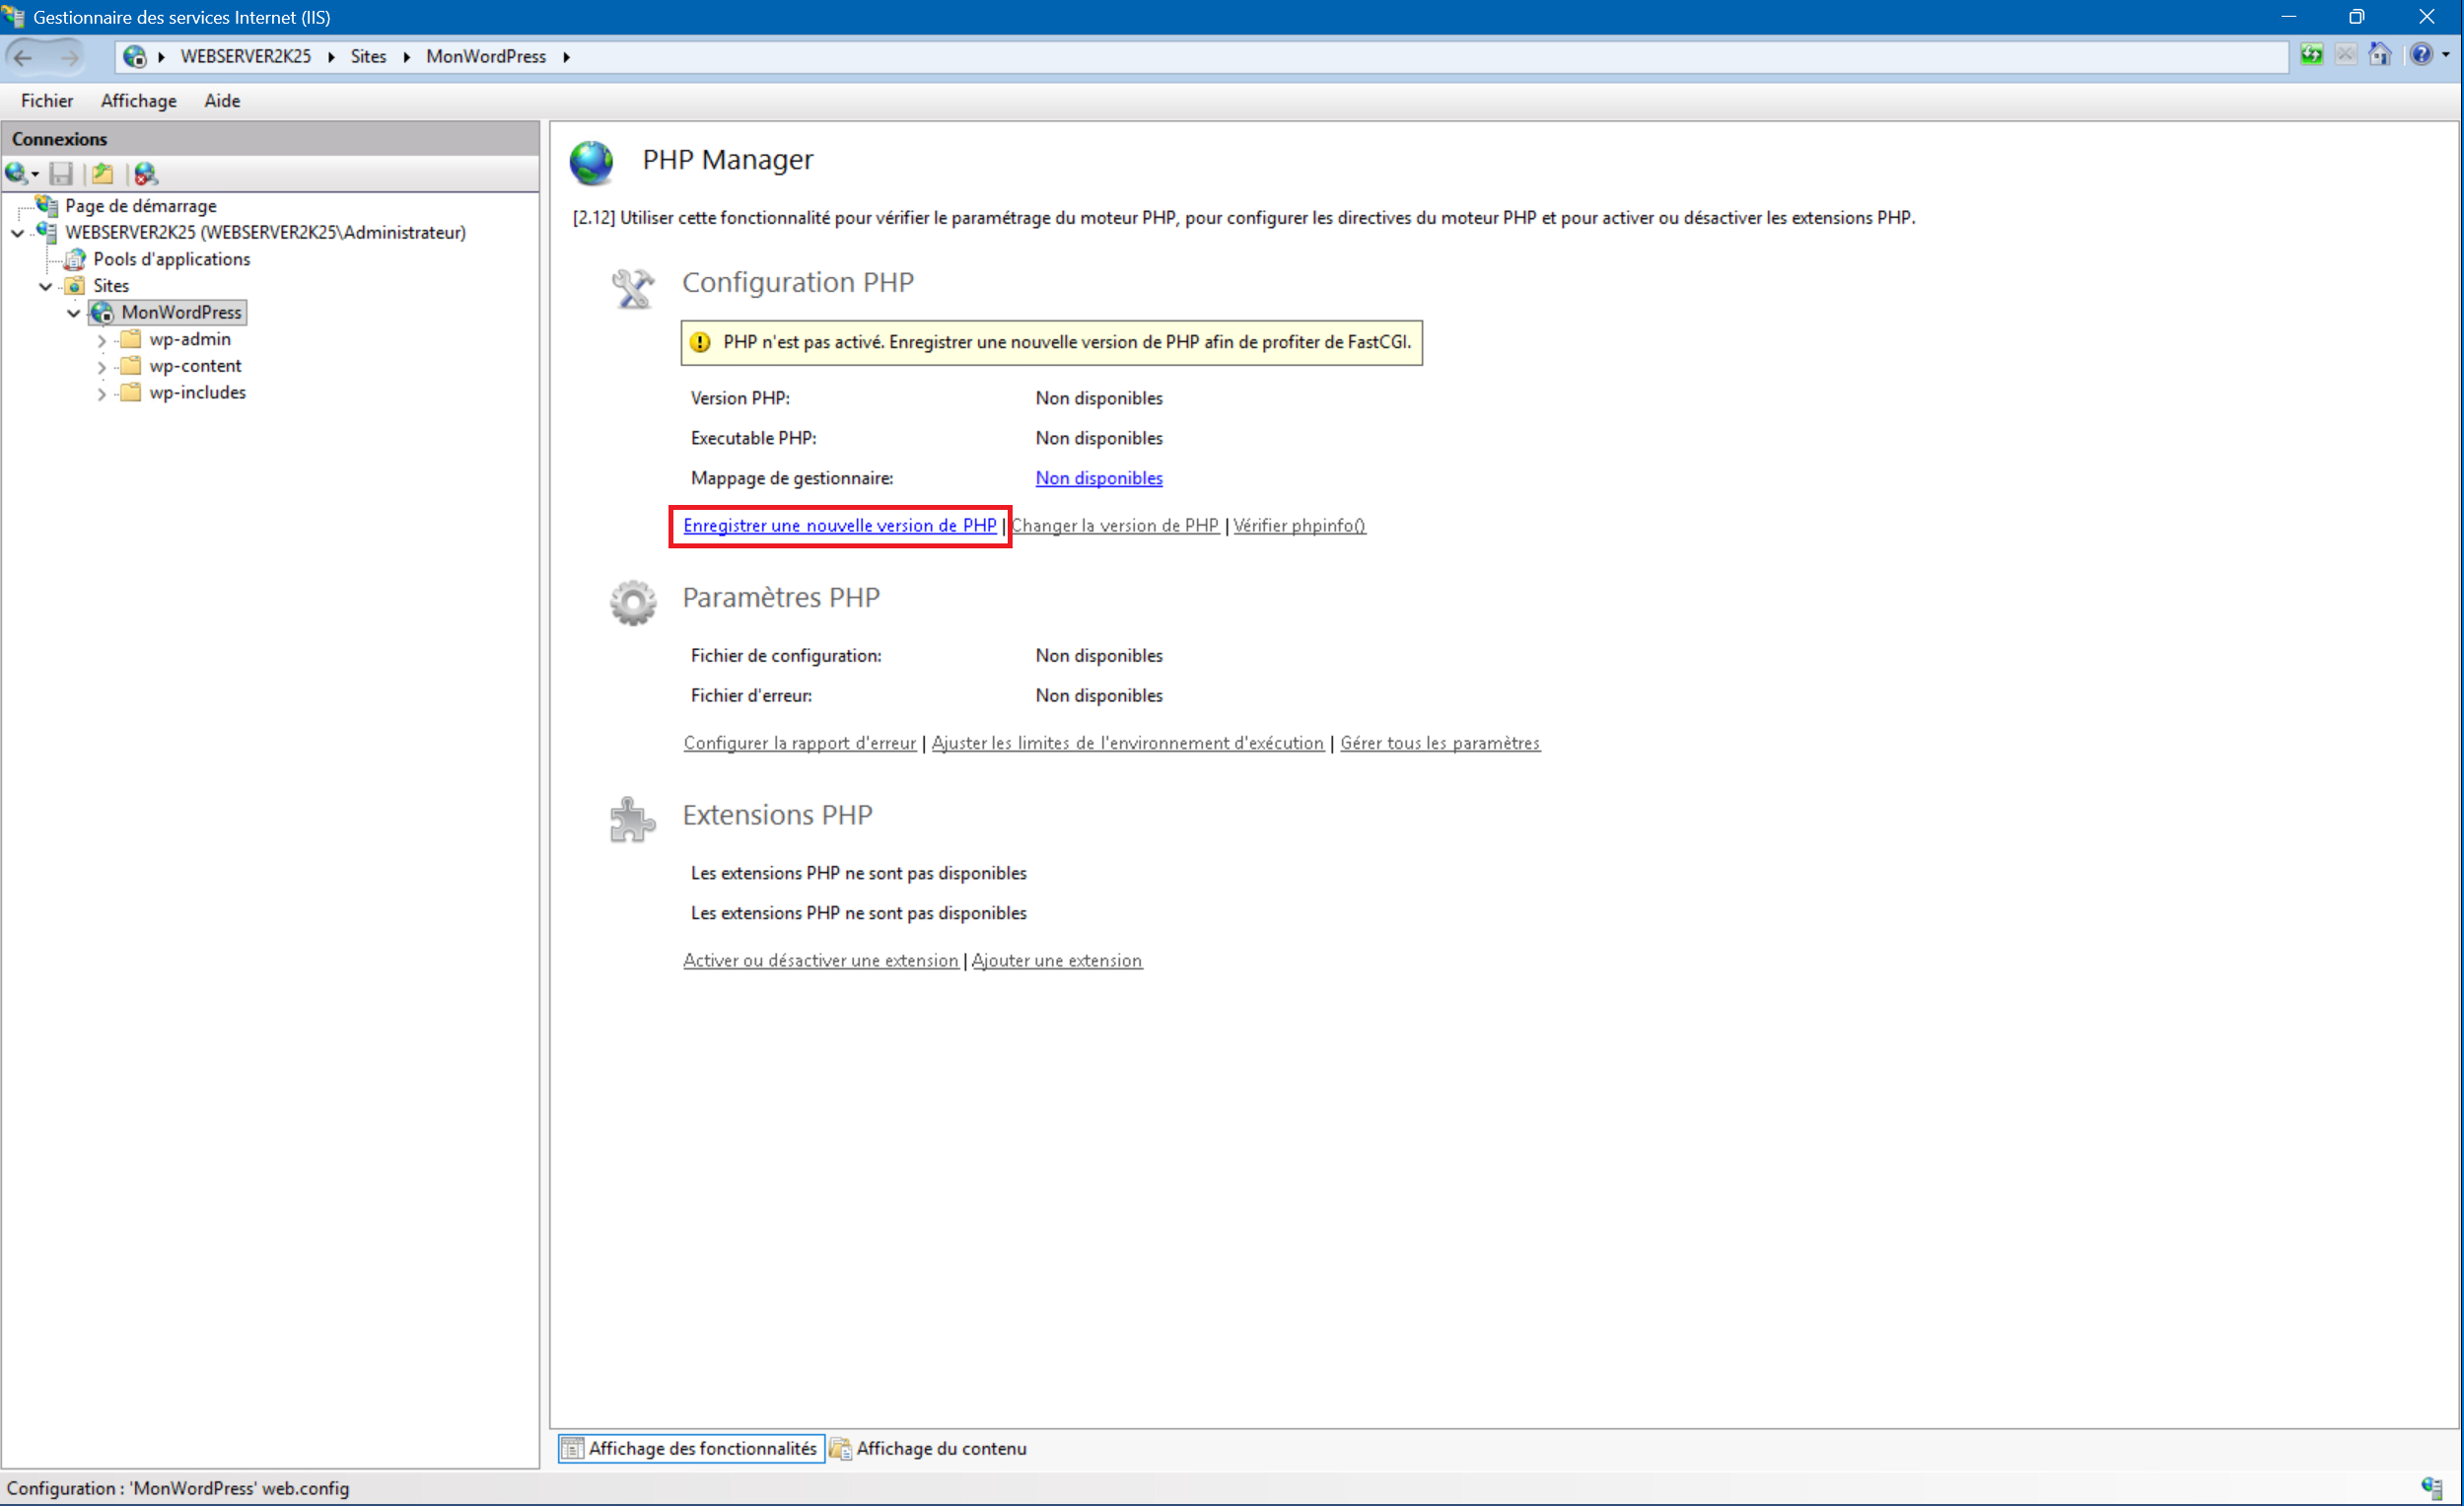
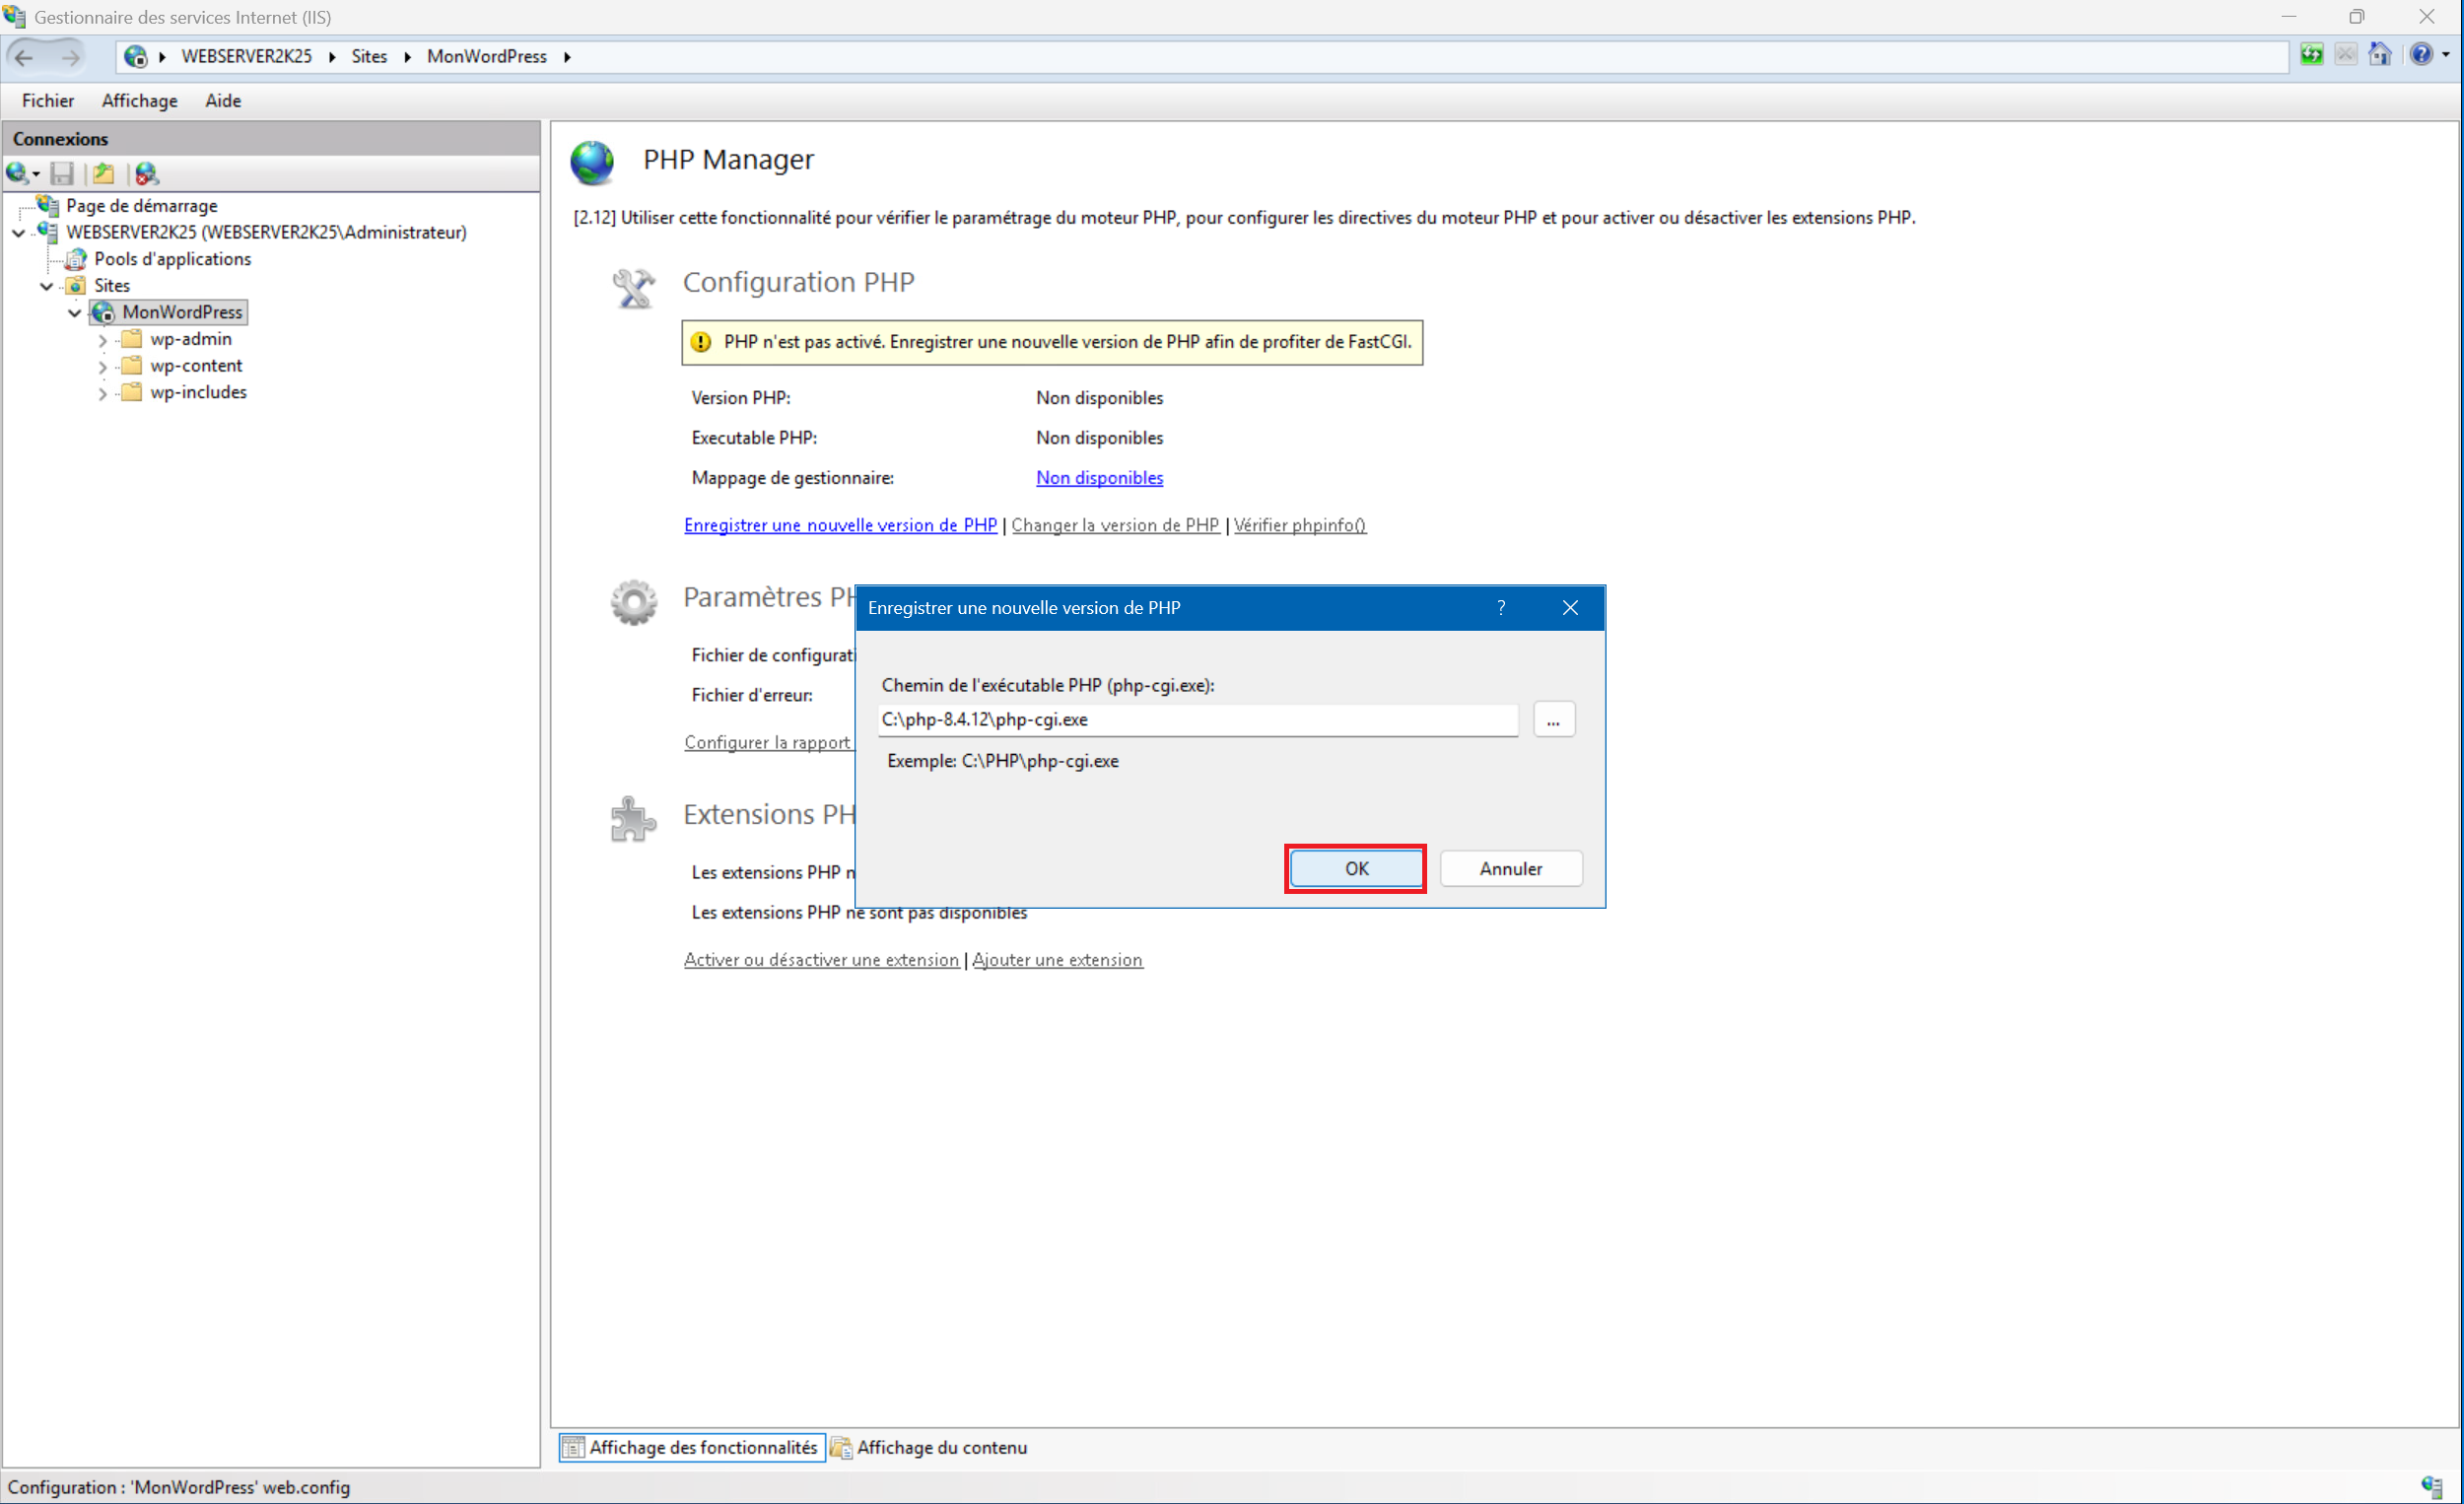
2 – Click on “Register new PHP version” :
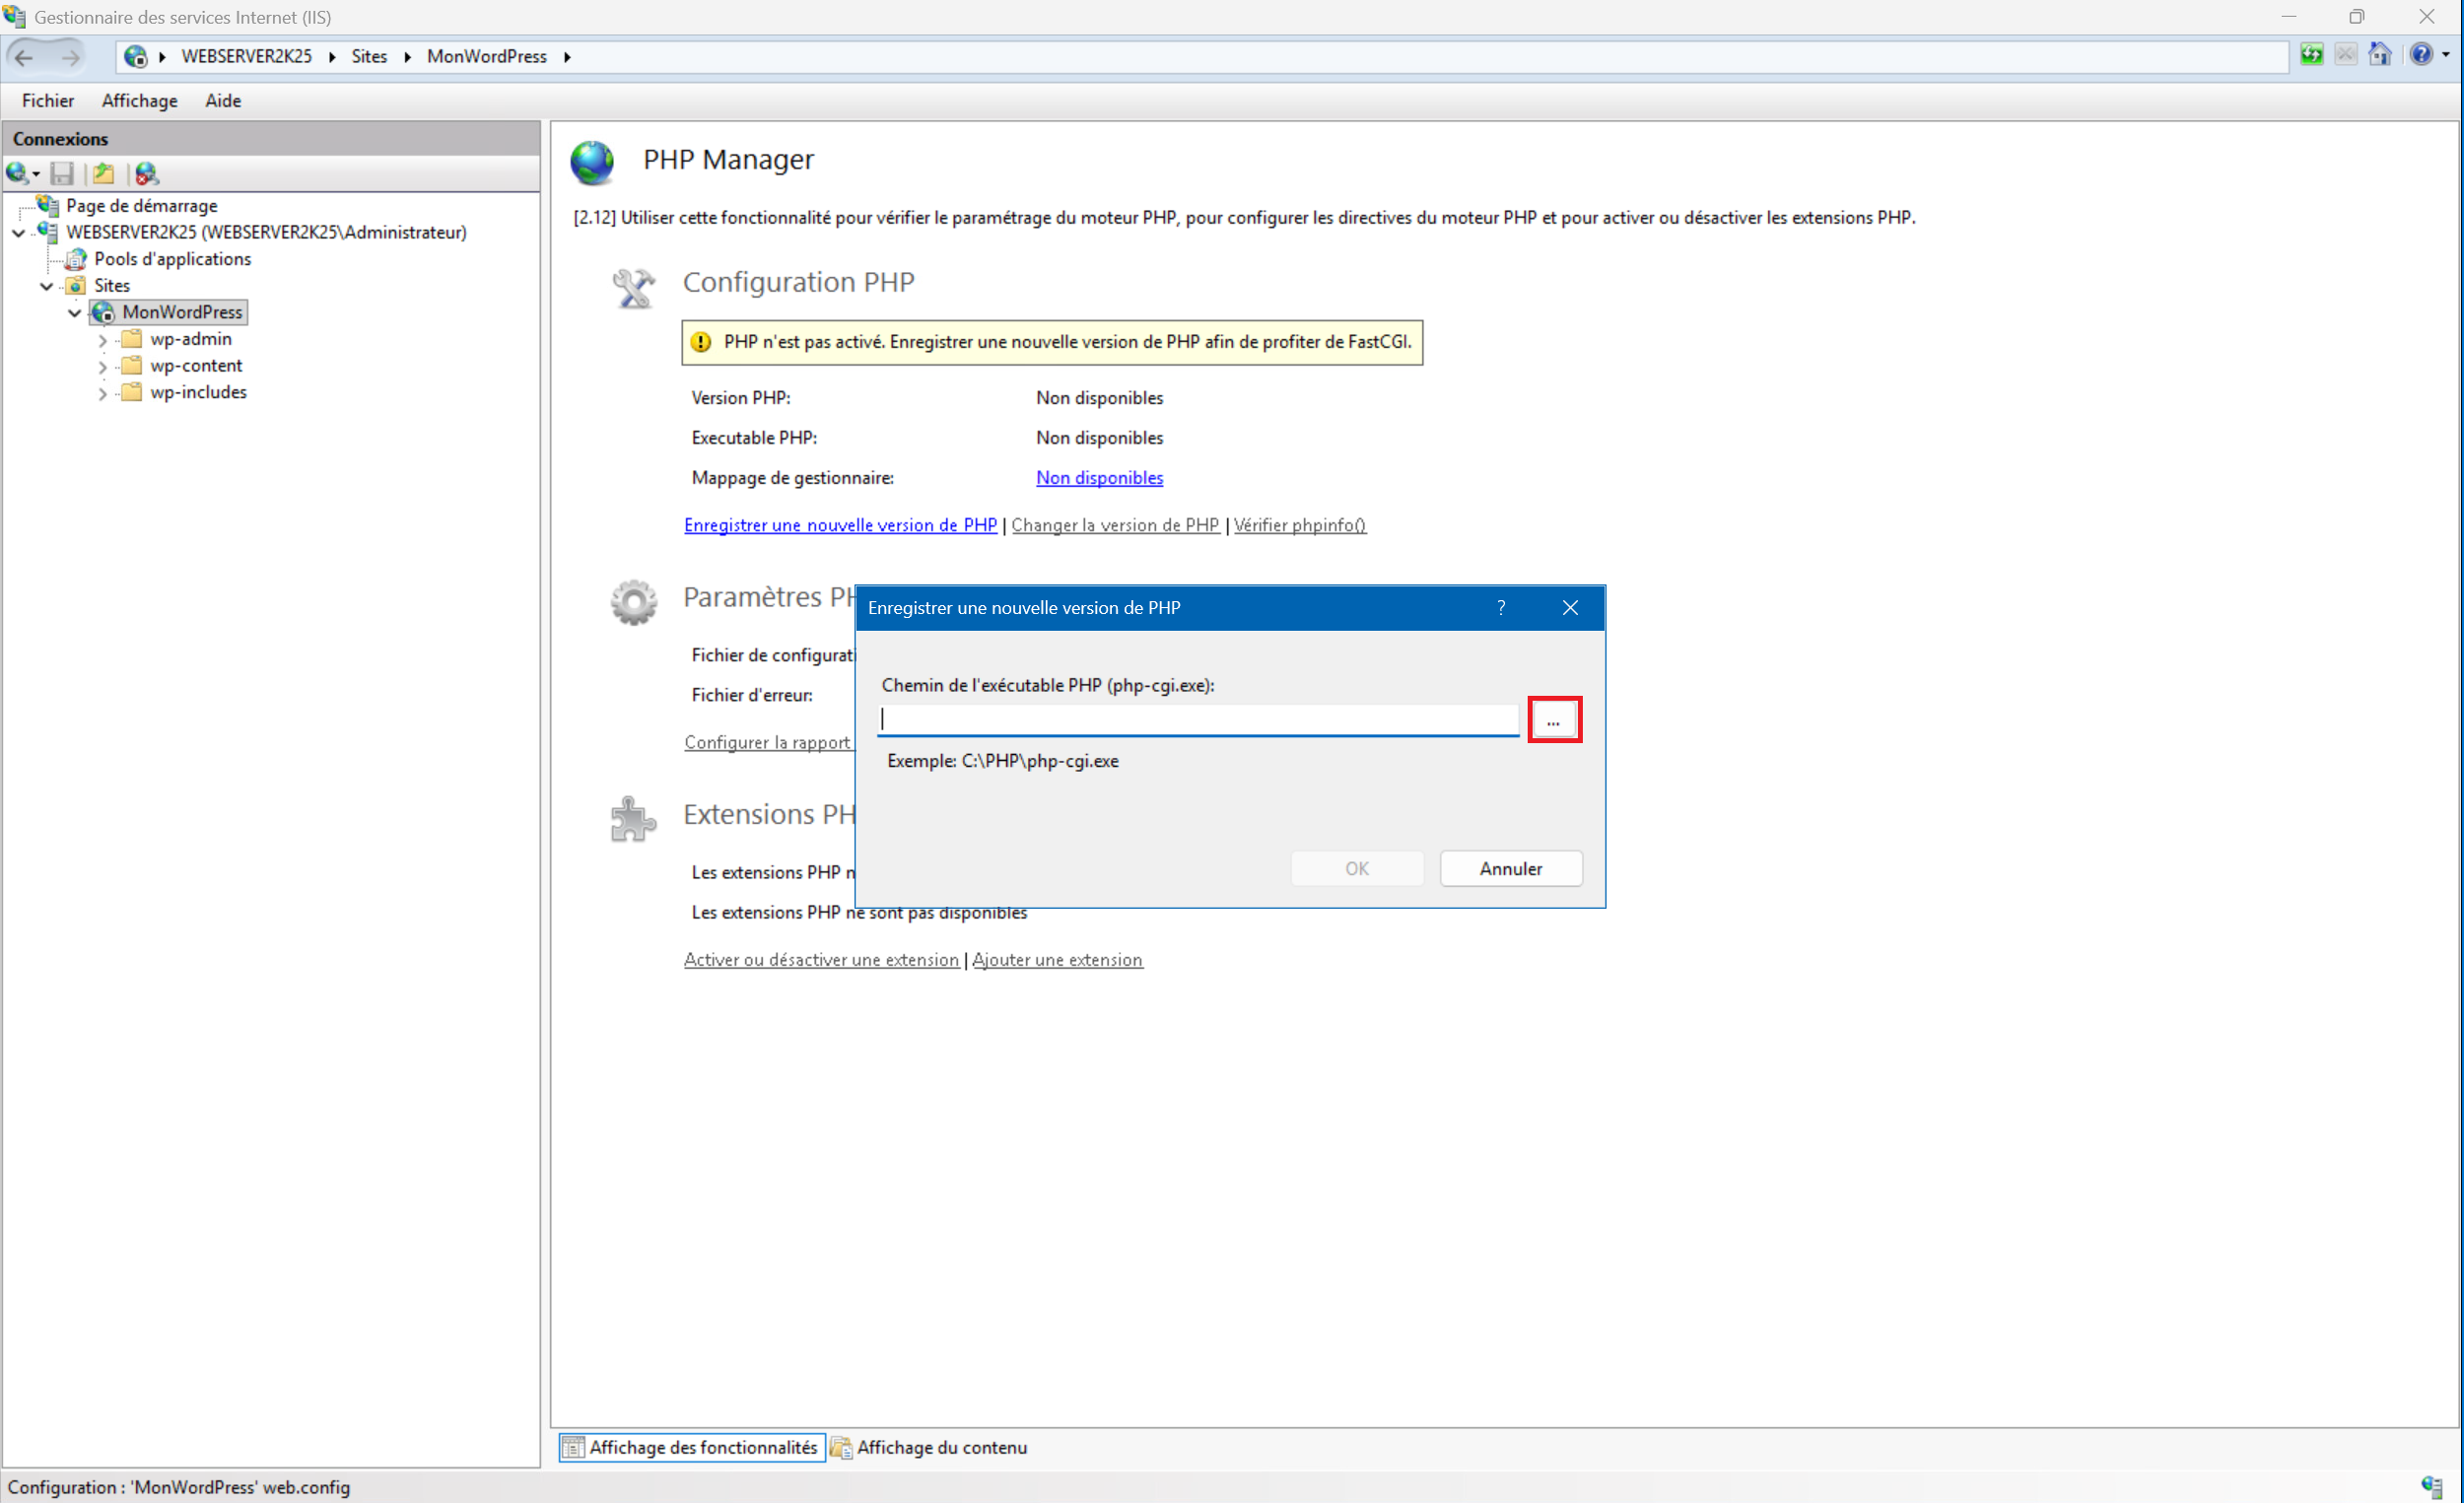
3 – Click the “…” button to browse the folders :
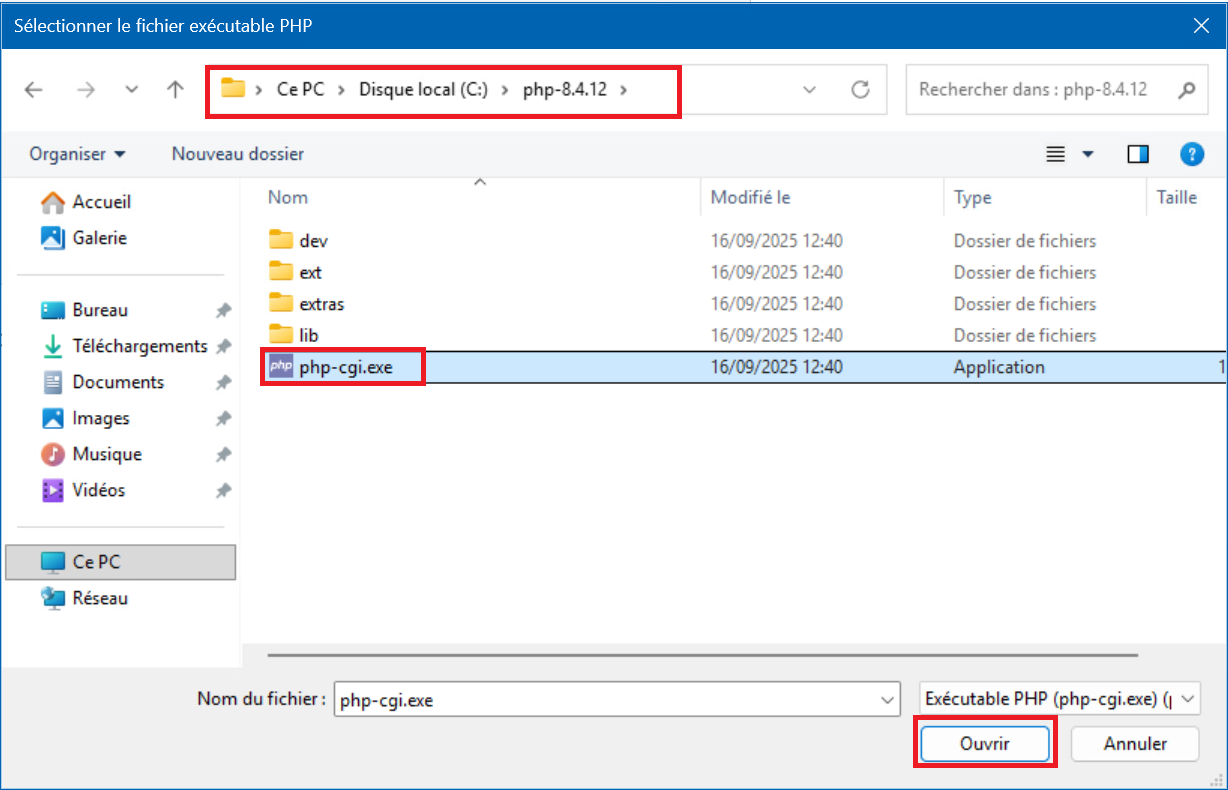
4 – Navigate to This PC > Local Disk (C:) > php-8.4.12 , then select the file “php-cgi.exe” and click “Open” :
5 – Click “OK” to confirm the executable path :
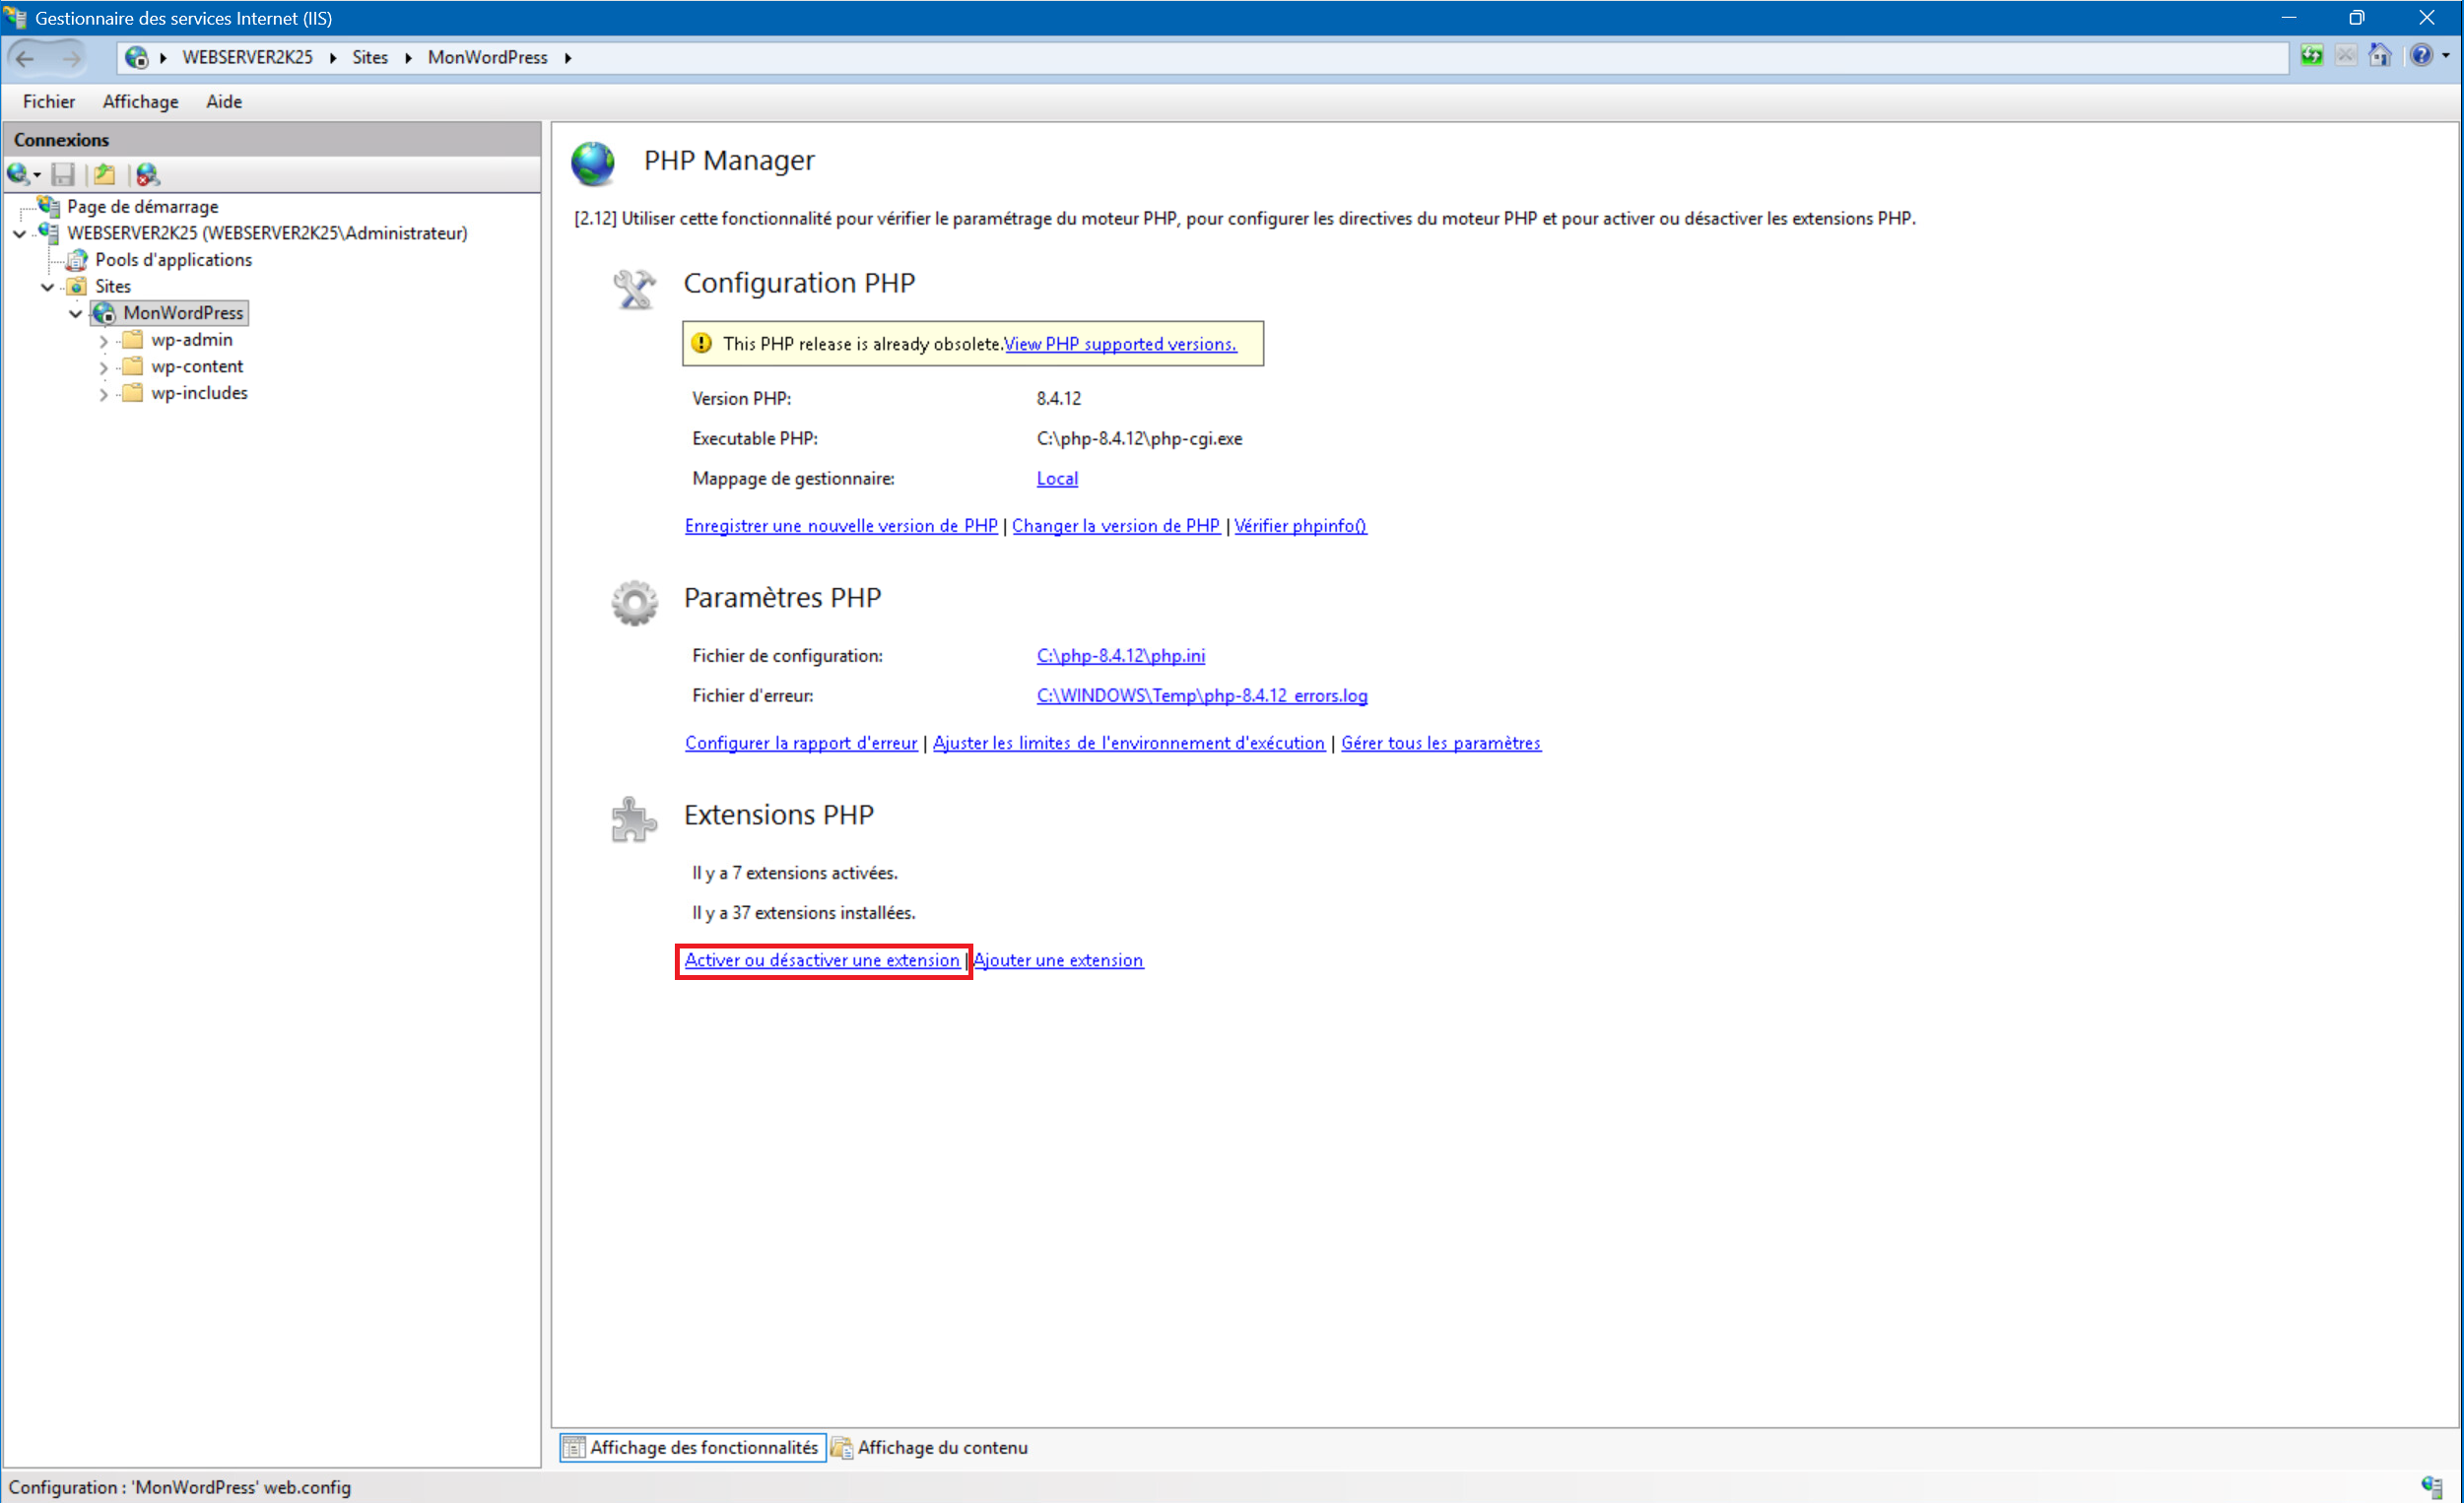
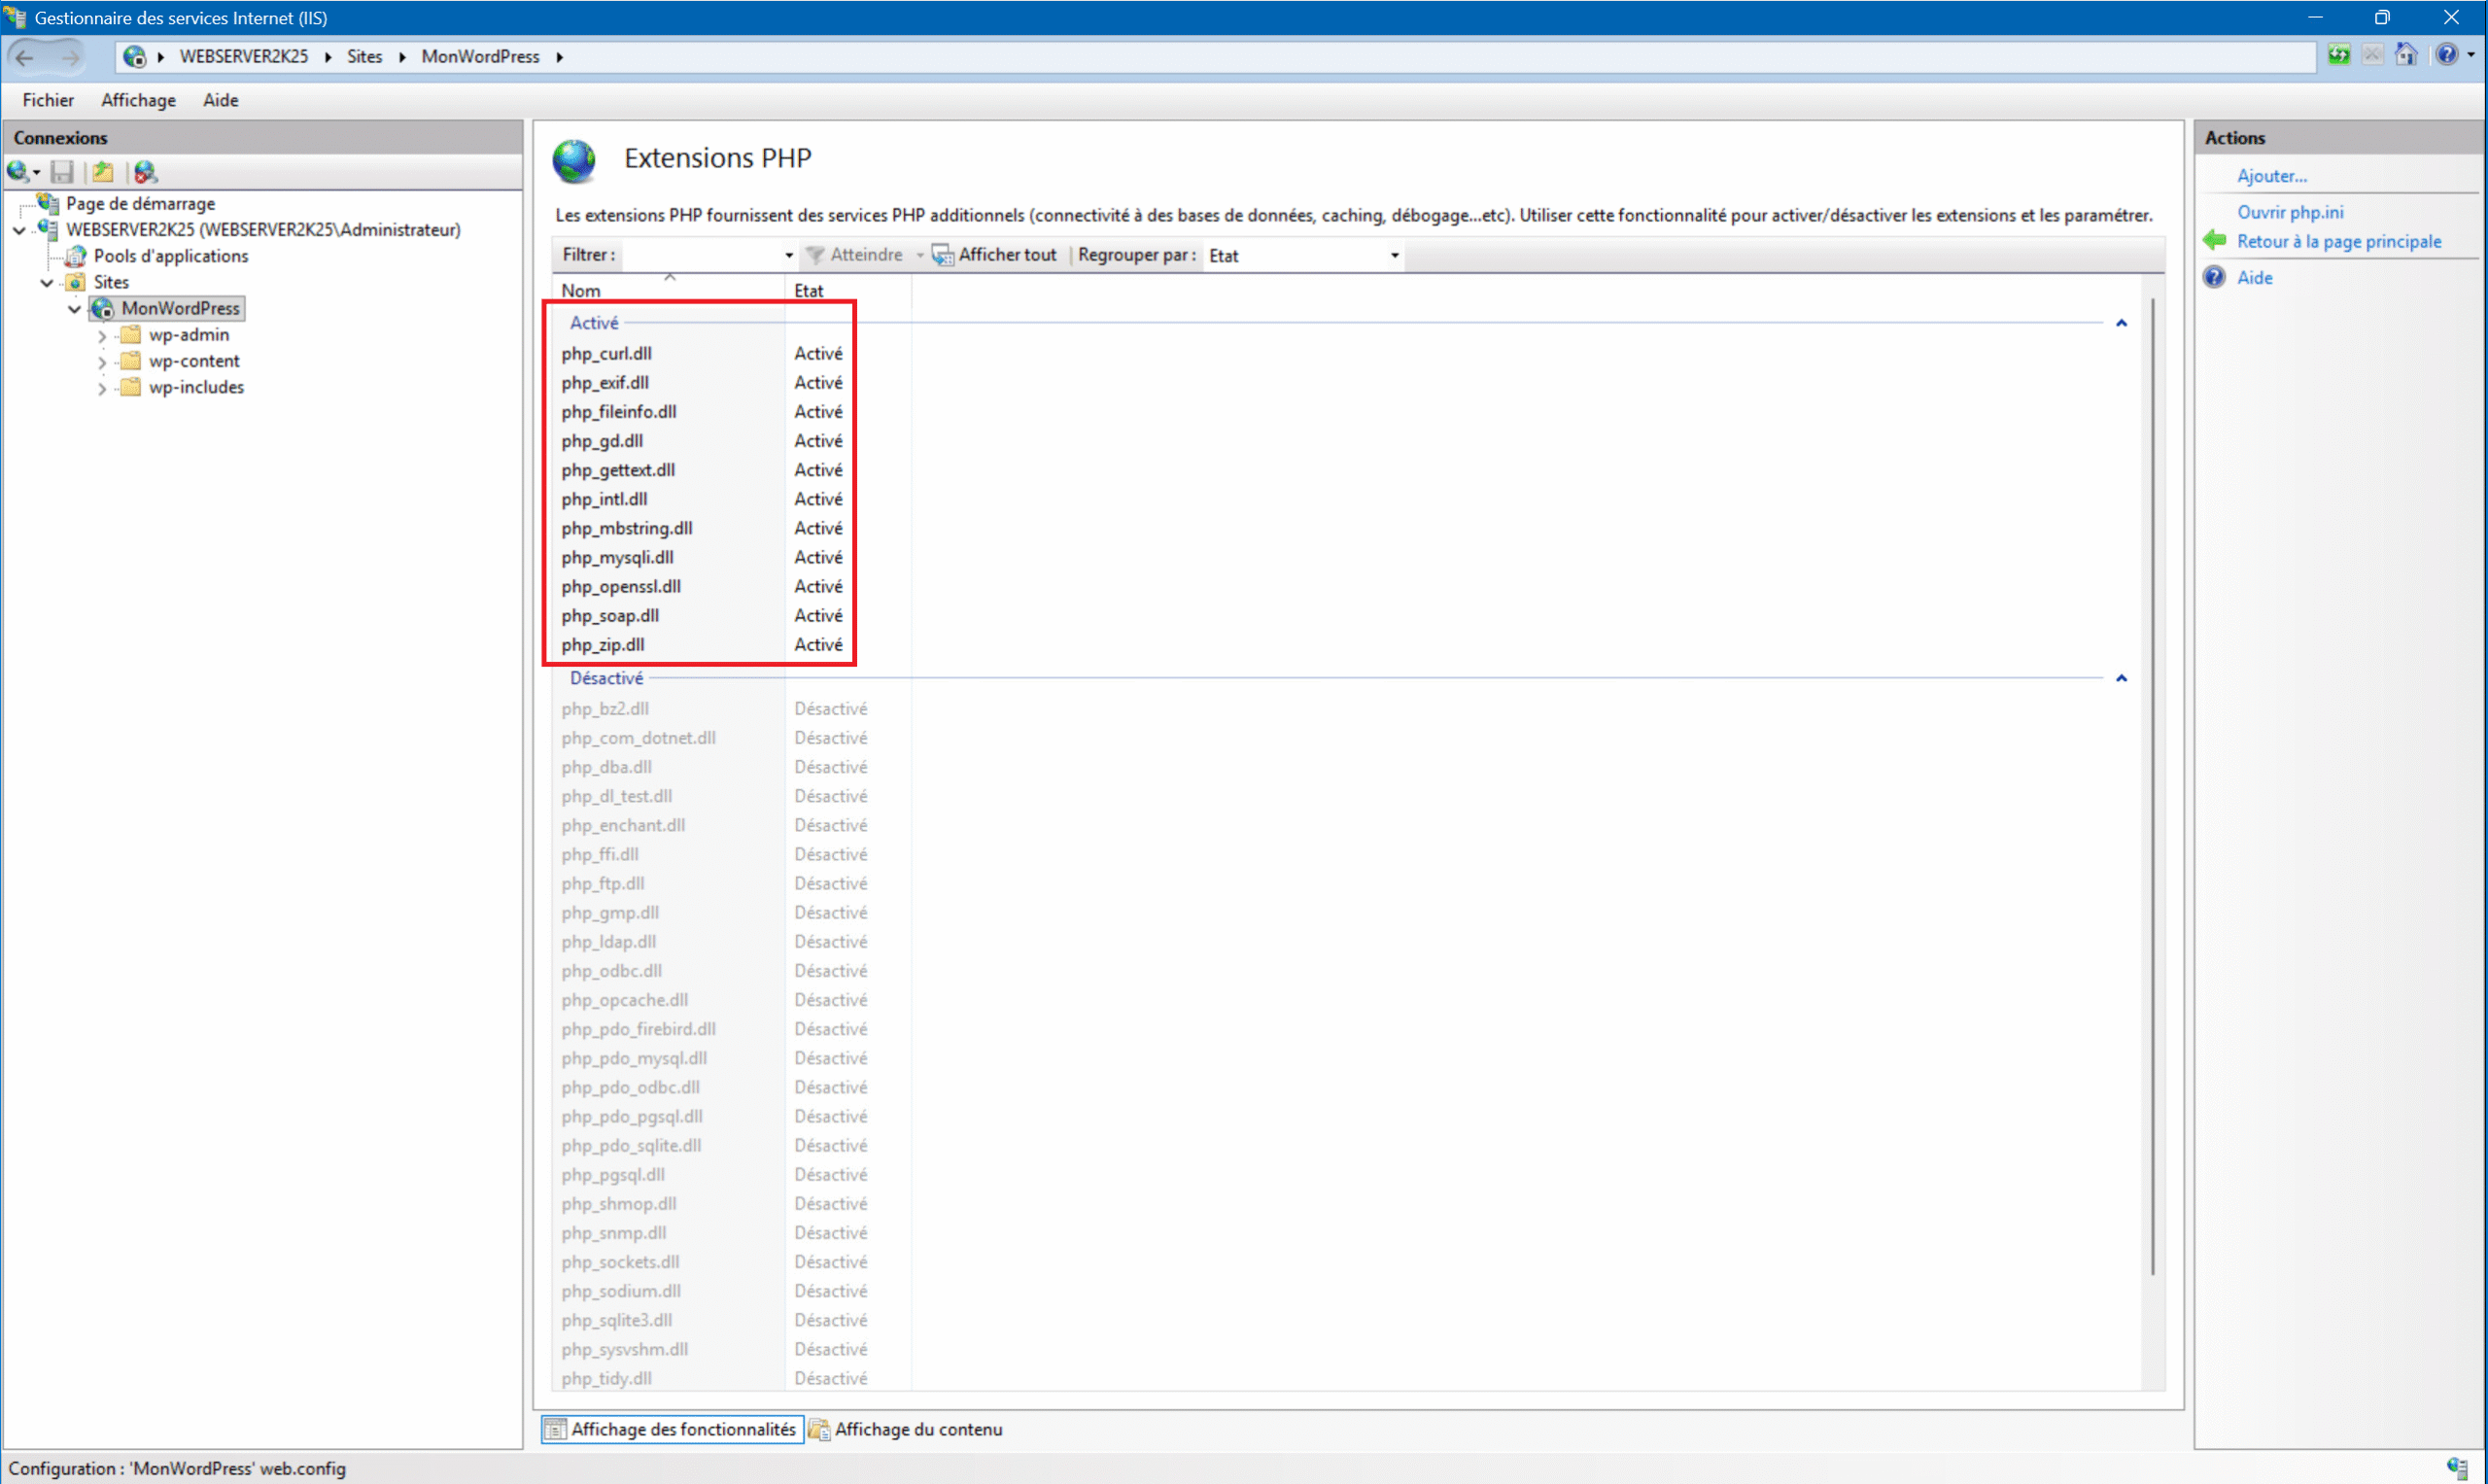
6 – Once back on PHP Manager click on “Enable or disable an extension” :
7 – In this view you can see and manage installed, enabled, or disabled PHP extensions. To enable a disabled extension, simply click on it and then click “Enable” in the top right corner. Here is the list of additional extensions that must be enabled for WordPress to work :
- php_exif.dll
- php_fileinfo.dll
- php_intl.dll
- php_zip.dll
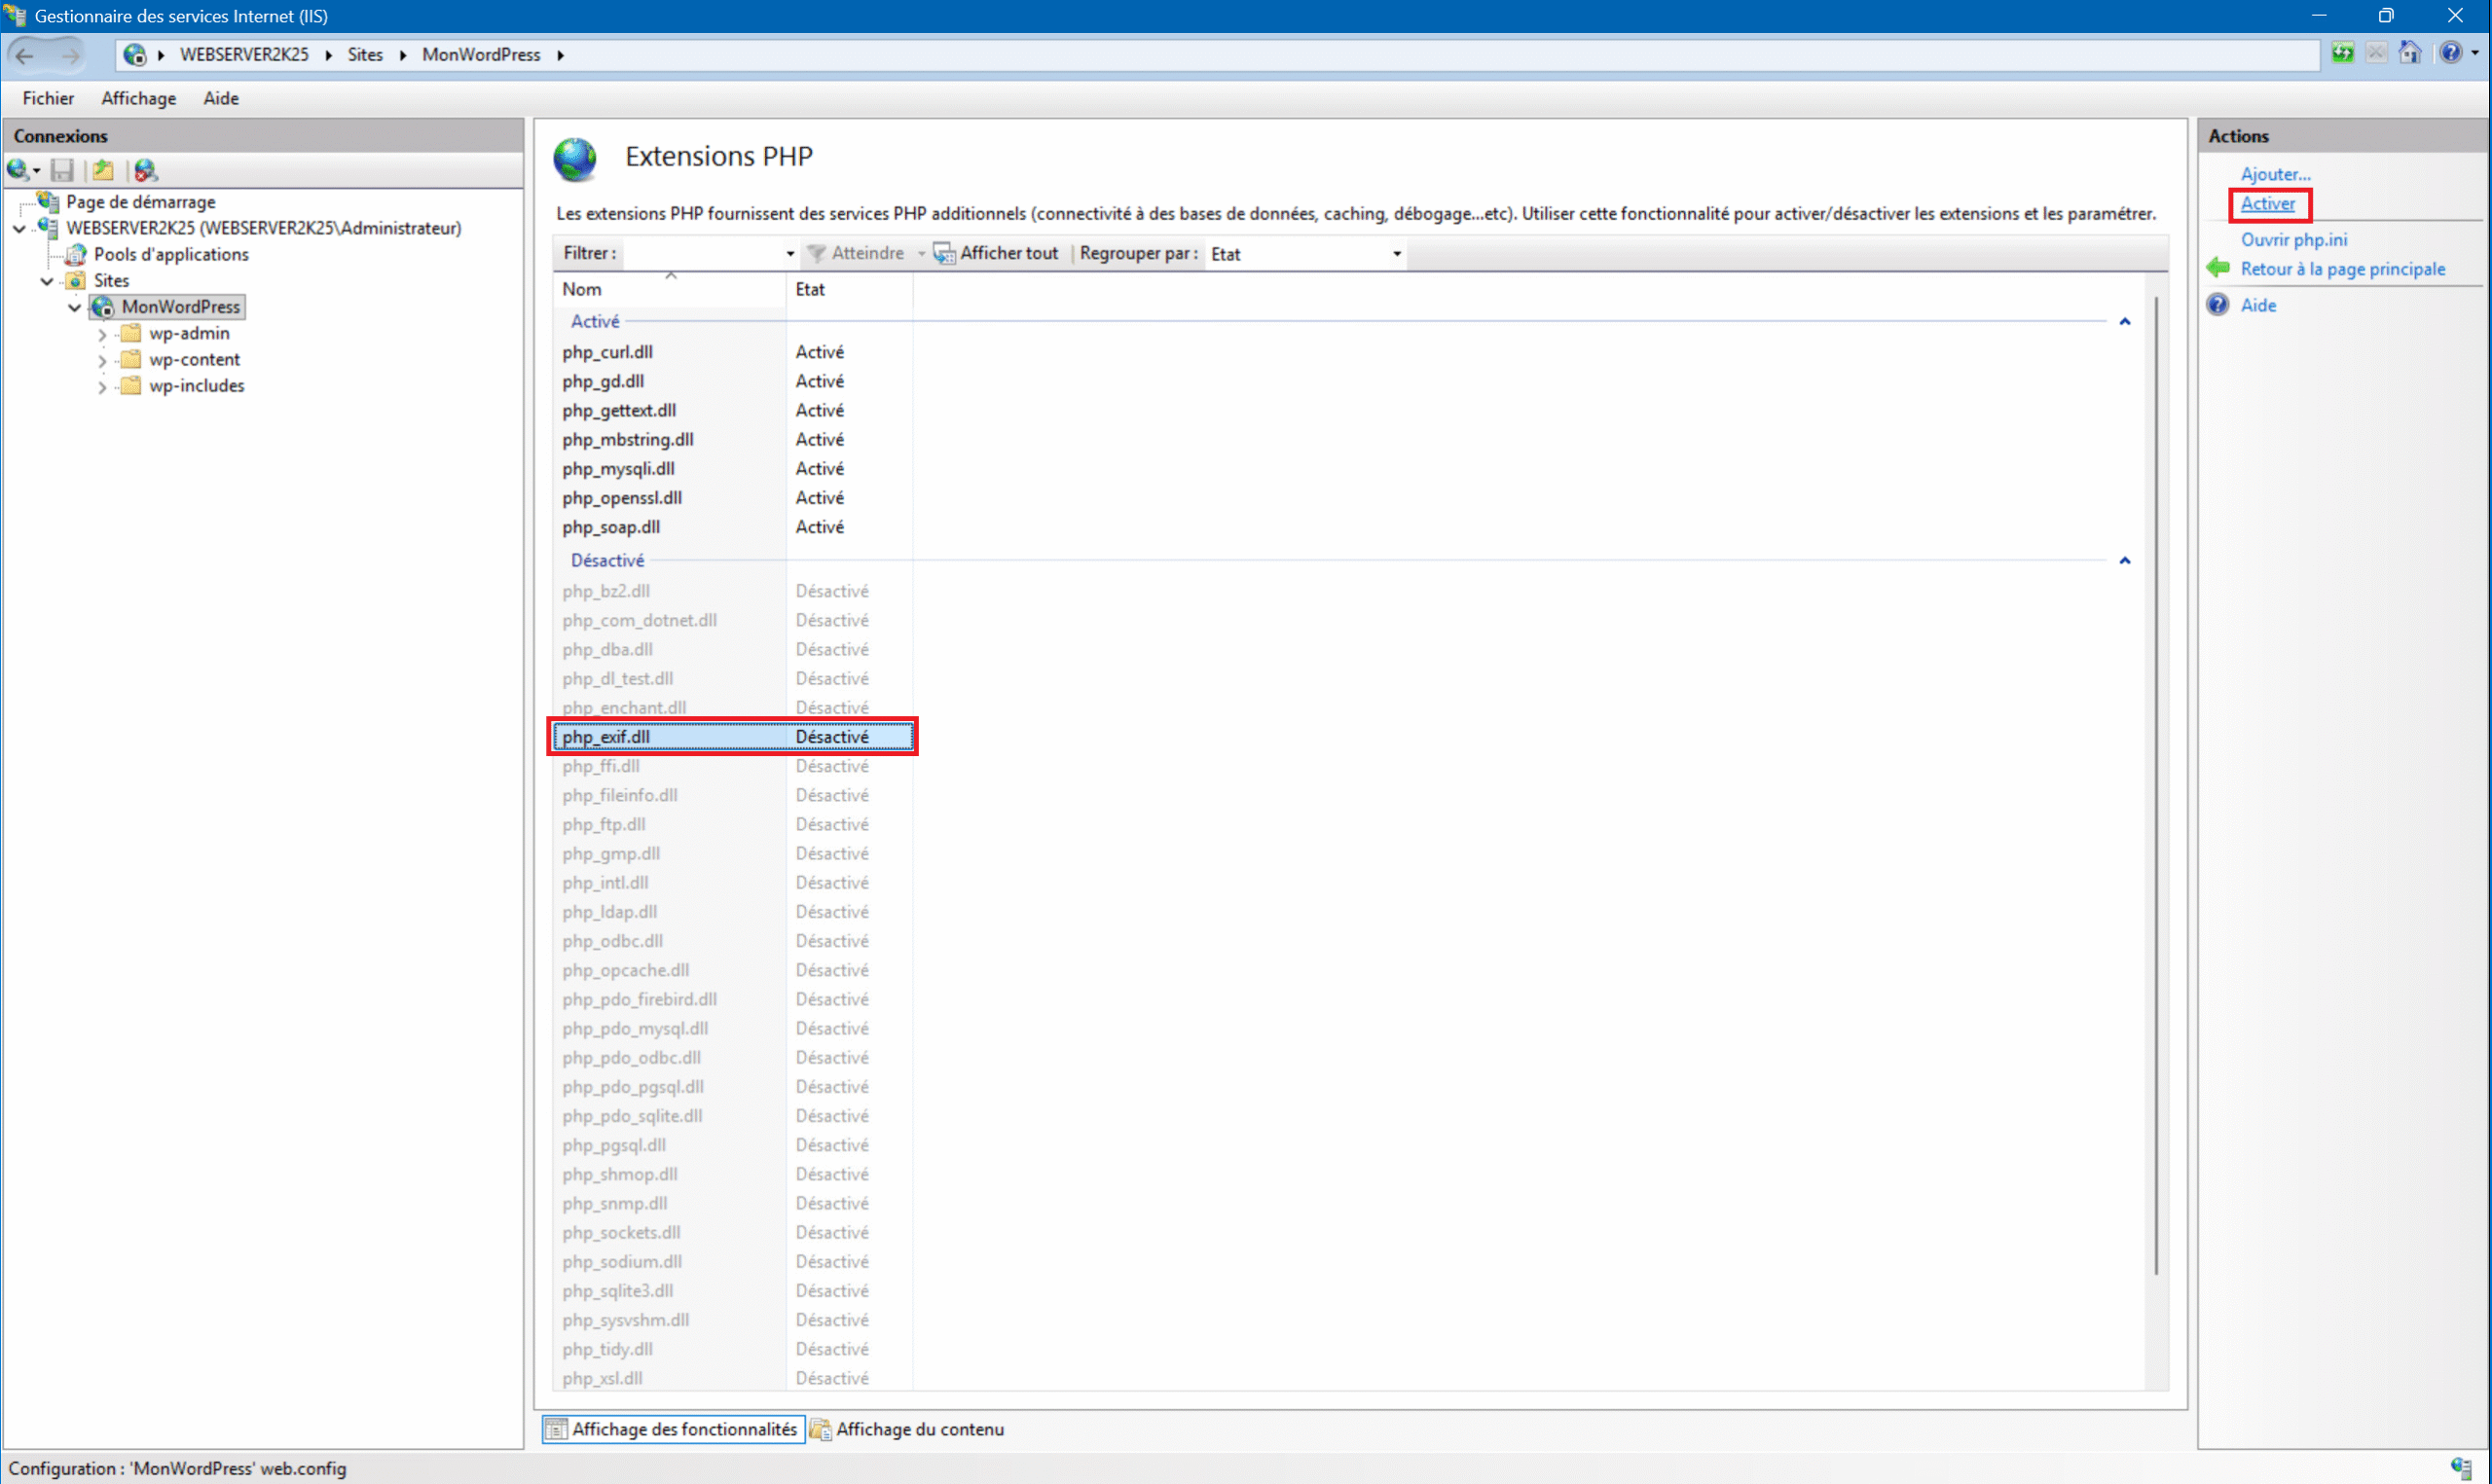
8 – When you have these 11 extensions activated your site is ready to launch.
E – IIS site launch :
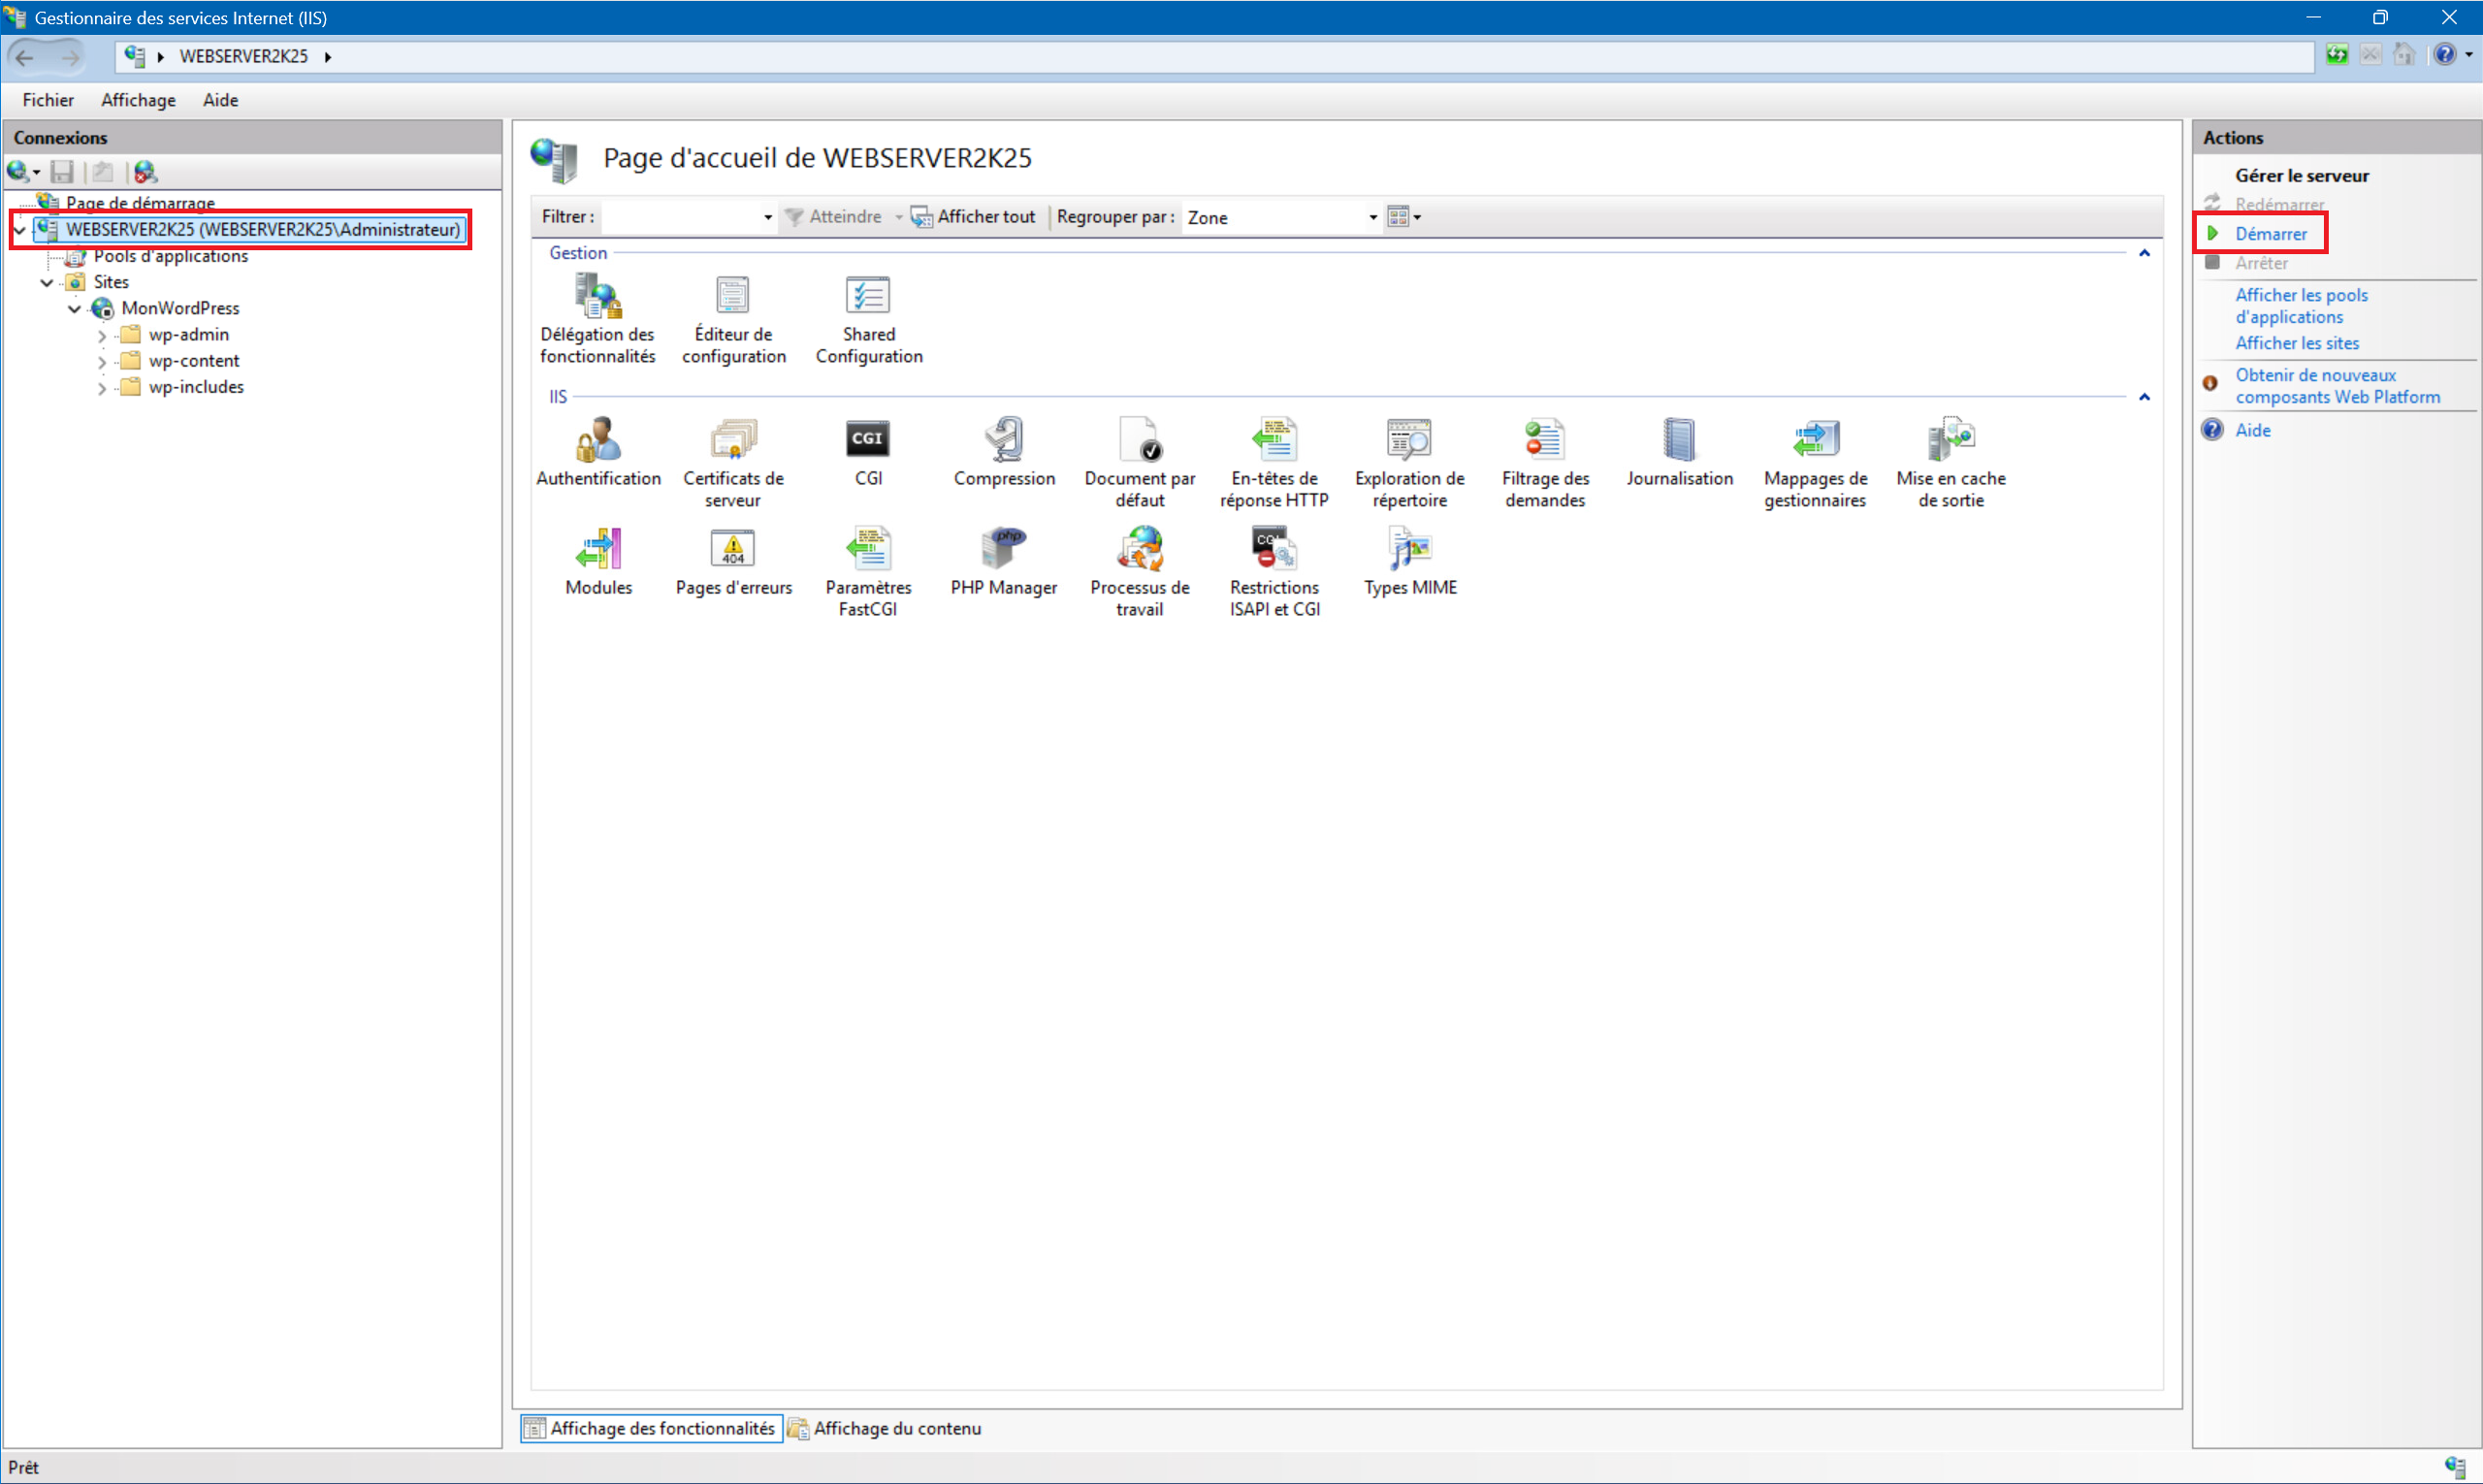
1 – Select your server at the top of the “Connections” menu then click “Start” on the right :
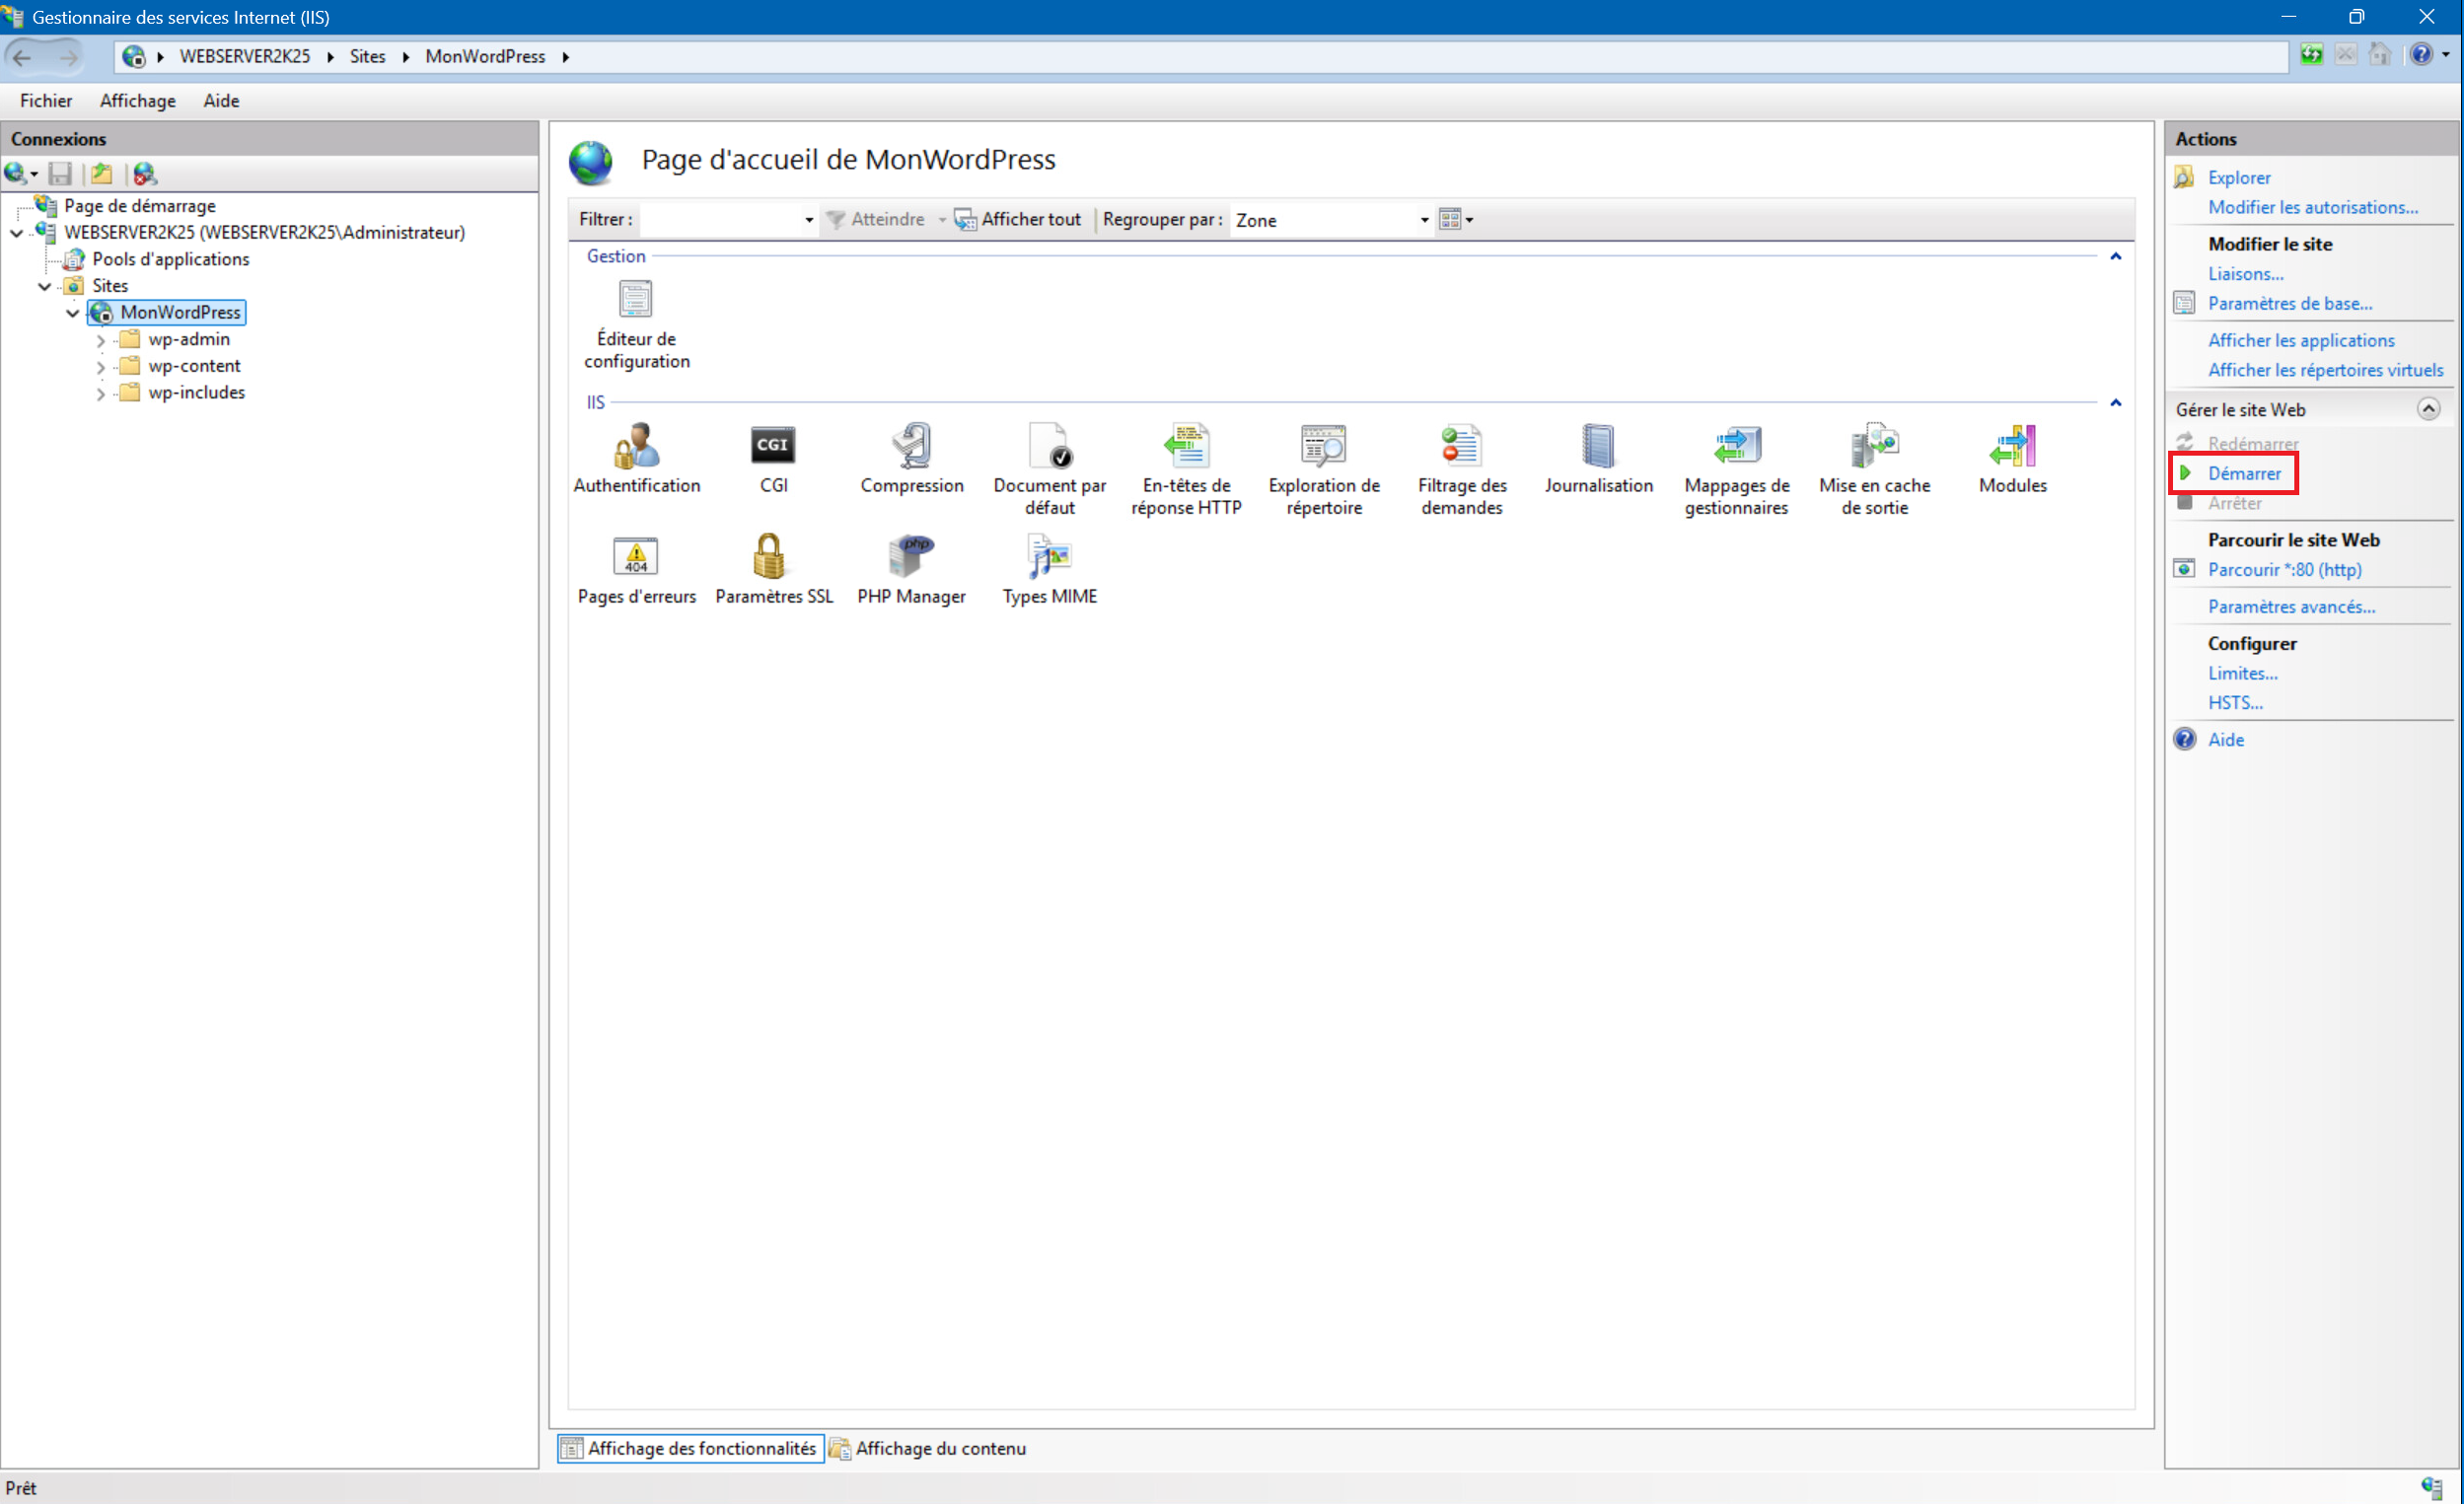
2 – Select your site then click on “Start” :
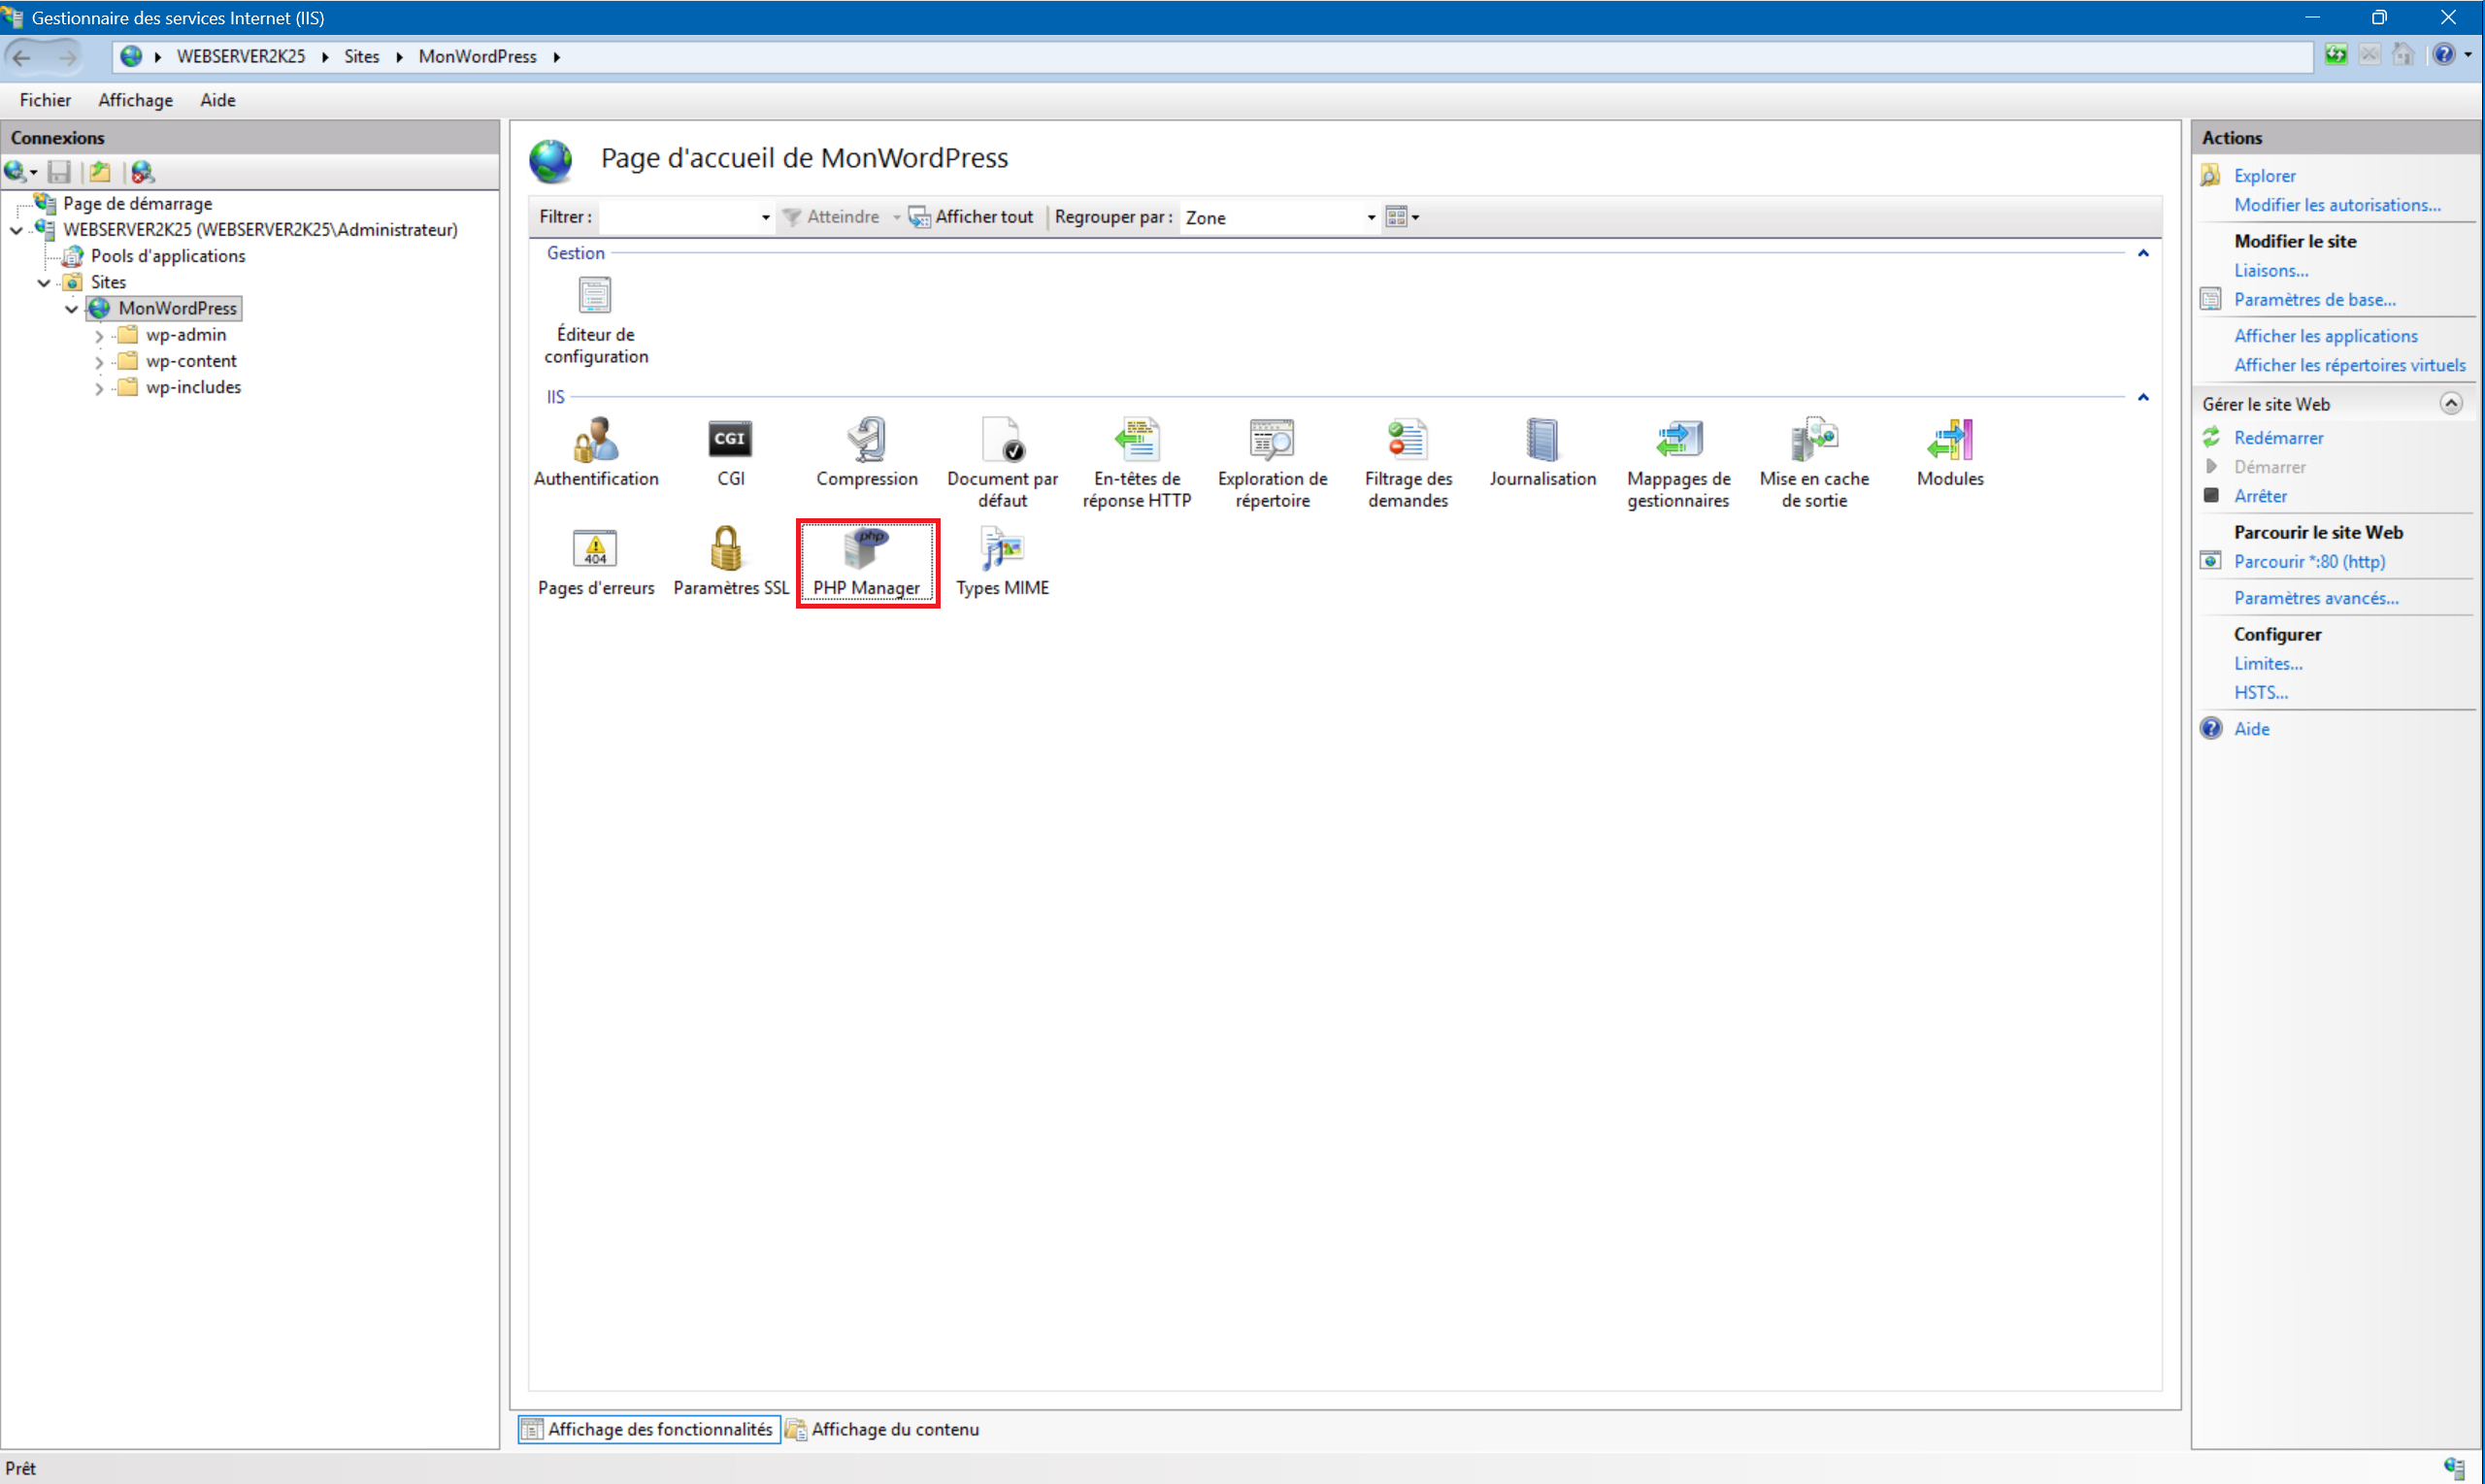
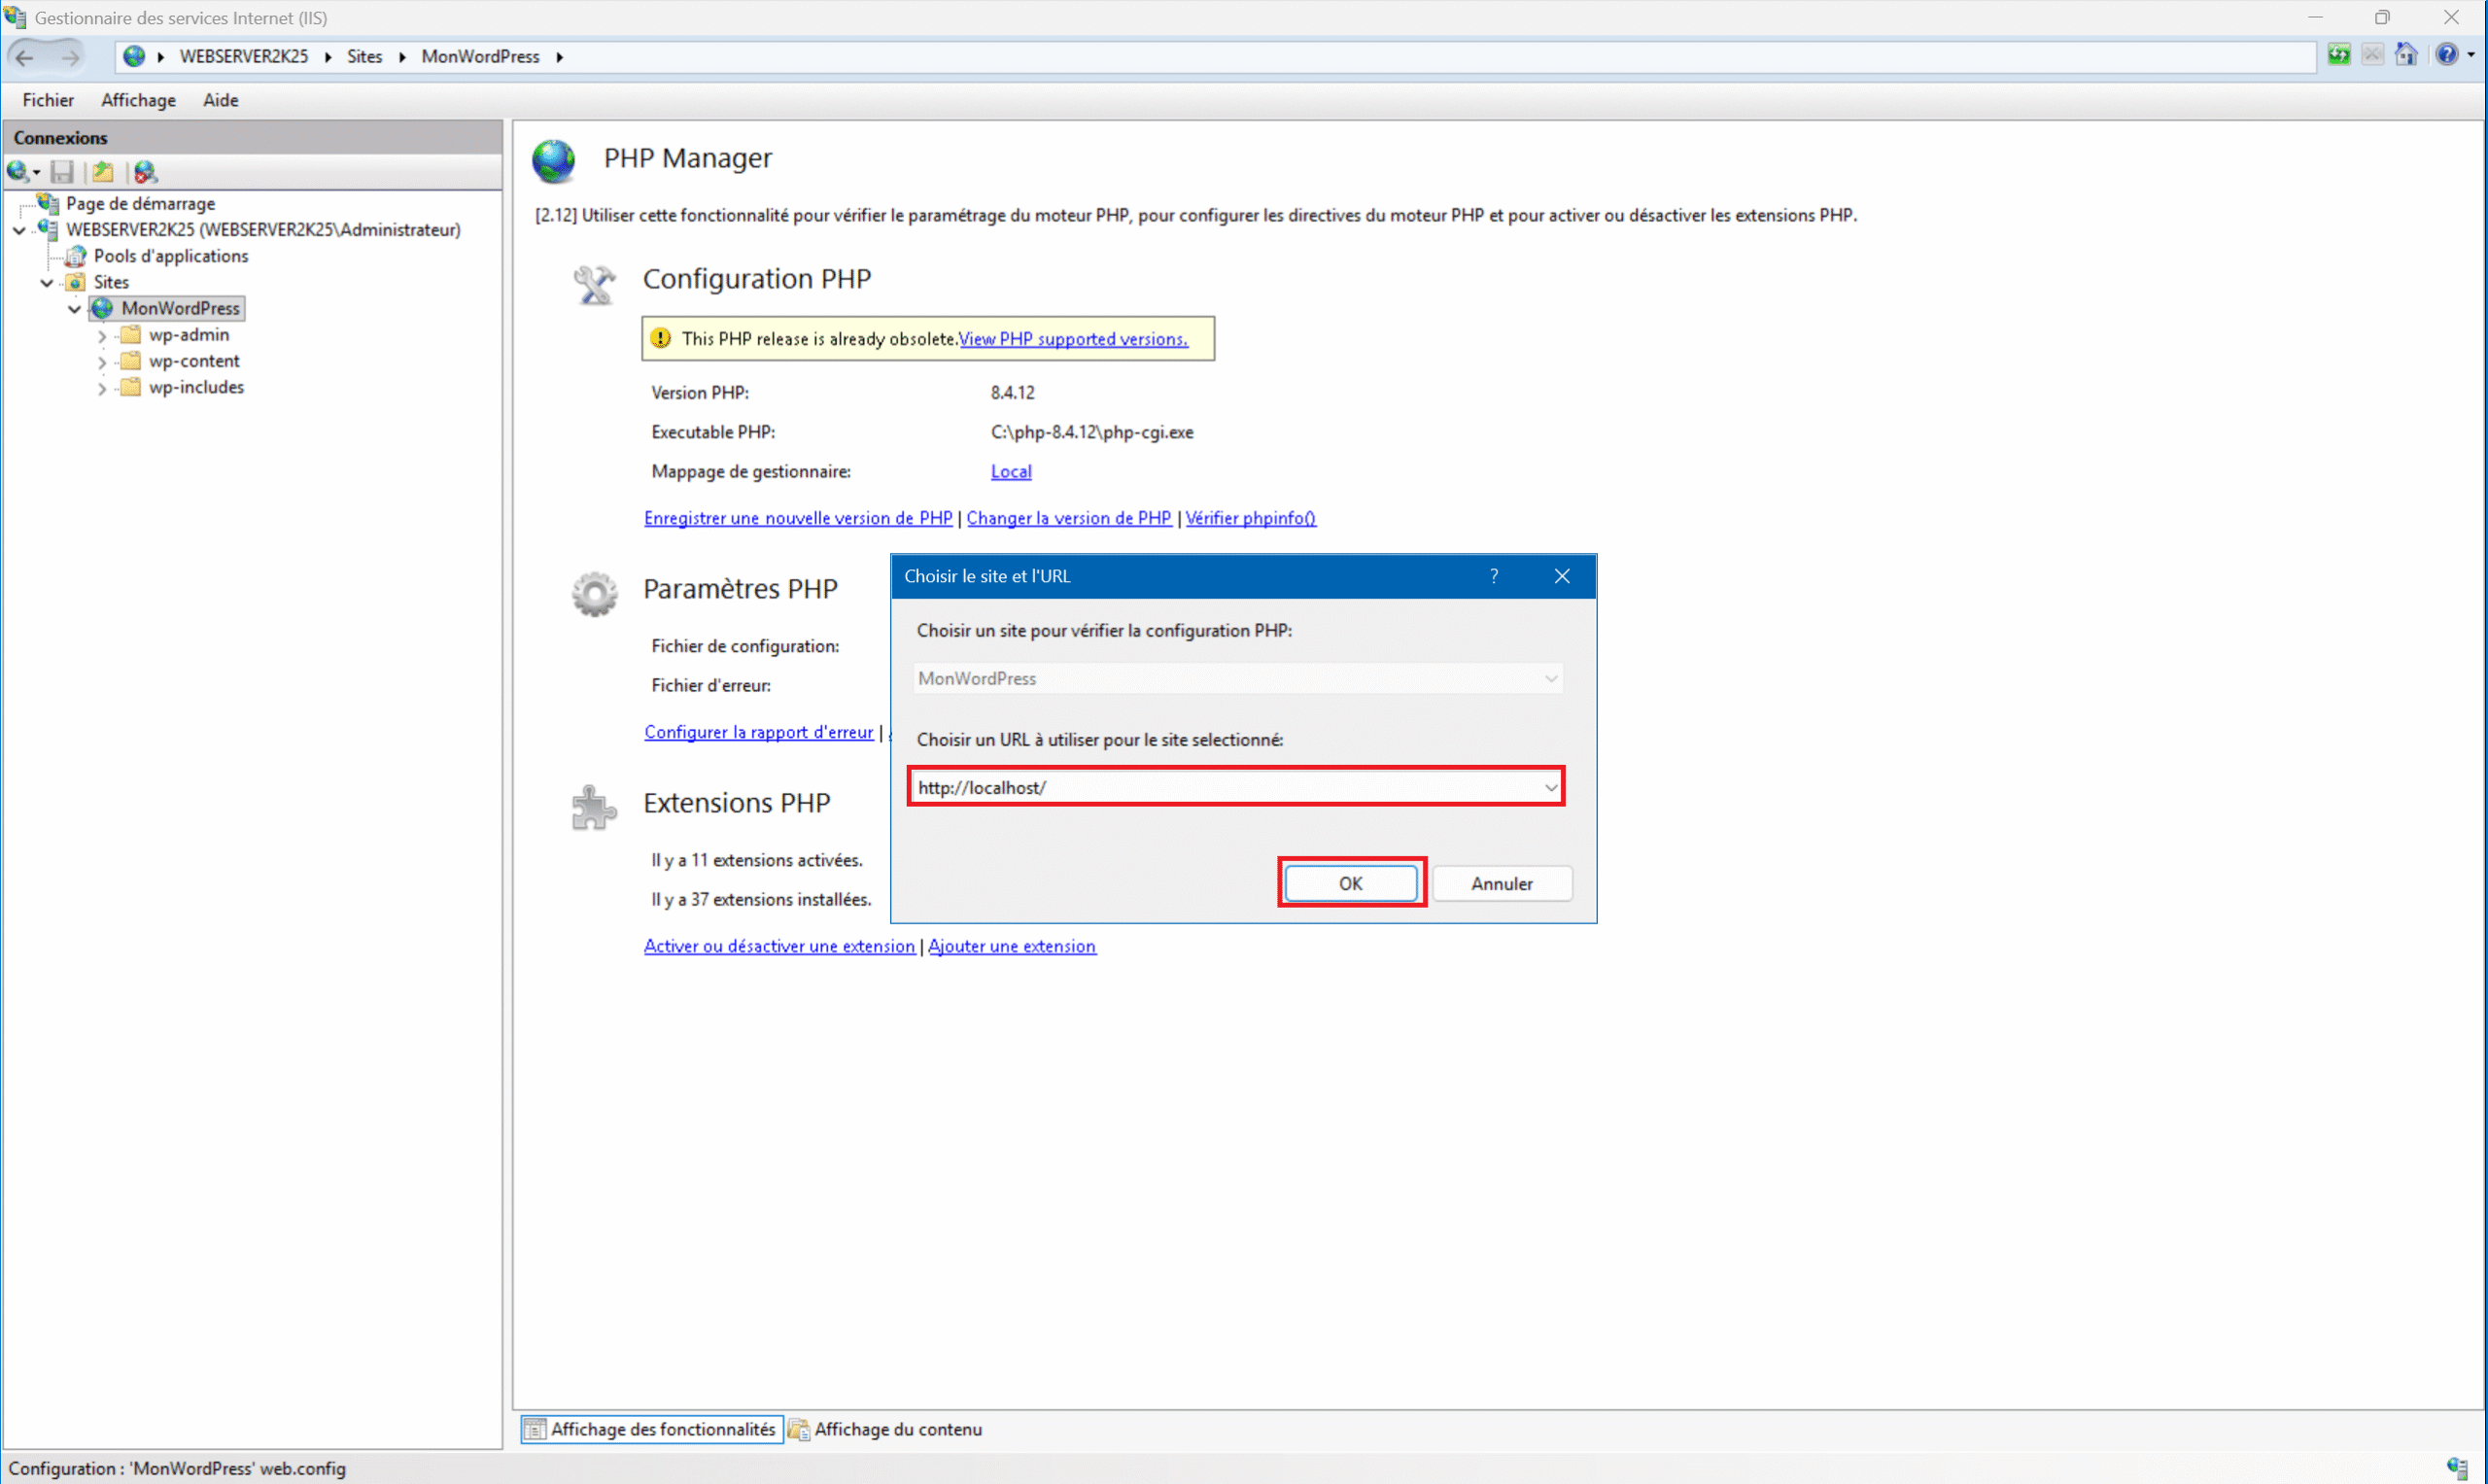
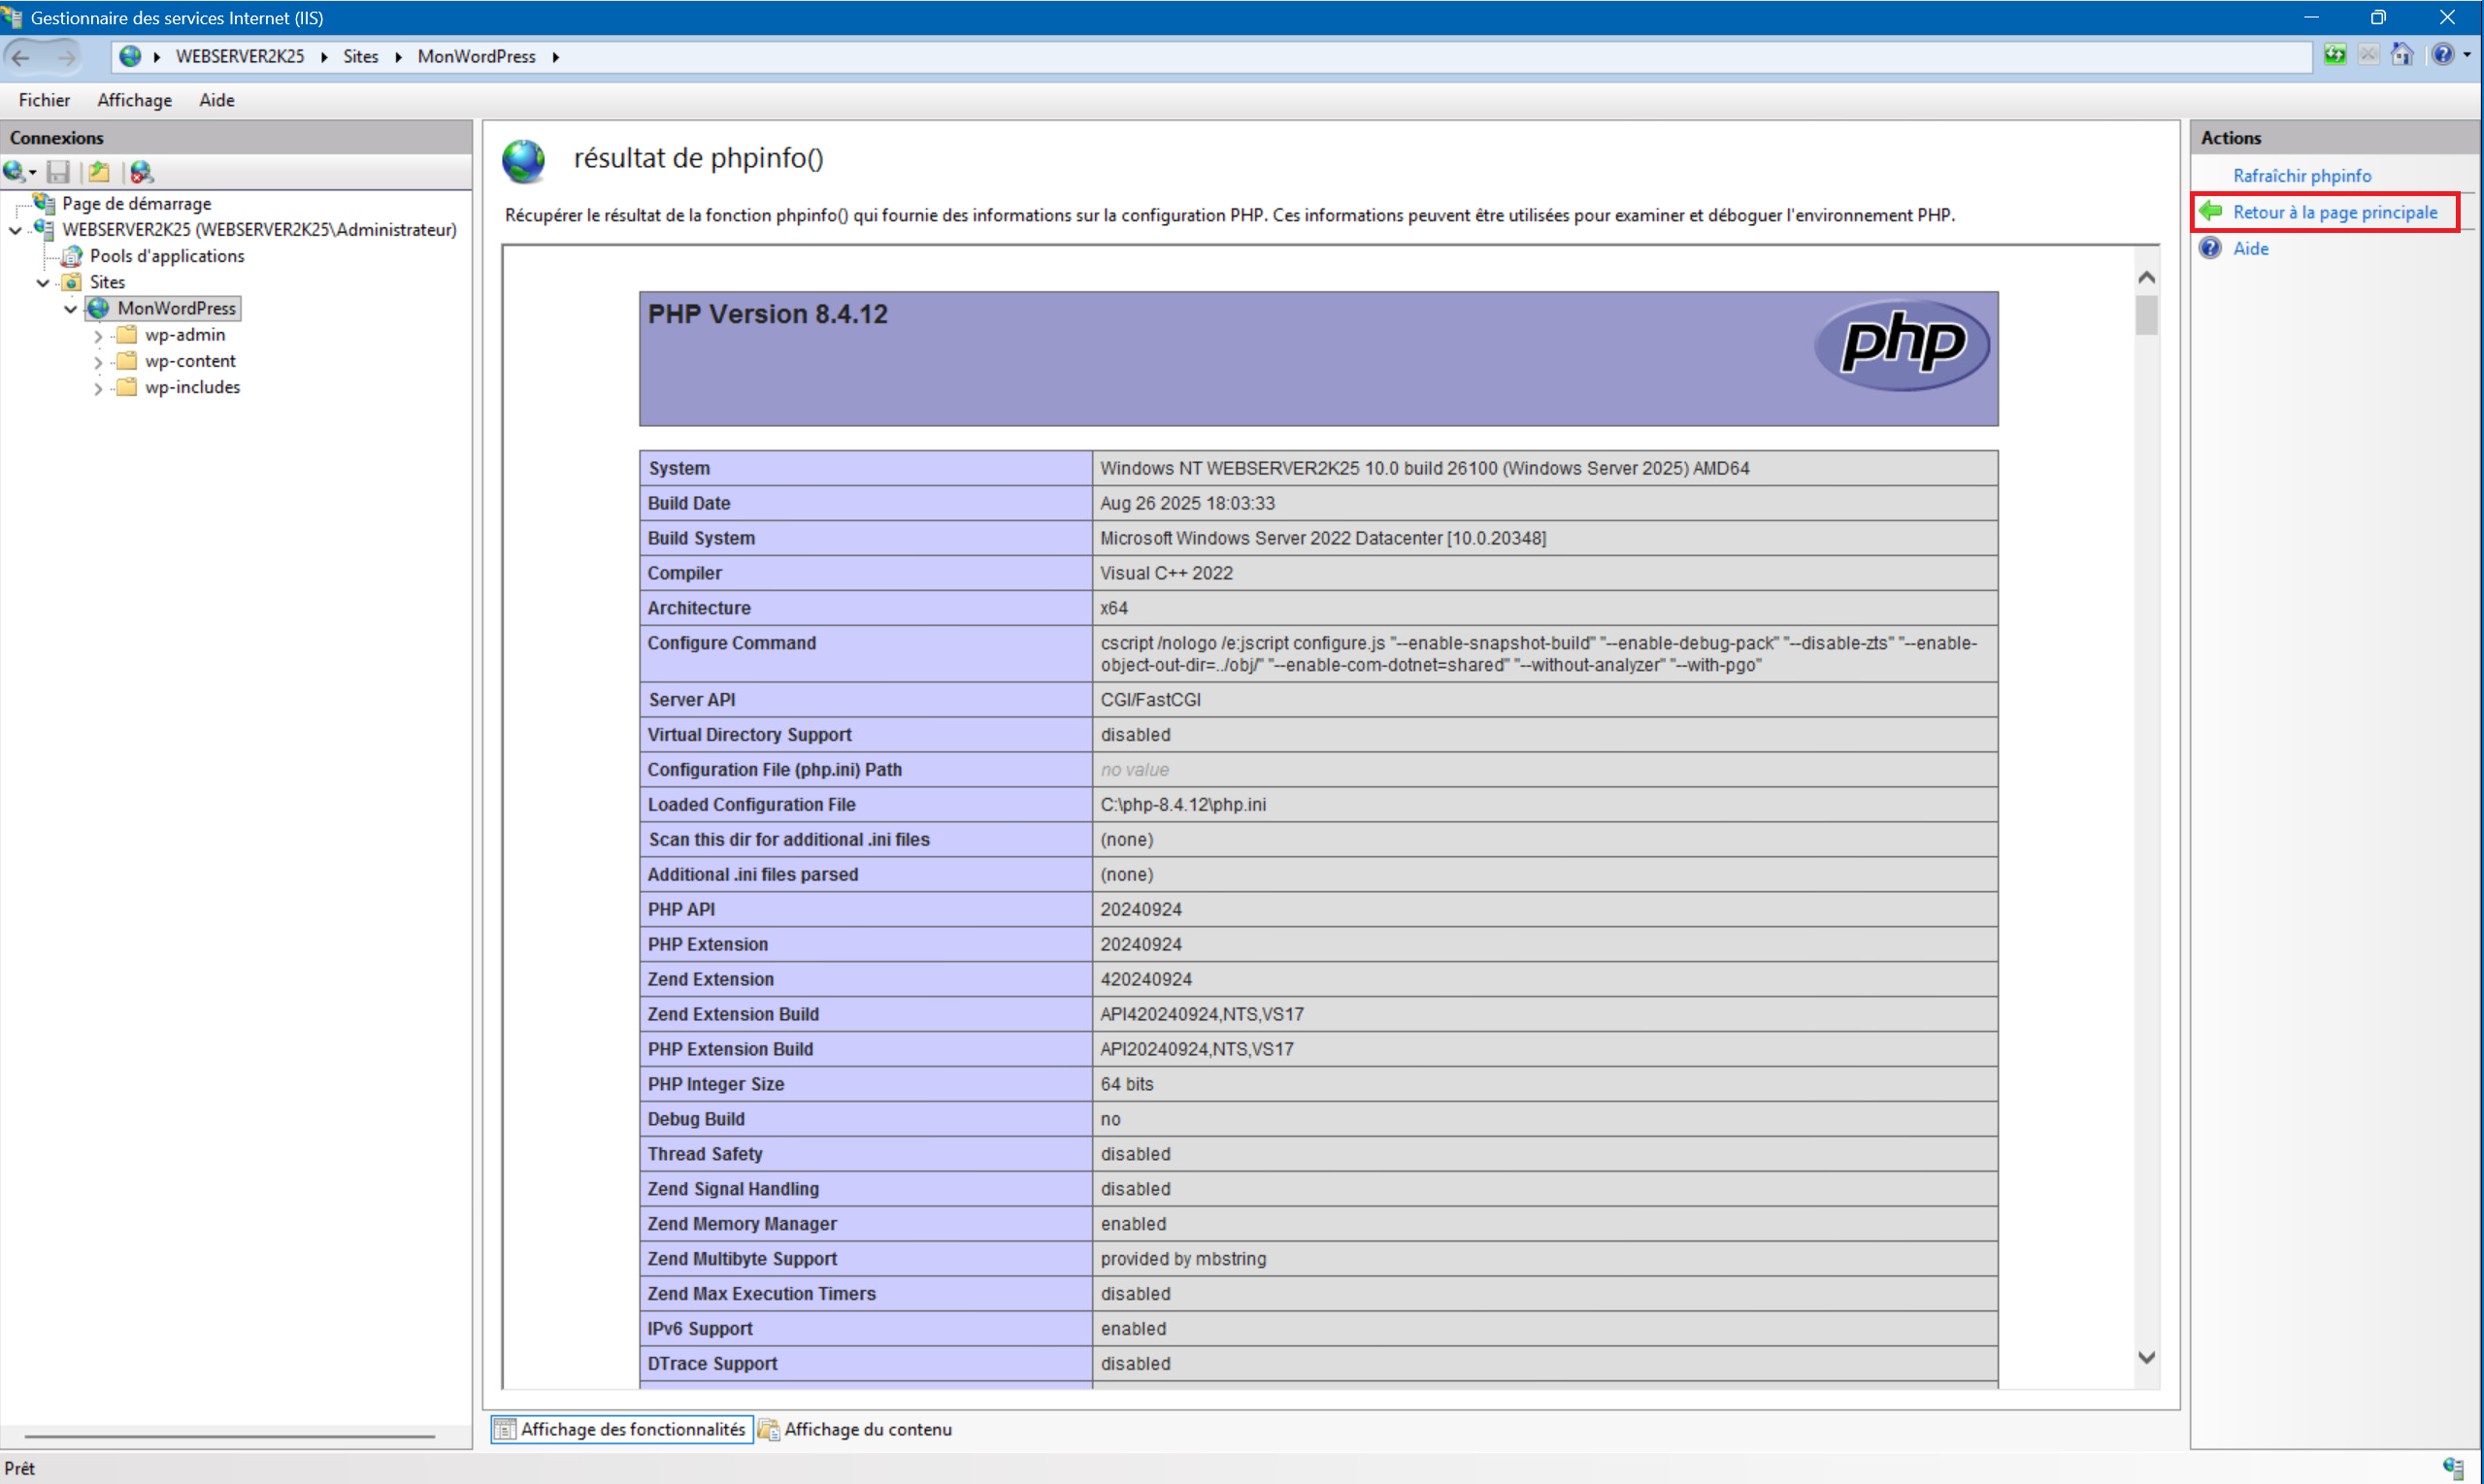
3 – You can check that PHP is working properly by launching “PHP Manager” , then clicking “Check phpinfo()” and then “OK” . The PHP configuration page should appear. Once you see it, you can click “Back to main page” :

F – WordPress launch :
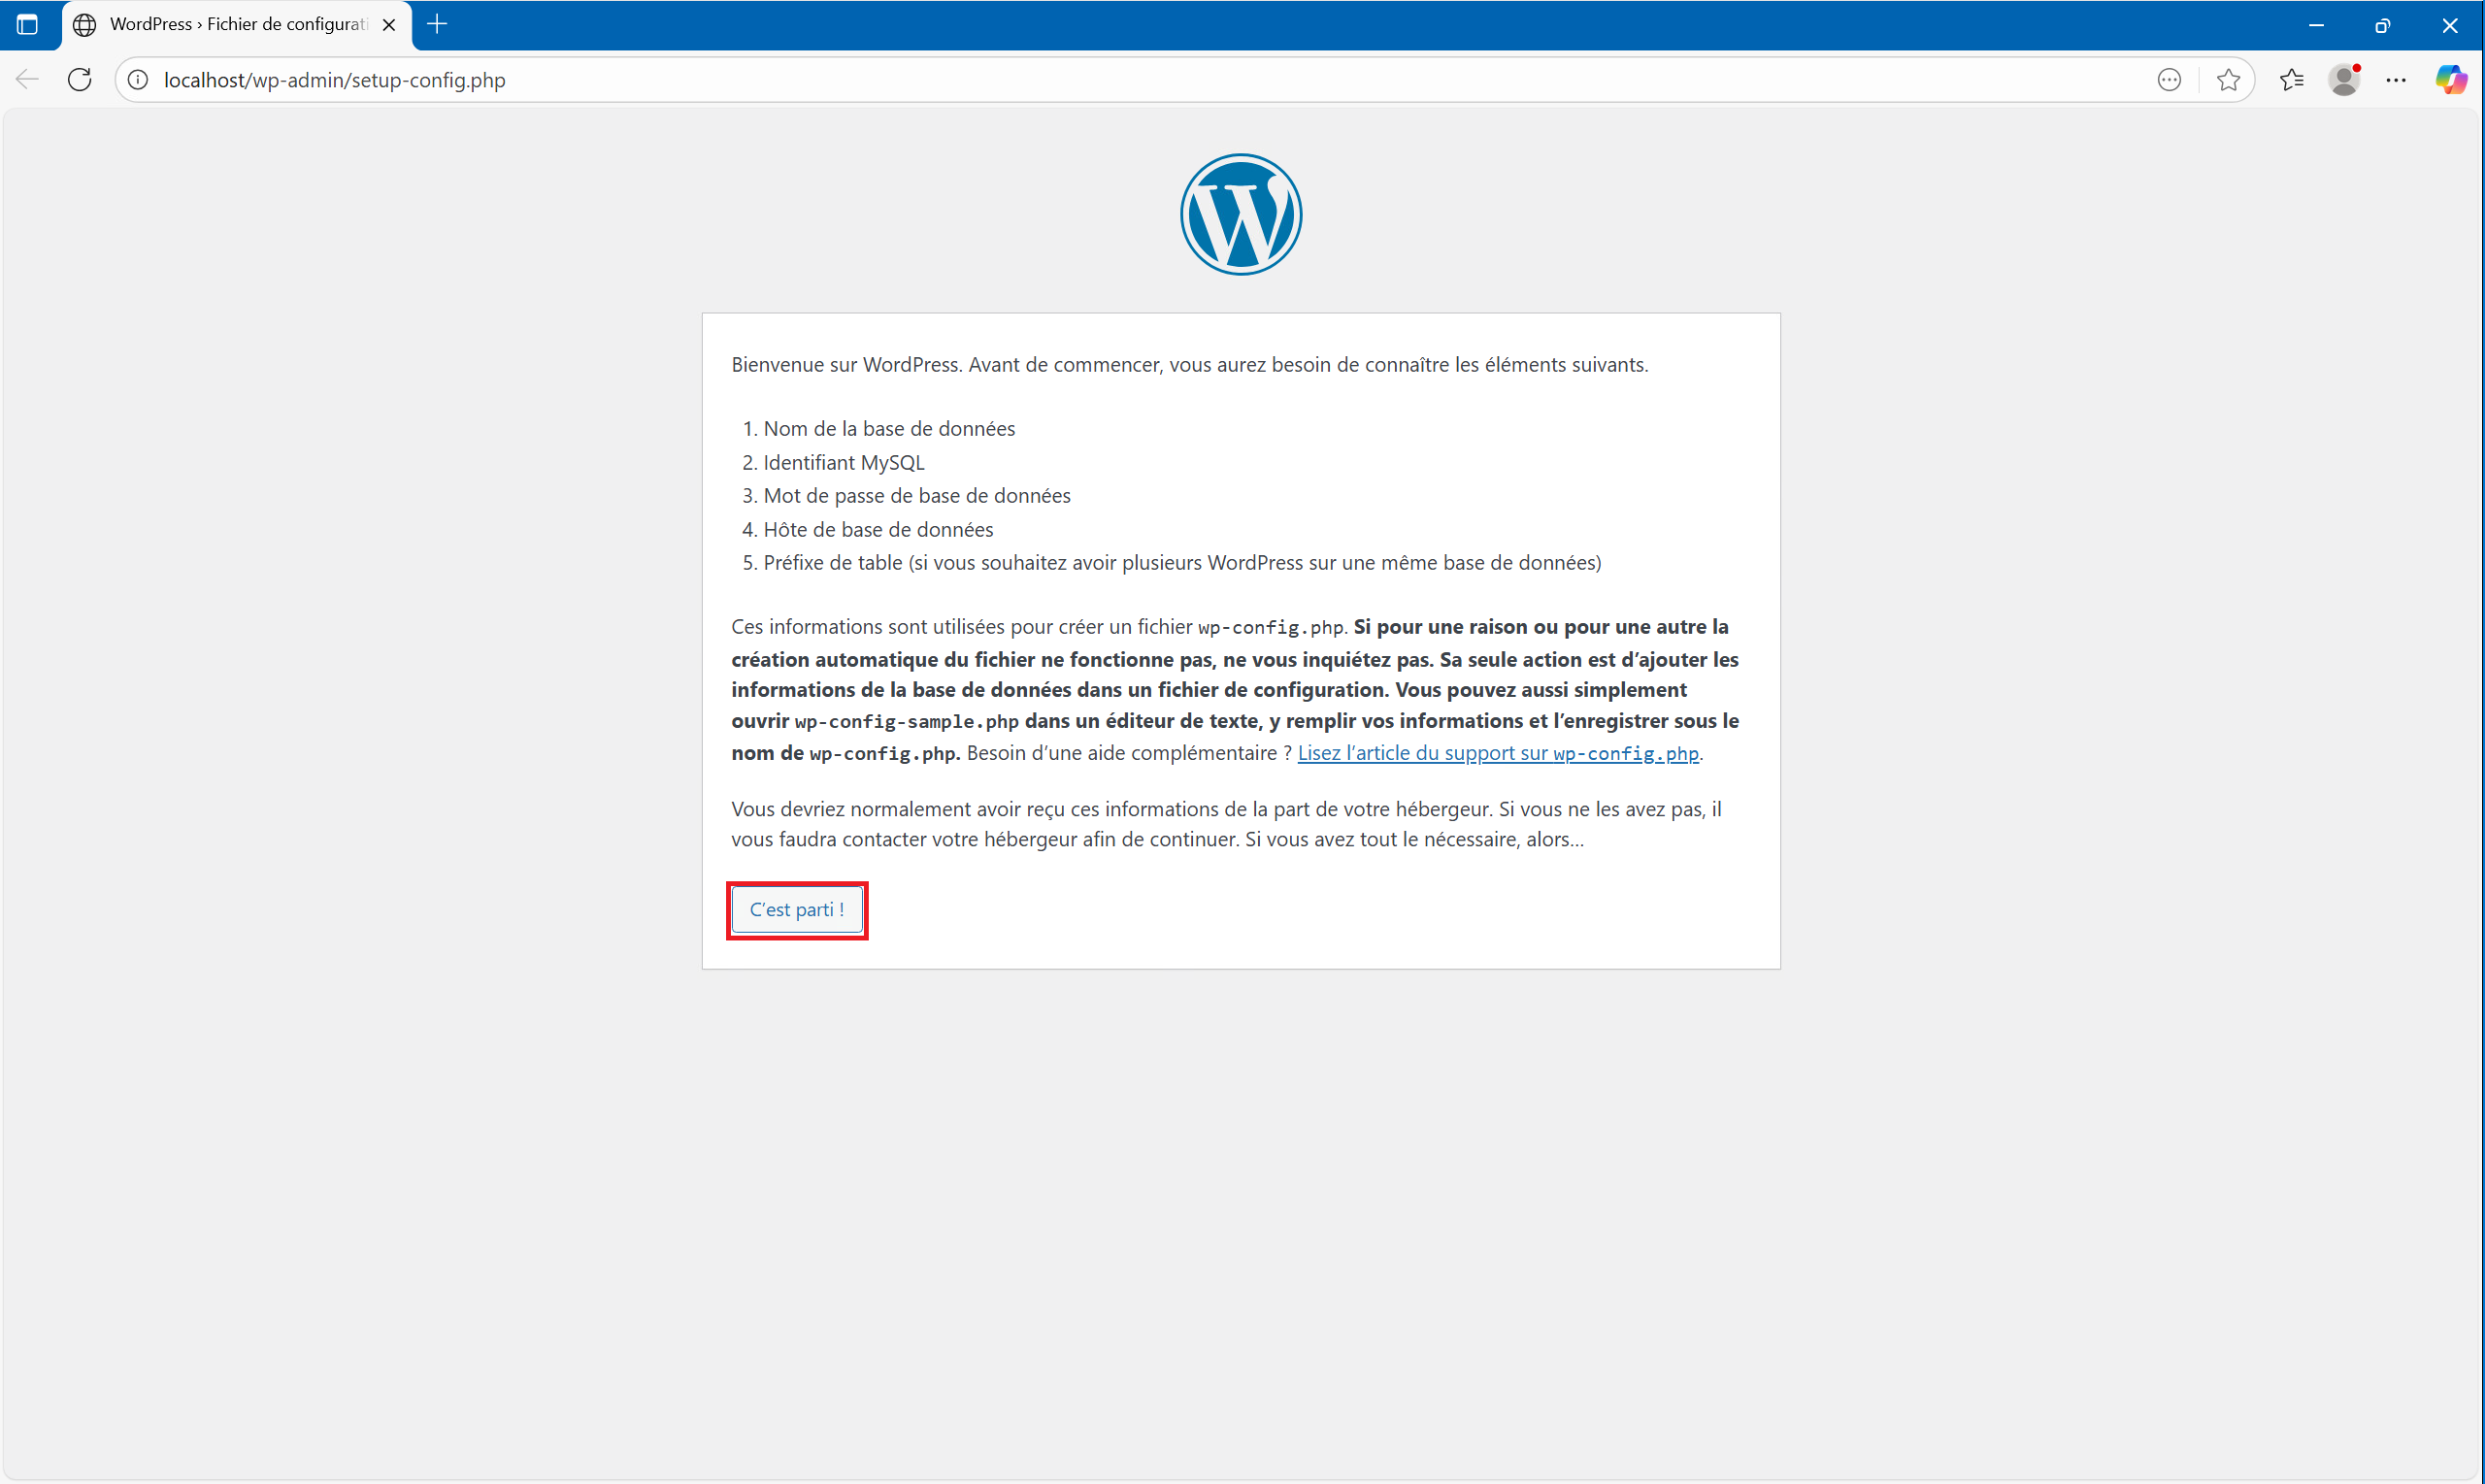
1 – Type “http://localhost” into your web browser’s address bar. When the WordPress installation wizard launches, click “Let’s go!” , then “Launch installation” :
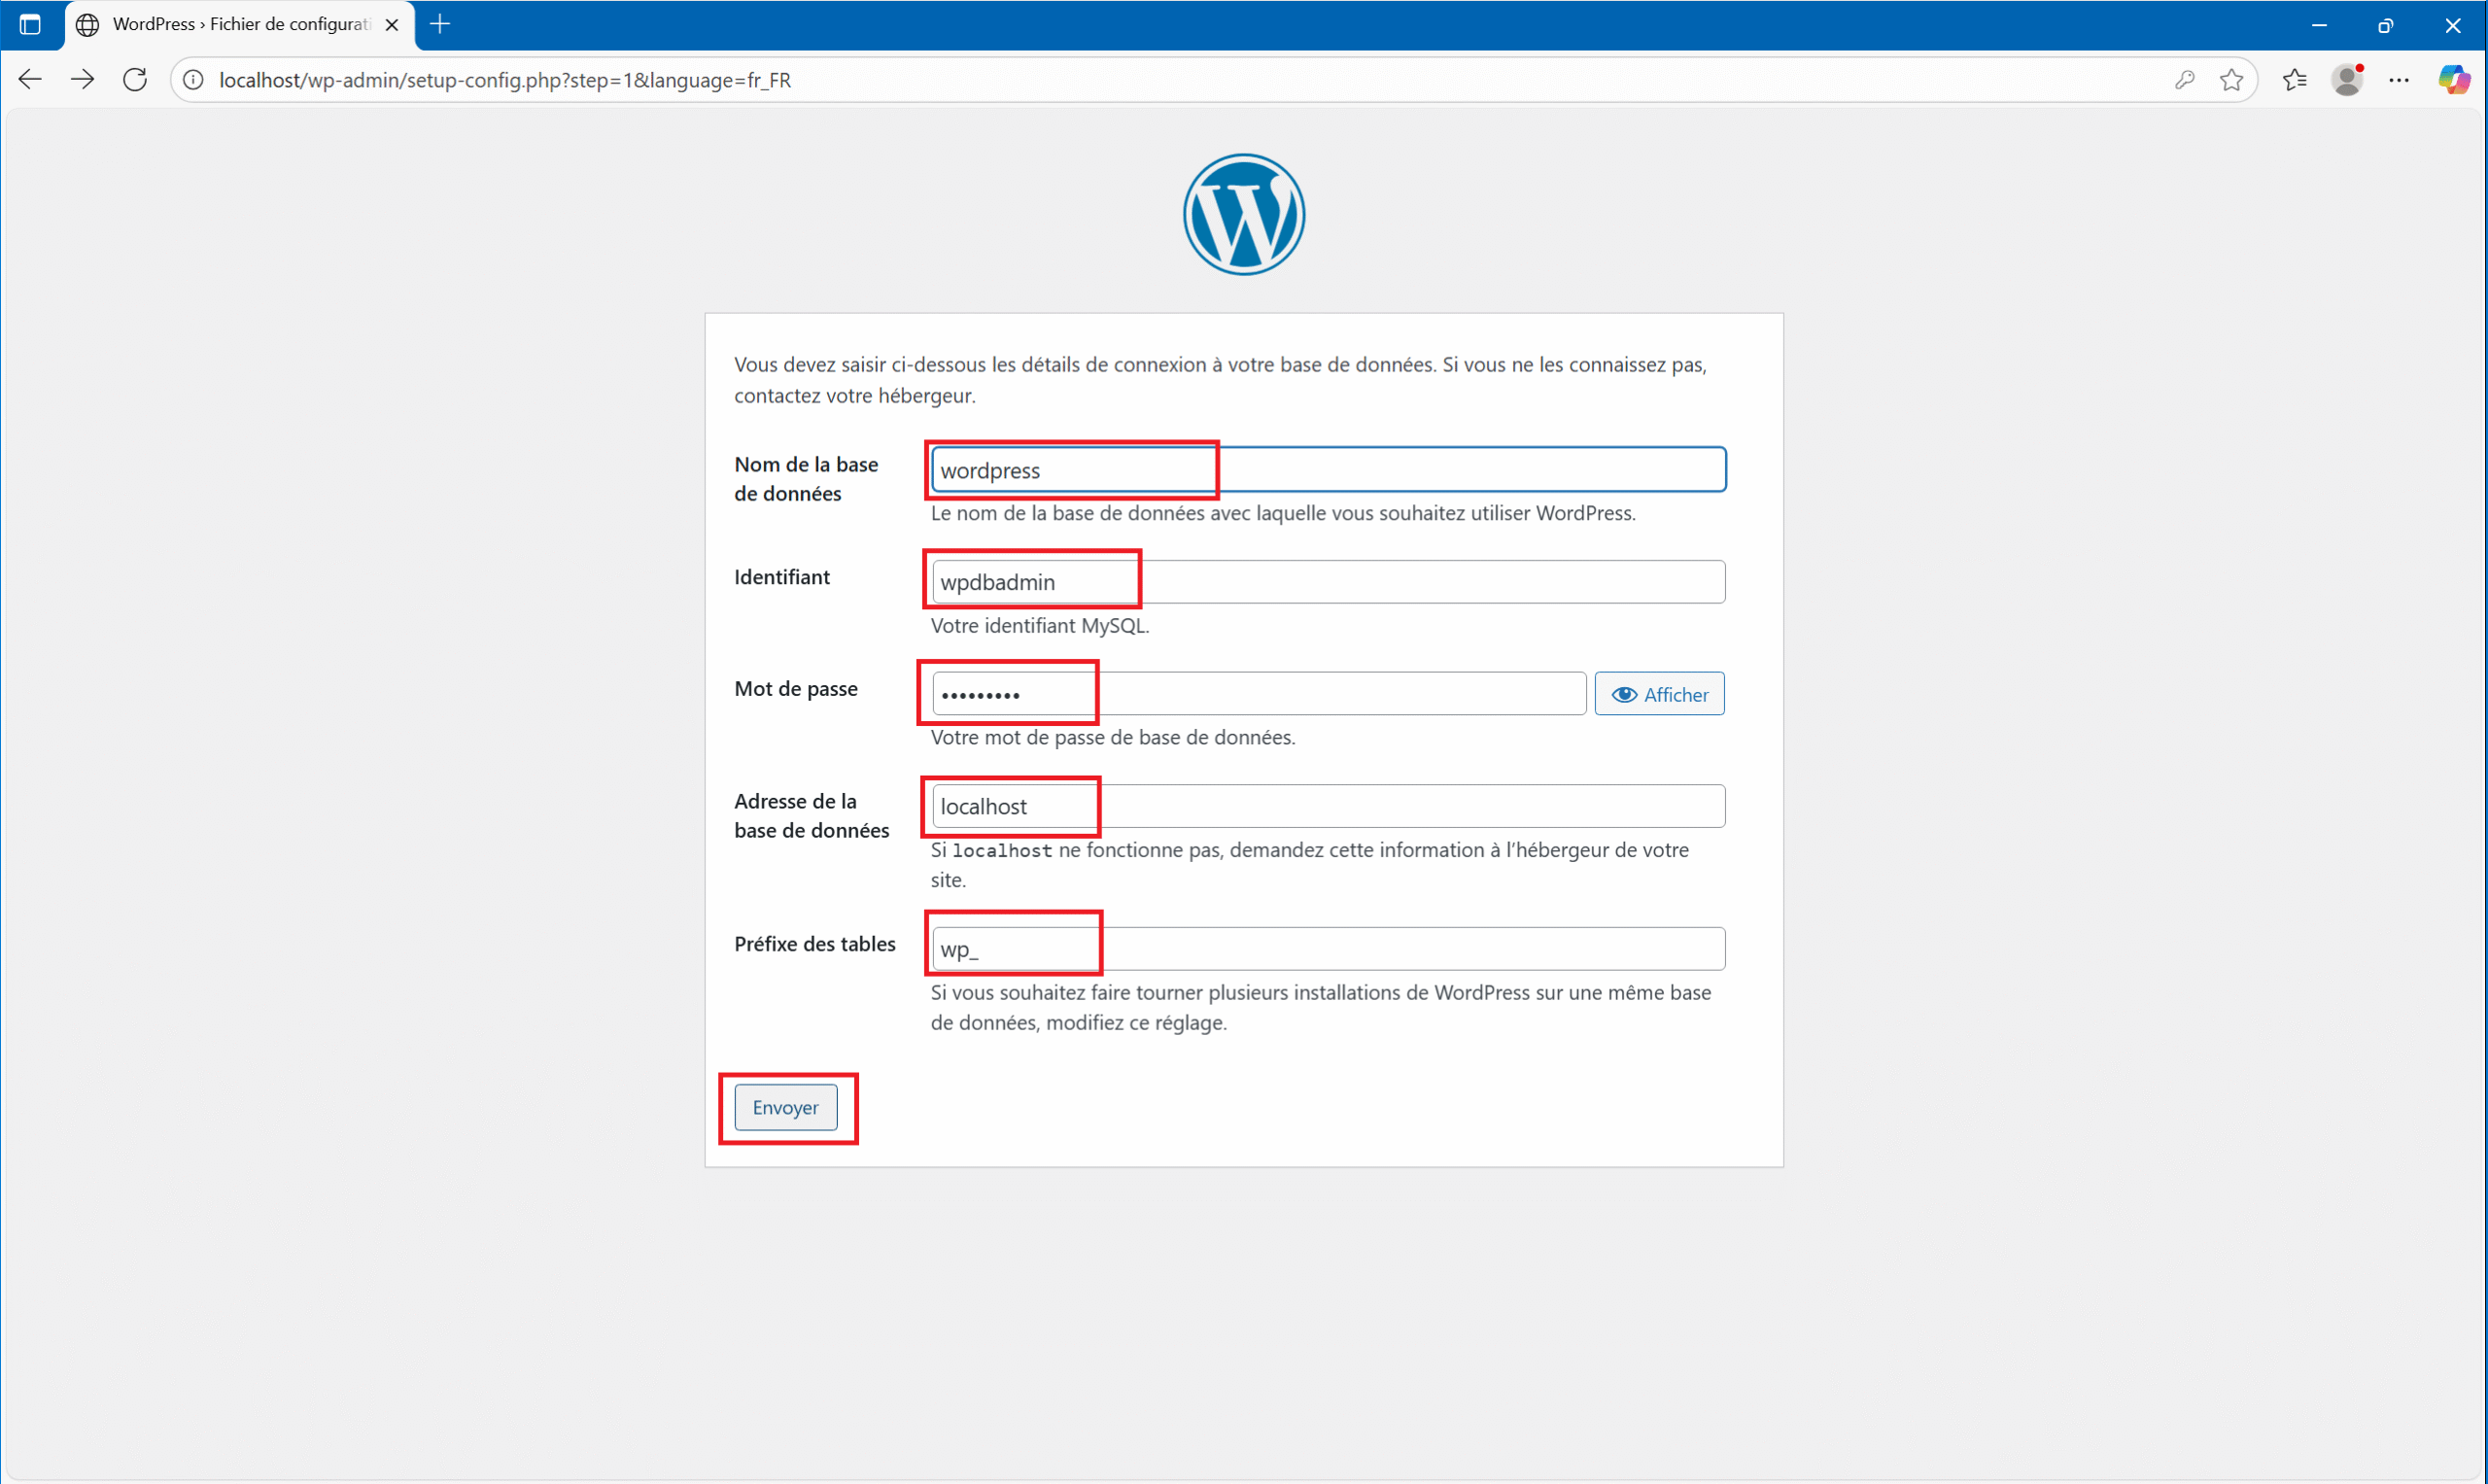
2 – Enter the information you defined when installing the MariaDB database. The database name (in our example “wordpress” ), the database administrator account ID and password, then in the “Database address” field leave “localhost” and preferably also leave “wp-” as the prefix (but you can define whatever you want). Finally, validate by clicking on “Submit” :
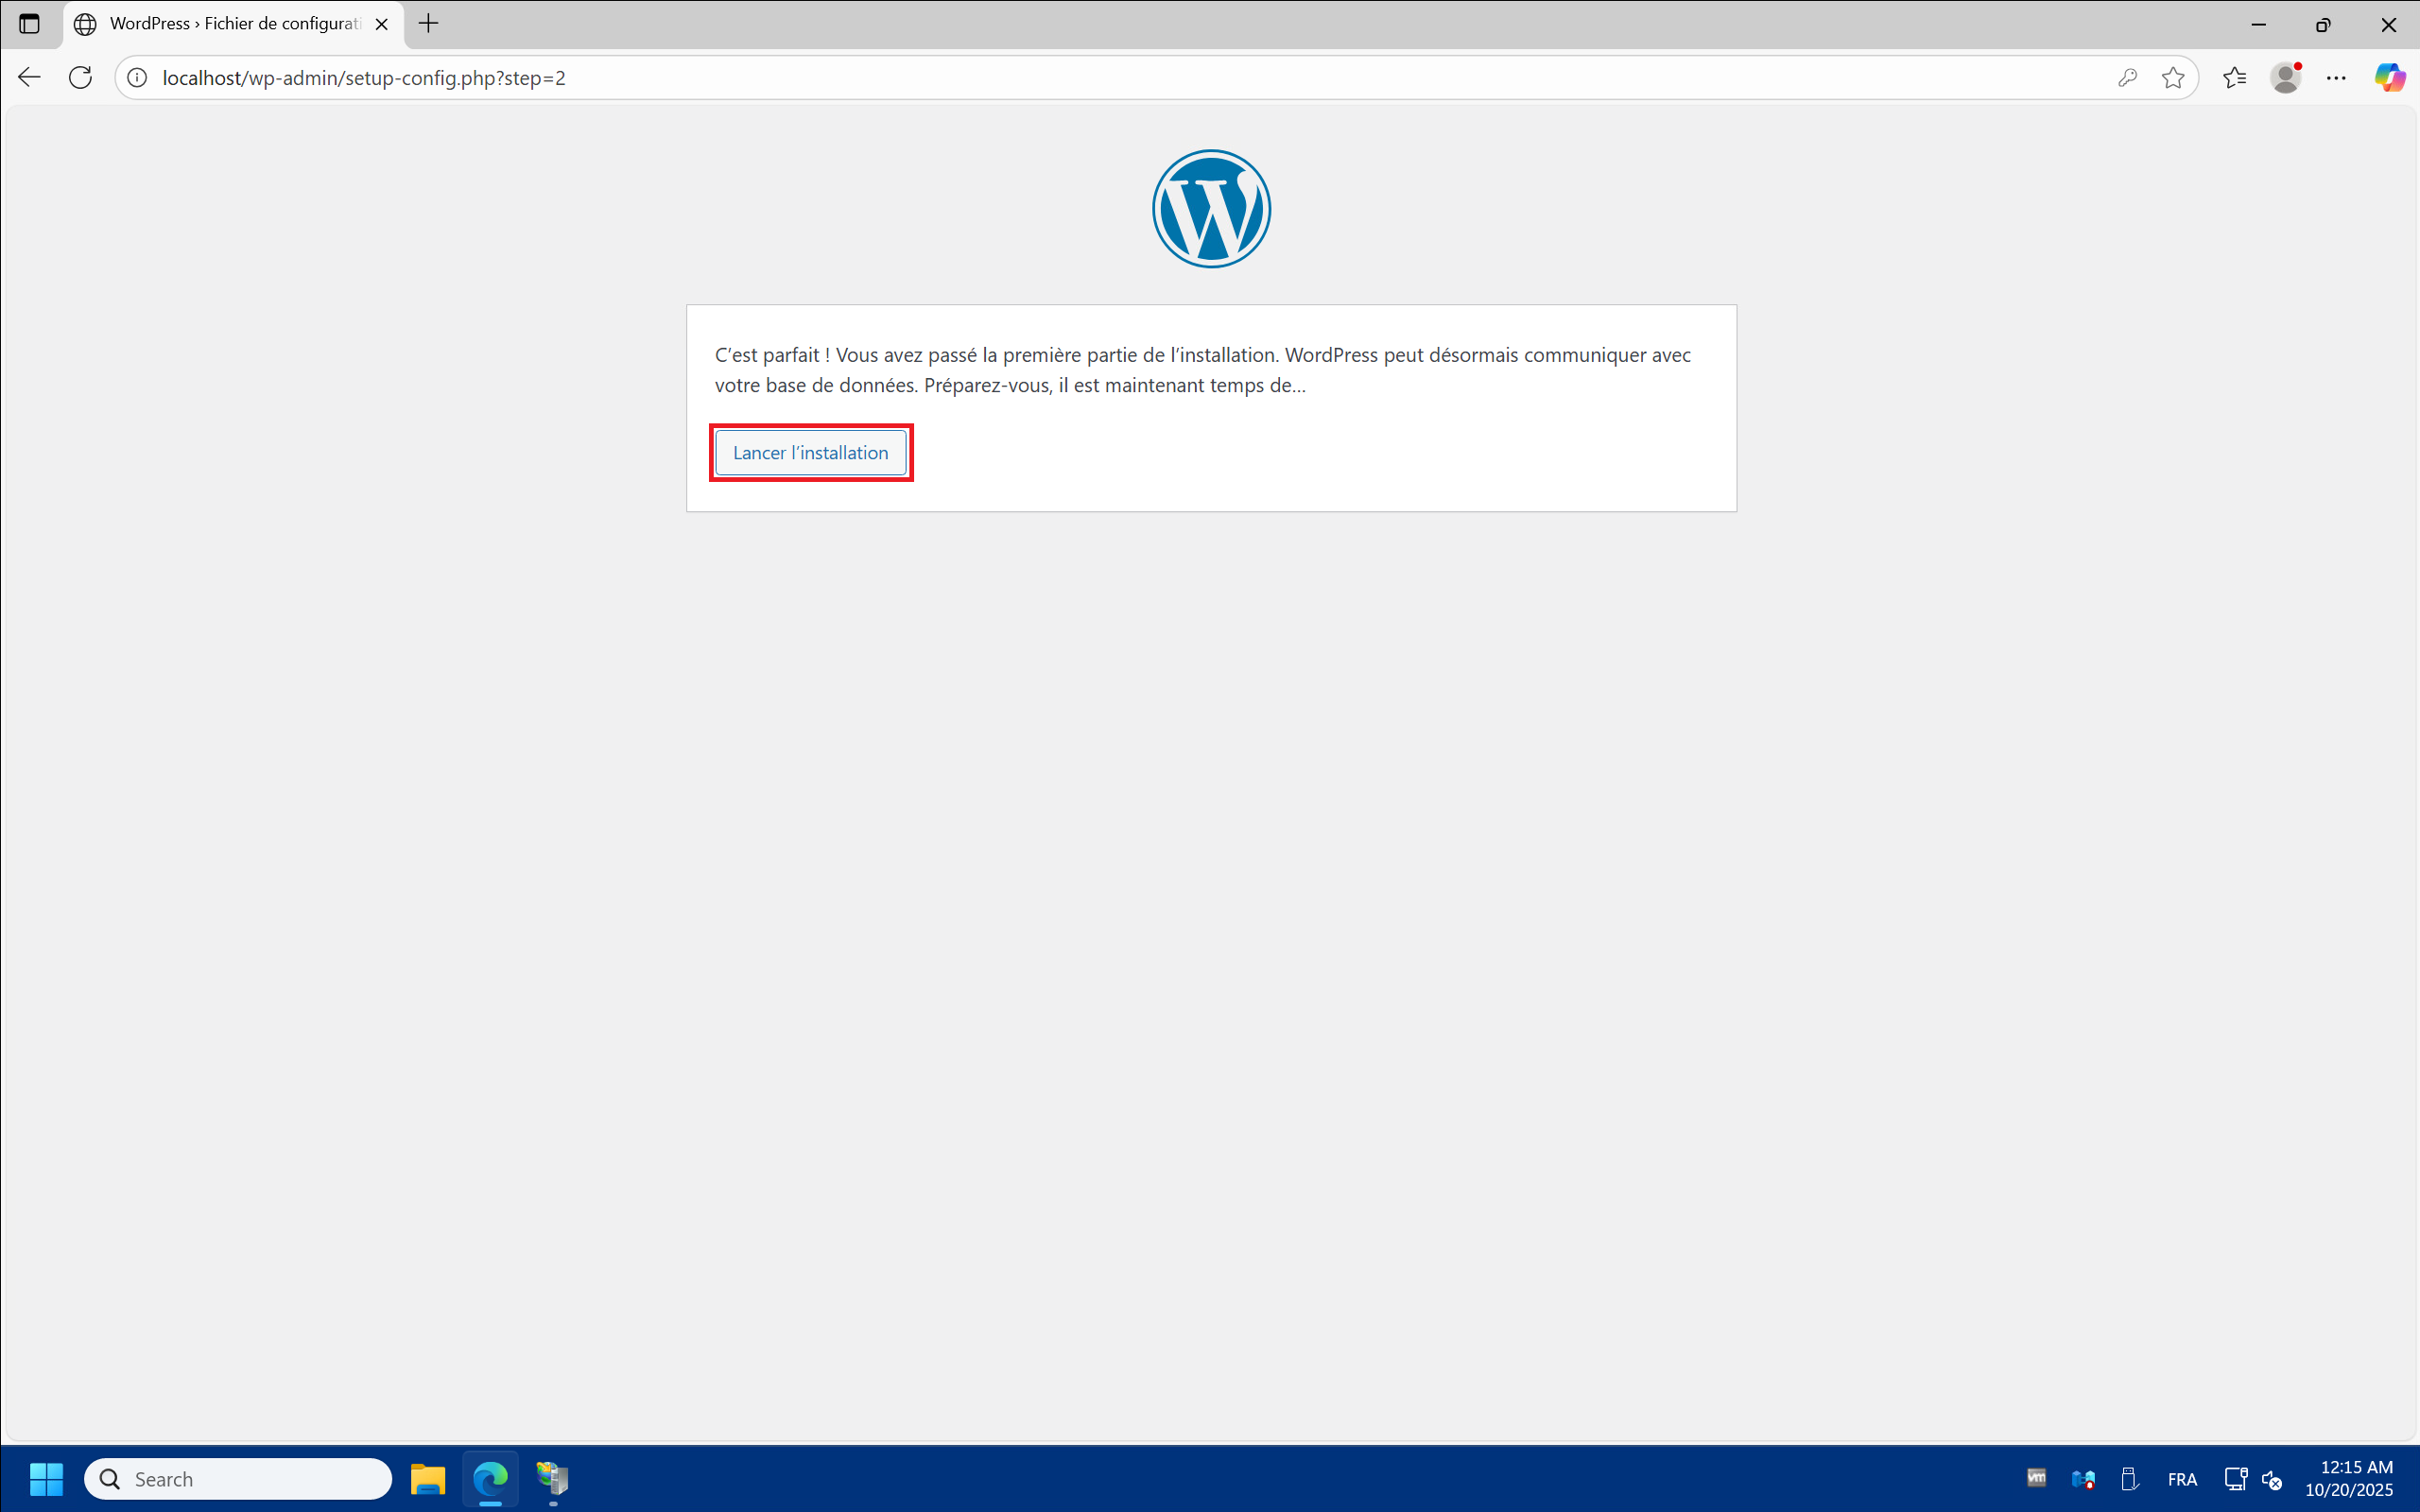
3 – Click “Run the installation” :
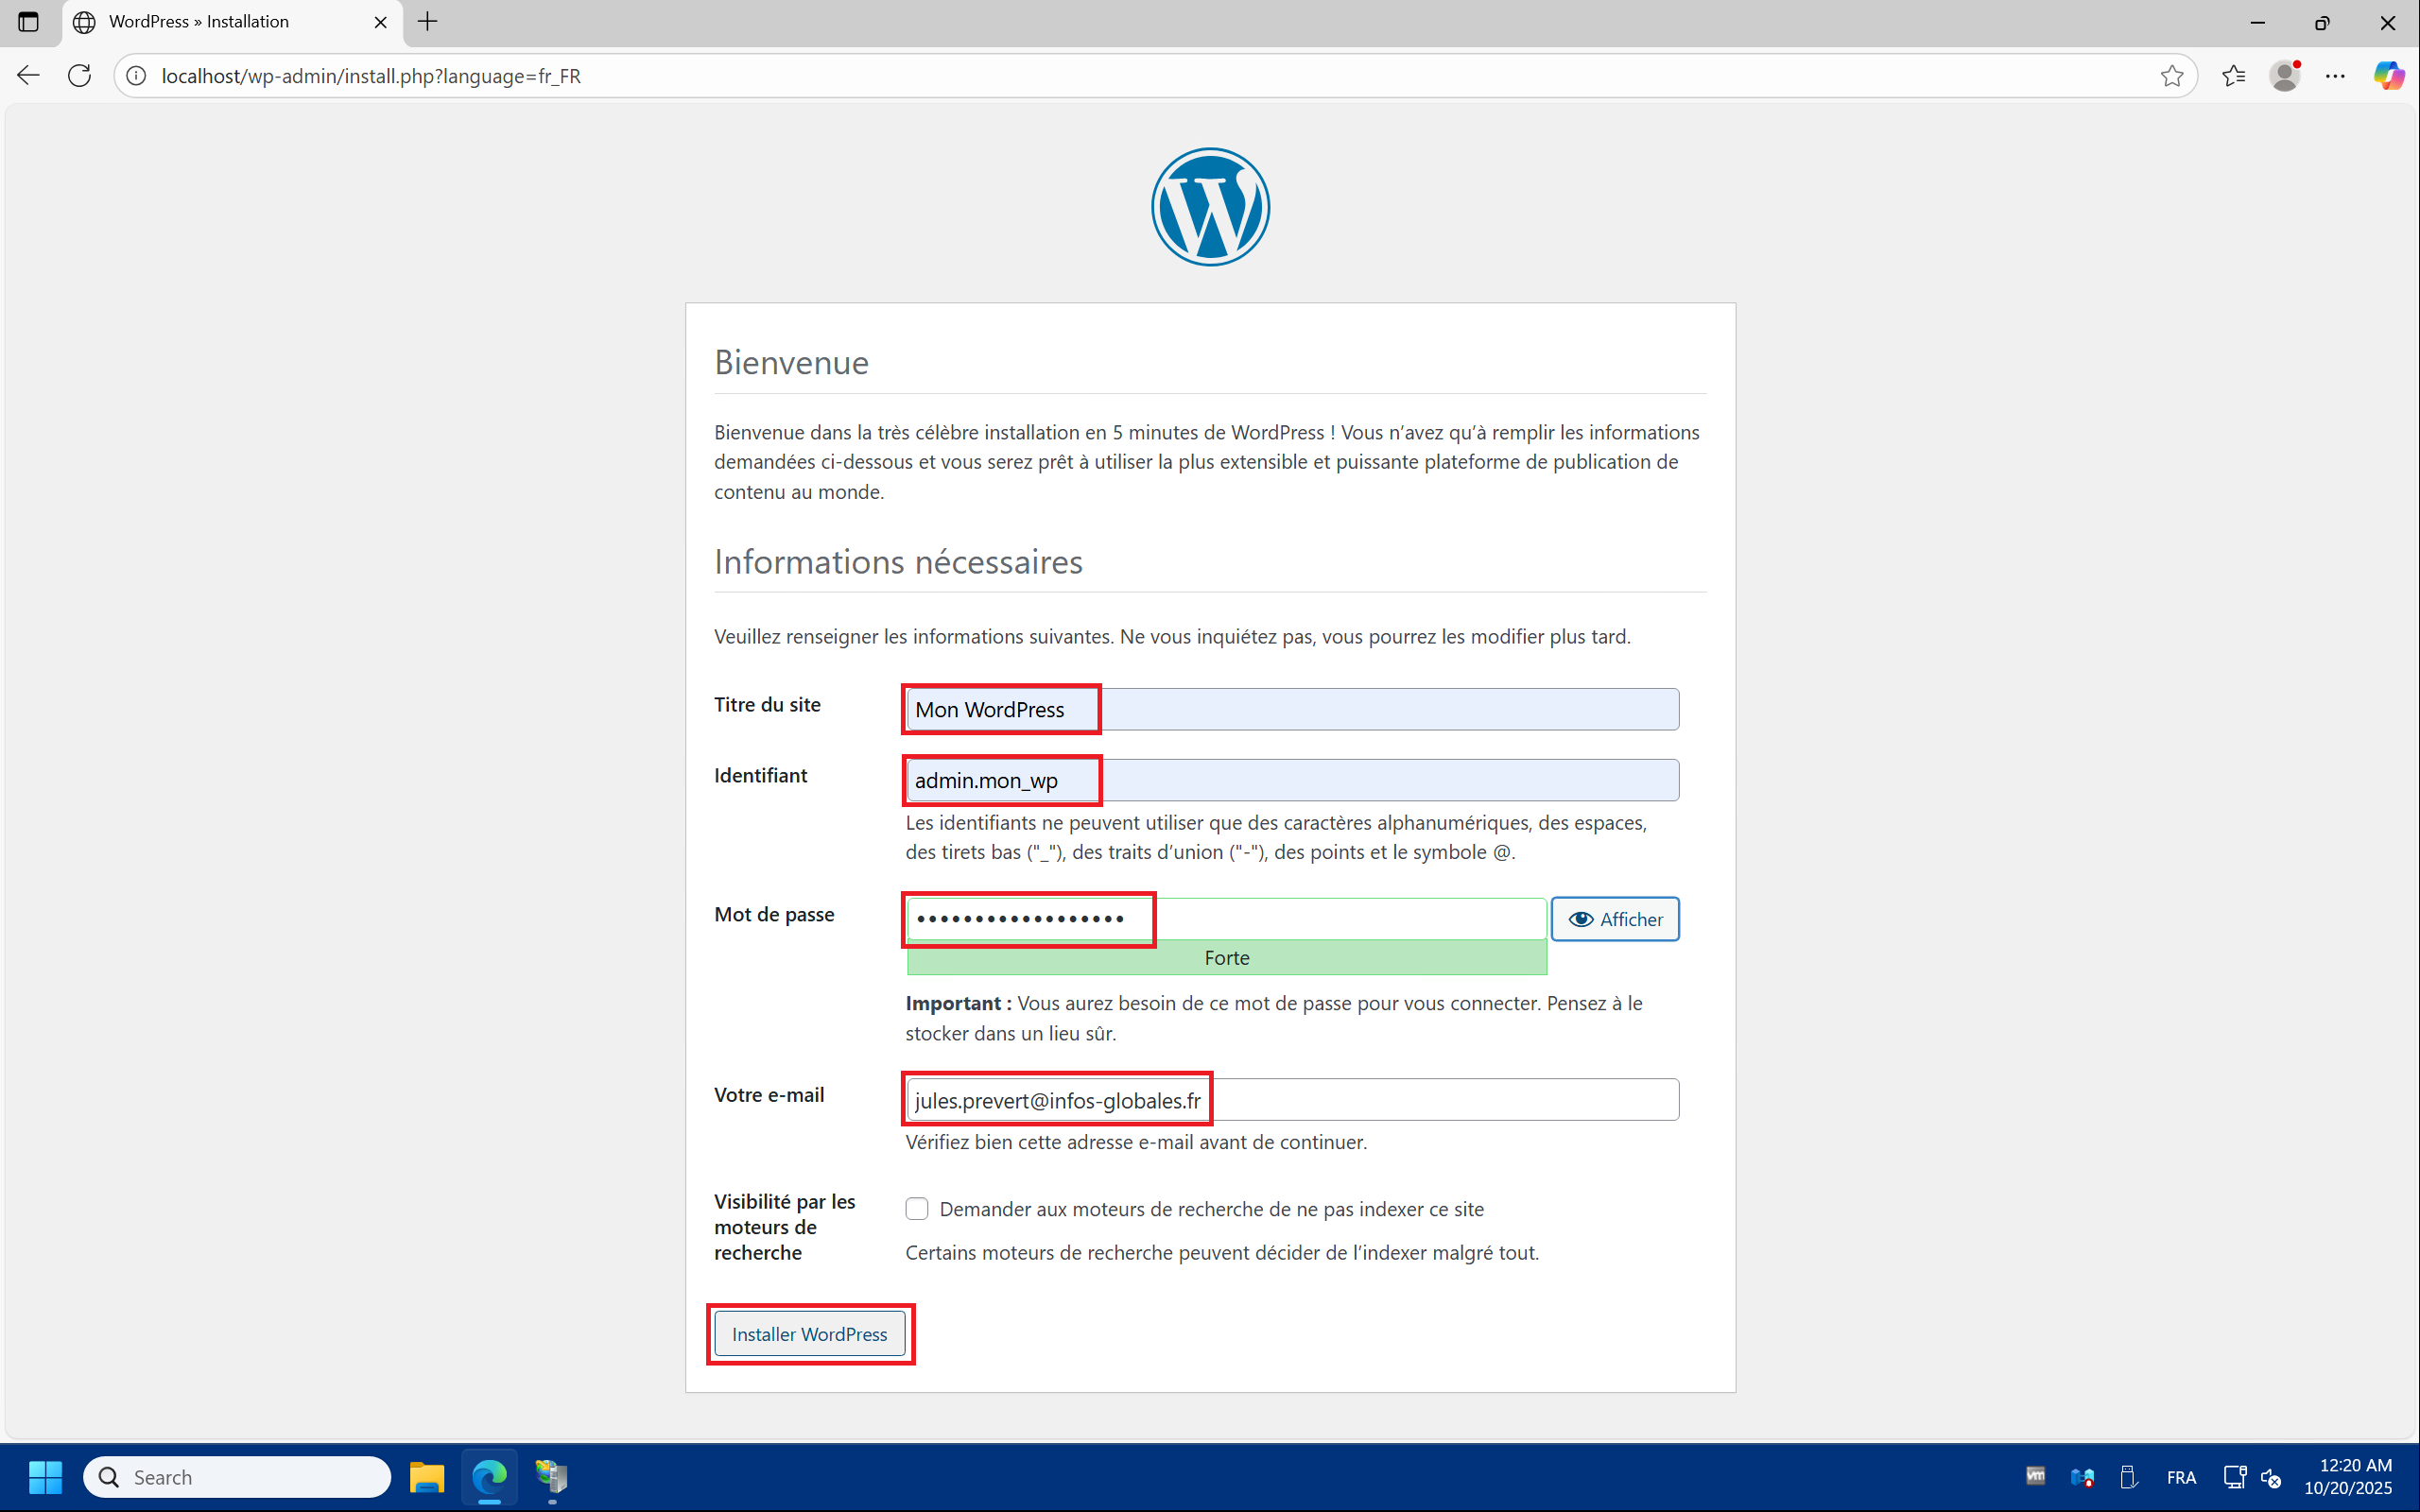
4 – Once WordPress is connected to the database, you can configure the site itself. Choose a title for your site in the “Site Title” , field, then set a username for the WordPress administration account in the “Username” field. A complex password will be suggested, but you can set one of your own in the “Password” . Then, enter a valid email address in the “Your Email” . And finally, click “Install WordPress” :
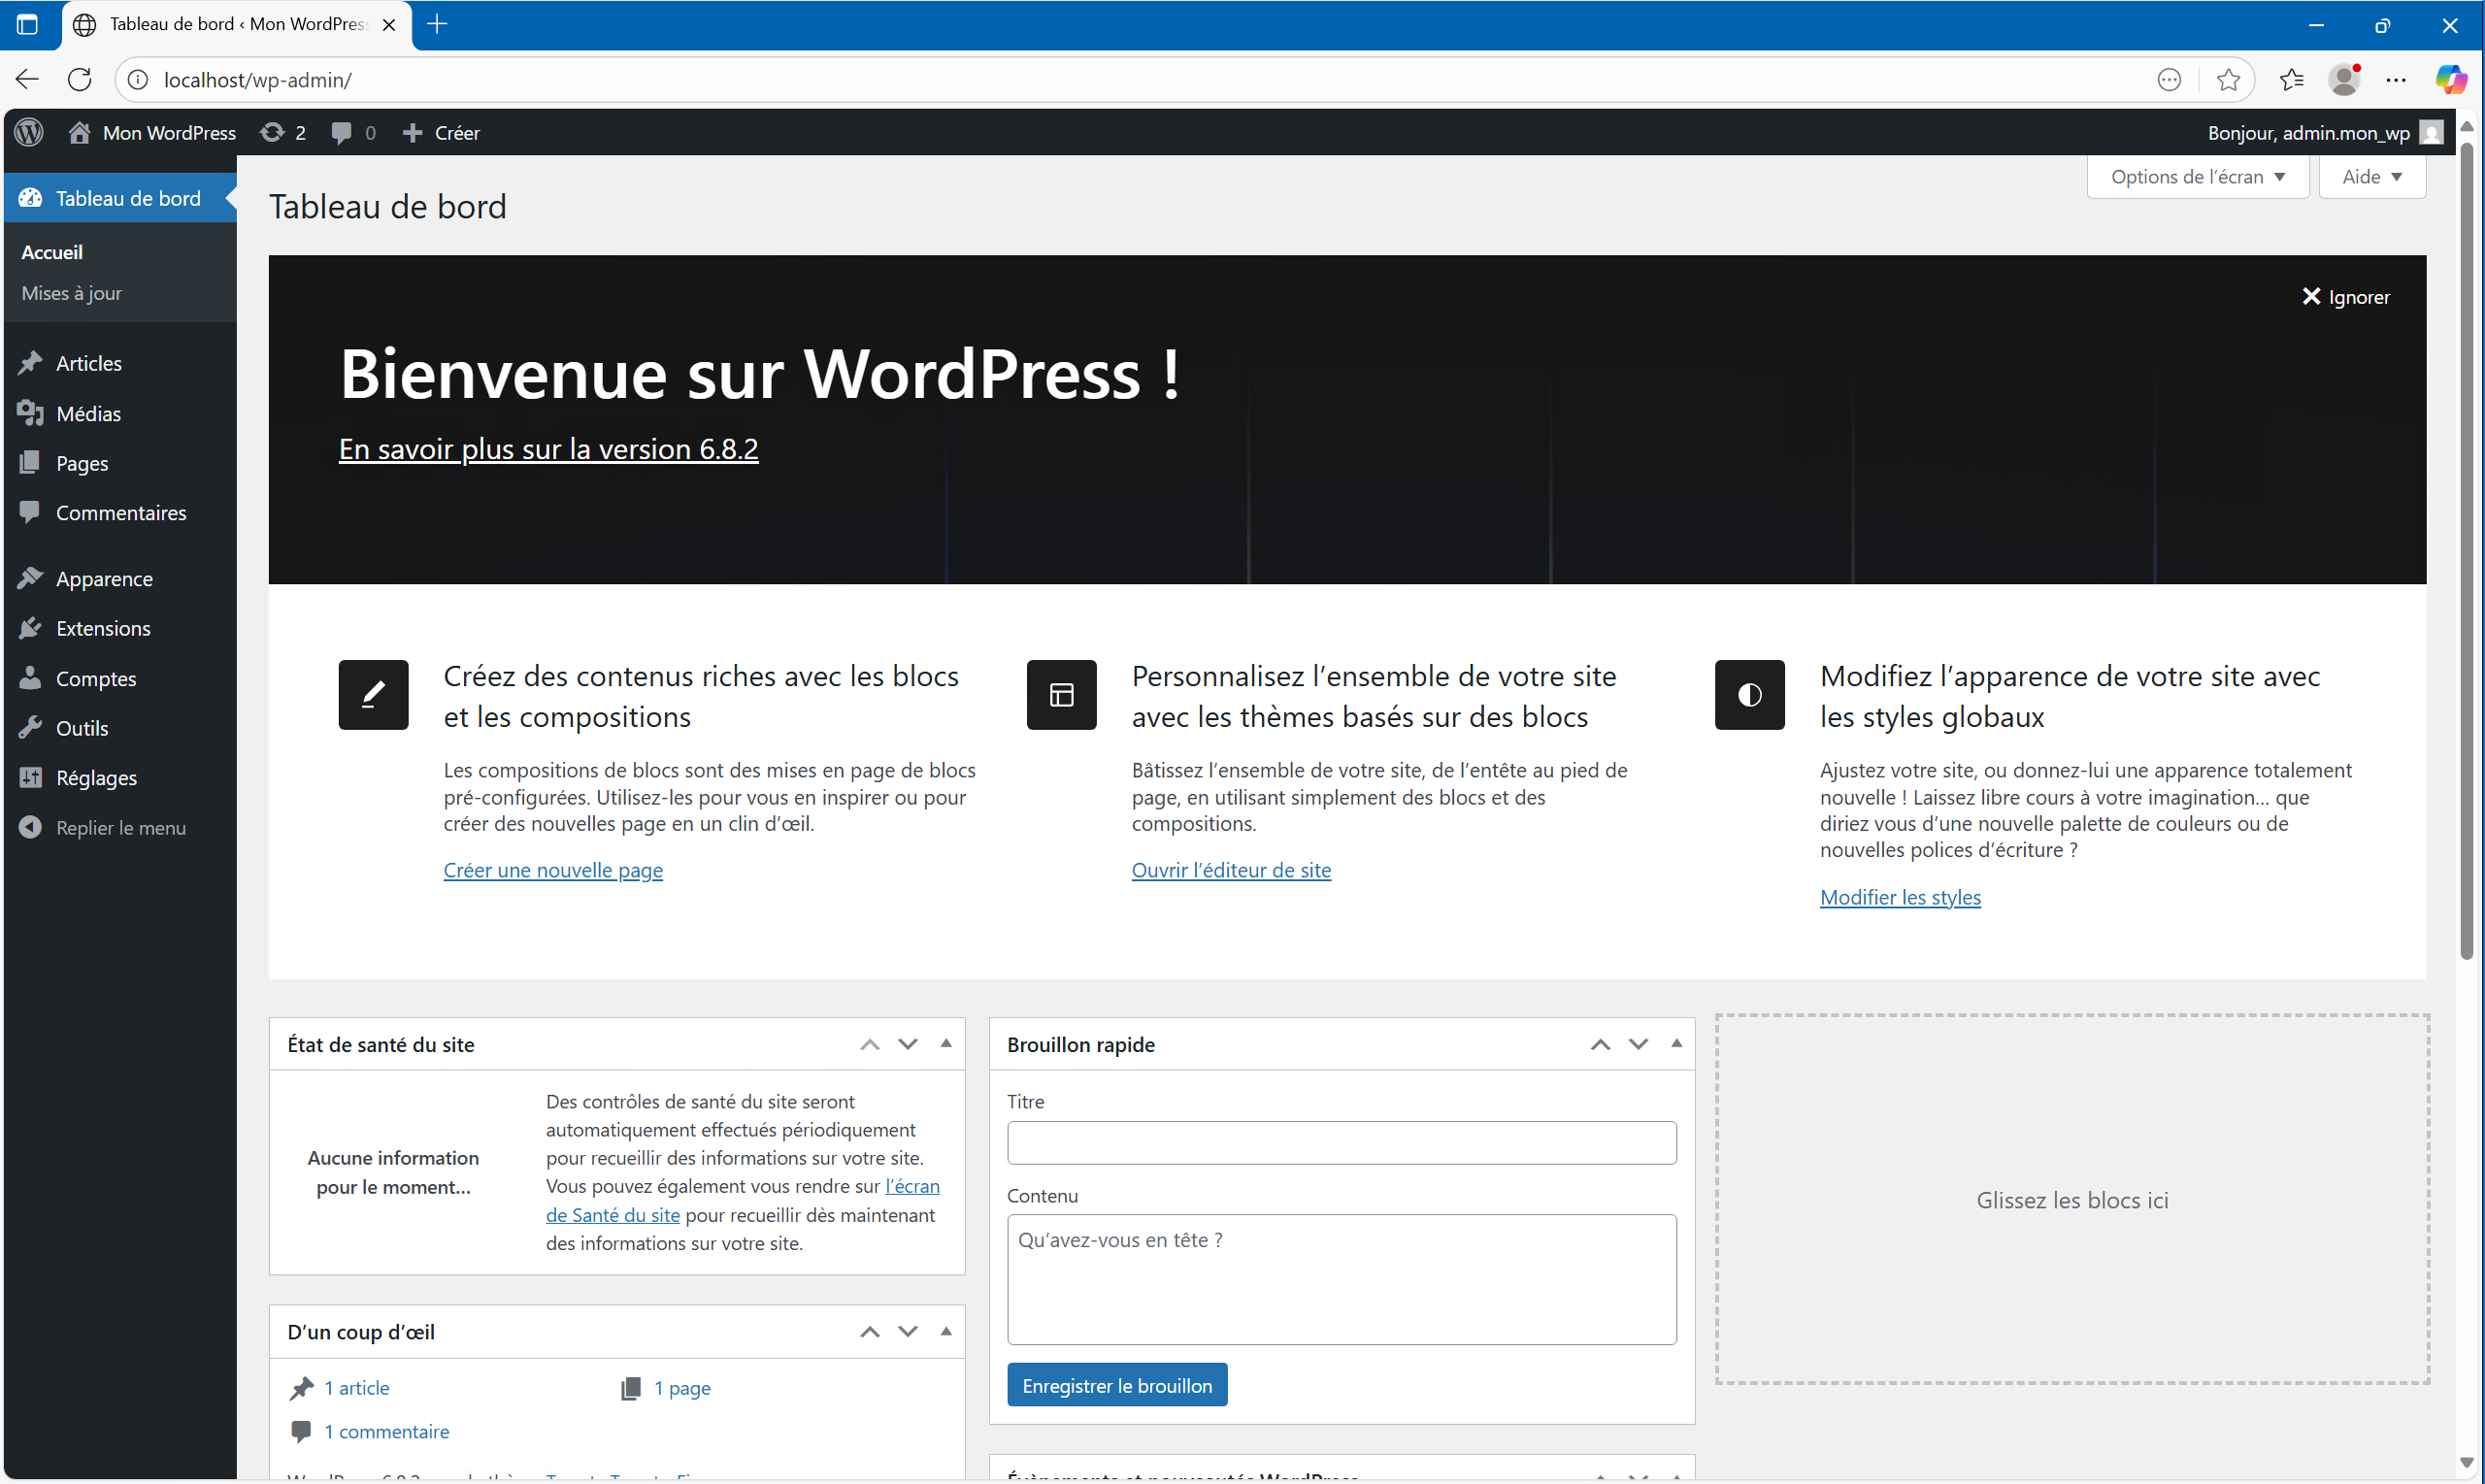
5 – Setup is complete! You can log in to your WordPress site by clicking “Log In” , then on the next page enter your WordPress credentials and finally click the “Log In” . Welcome to WordPress!


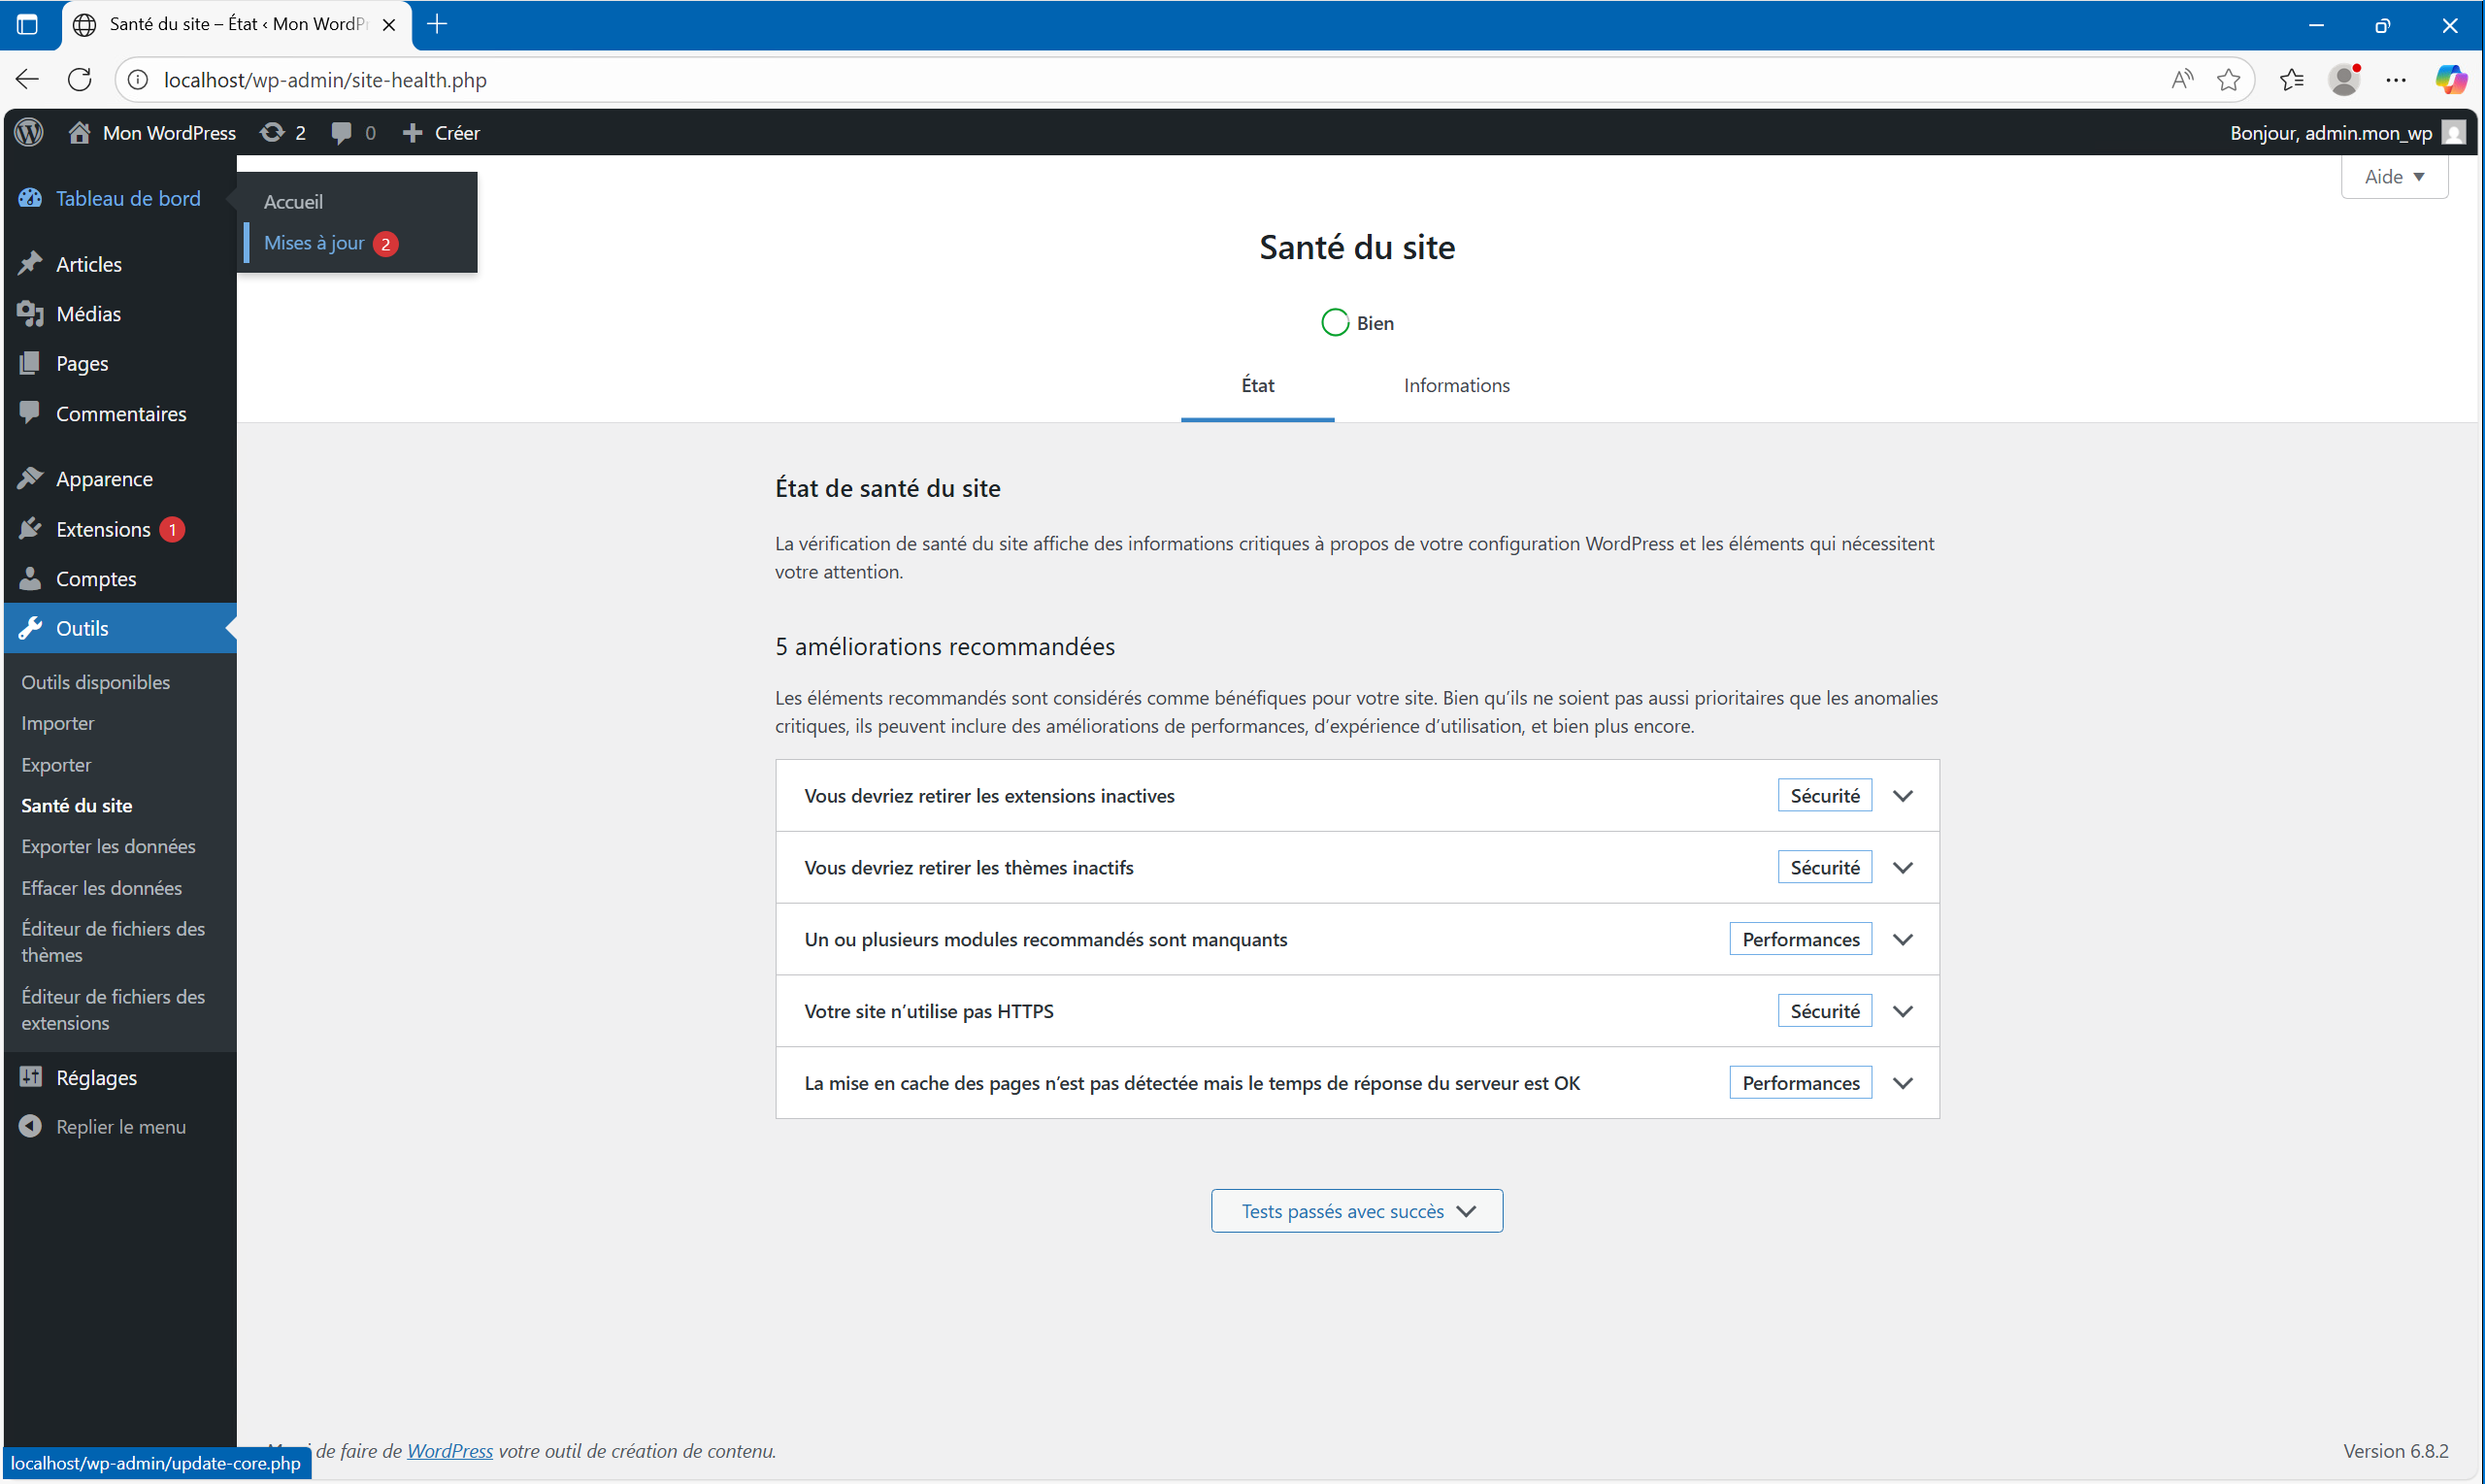
6 – Before you start editing your site you can take a look at the site health by clicking “Tools” then “Site Health” :
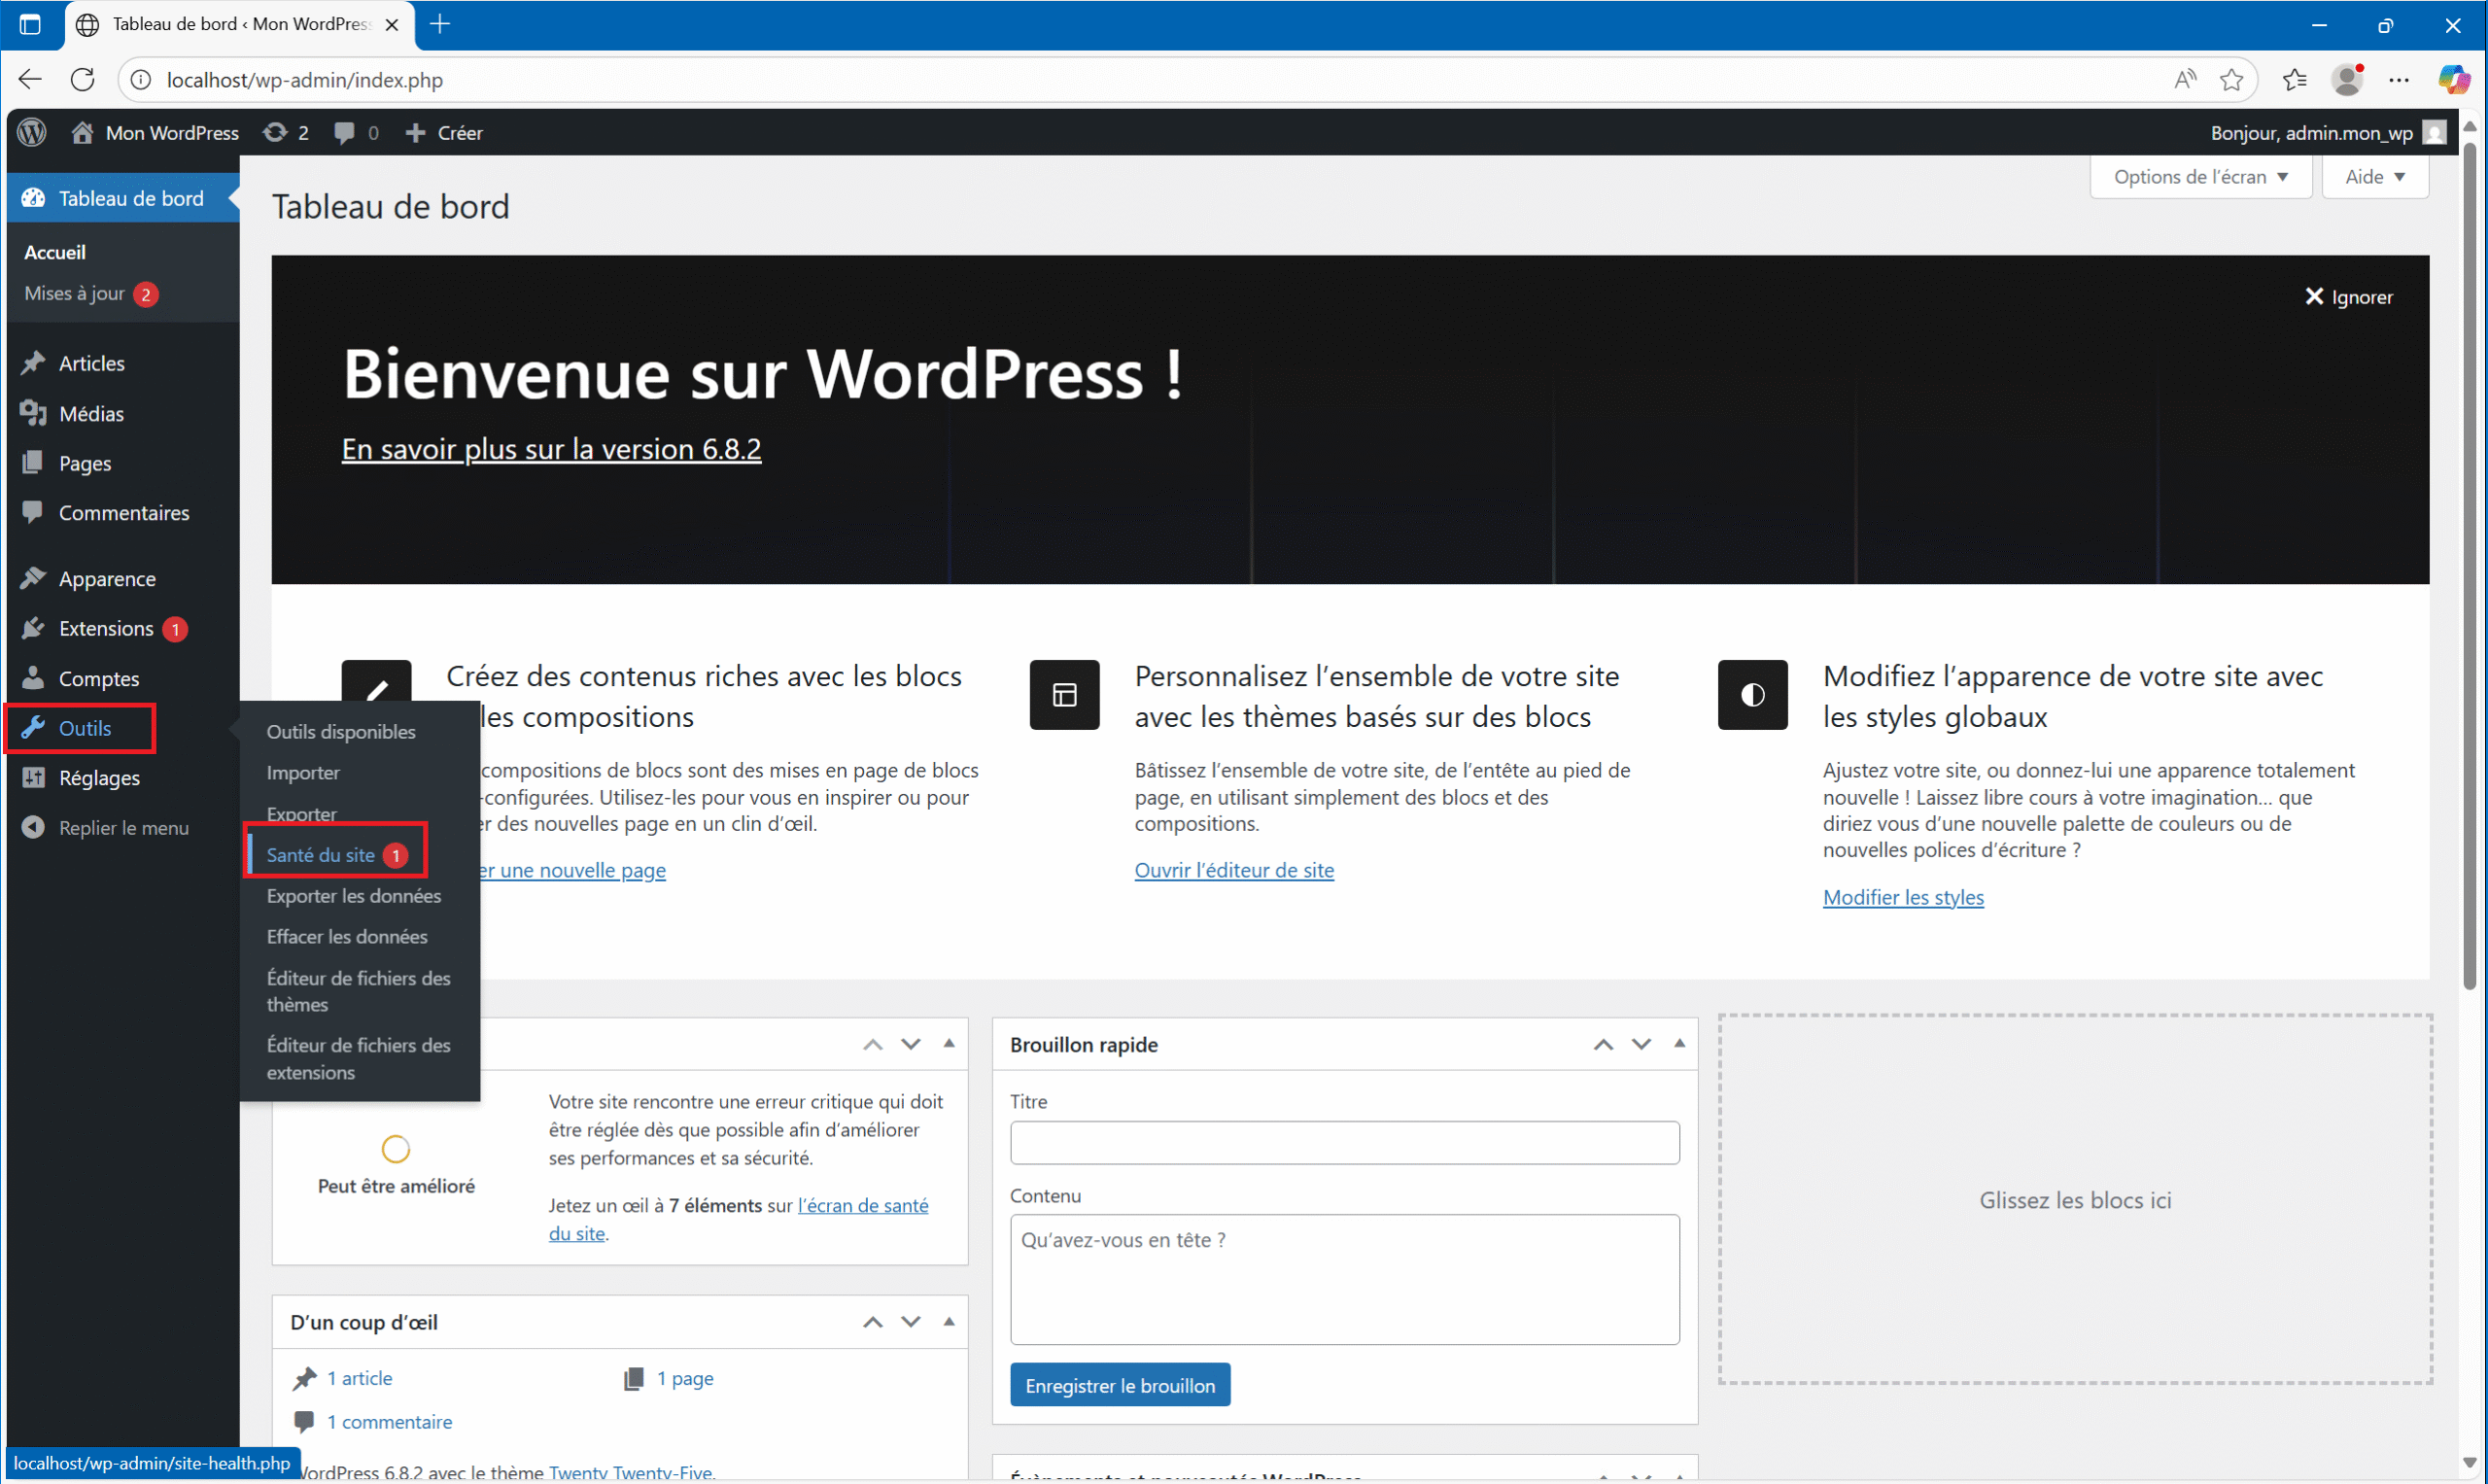
7 – At this point, you should have 5 recommended improvements, but your site is now up and running. You can start editing your site and creating pages! We’ll cover how to optimize your server to handle all these recommendations in a future article. That’s it for installing WordPress on IIS. Congratulations!
Conclusion
Congratulations again for making it to the end of this tutorial!
Here you have a WordPress site with the minimum configuration to run locally. In the next article, we’ll see how to install certain PHP extensions like Imagick, enable the HTTPS protocol, increase upload sizes, and optimize the server for performance. Another article will cover the actual launch, including network configuration, domain name configuration, and setting up an HTTPS certificate.
If you have any questions or comments, please feel free to leave a comment!
